![]()
![]()
|
|
|
|
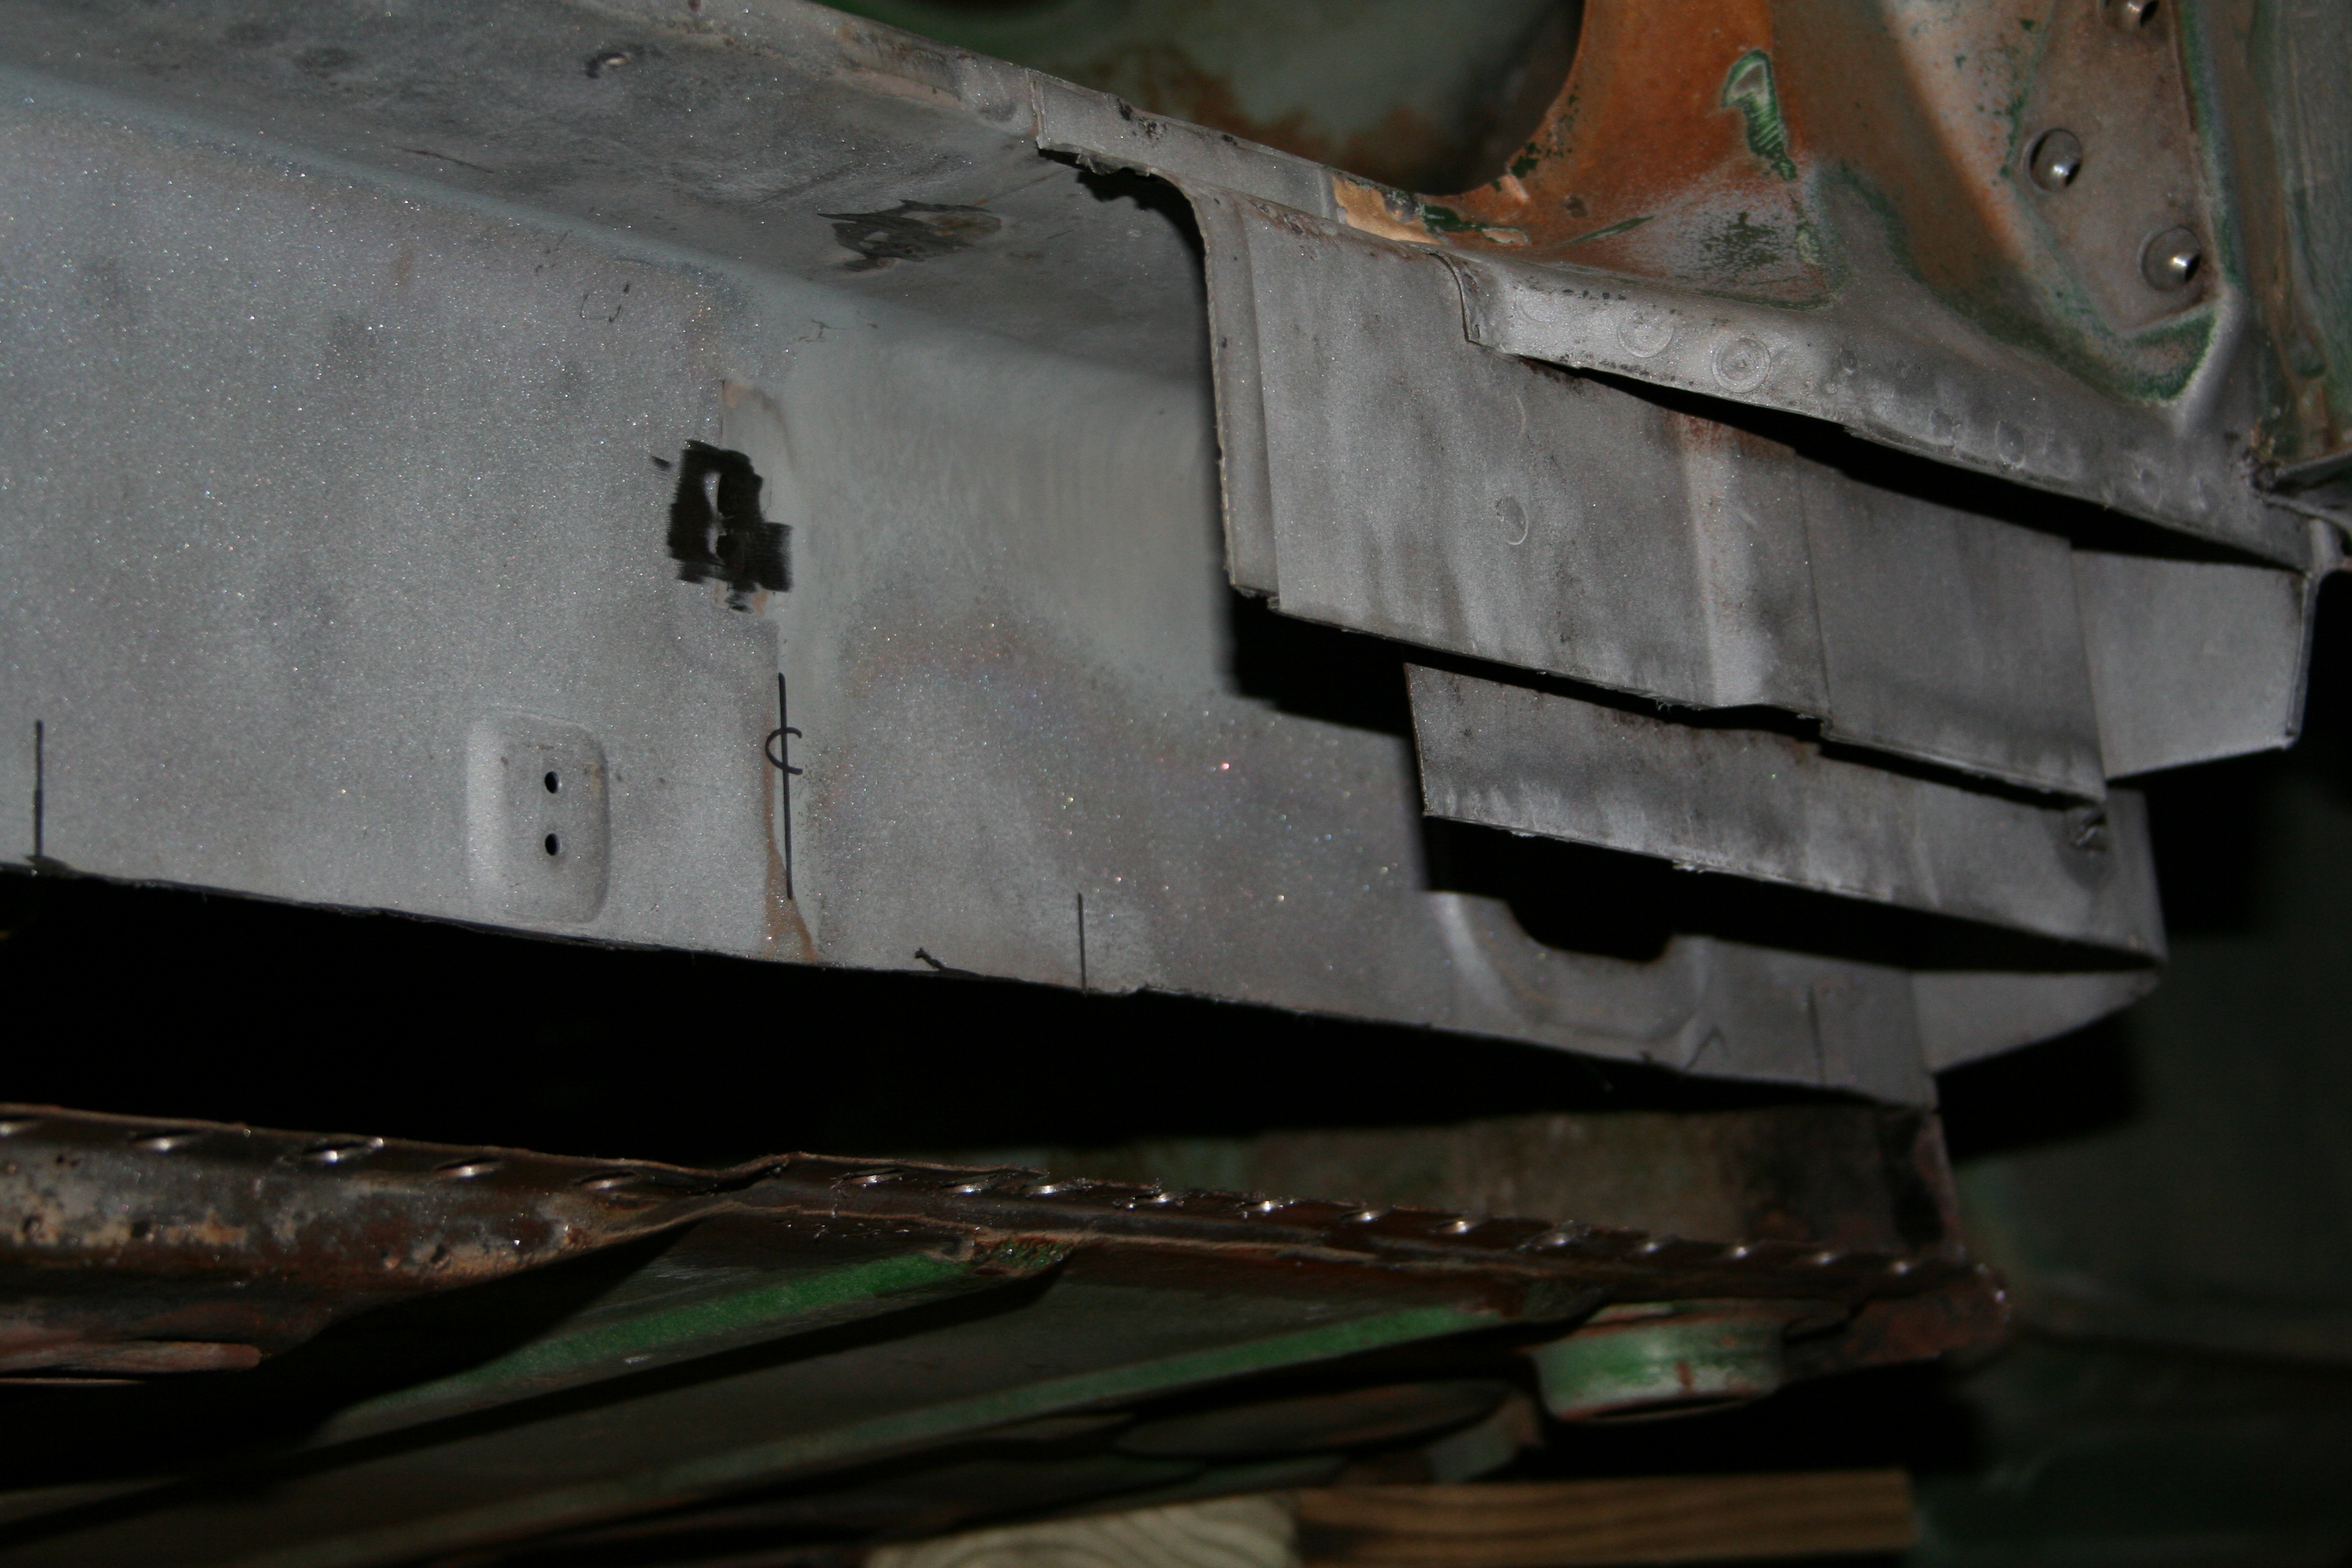
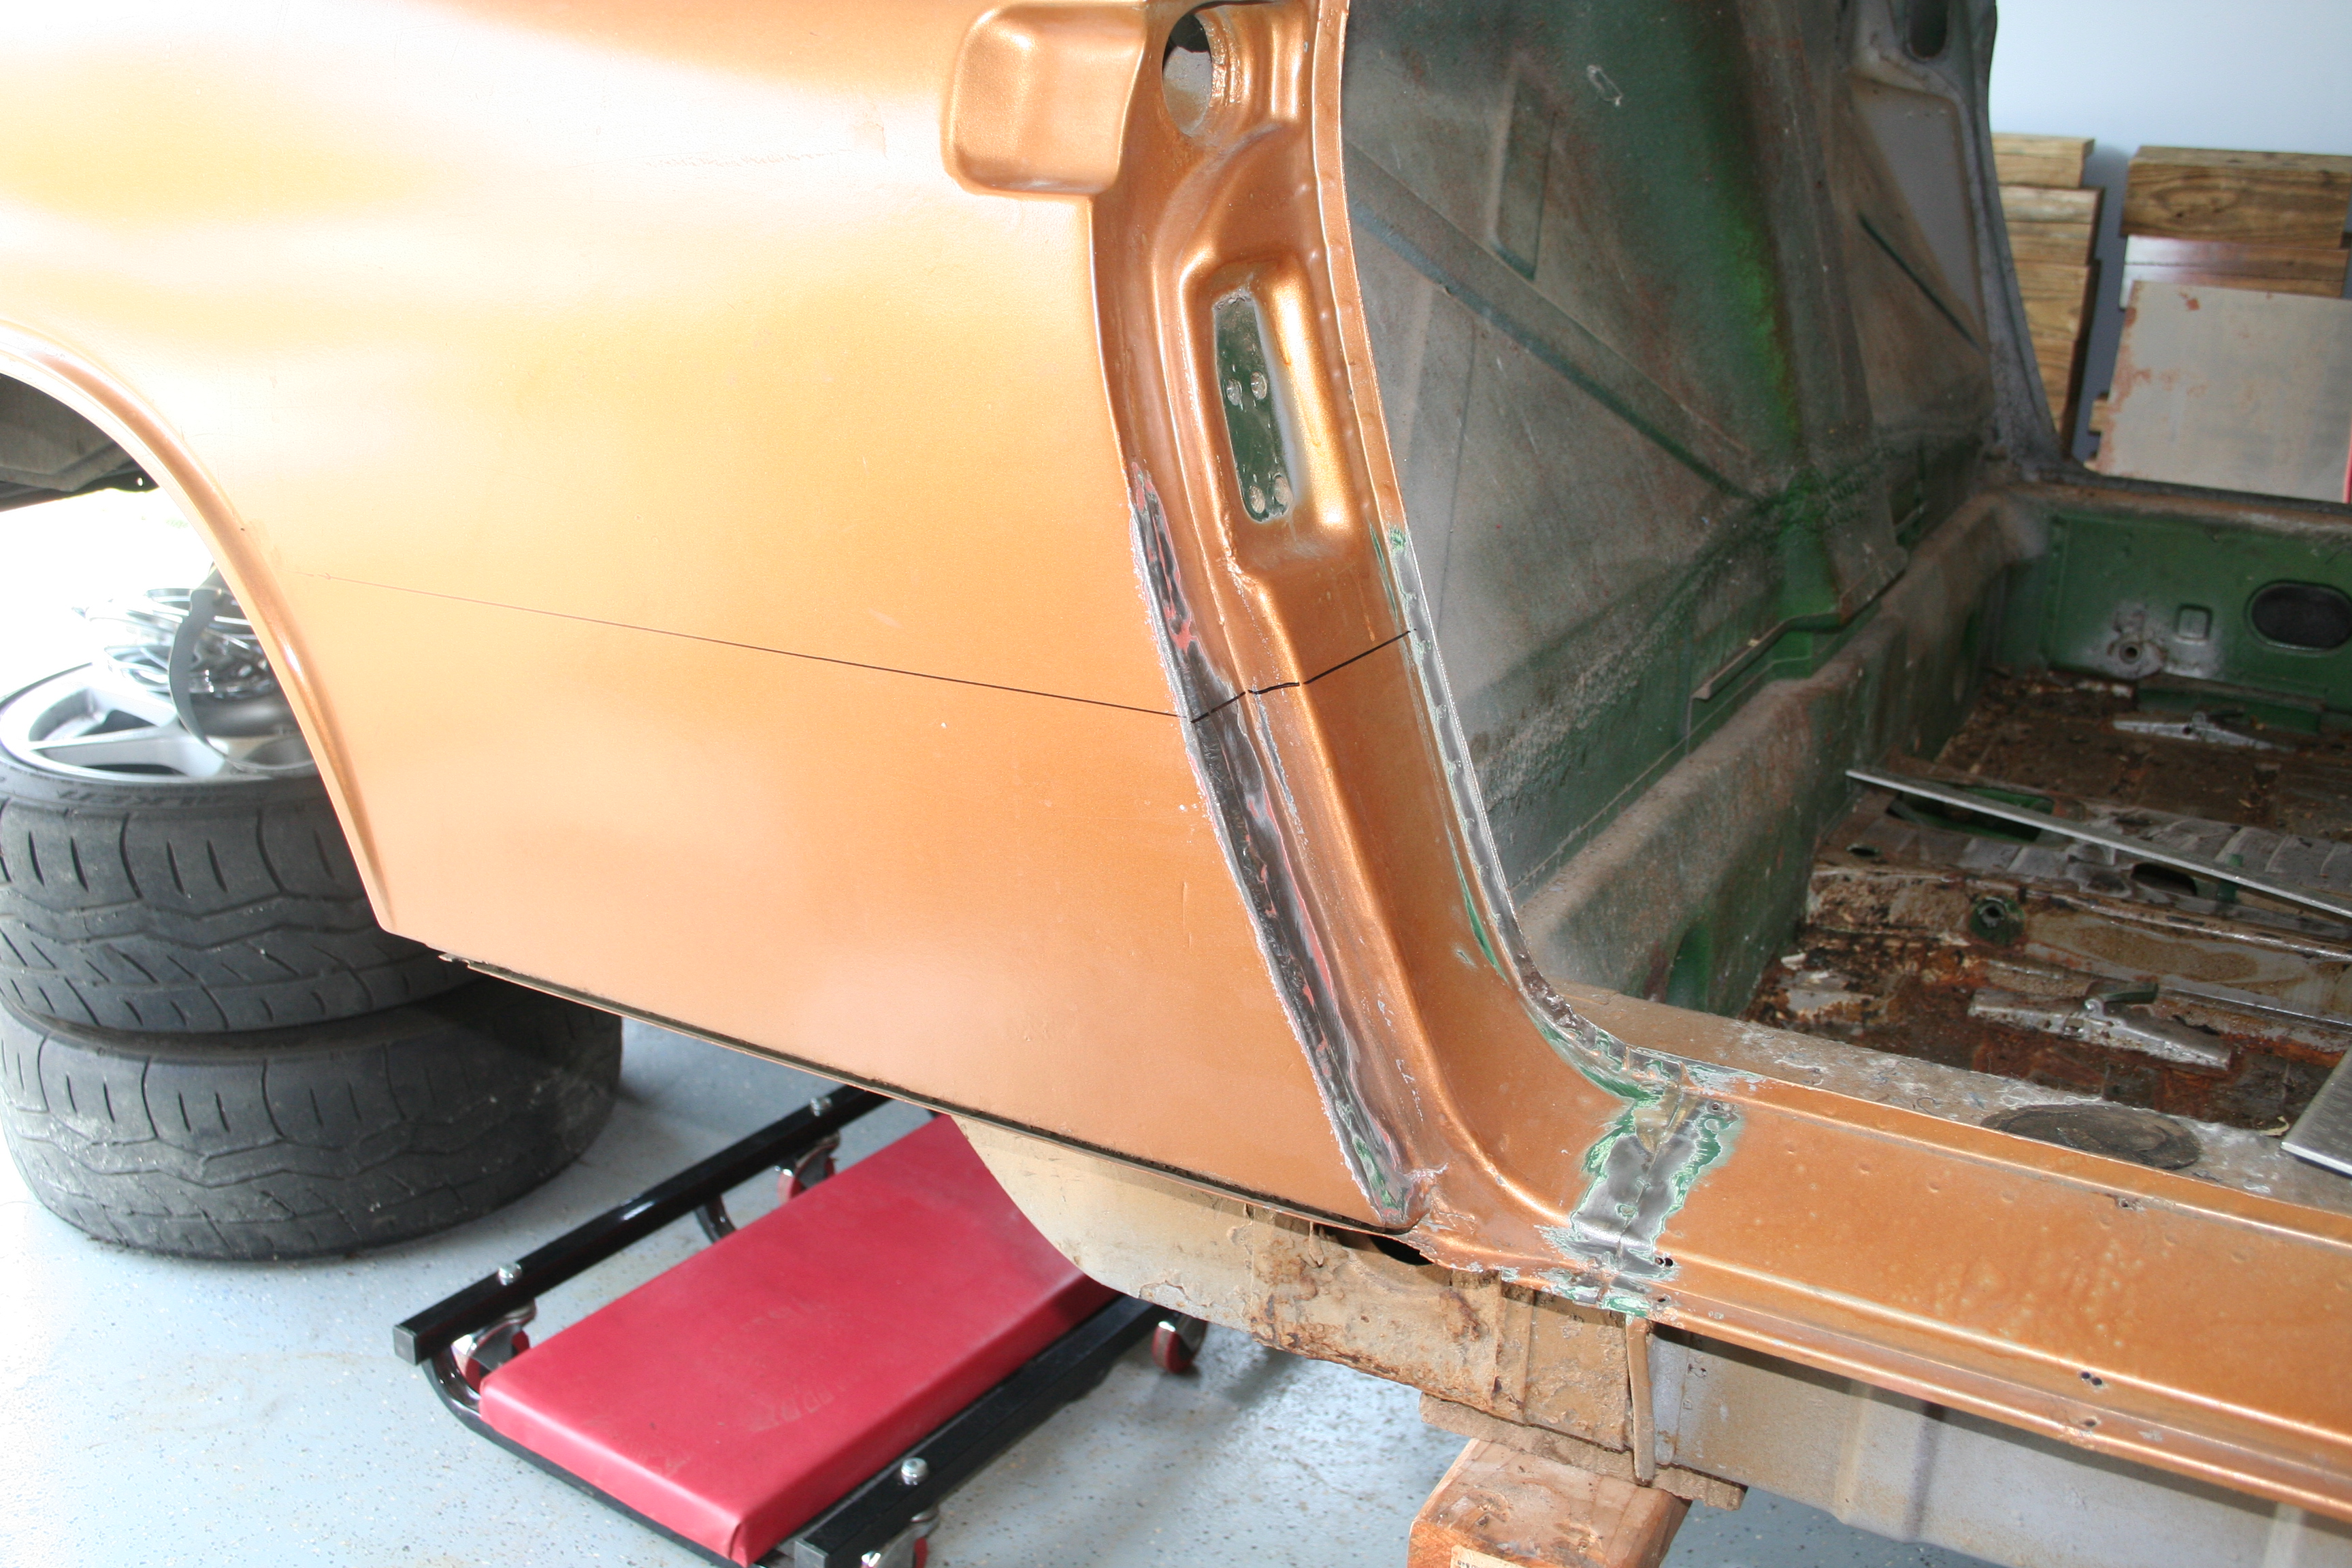
Richard's 1972 Porsche 914 Blog2007 Archive12/30/2007No work today, but rather just more photos of what I did yesterday. I cut out the lower section of the passenger inner longitudinal. I put in some registration marks to help when I mate up the replacement. I also ground off the remnants of the brackets that held on the heater pipes.
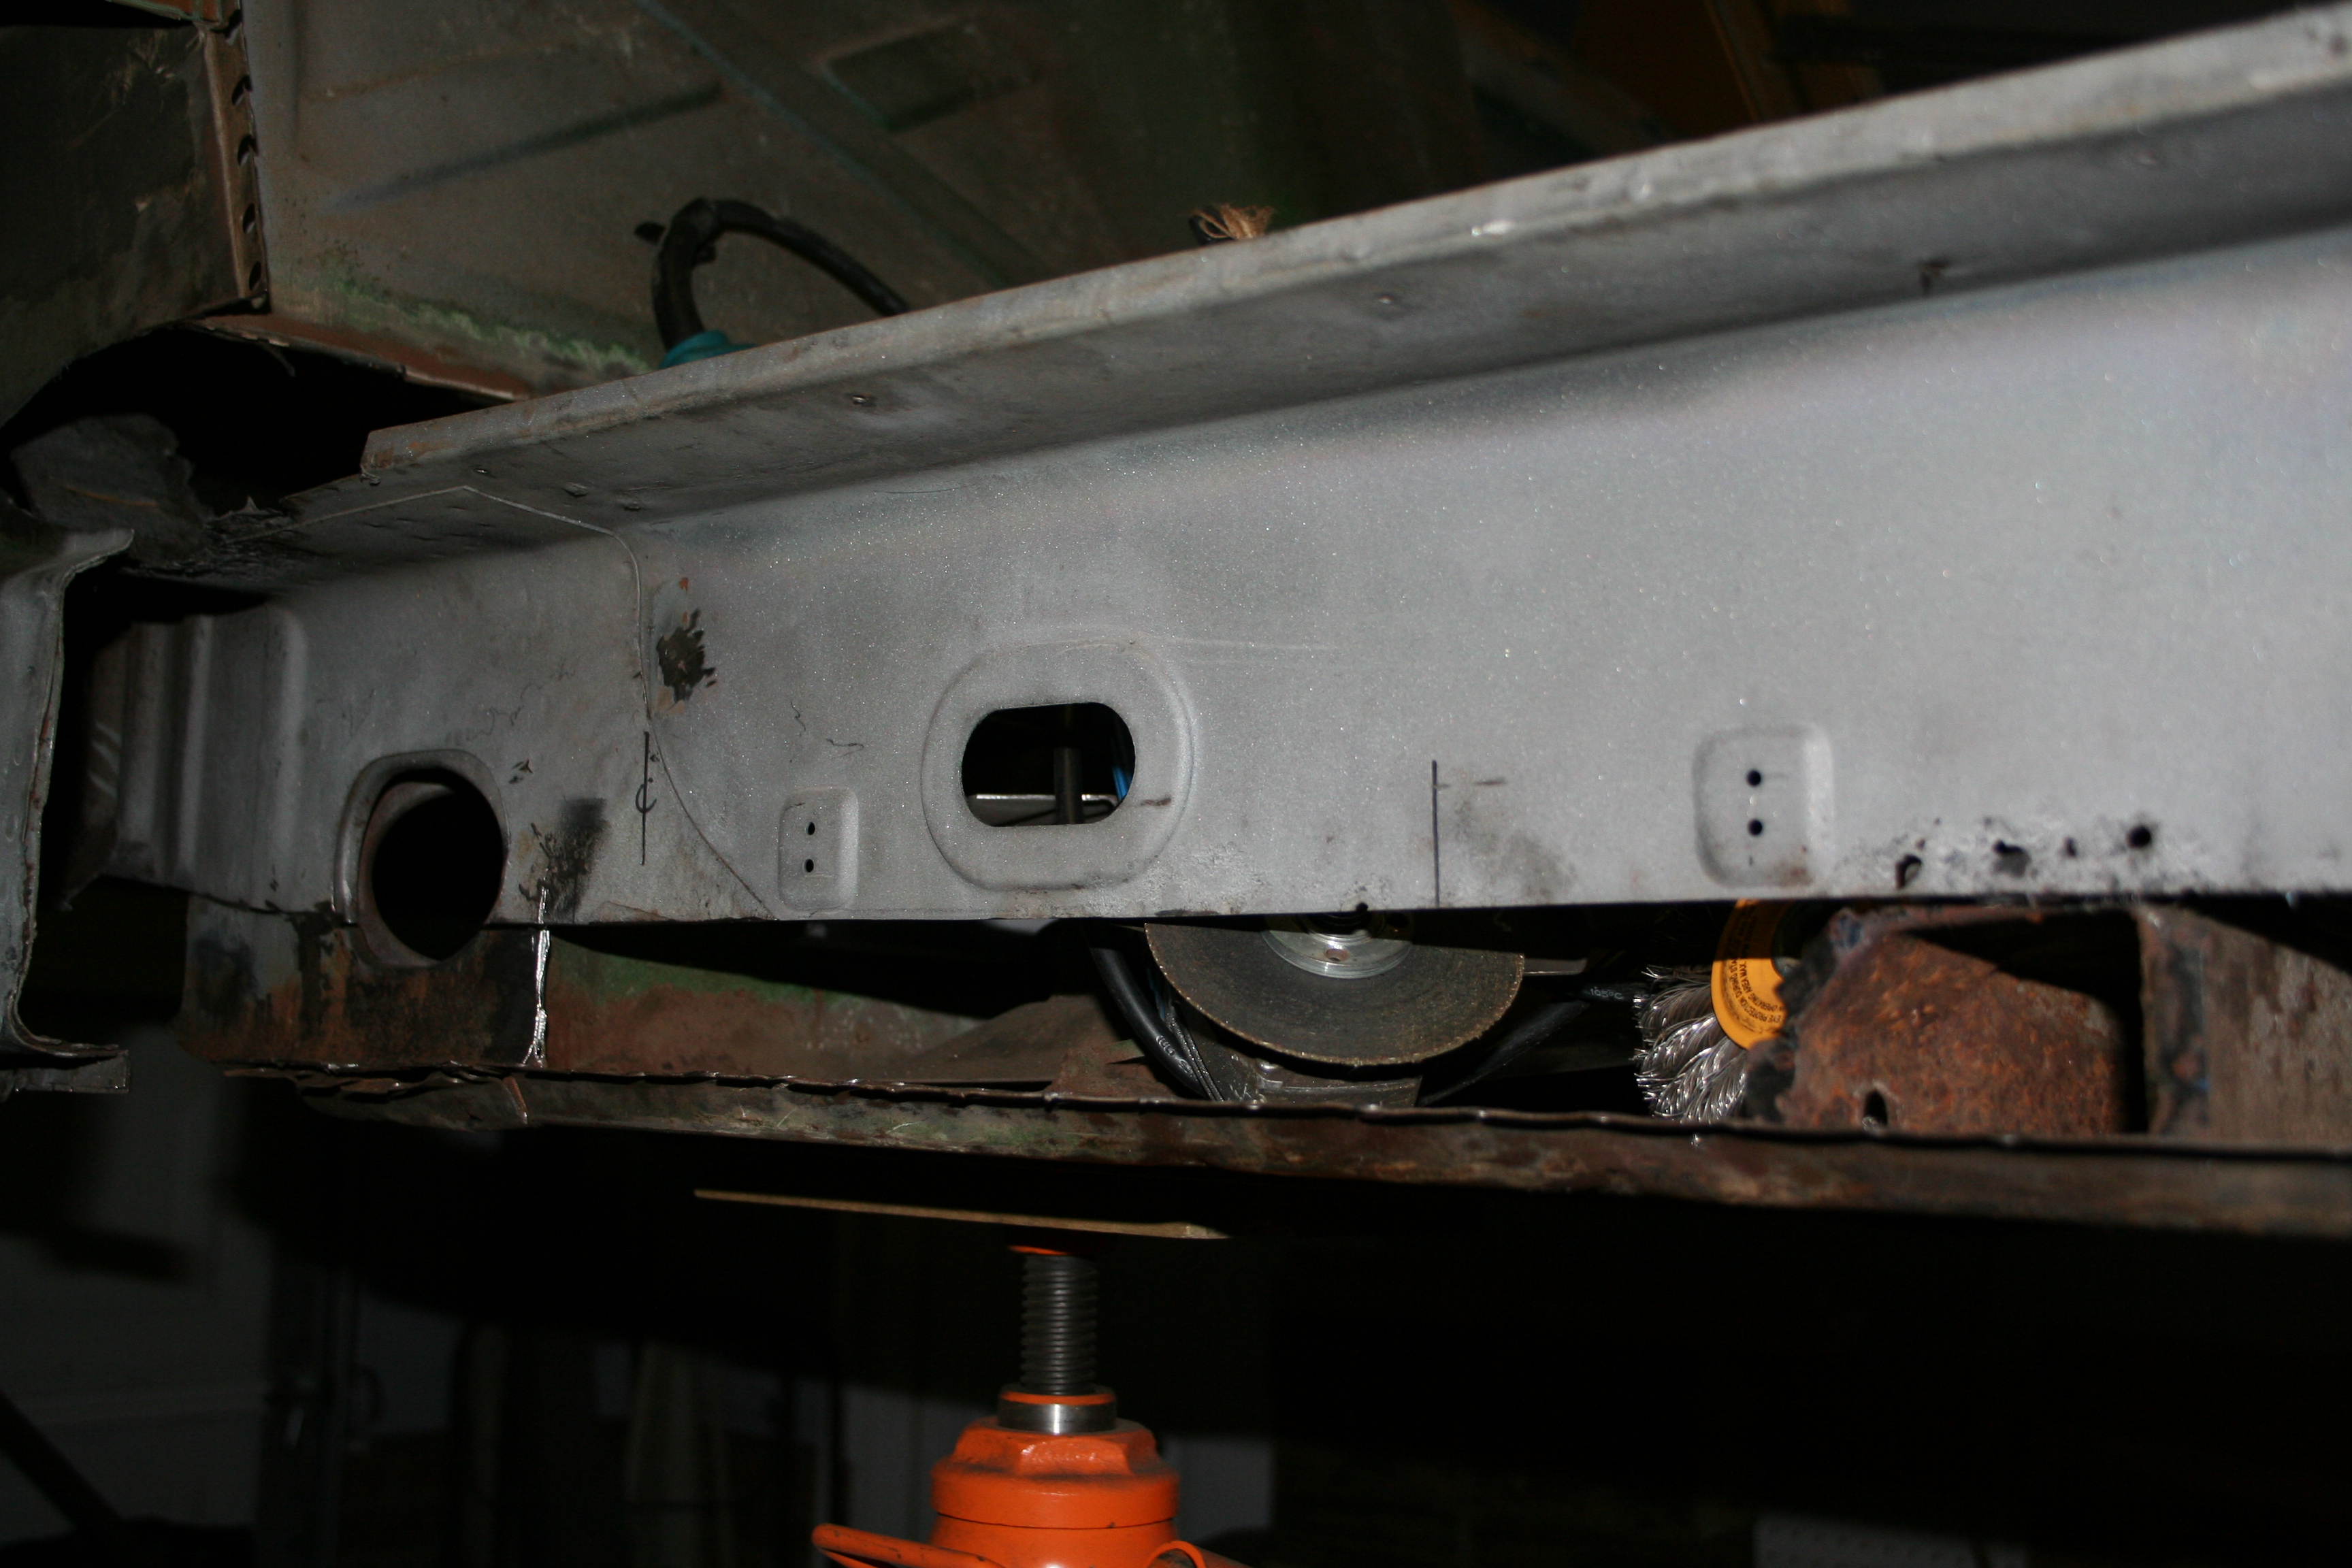
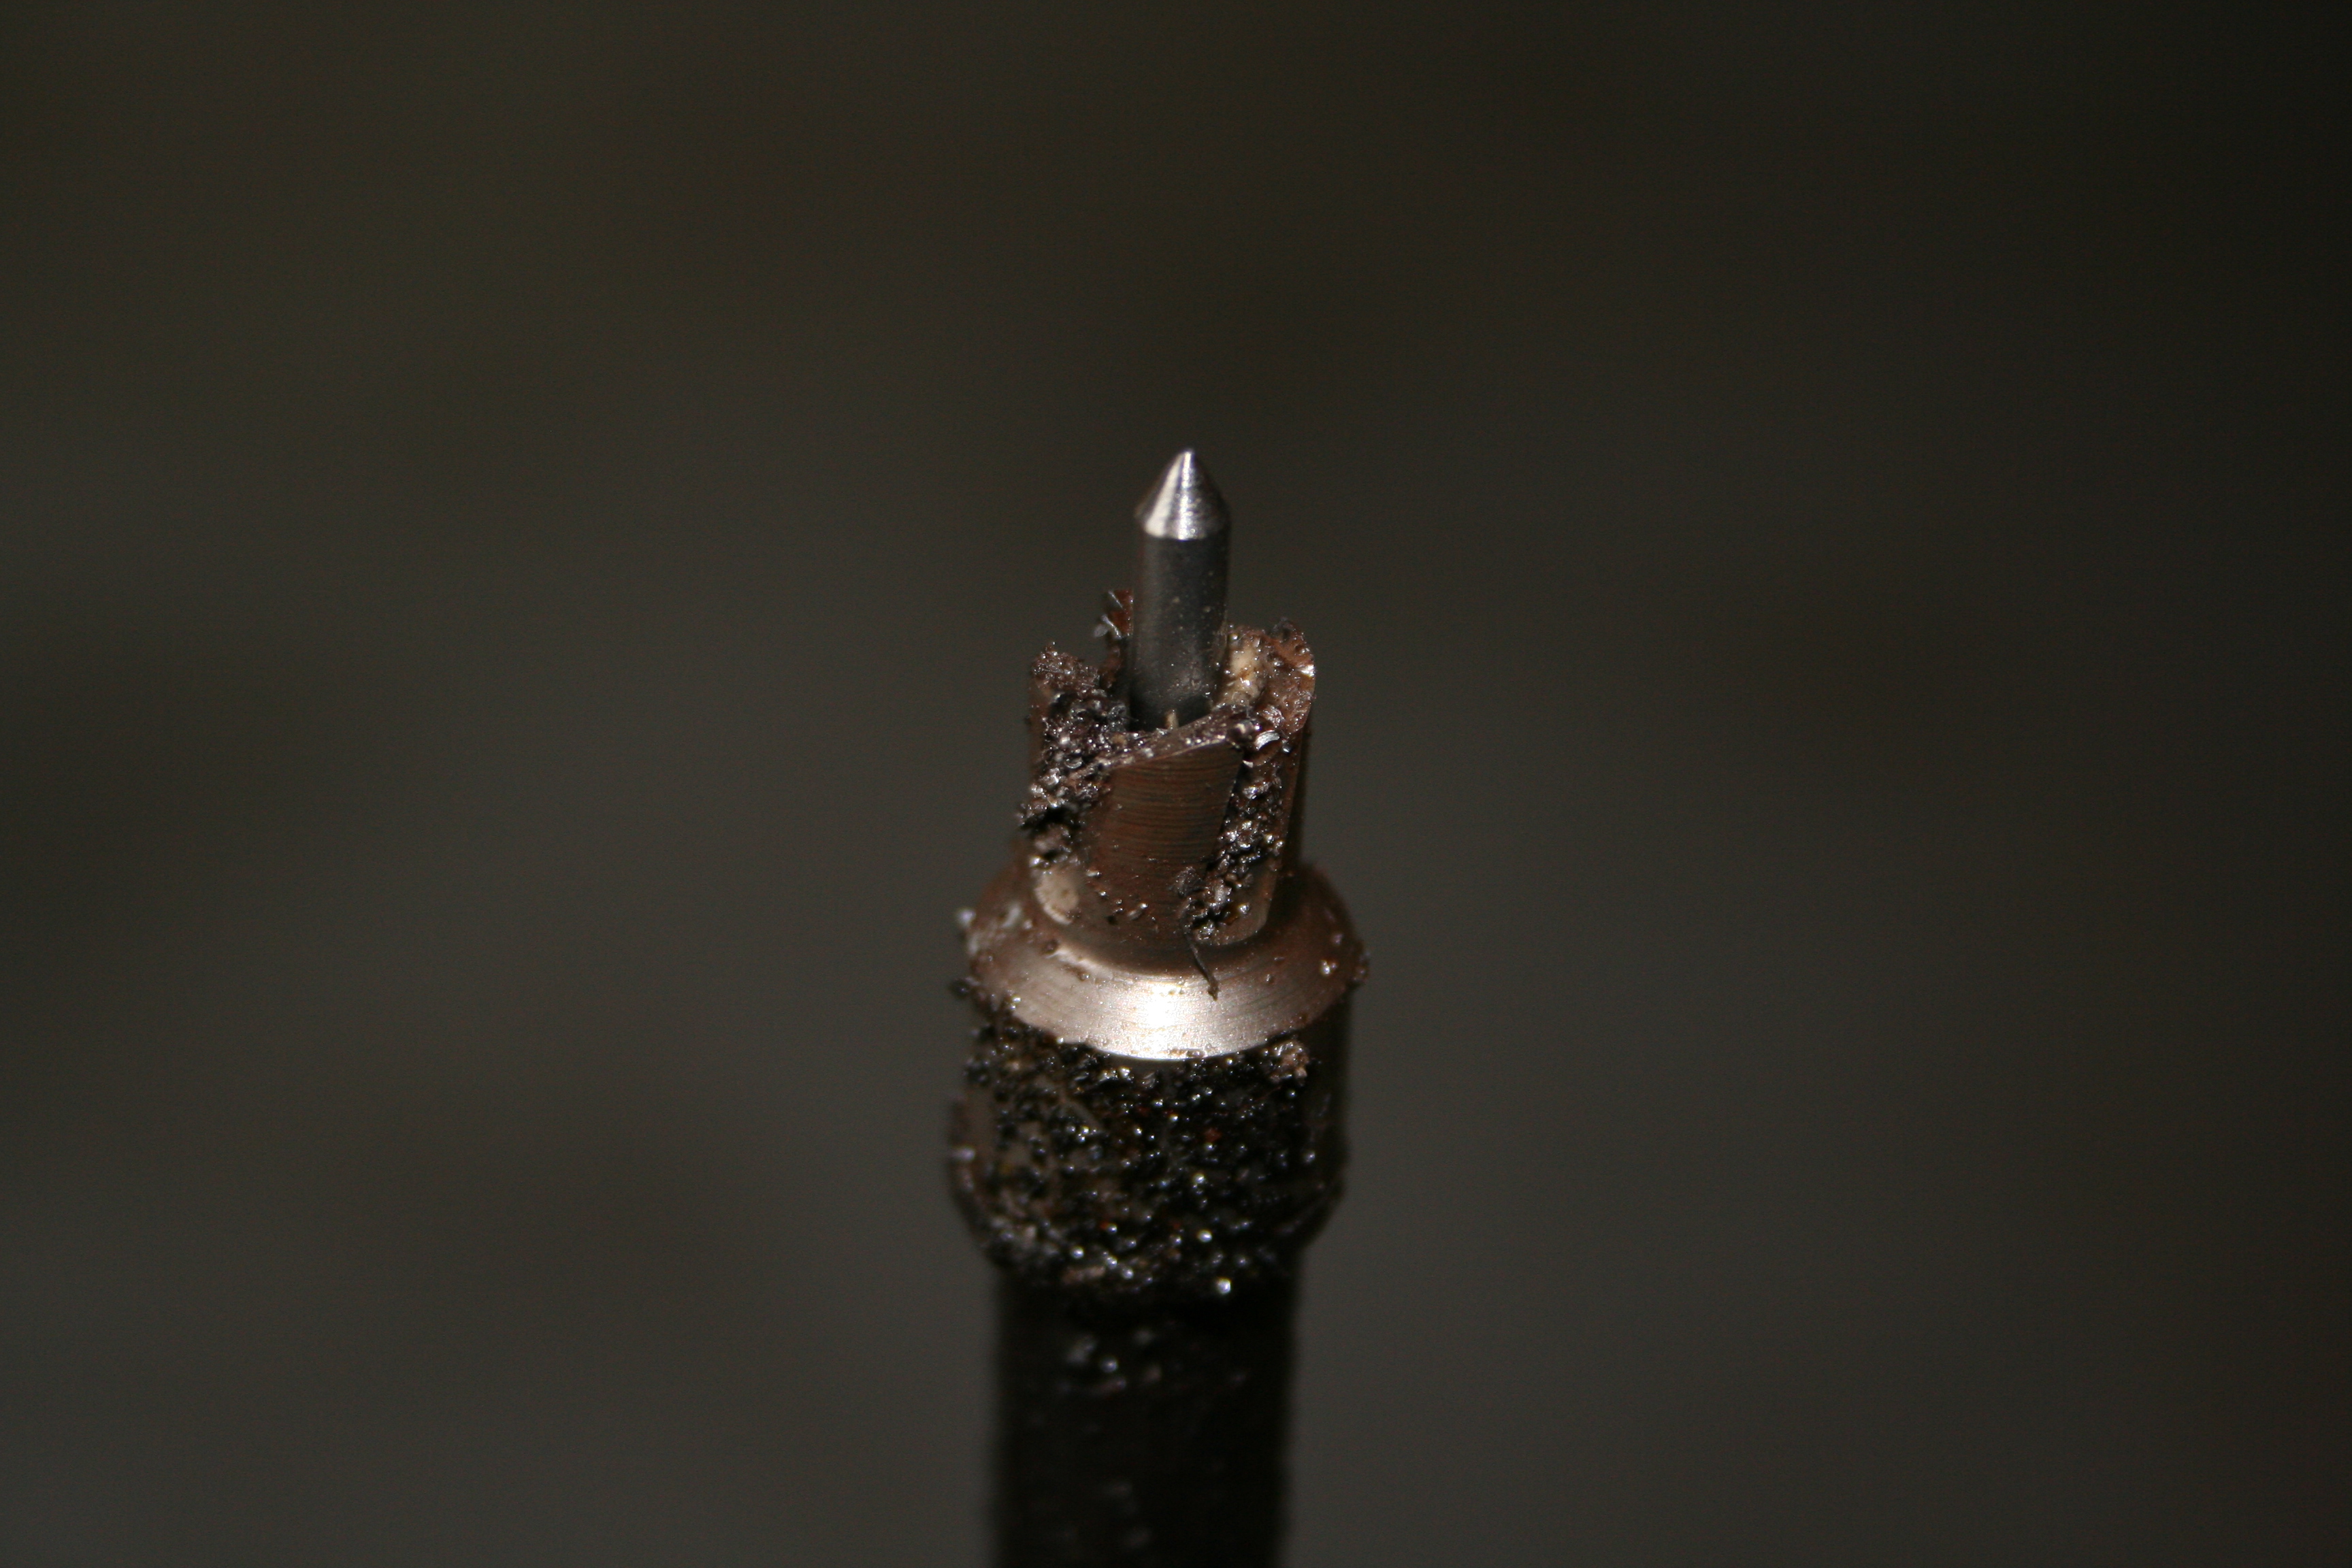
Read more about passenger side longitudinal repair work here 12/29/2007One last thing to do before I cut out the passenger inner longitudinal. I need to drill out the spot welds that attach the floor to the longitudinal. There is a bunch of these. I believe I have mentioned that I am using a Blair Rotabroach spotweld bit. I burnt up about three of these very early one before I realized that if you don't use cutting oil they have a very short life. Since then I have been using the same bit for awhile. It still cuts pretty well and while I have 2-3 new bits, I am curious how long I can use this one. To show my love for my spotweld bit, I have written a Haiku!! My Blair Rotabroach
12/24/2007It has been quite awhile since I have posted anything. In short I ended up having a slew of other stuff that took priority over the car. Projects around the house (replaced our water heater, fixed a significant dry-rot problem on the front porch, etc.), various family birthdays and the holidays have all taken their toll on my time. Additionally with my burst of activity in October, I ended up having to work out some new ground rules with my wife as to how often and when I should be working on the car. I tend to get pretty focused on it at times and lose sight of other stuff. Ok, enough with that. So Santa came early and gave me what I want. Time to work on the car! I am about to cut out the bottom of the passenger inner longitudinal and needed to find the edge of the good metal so I media blasted the entire area.
Read more about passenger side longitudinal repair work here 12/2/2007Remove the two clamps that hold the flexible heater hose as well as the two heater pipes. This was done to give me the access needed to eventually cut out the bad section of the inner longitudinal.
Read more about passenger side longitudinal repair work here 11/4/2007Ongoing work on removing the outer skin in the hell hole area. It is slow work as the pitted metal makes it hard to find the spot welds.
Read more about hell hole repair work here 10/28/2007I did some more work today. No new photos. I spent most of my time working on drilling out spot welds and grinding down spot welds after I have drilled and removed a part. The Blair Rotabroach bit leaves a little "island" left behind that needs to be ground down. 10/26/2007Surgery has begun! Ok, I can put it off no longer. I have started to cut into the car. The first thing I did was cut out 90% of the outside passenger side longitudinal. I knew that this part had a number of pinholes on the bottom and if they are all the way through then the inside looks worse. And I also knew there was plenty of rust rattling around inside.
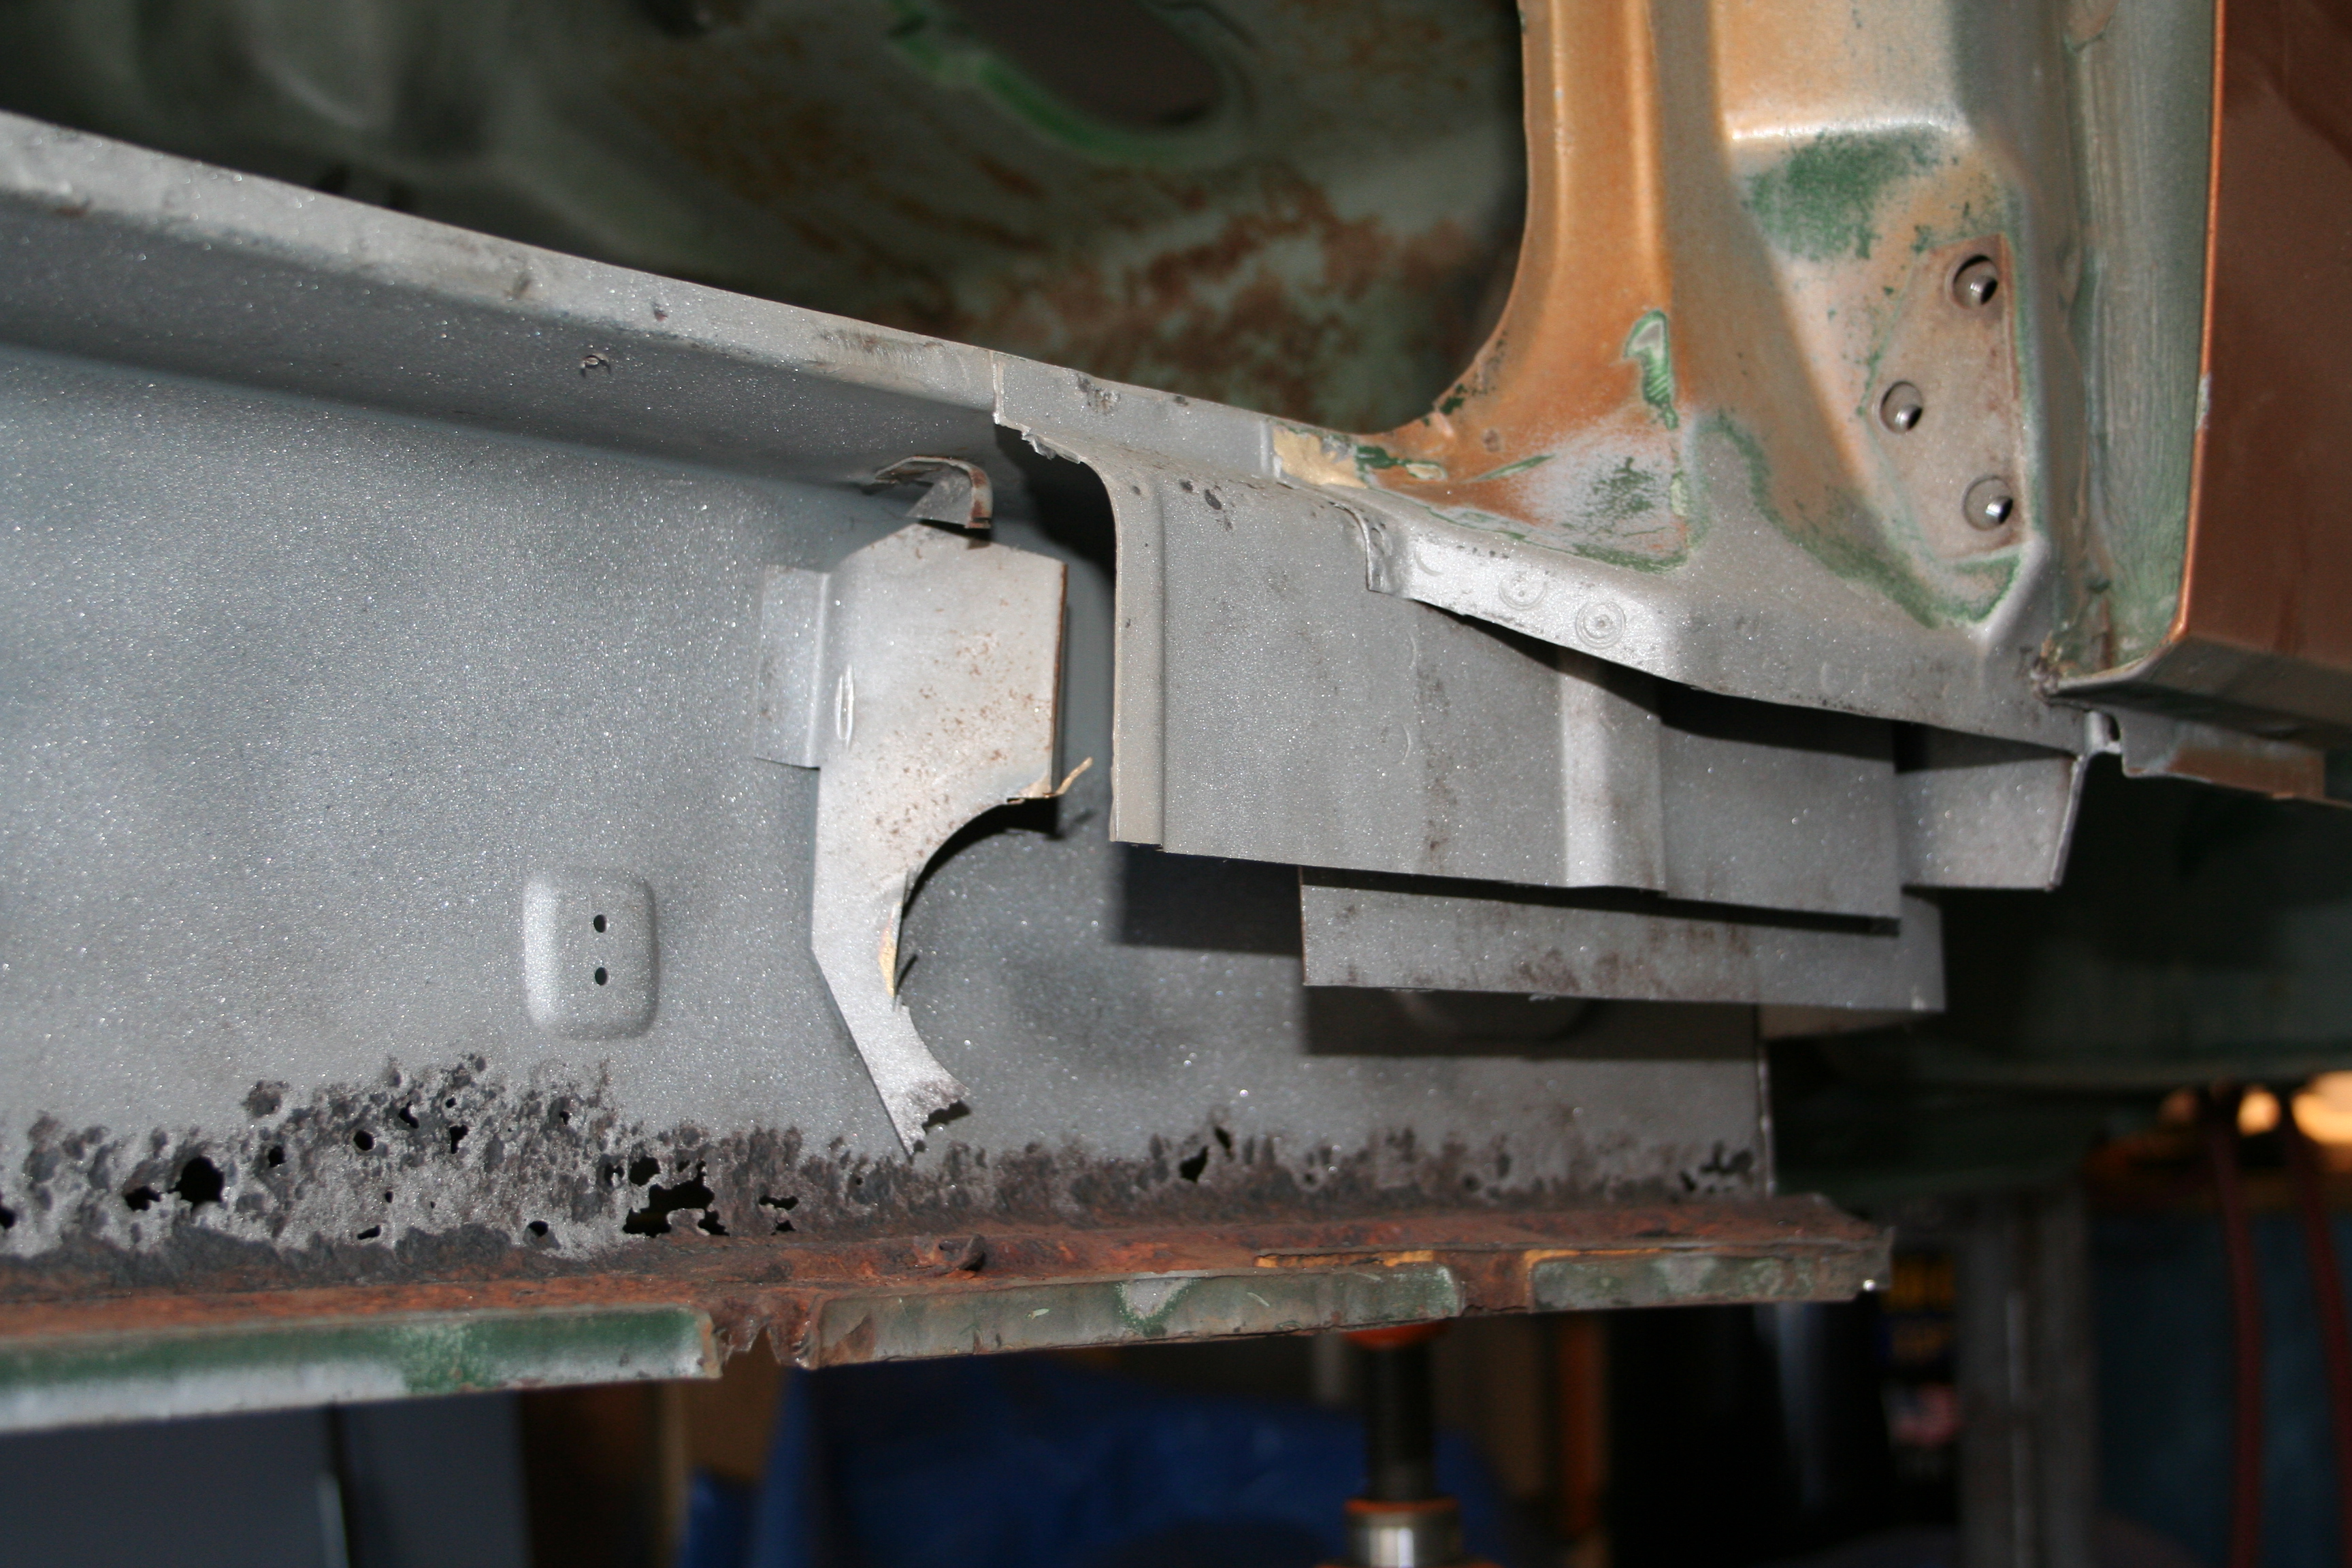
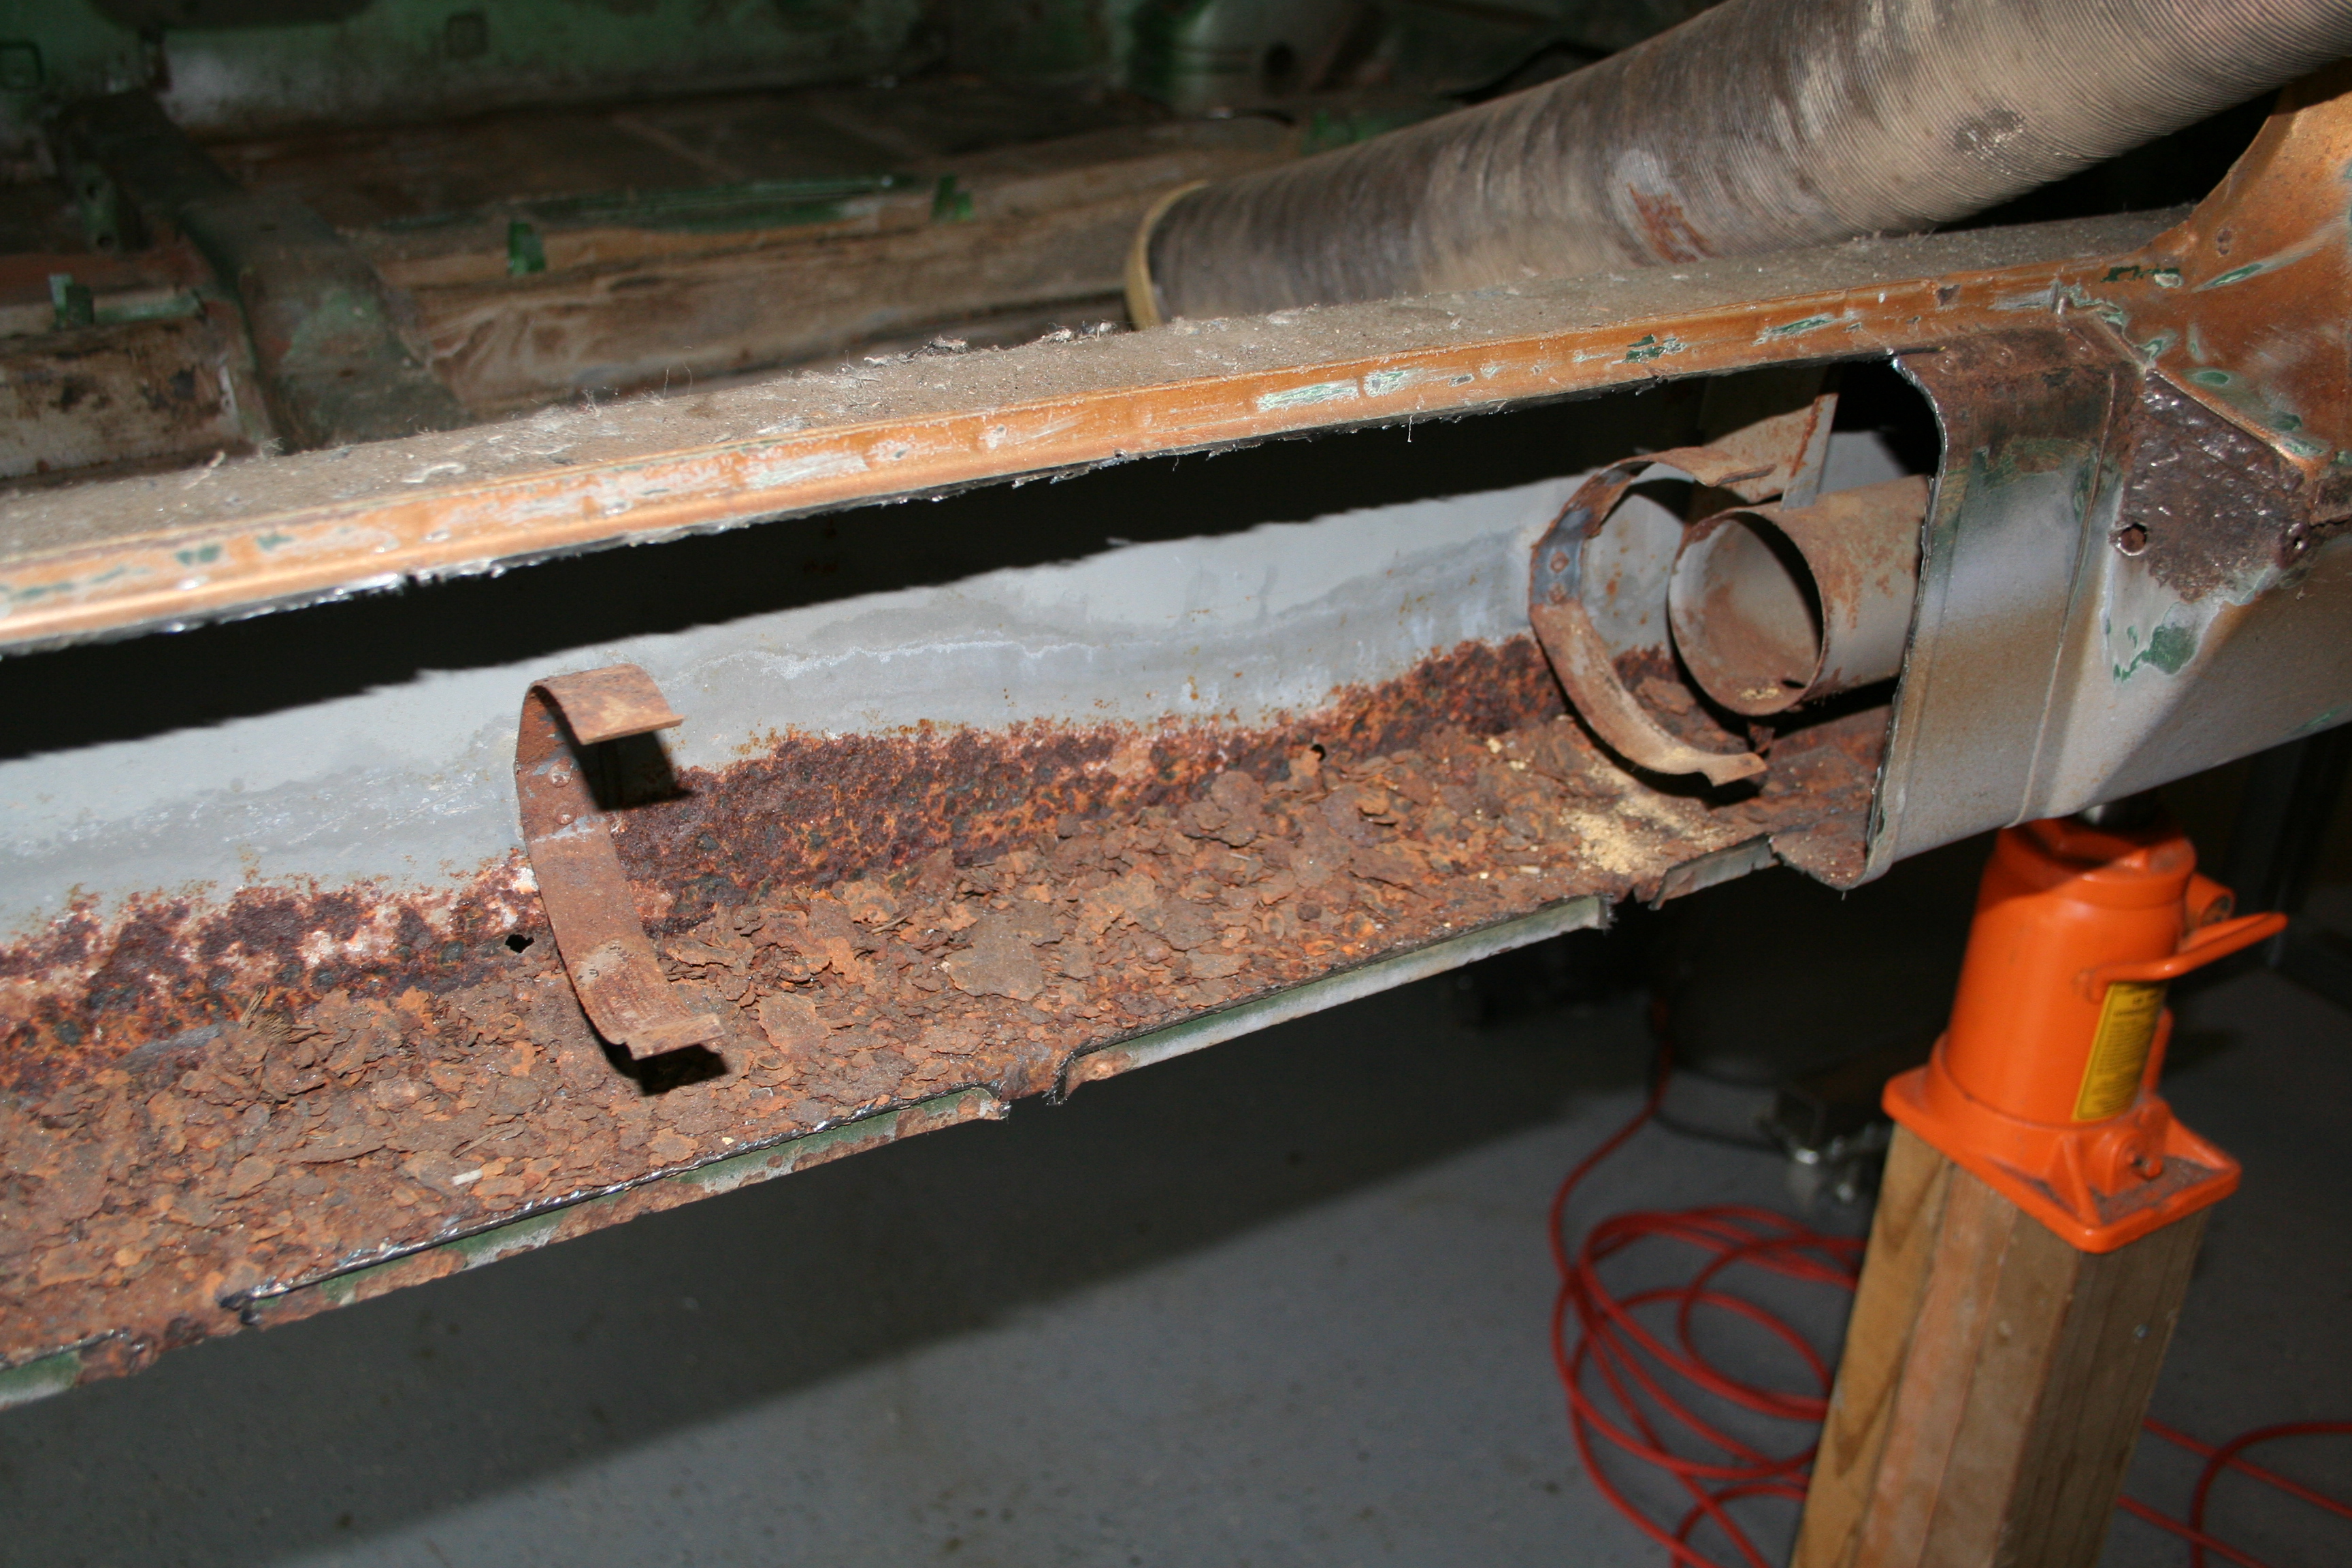
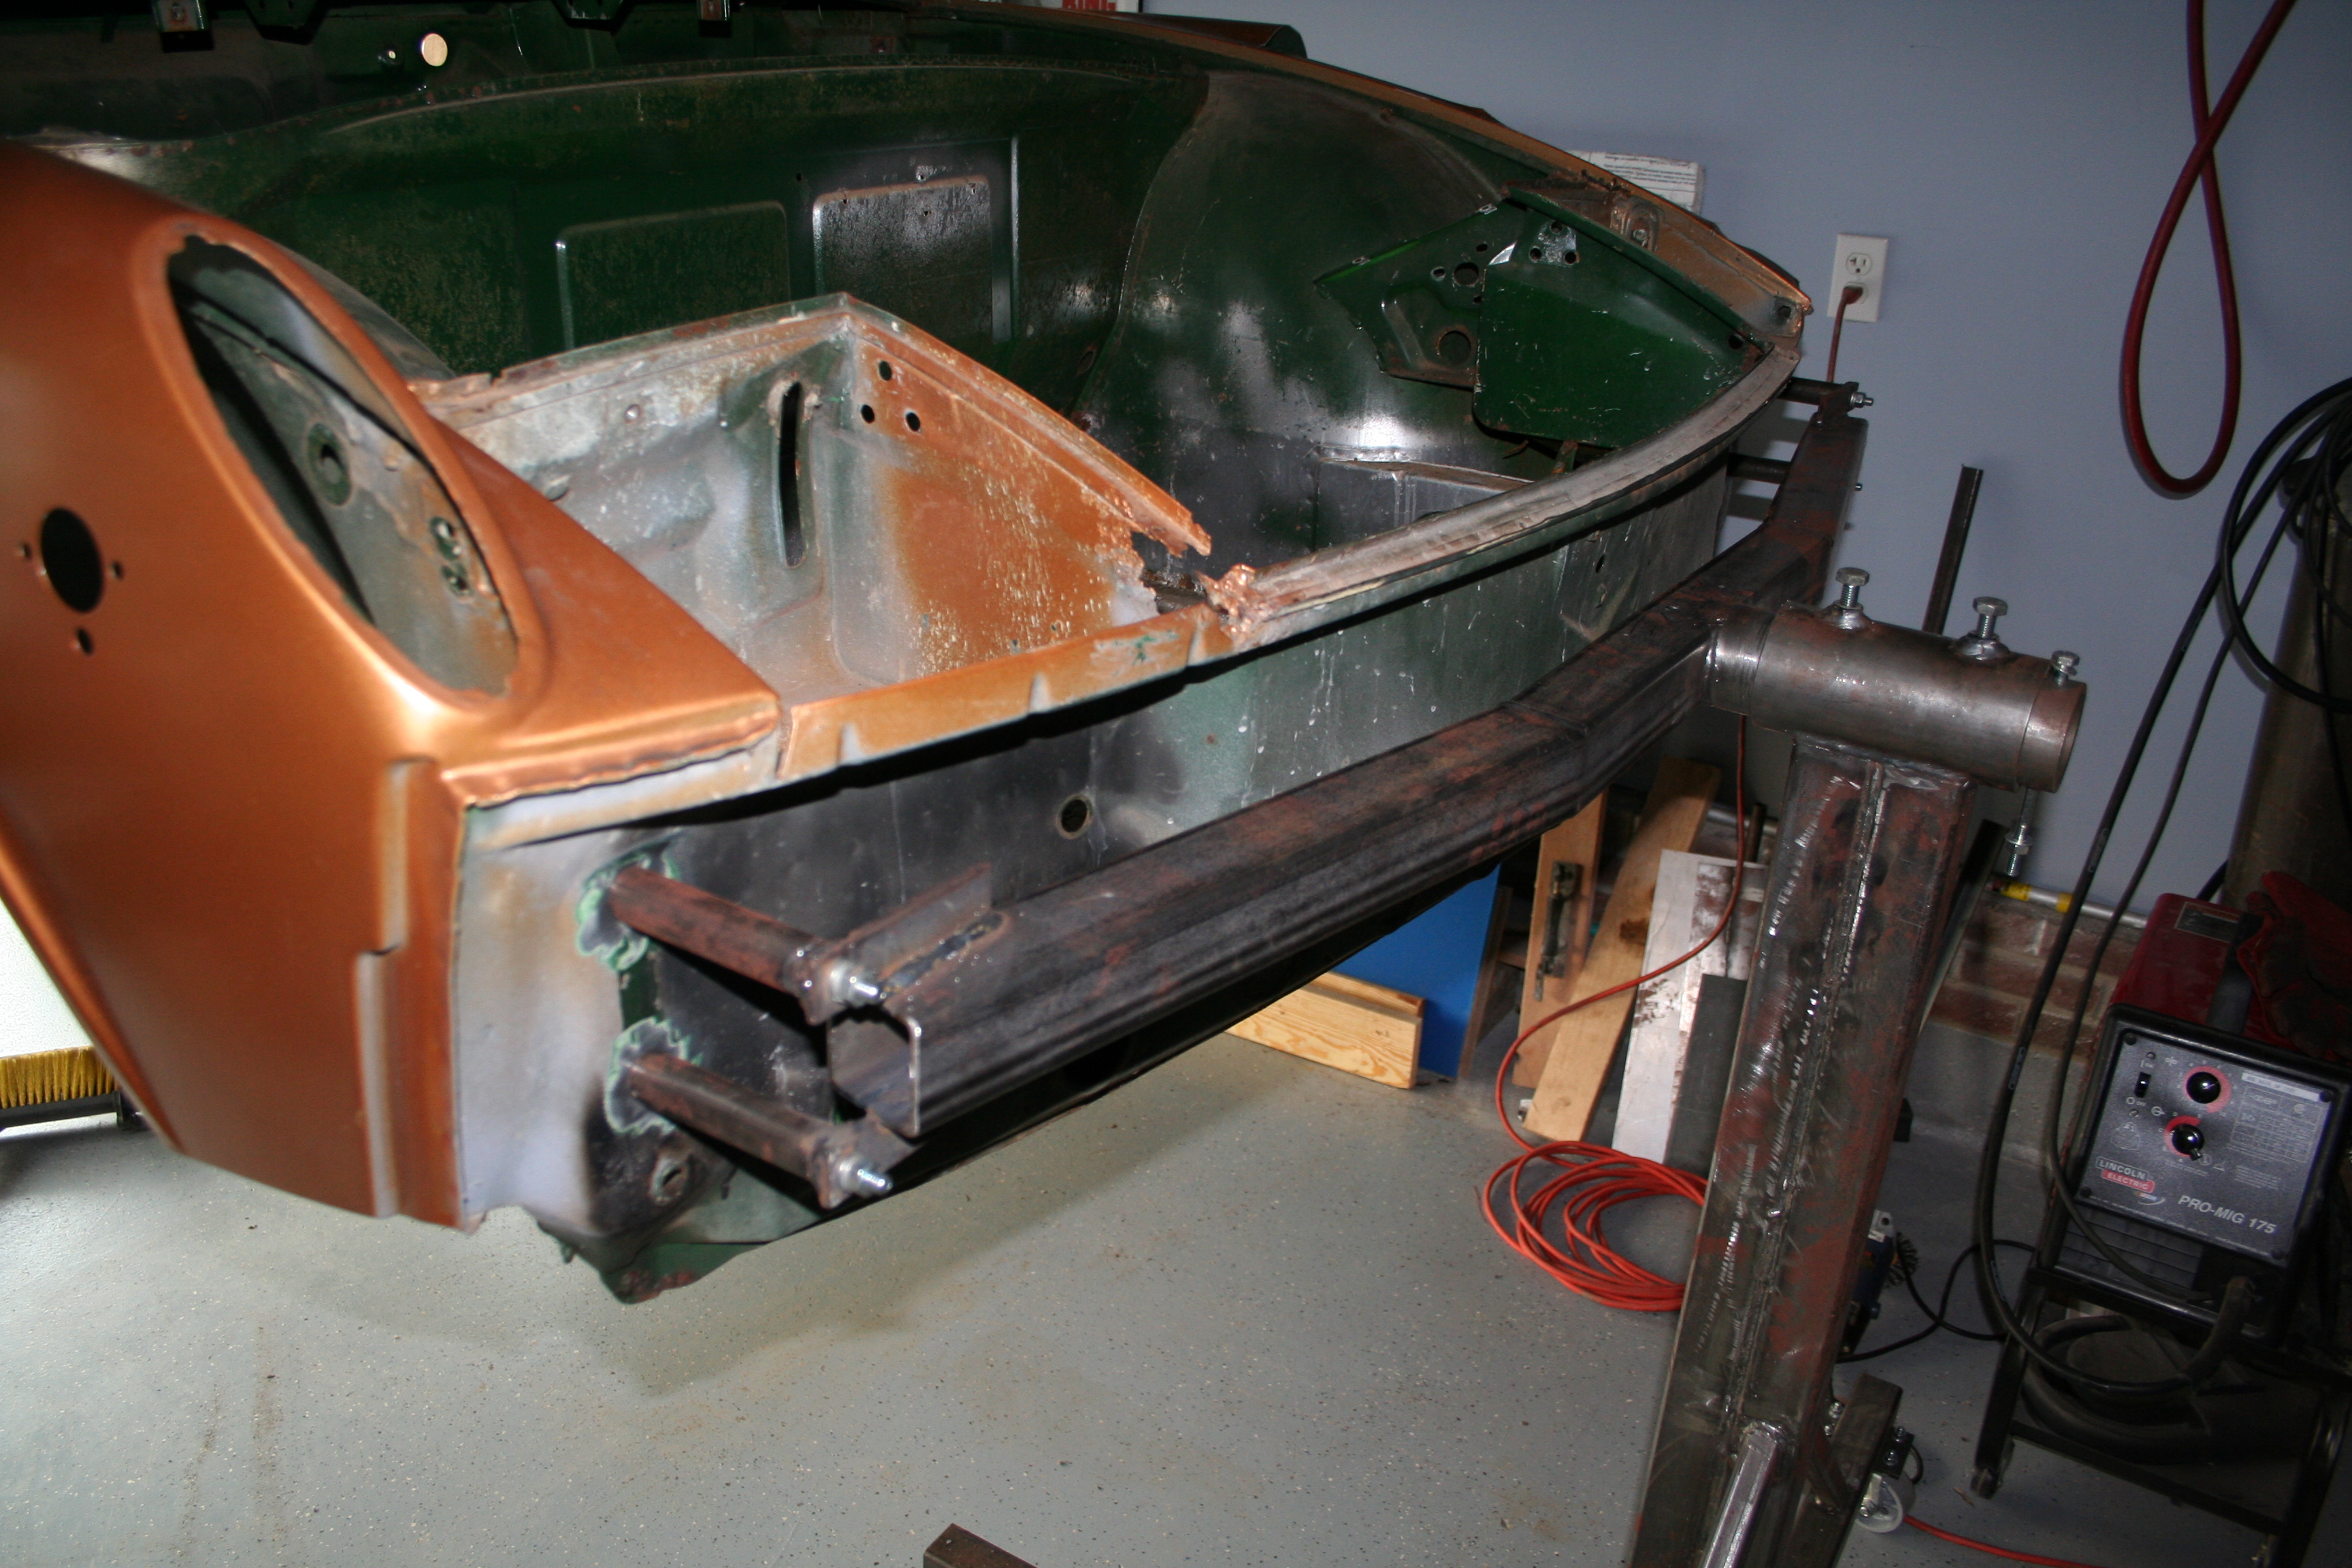
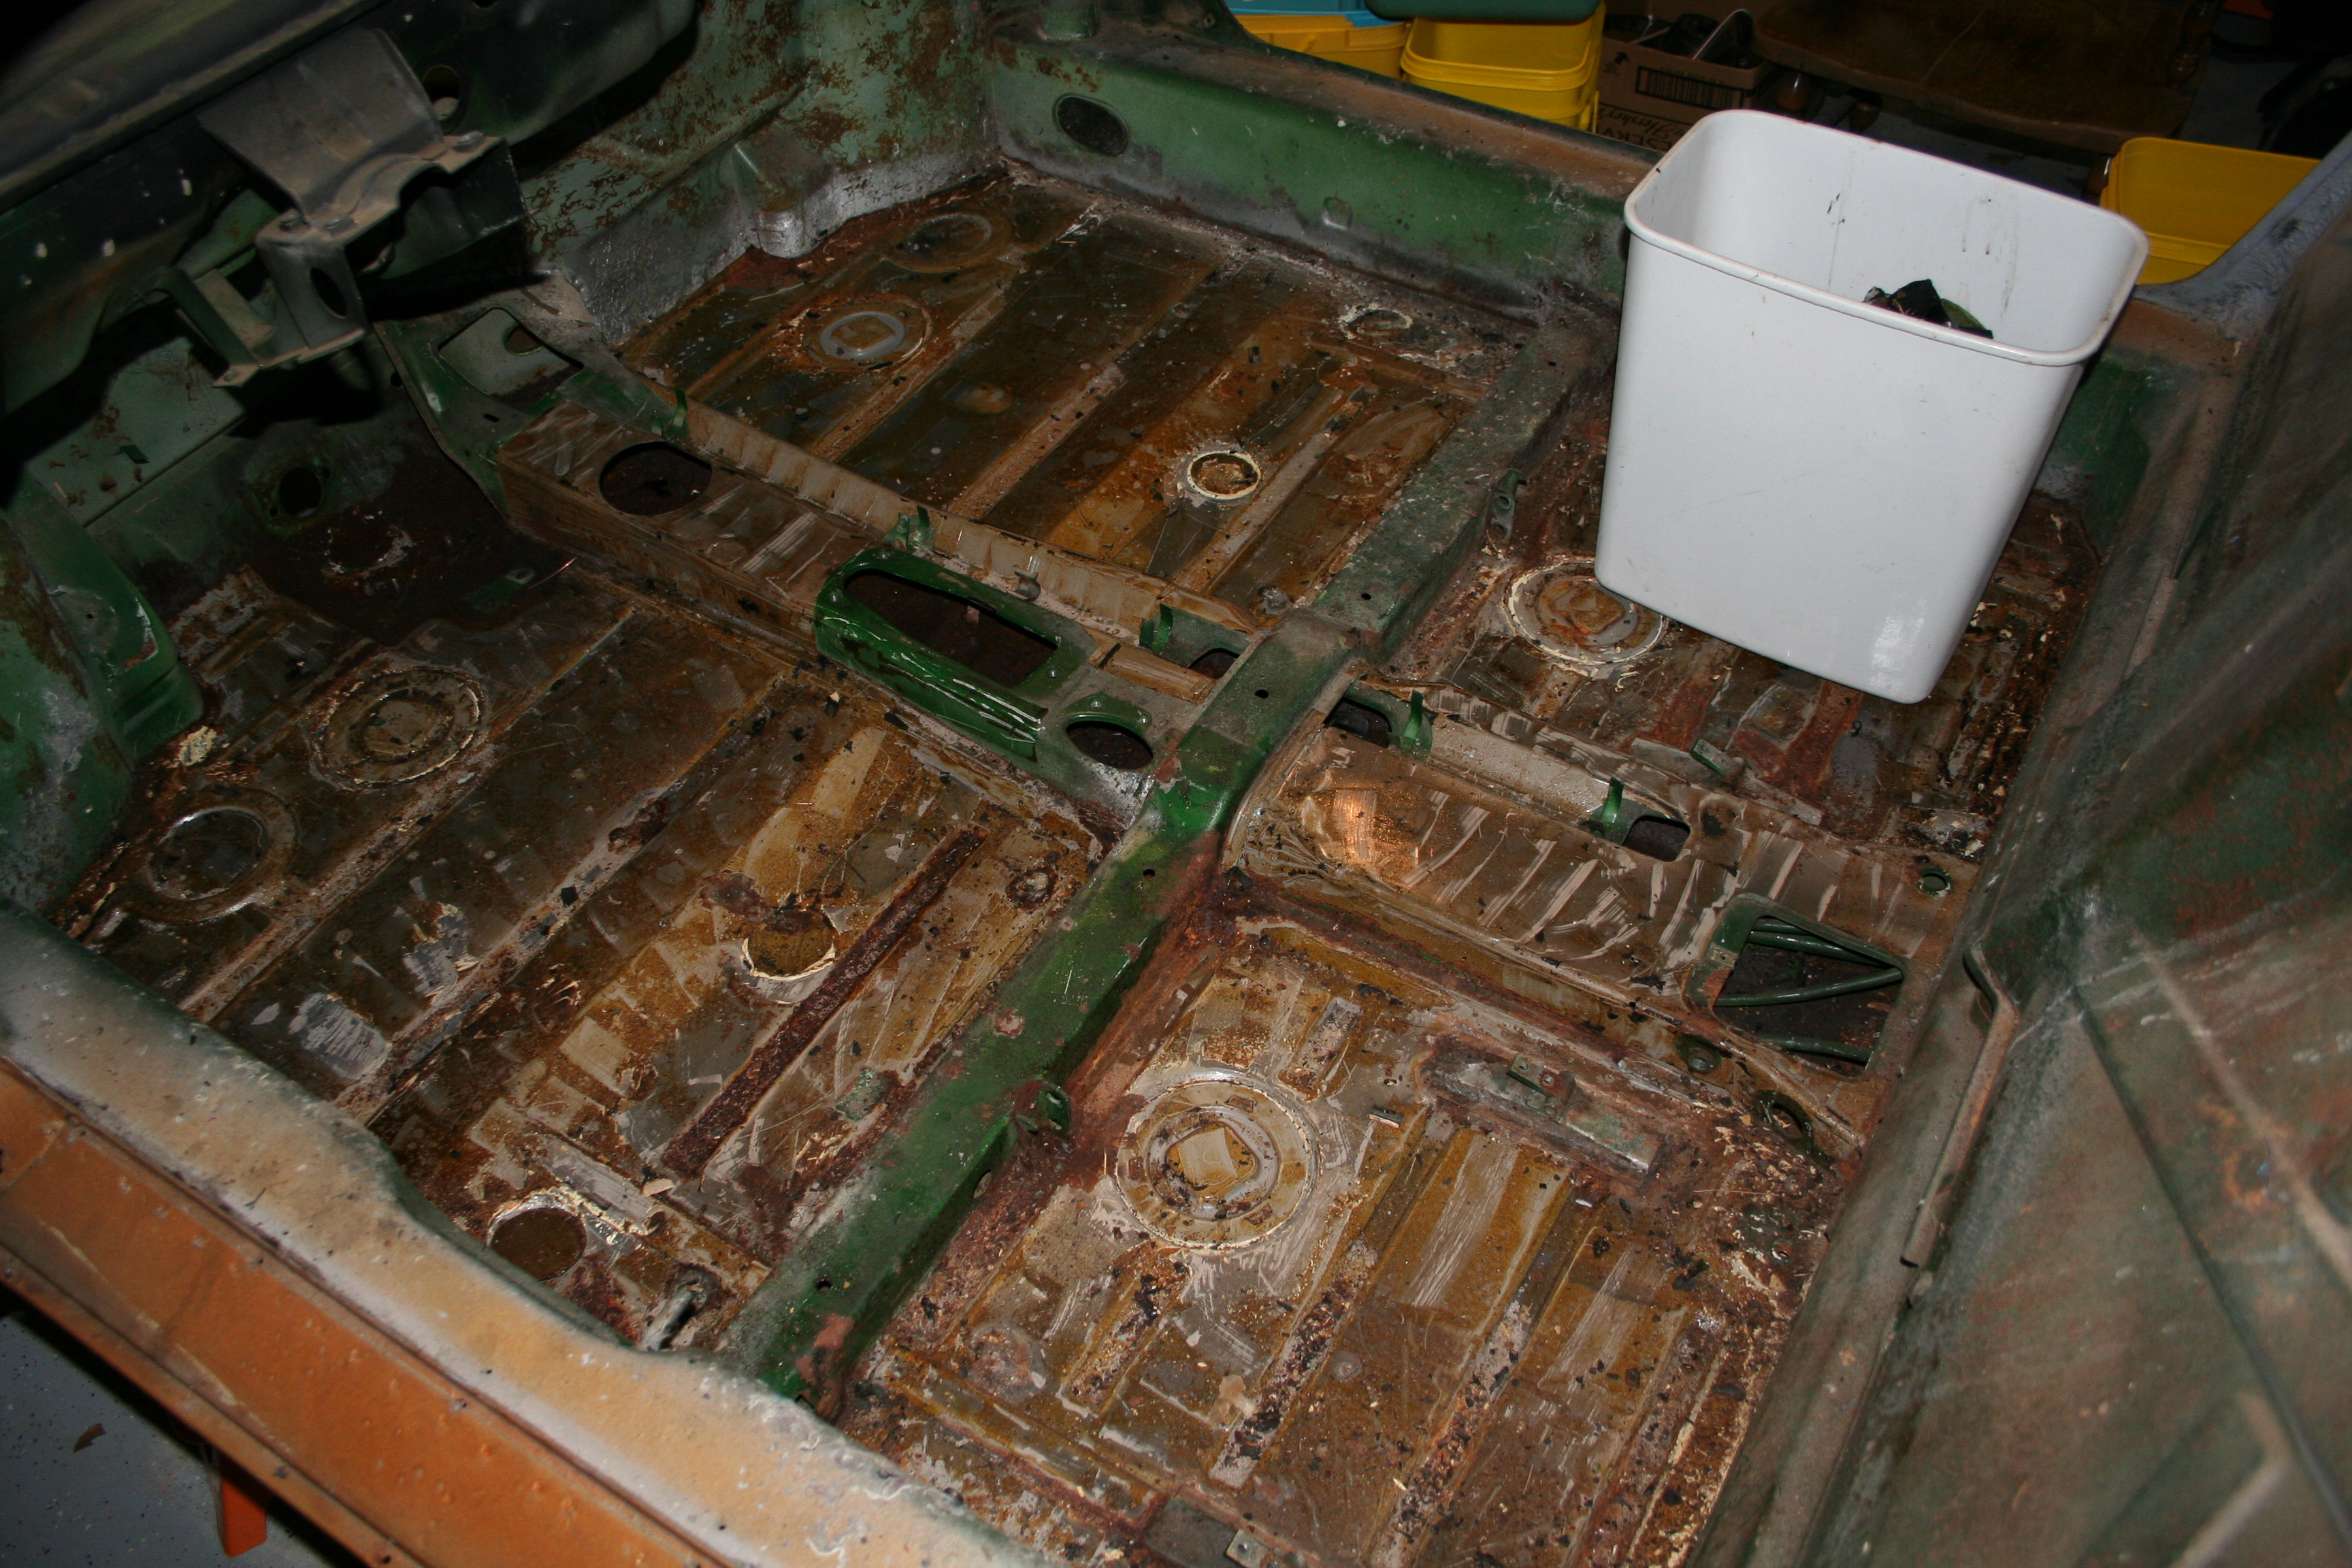
The heater tube (visible in the upper right) has been removed and you can see the rust and loose flakey rust in the bottom. Actually this is pretty much as I expected. All of the loose rust you see laying here is not just from the bottom of the longitudinal. I believe half if not more is from the "Hell hole" area to the left of this photo. This is the lowest place and after having the car do a number of 360 roles on the rotisserie this stuff is pretty well distributed.
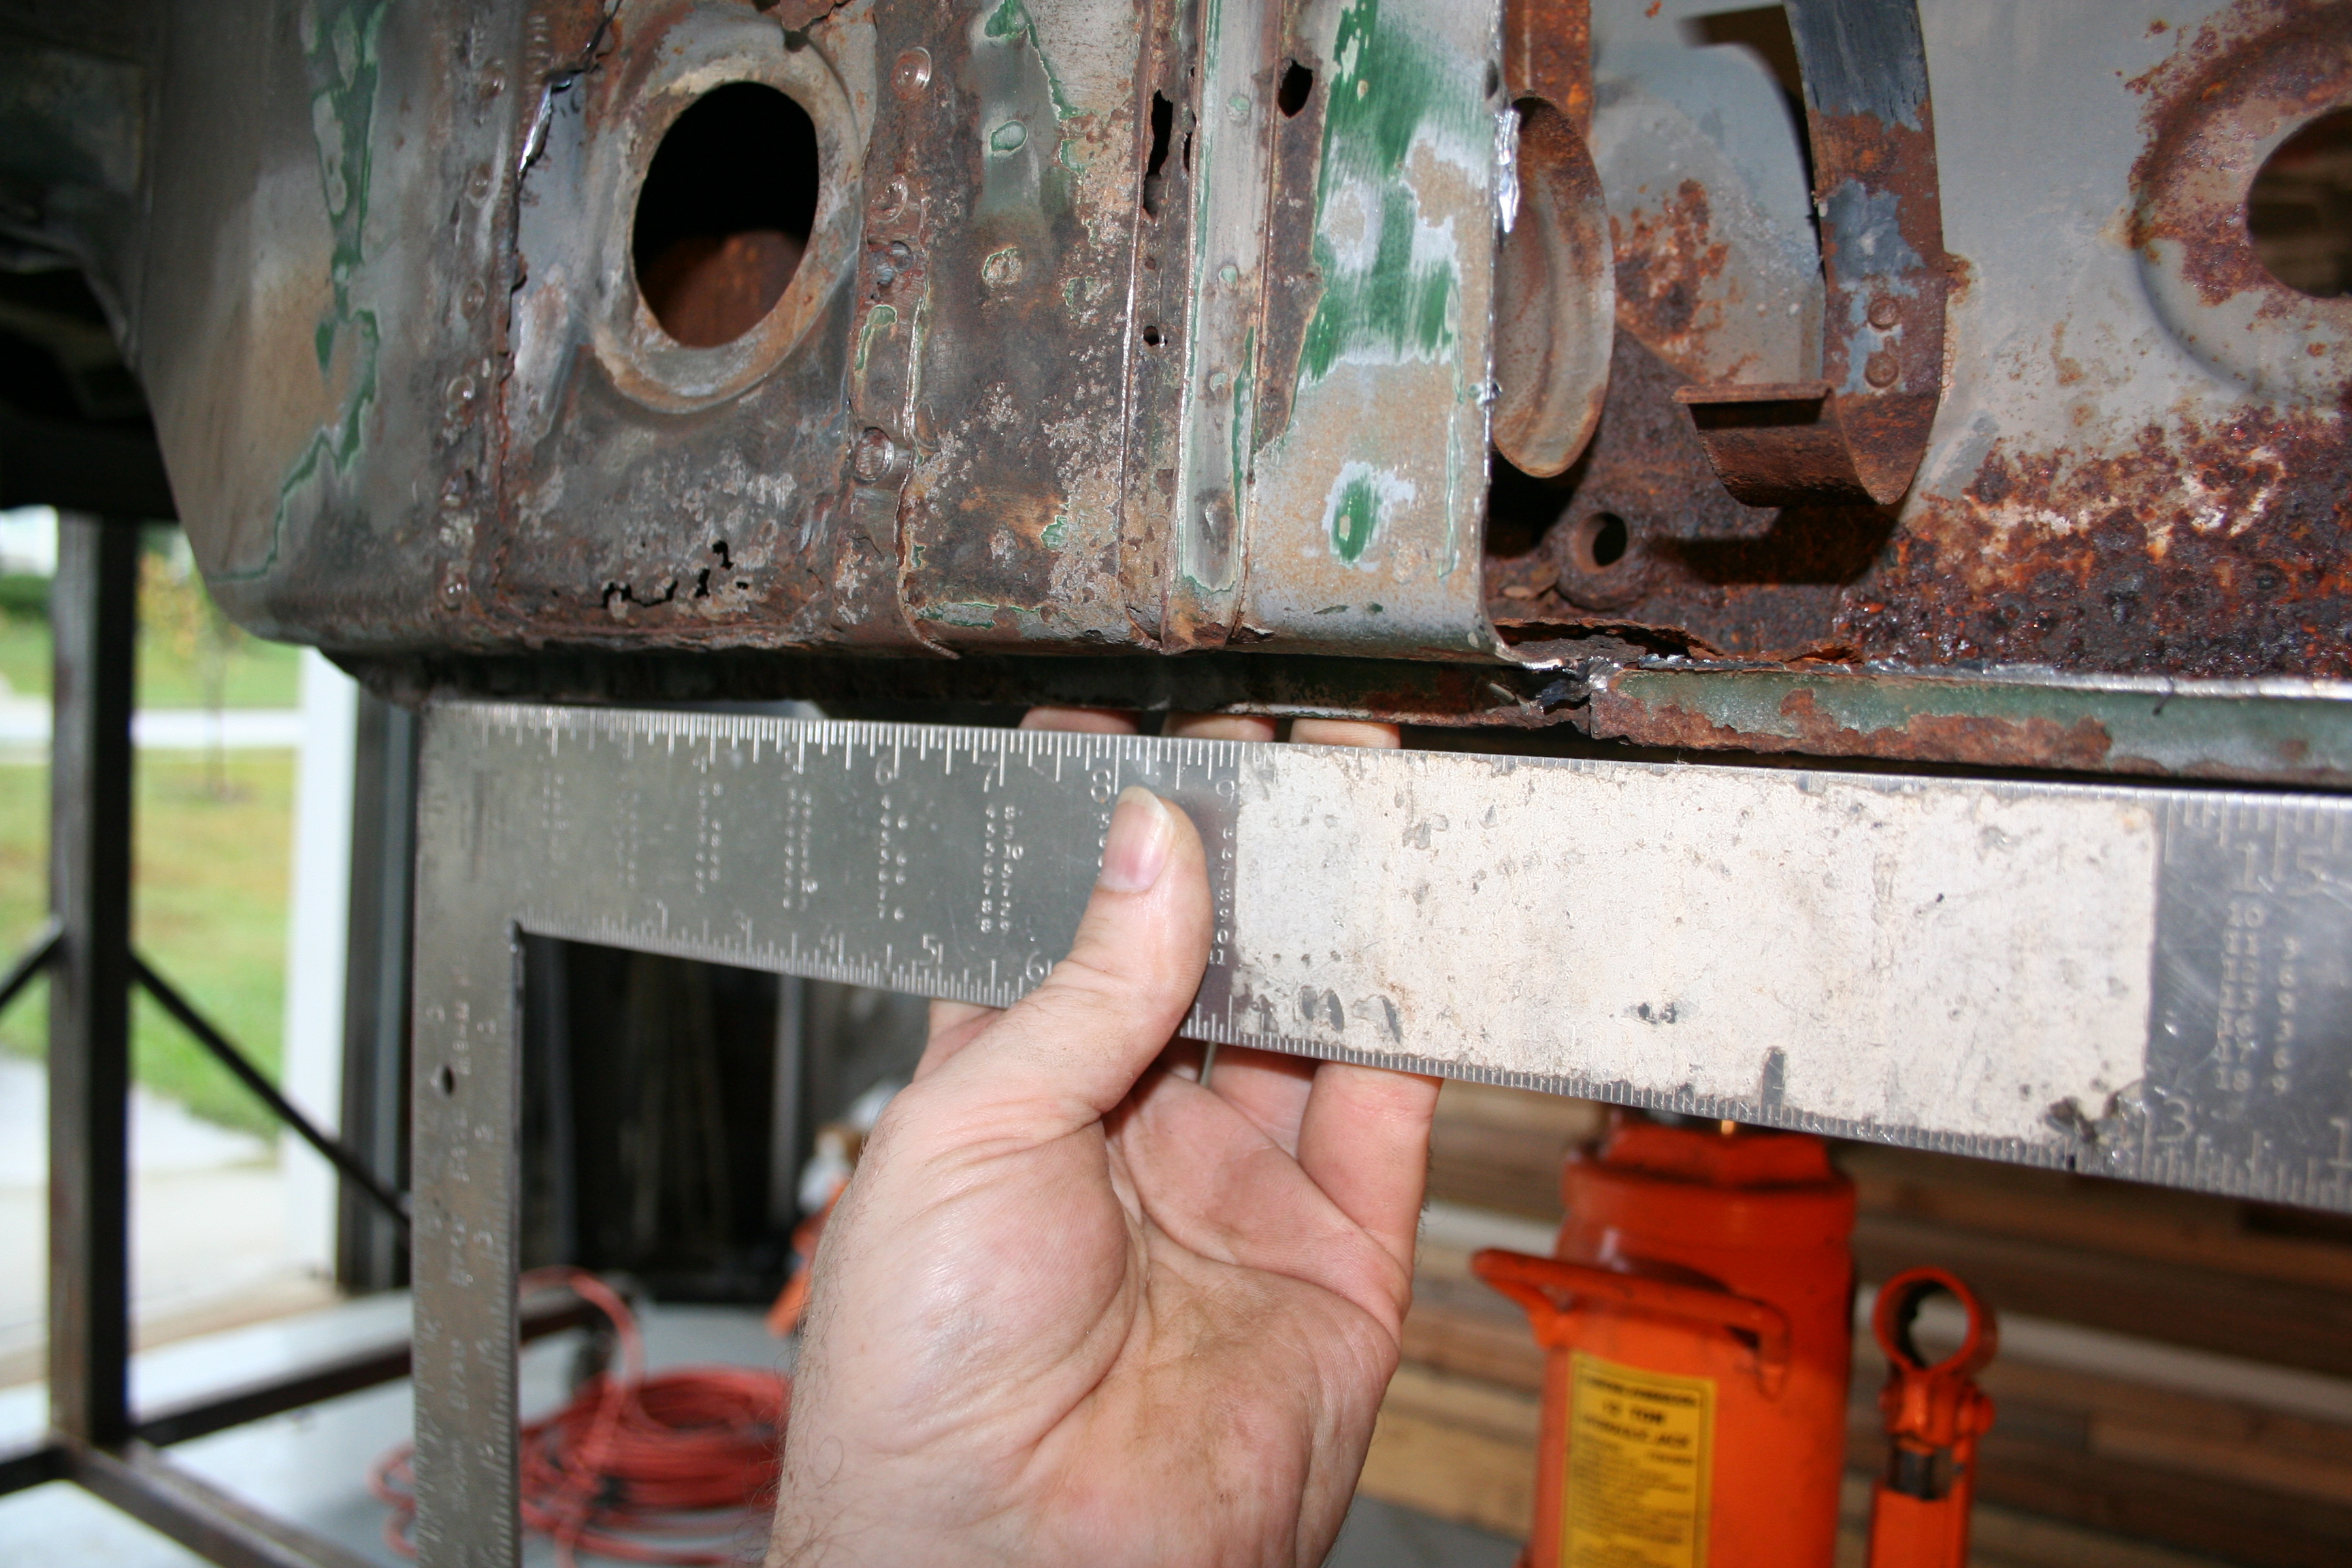
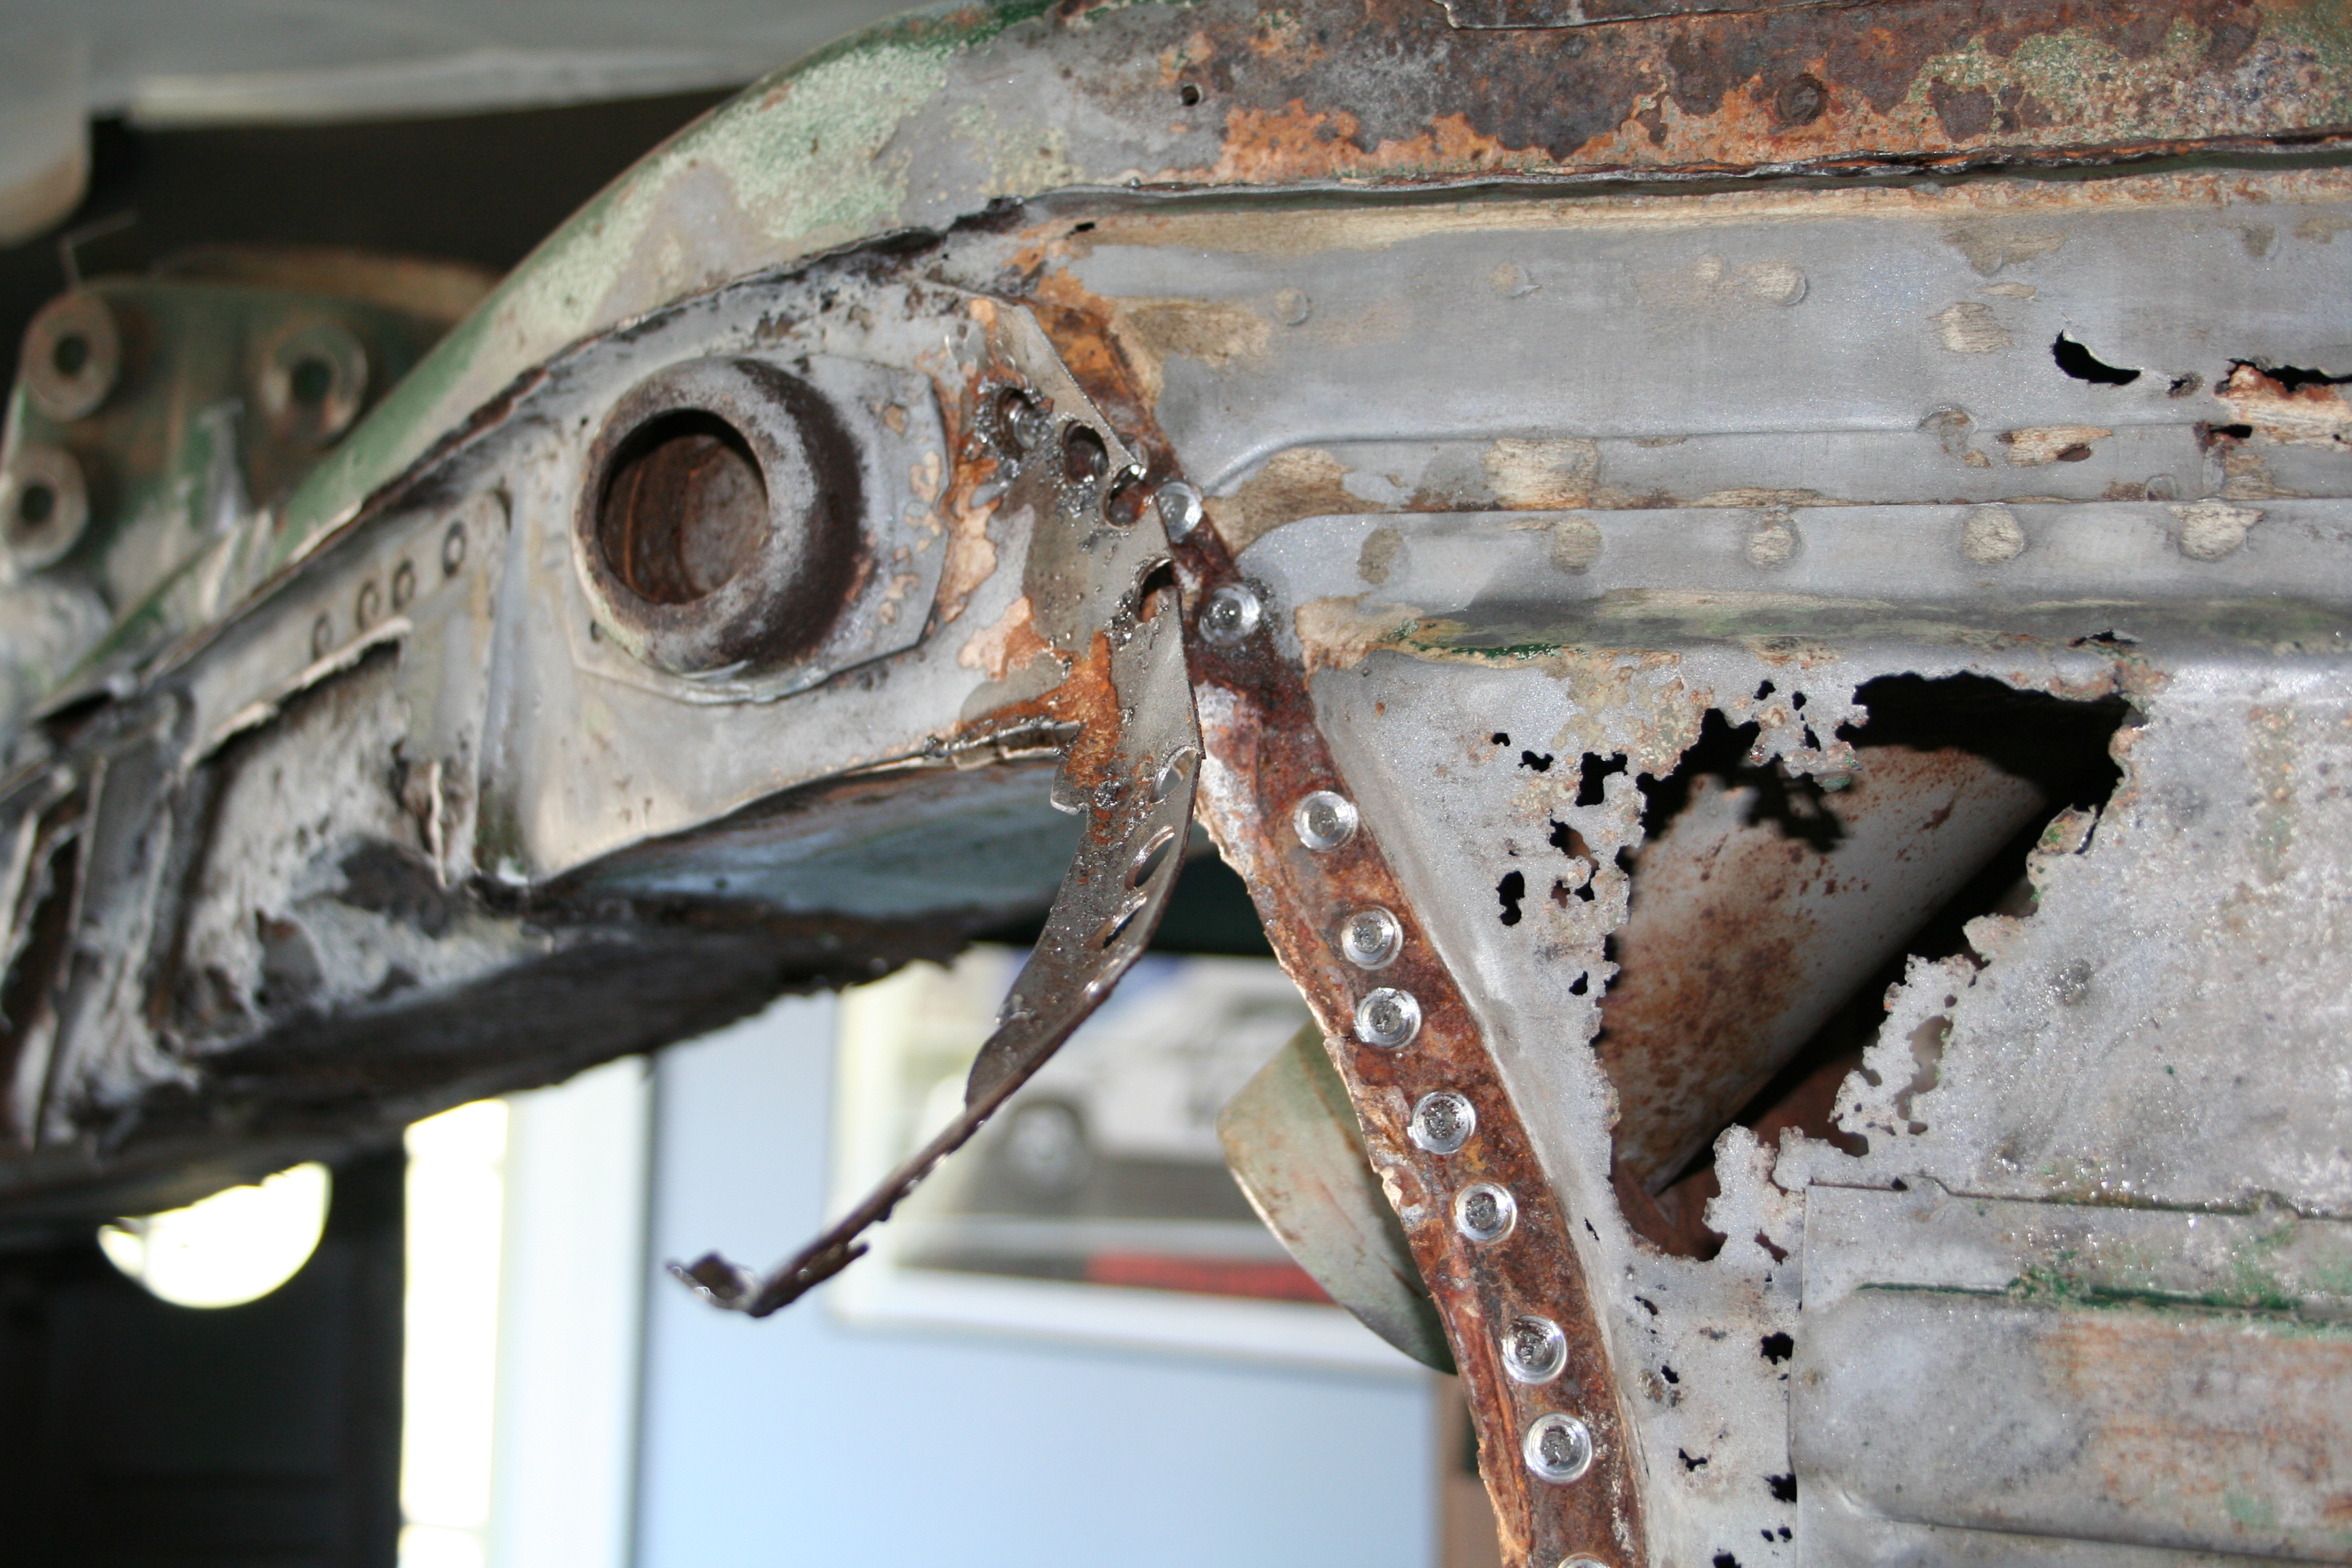
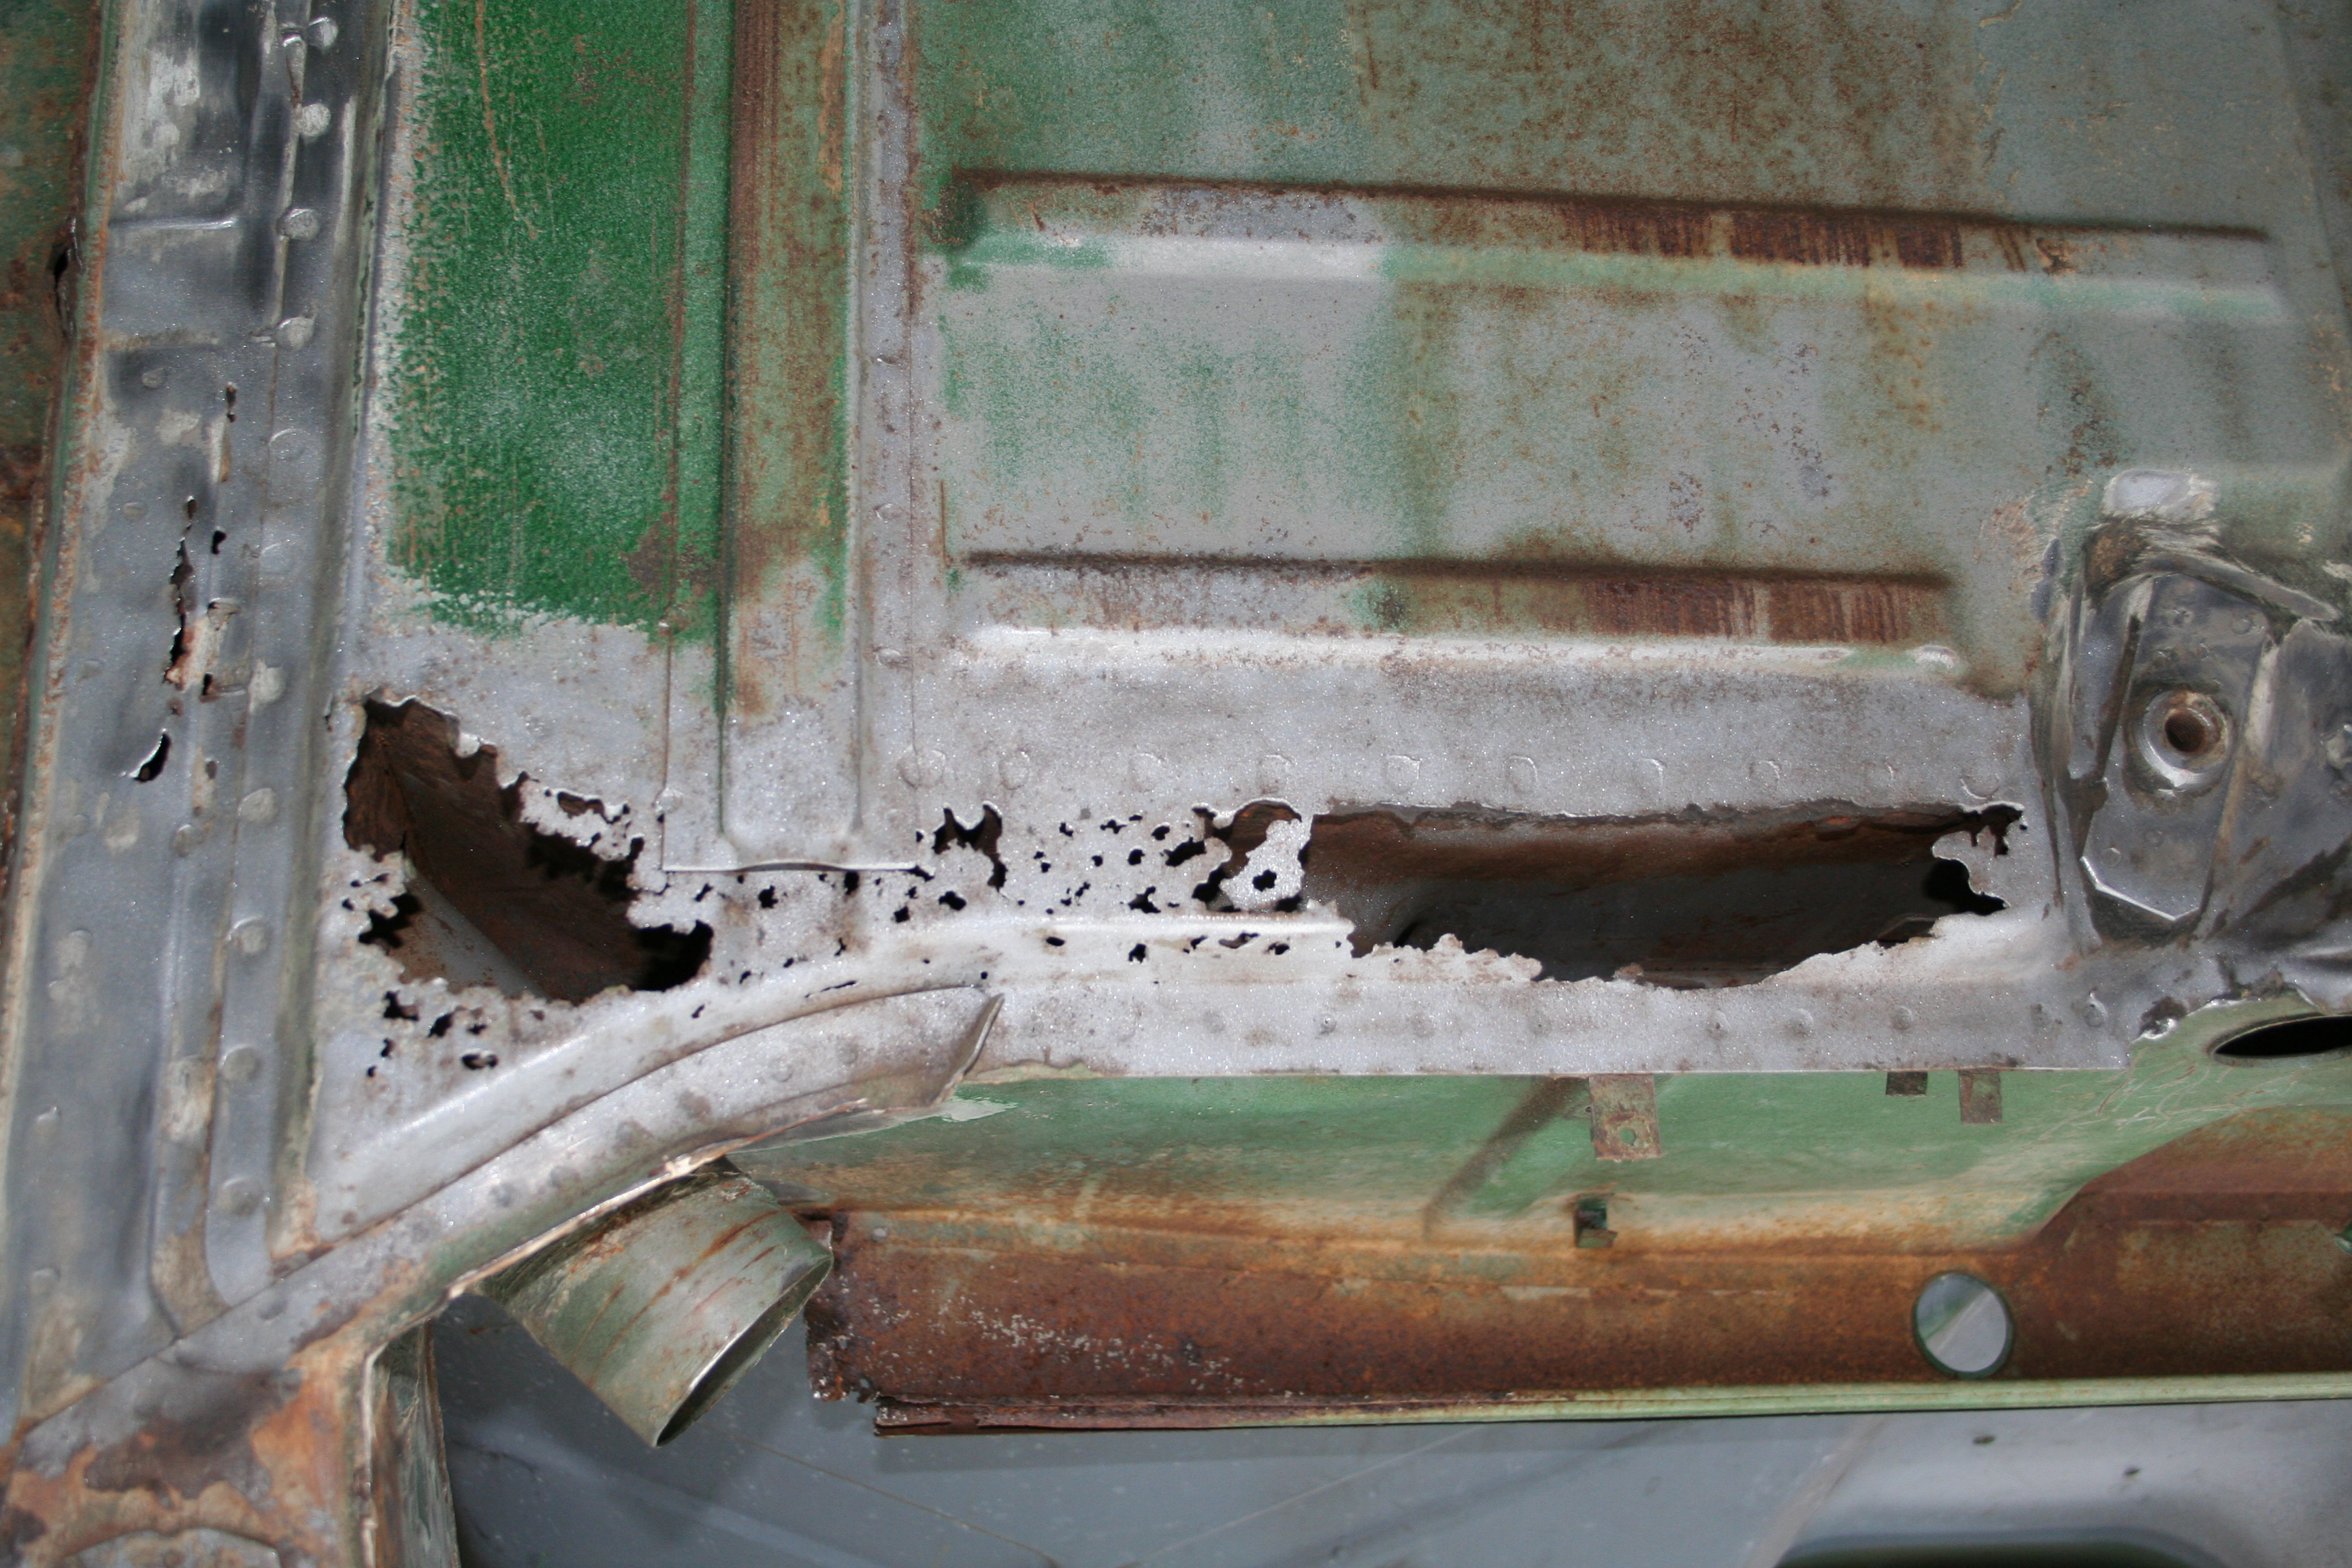
Here is part of why I am tearing into this section. You can see the gap (with my fingers showing through) on the top of this straight edge. This is where the car has been jacked up and the bottom joint that mates the inner and outer clamshell into a box has been pushed up in this area. This is the bottom of the "Hell hole". Battery acid and rain water have percolated down into this area for years and has rusted out the double walled section on the inside of this joint. This area has a fraction of the strength it had when new.
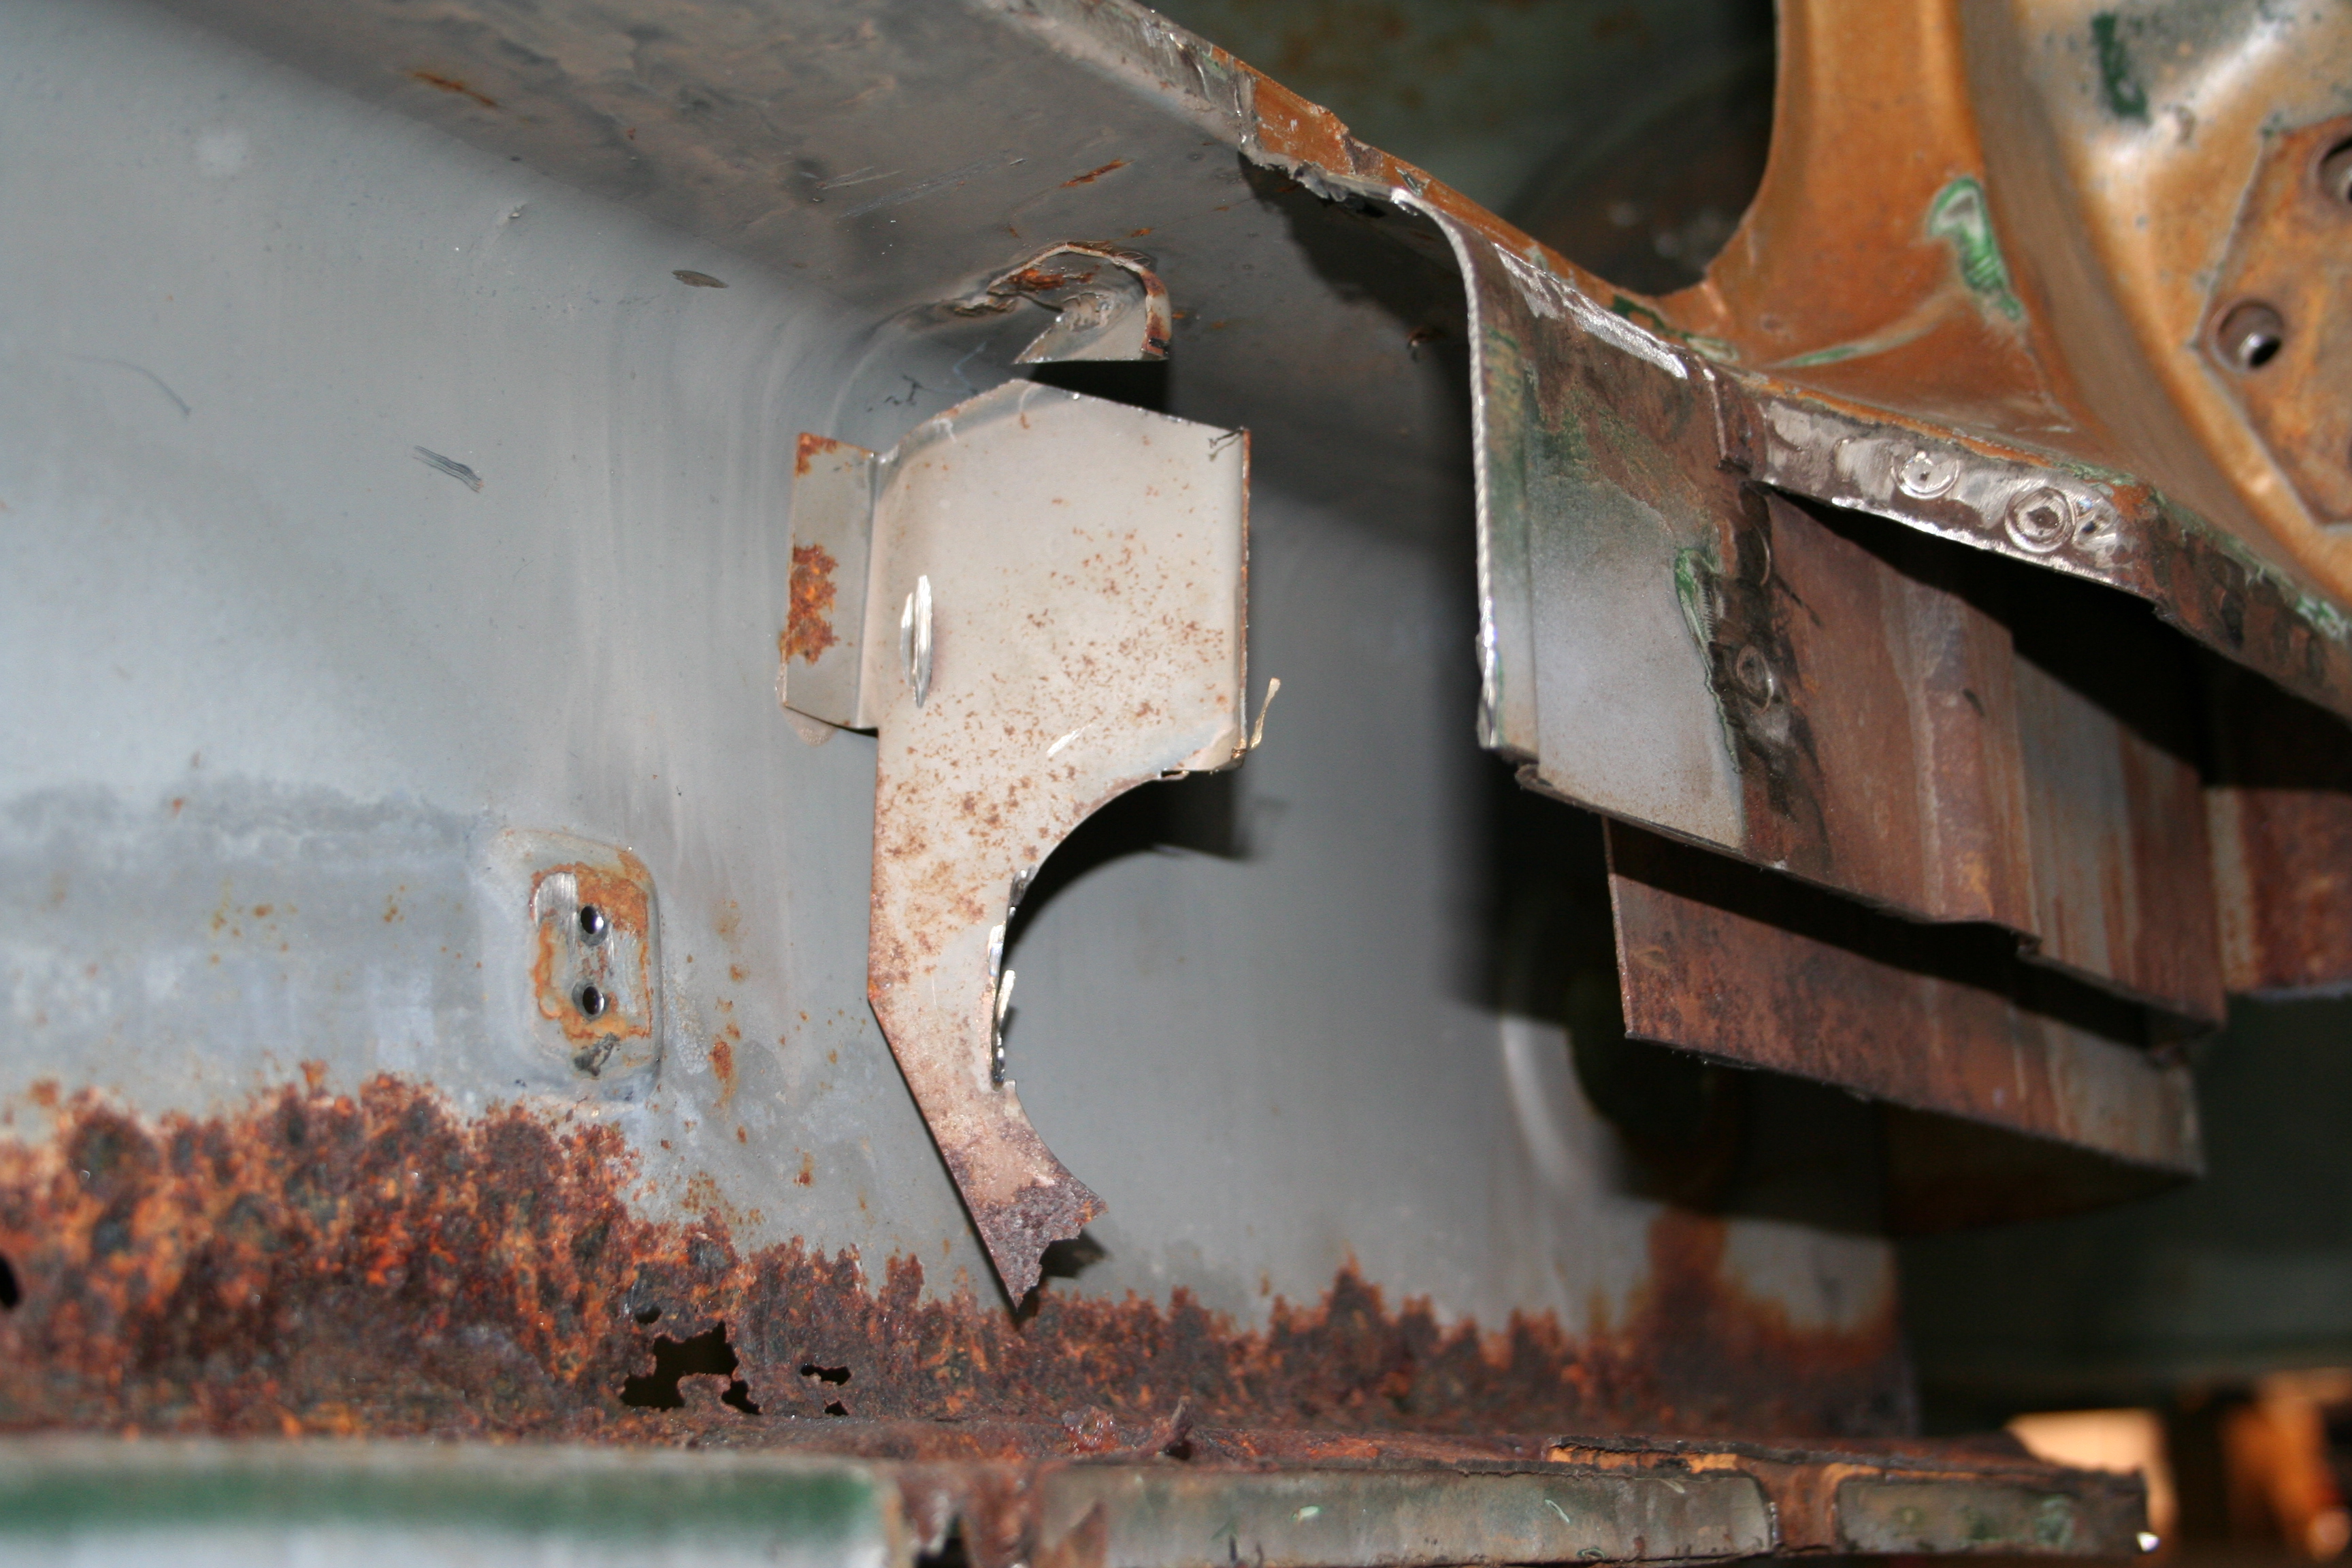
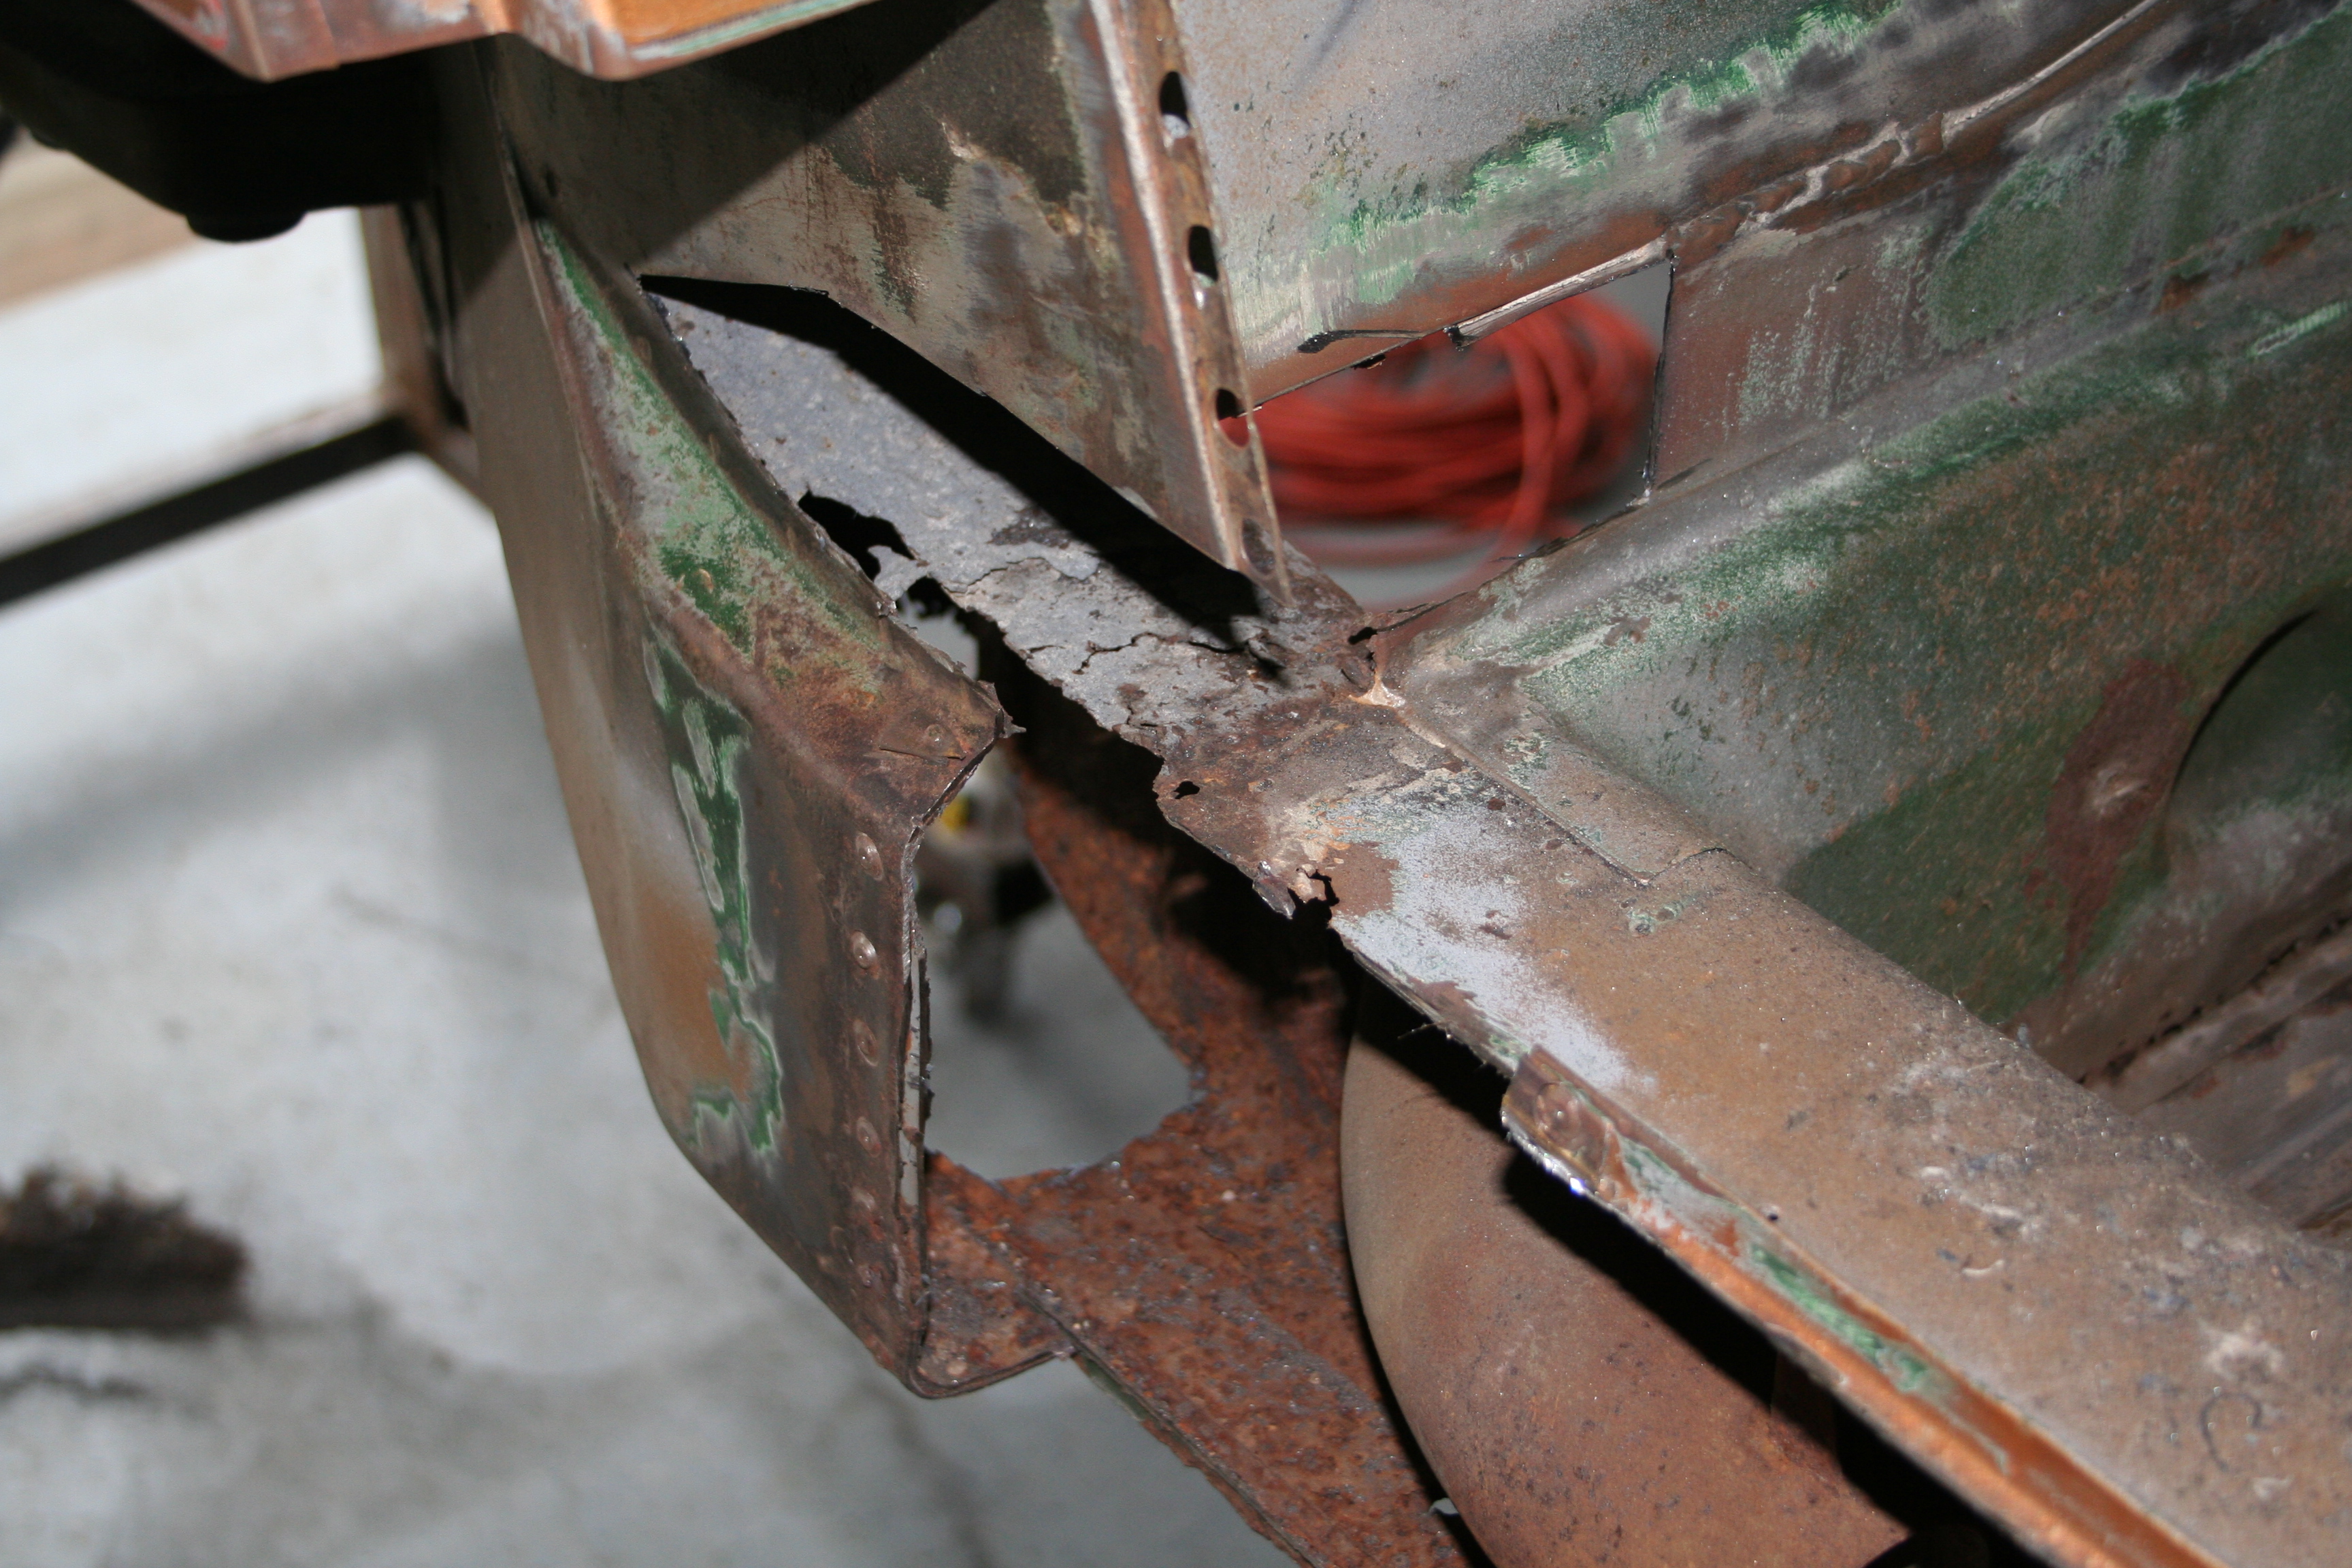
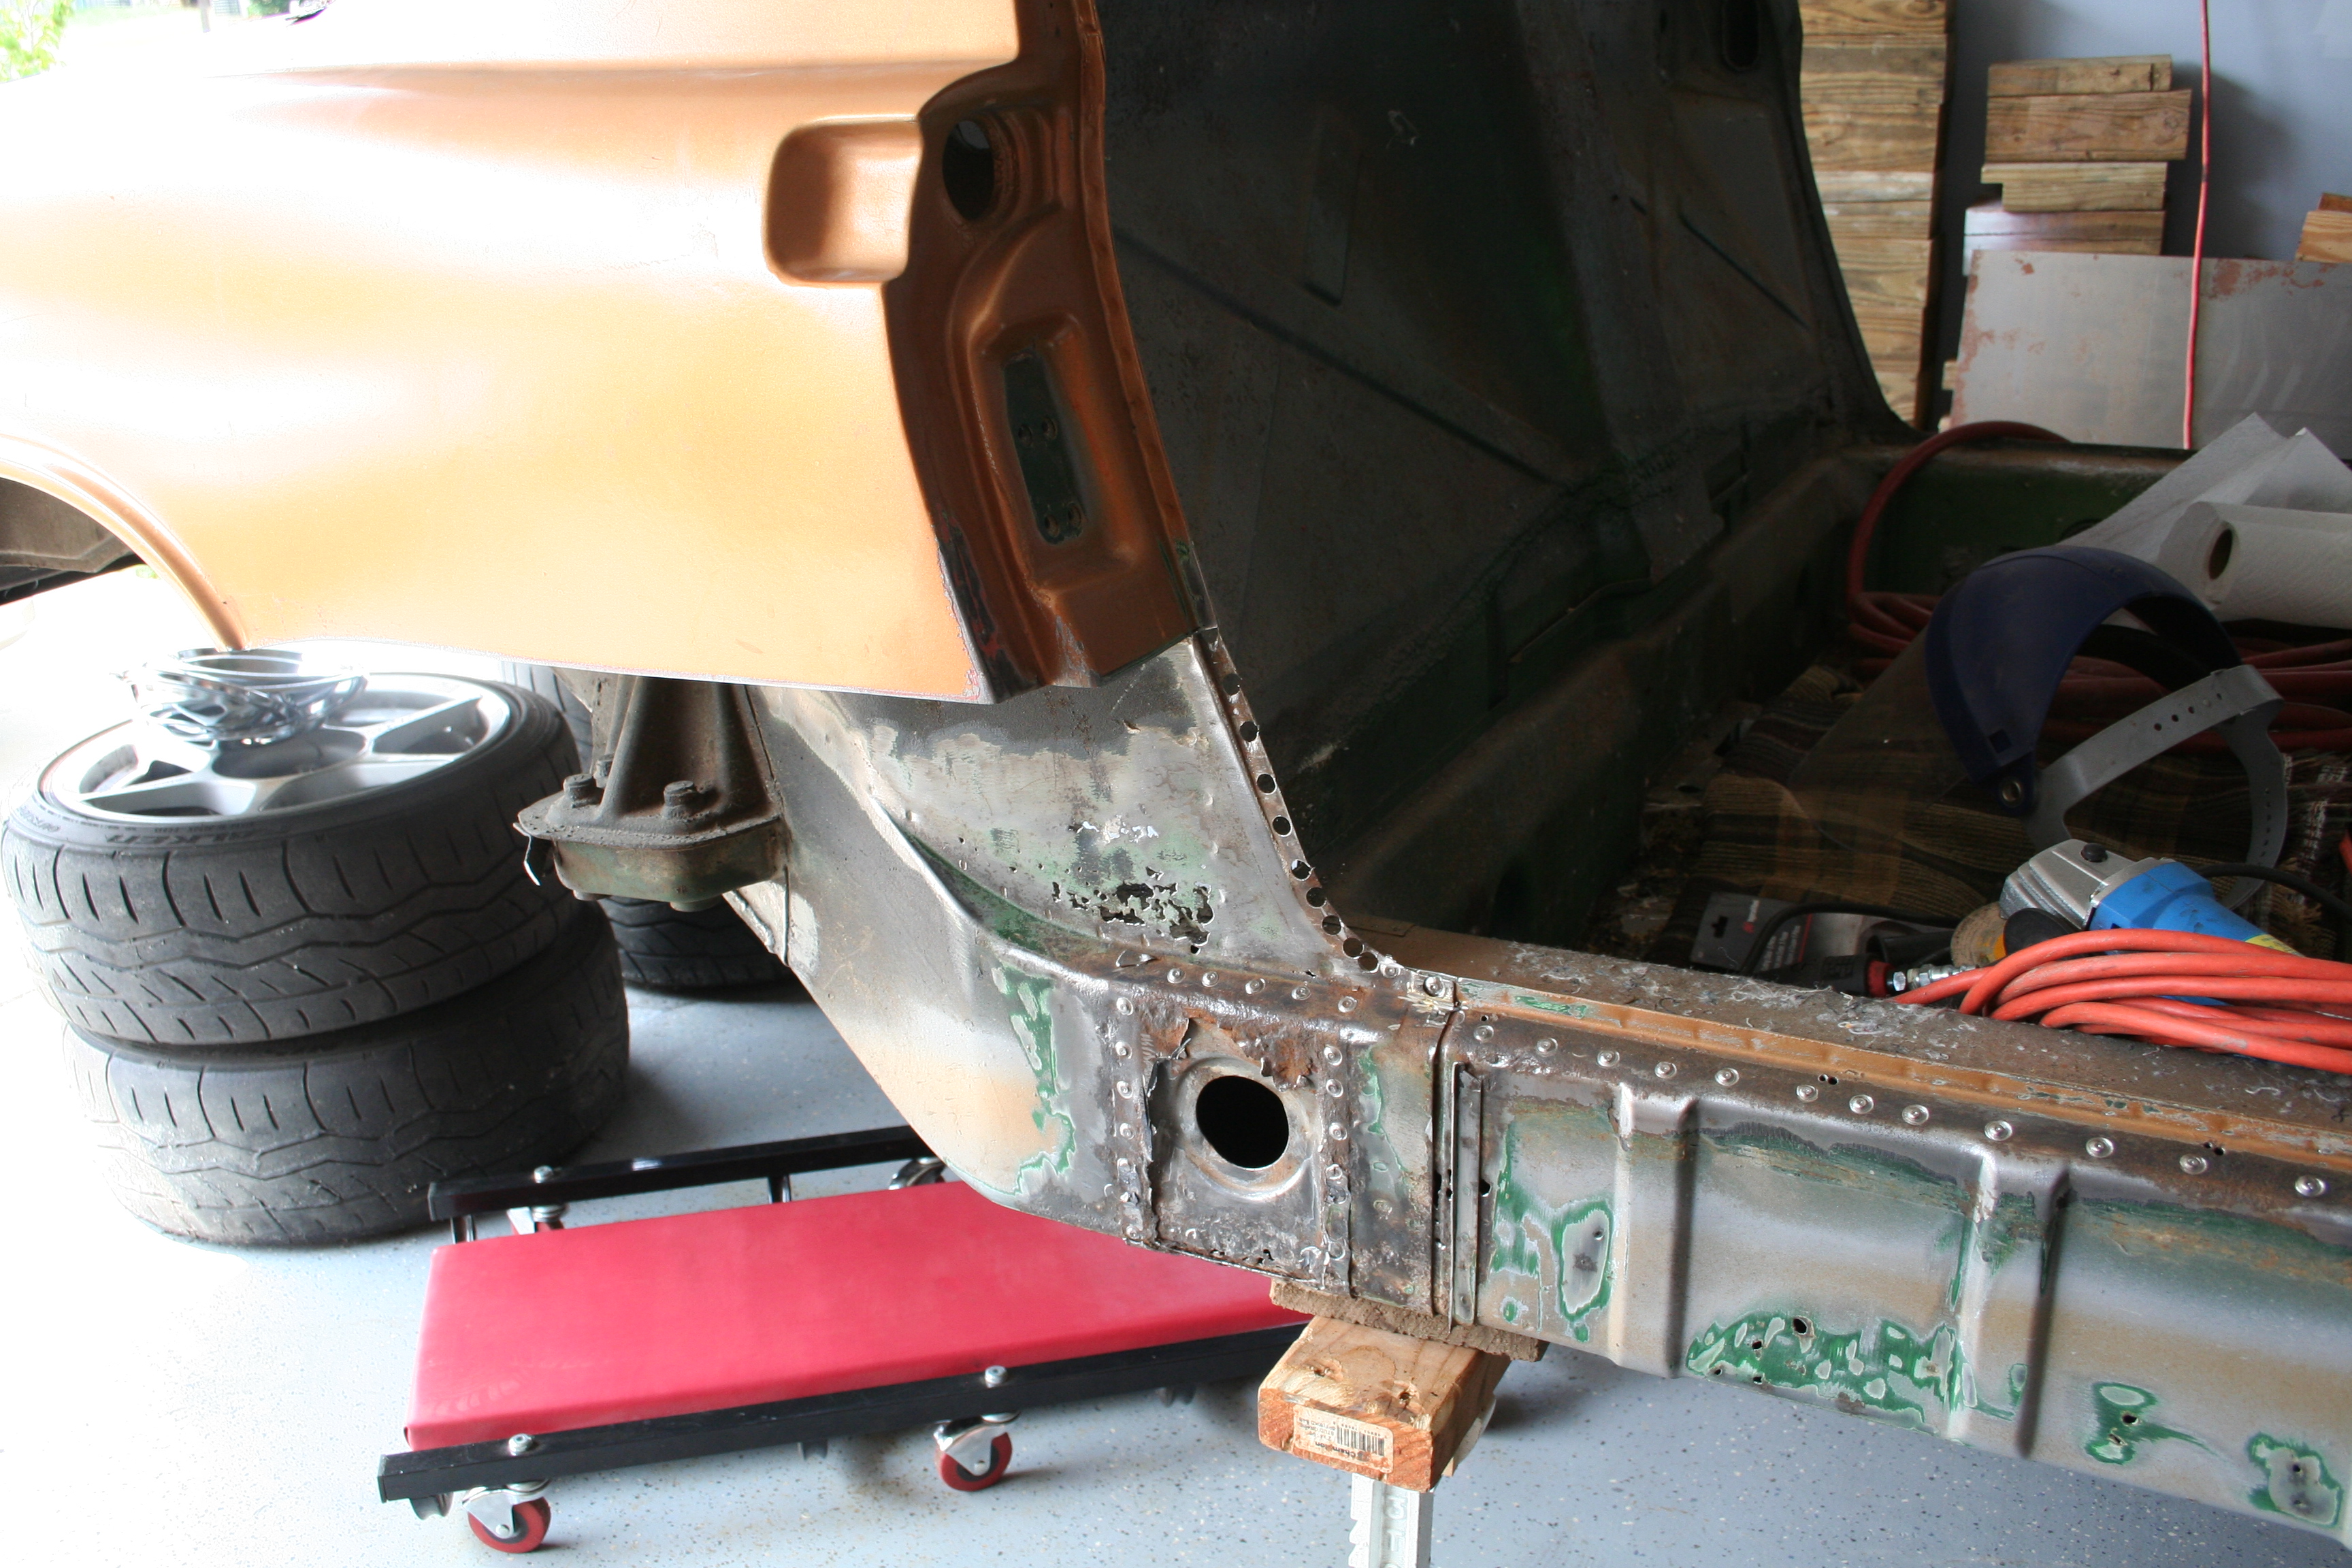
Kind of hard to see as it is dark, but there is loose rust, plant material and other debris farther up in the longitudinal. If it is not obvious what this picture is of, it is looking inside the longitudinal toward the rear of the car where the inner and outer rear suspension consoles are welded to the car This section uses a double walled construction. The inner walls have a corrugated pattern to add strength. I wasn't sure until I cut this open as to how healthy that inner wall was. After I vacuumed out the debris it actually looked pretty good up in that area with only some minor surface rust. Only the very bottom (seen in the photo above with the straight edge) needs to be replaces.
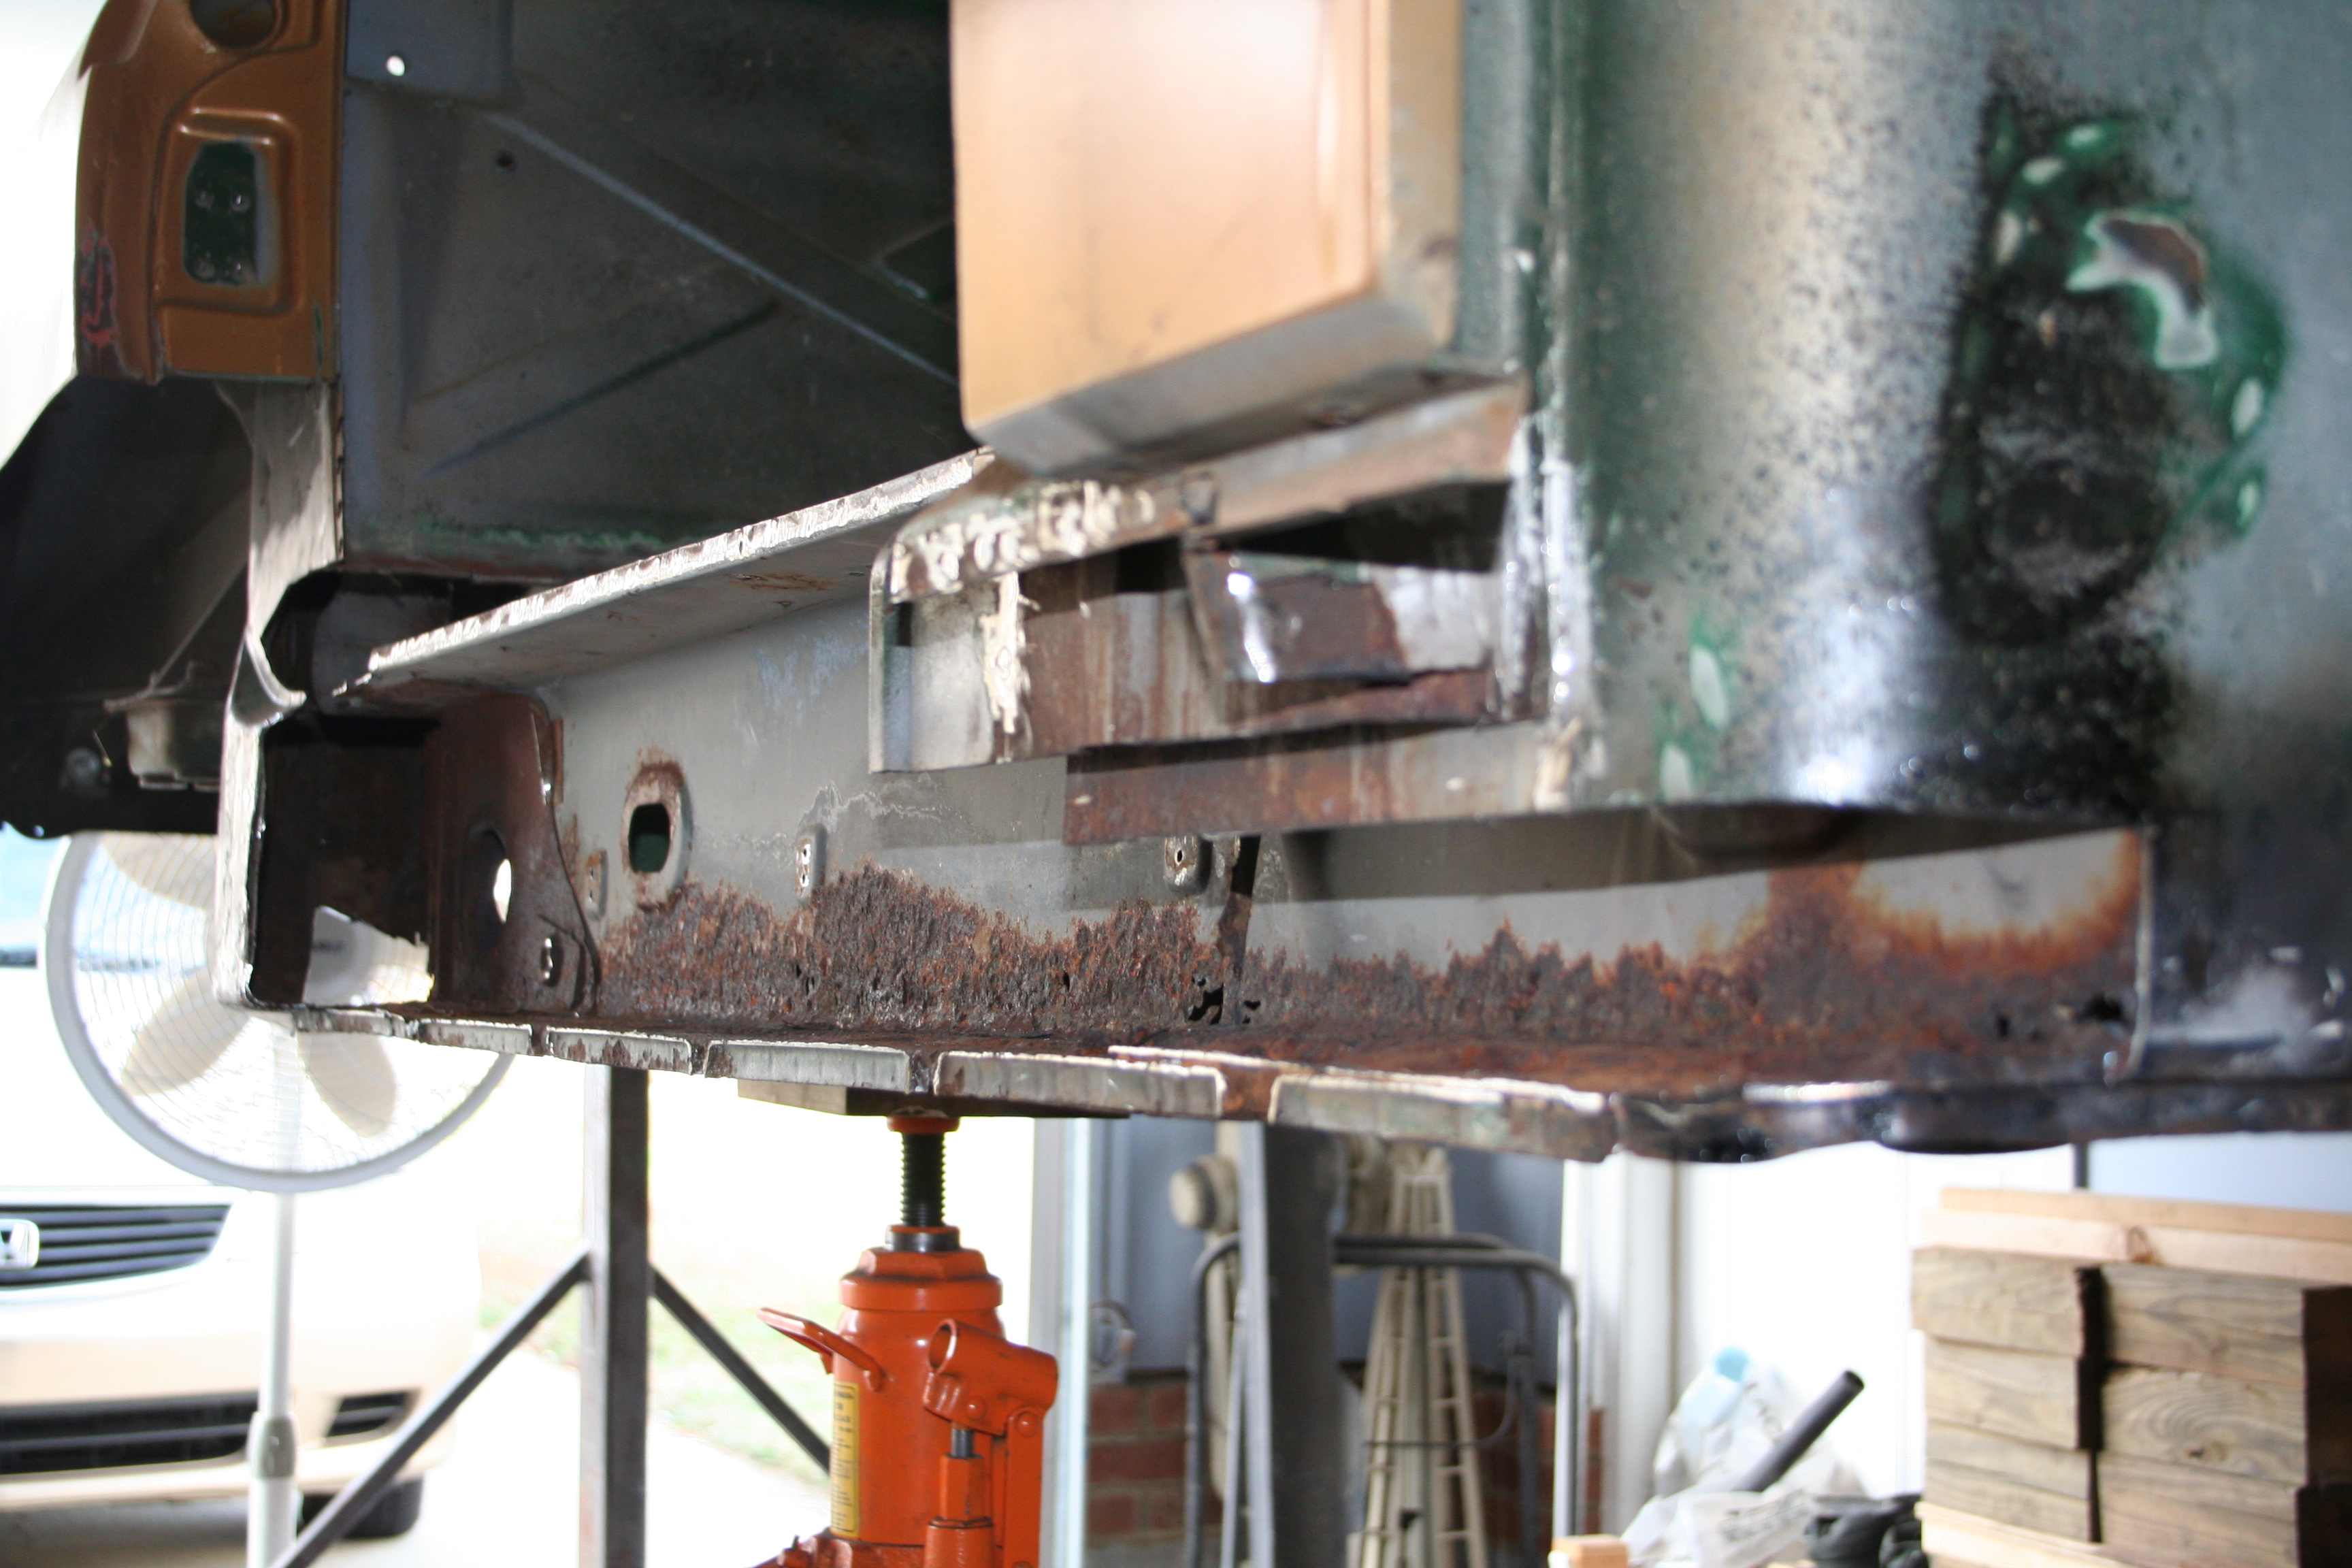
I eventually went ahead and cut the area around the jack point out as well as directly below the Hell hole on the bottom. I have more to cut out, but time ran out.
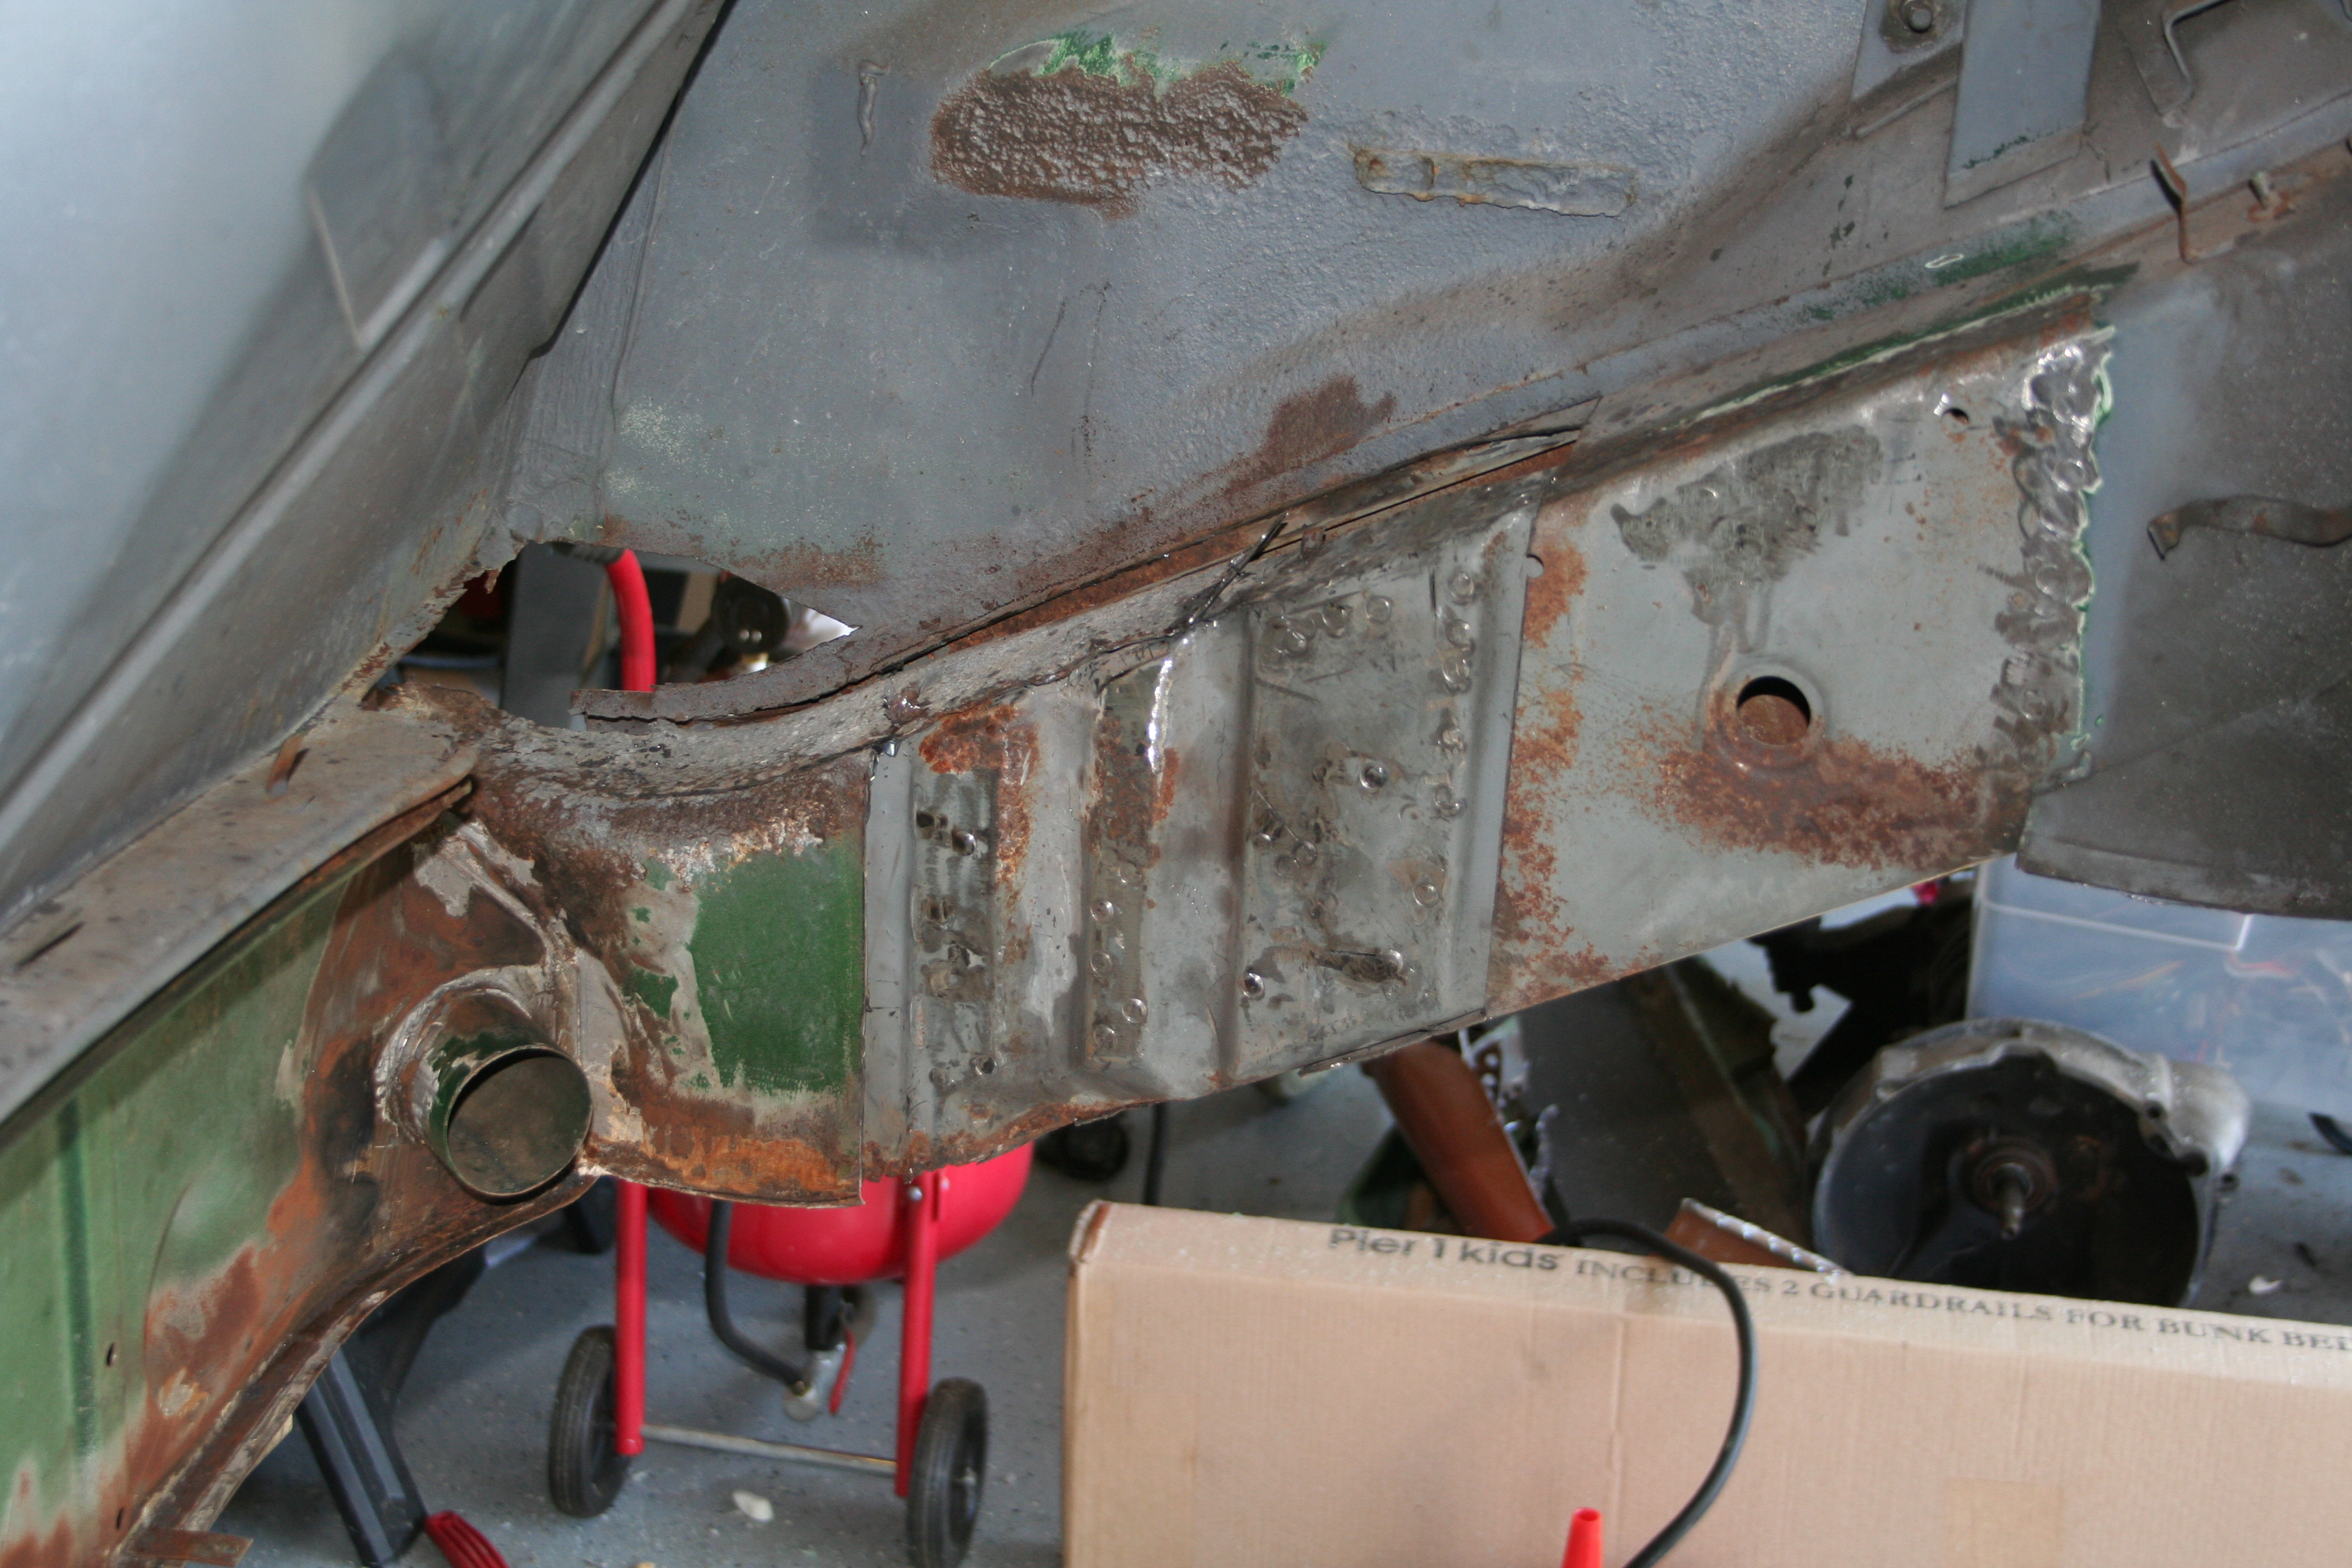
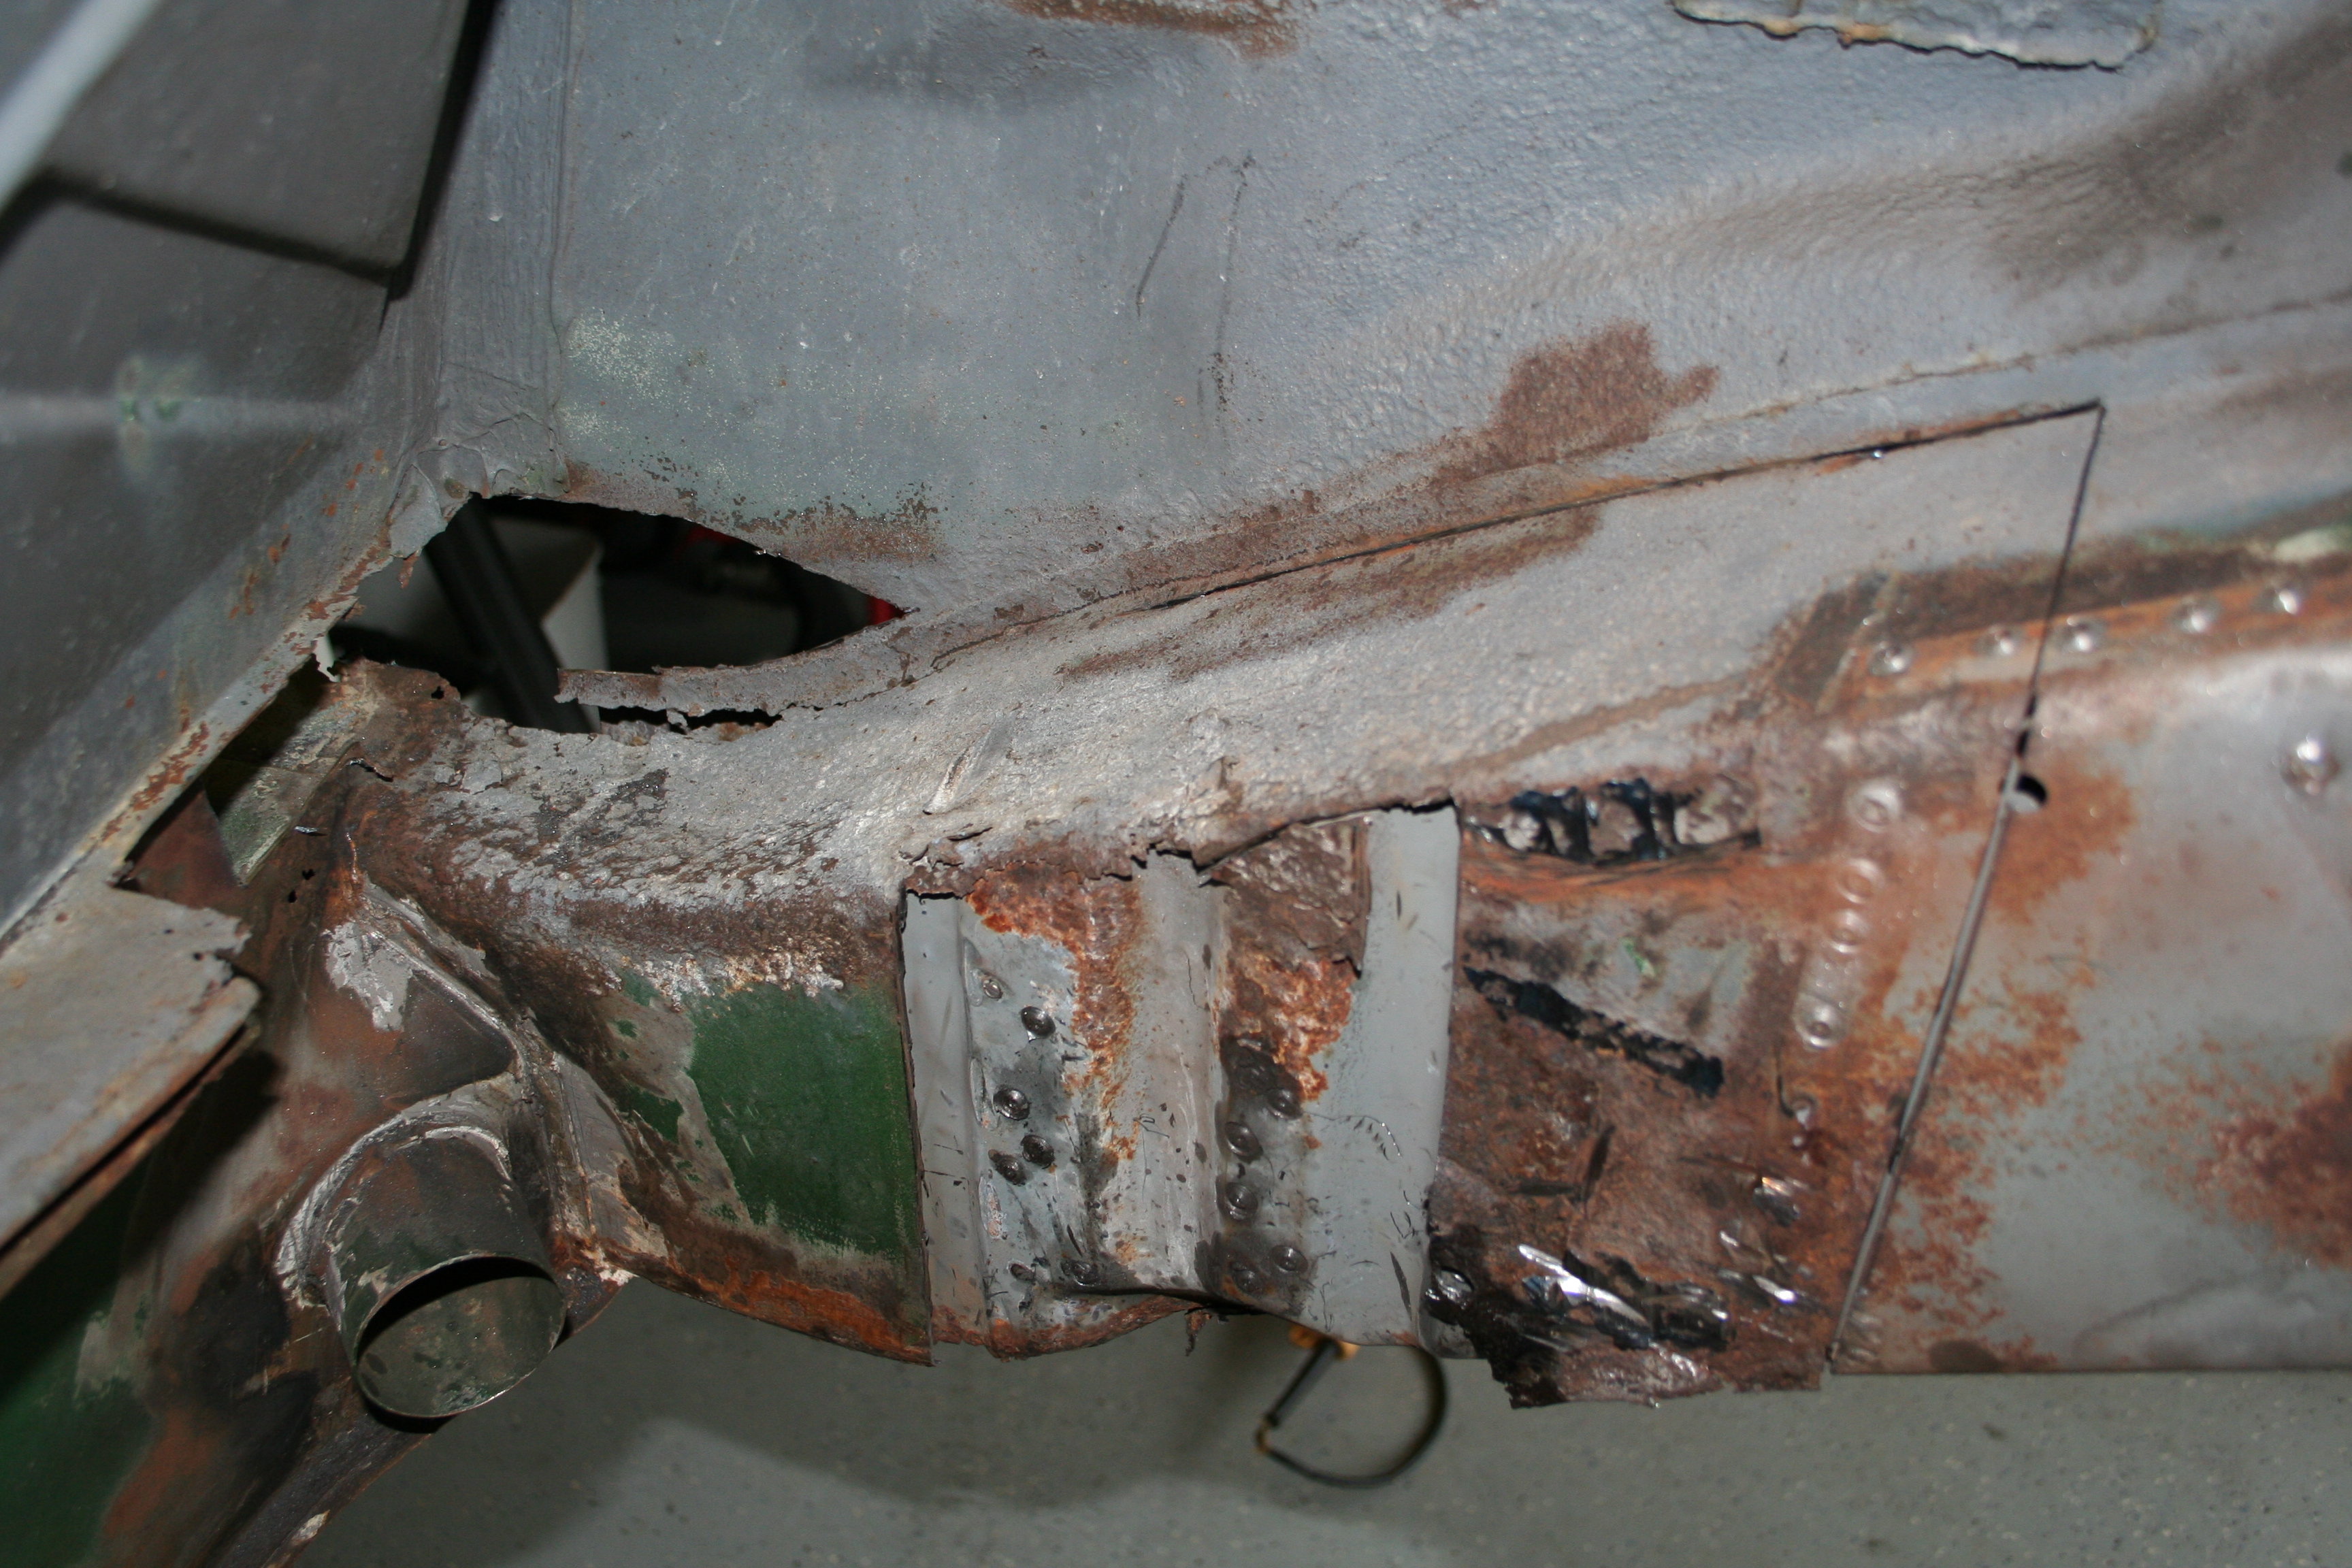
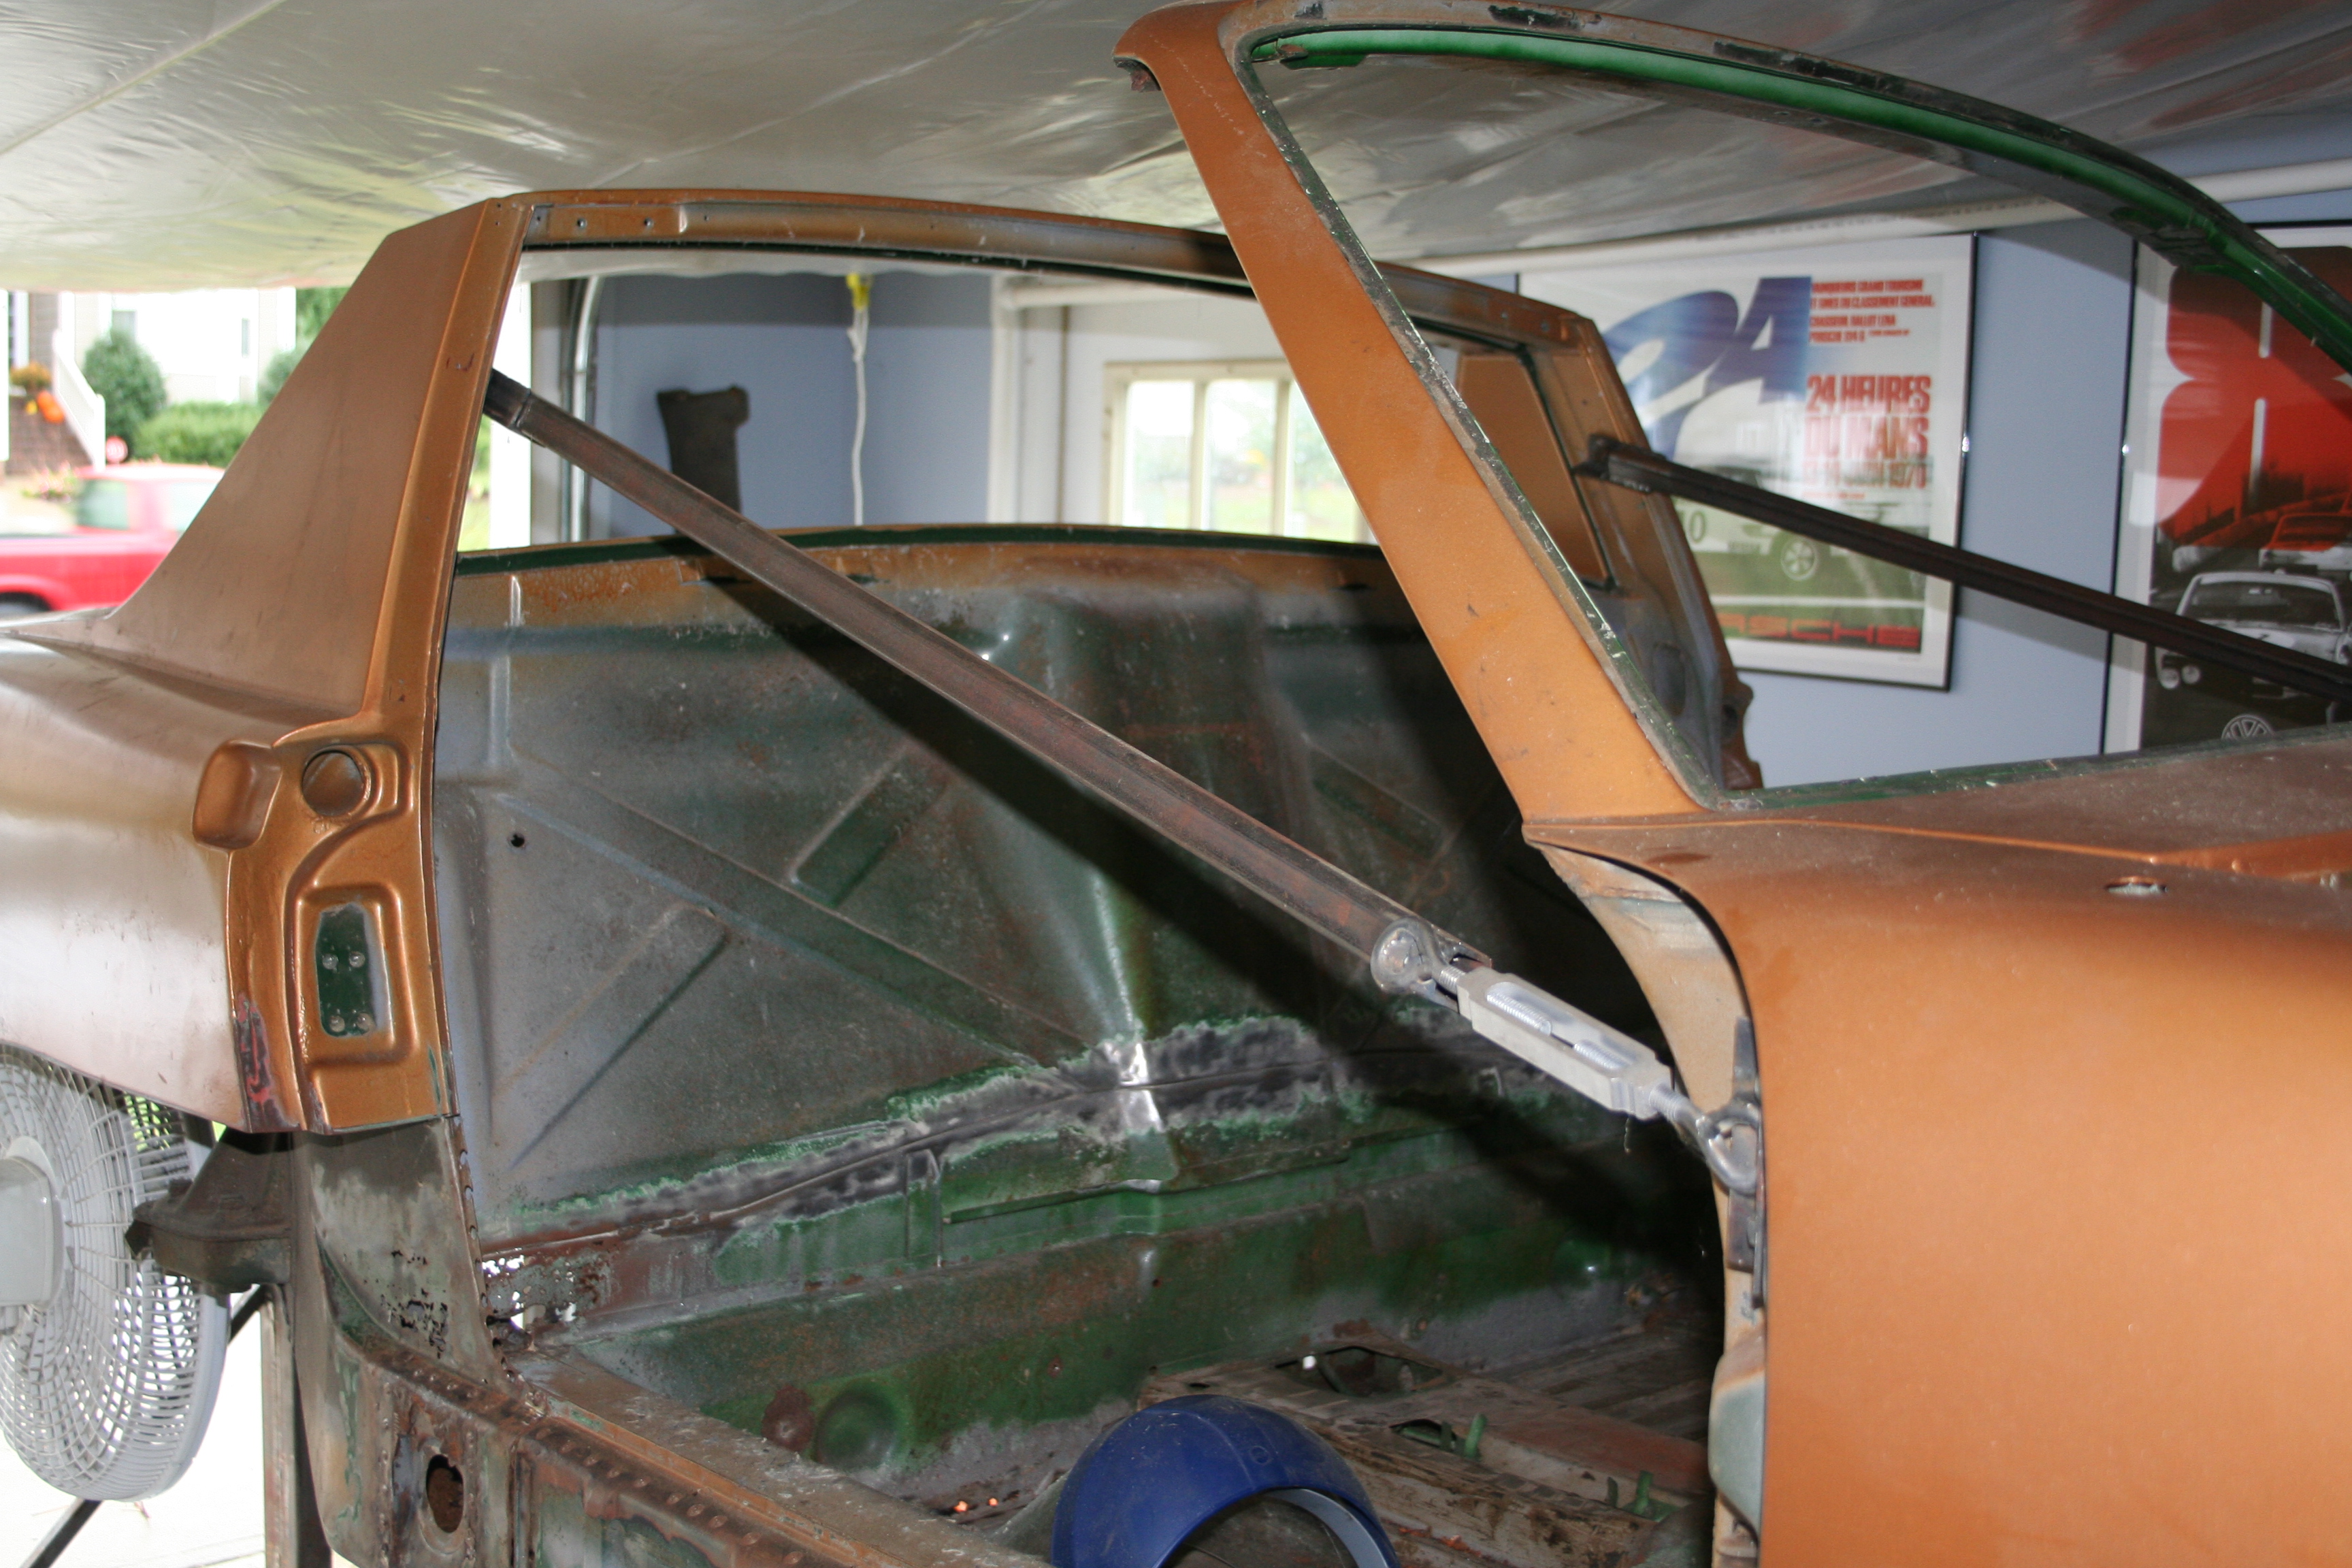
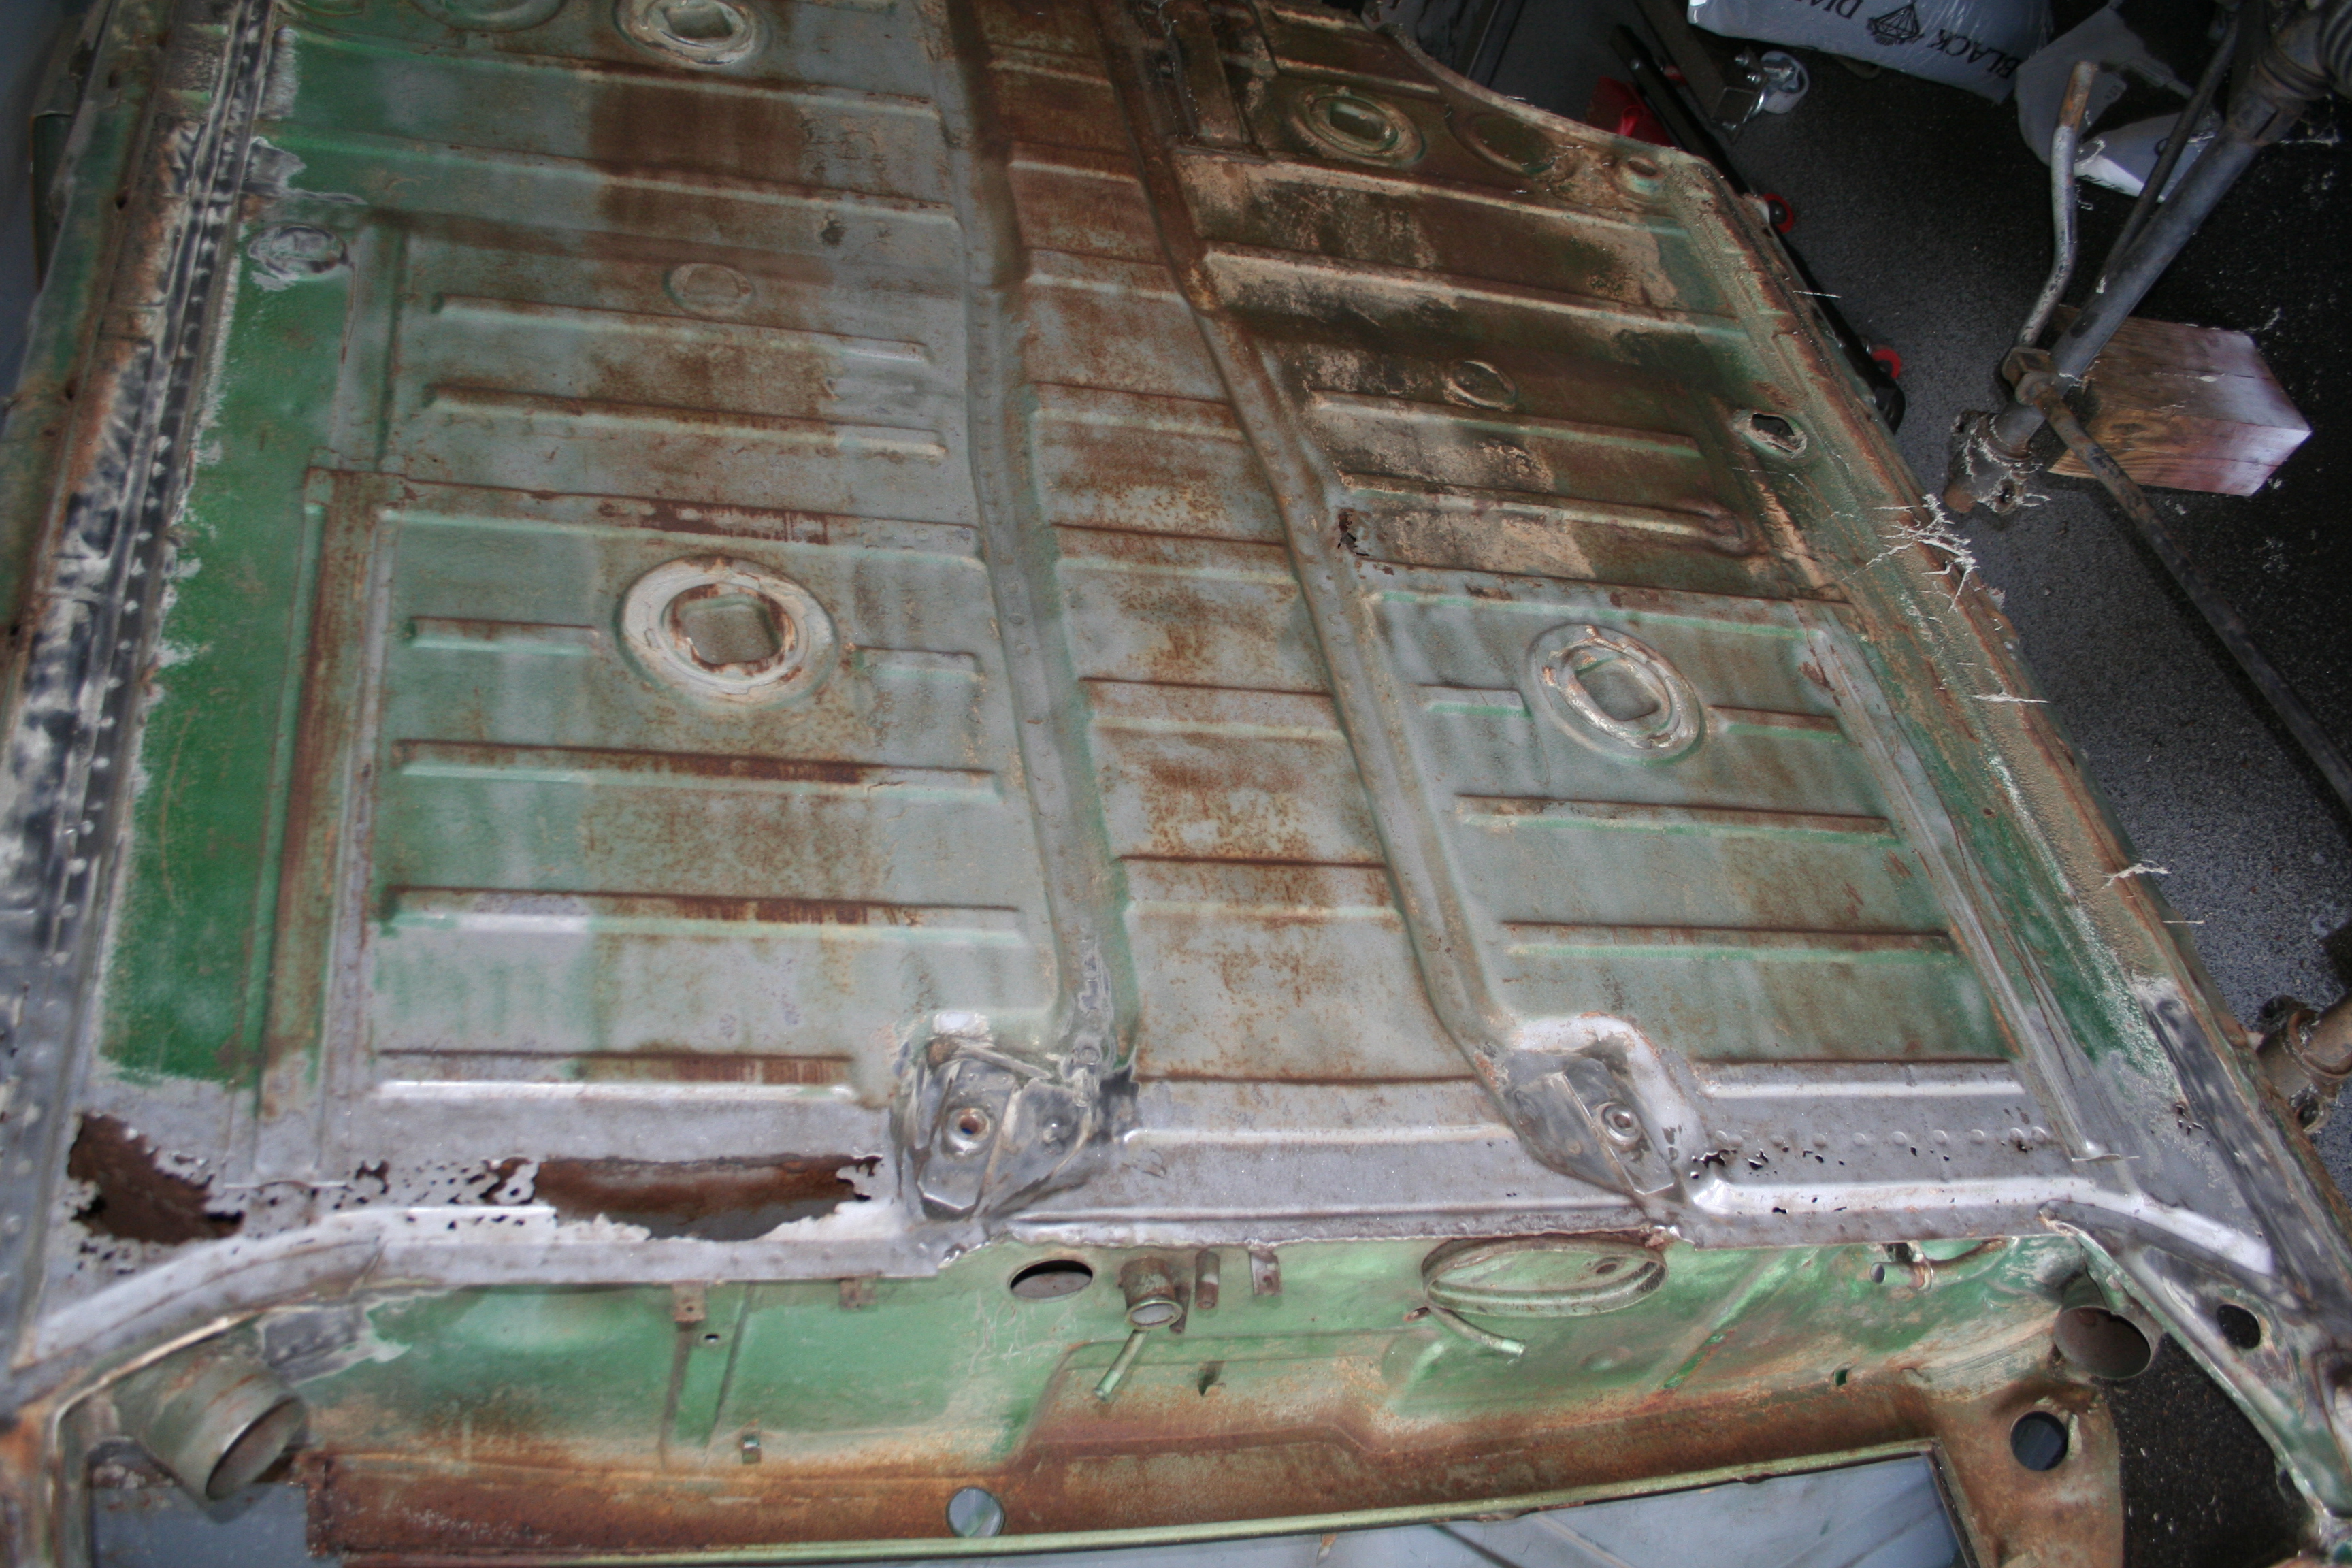
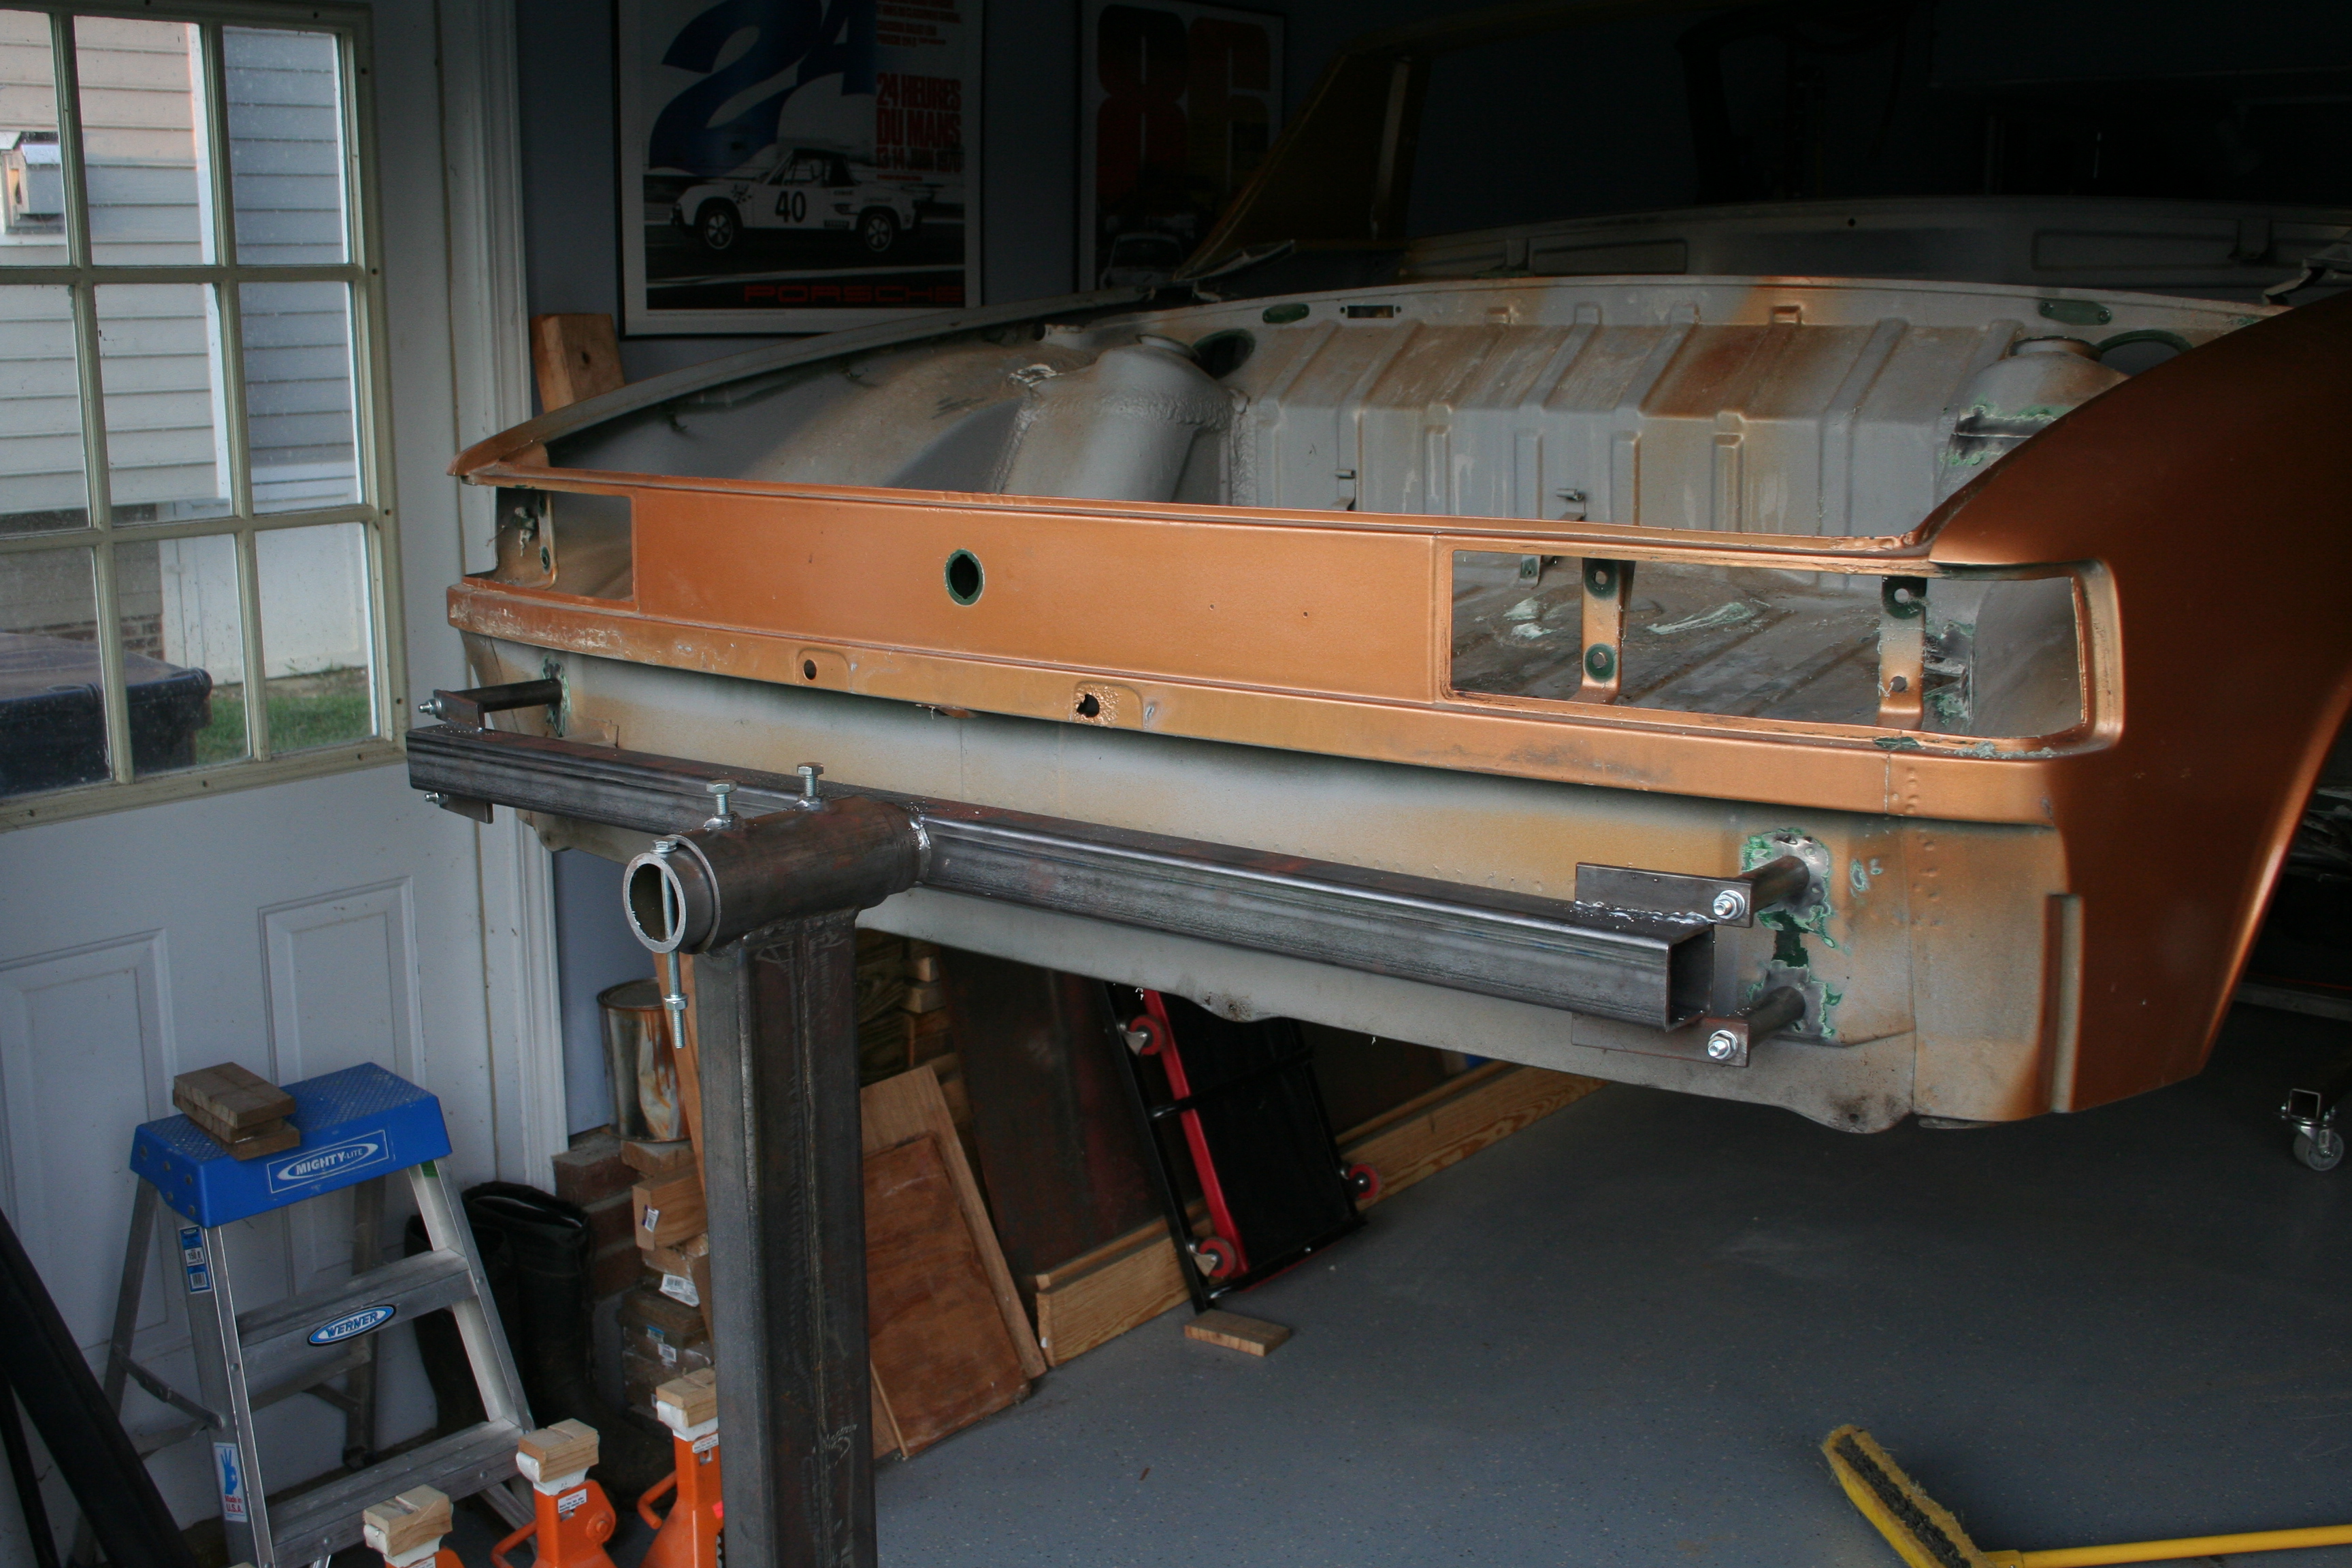
Here is a good view from the inside. The exterior wall is either rusted through, or has rust pitting. You can see I have started to remove some of the outer wall and you can see the inner corrugated wall. Other than the very bottom and the small section on the top the inner wall is in good shape. I am going to remove most of the outer wall, clean up and repair the inner wall and then re-skin the outer wall. Removing the outer wall consist of finding the spot welds and drilling them out. It is slow going. Read more about hell hole repair work here Read more about passenger side longitudinal repair work here Read more about floorboard and seat repair work here Read more about trunk repair work hear 10/25/2007I took today and tomorrow off from work so I could dedicate two uninterrupted days working on the car. I also wanted to enjoy the nice weather. It has been mild and a side effect of the drought has been nice sunny days. As it turns out, I had to spend 1/2 of the day doing work stuff from home and it has been raining. But I can't complain about the rain as we need it! One last item that I have not installed on the car was the door braces. These mount using the shoulder harness mount and the upper door hinge mount. They each have a turnbuckle so make the bar shorter or longer. These are to help take the load off the longitudinal while they are cut apart and to maintain the factory spec distance between the the Targa bar and the windshield. Both sides currently are at factory spec prior to surgery (a good thing). I had built these braces months ago, but I was having a hard time getting the top ends to bolt to the shoulder harness mounting point. I just couldn't find a bolt that worked!. The existing bolts was packed away and I knew the bolt was roughly a 10mm bolt. I bought a couple 10mm with different thread pitches and none worked. And 12mm was too big. Could this be an 11mm bolt? That seemed an odd size. I ended up digging out the factory bolts and sure enough as far as I can tell they are 11 x 1.25 bolts.
While these door braces will help, I don't want them to carry 100% of the load while the car is suspended on the rotisserie. So I am going to lock the rotisserie with the car being exactly level (left to right) and then also put bracing under the car at the front and rear of the longitudinal on the side that I am working on. I built some wood braces (sort of like jack stands), but I used three 2x4s and there is space at the top for a hydraulic bottle jack. I wanted to be able to adjust the pressure on these as I worked. I am a little concerned about these bleeding down, but I have used these jacks before and have not had problems with them bleeding down. Also the car at this point is pretty light.
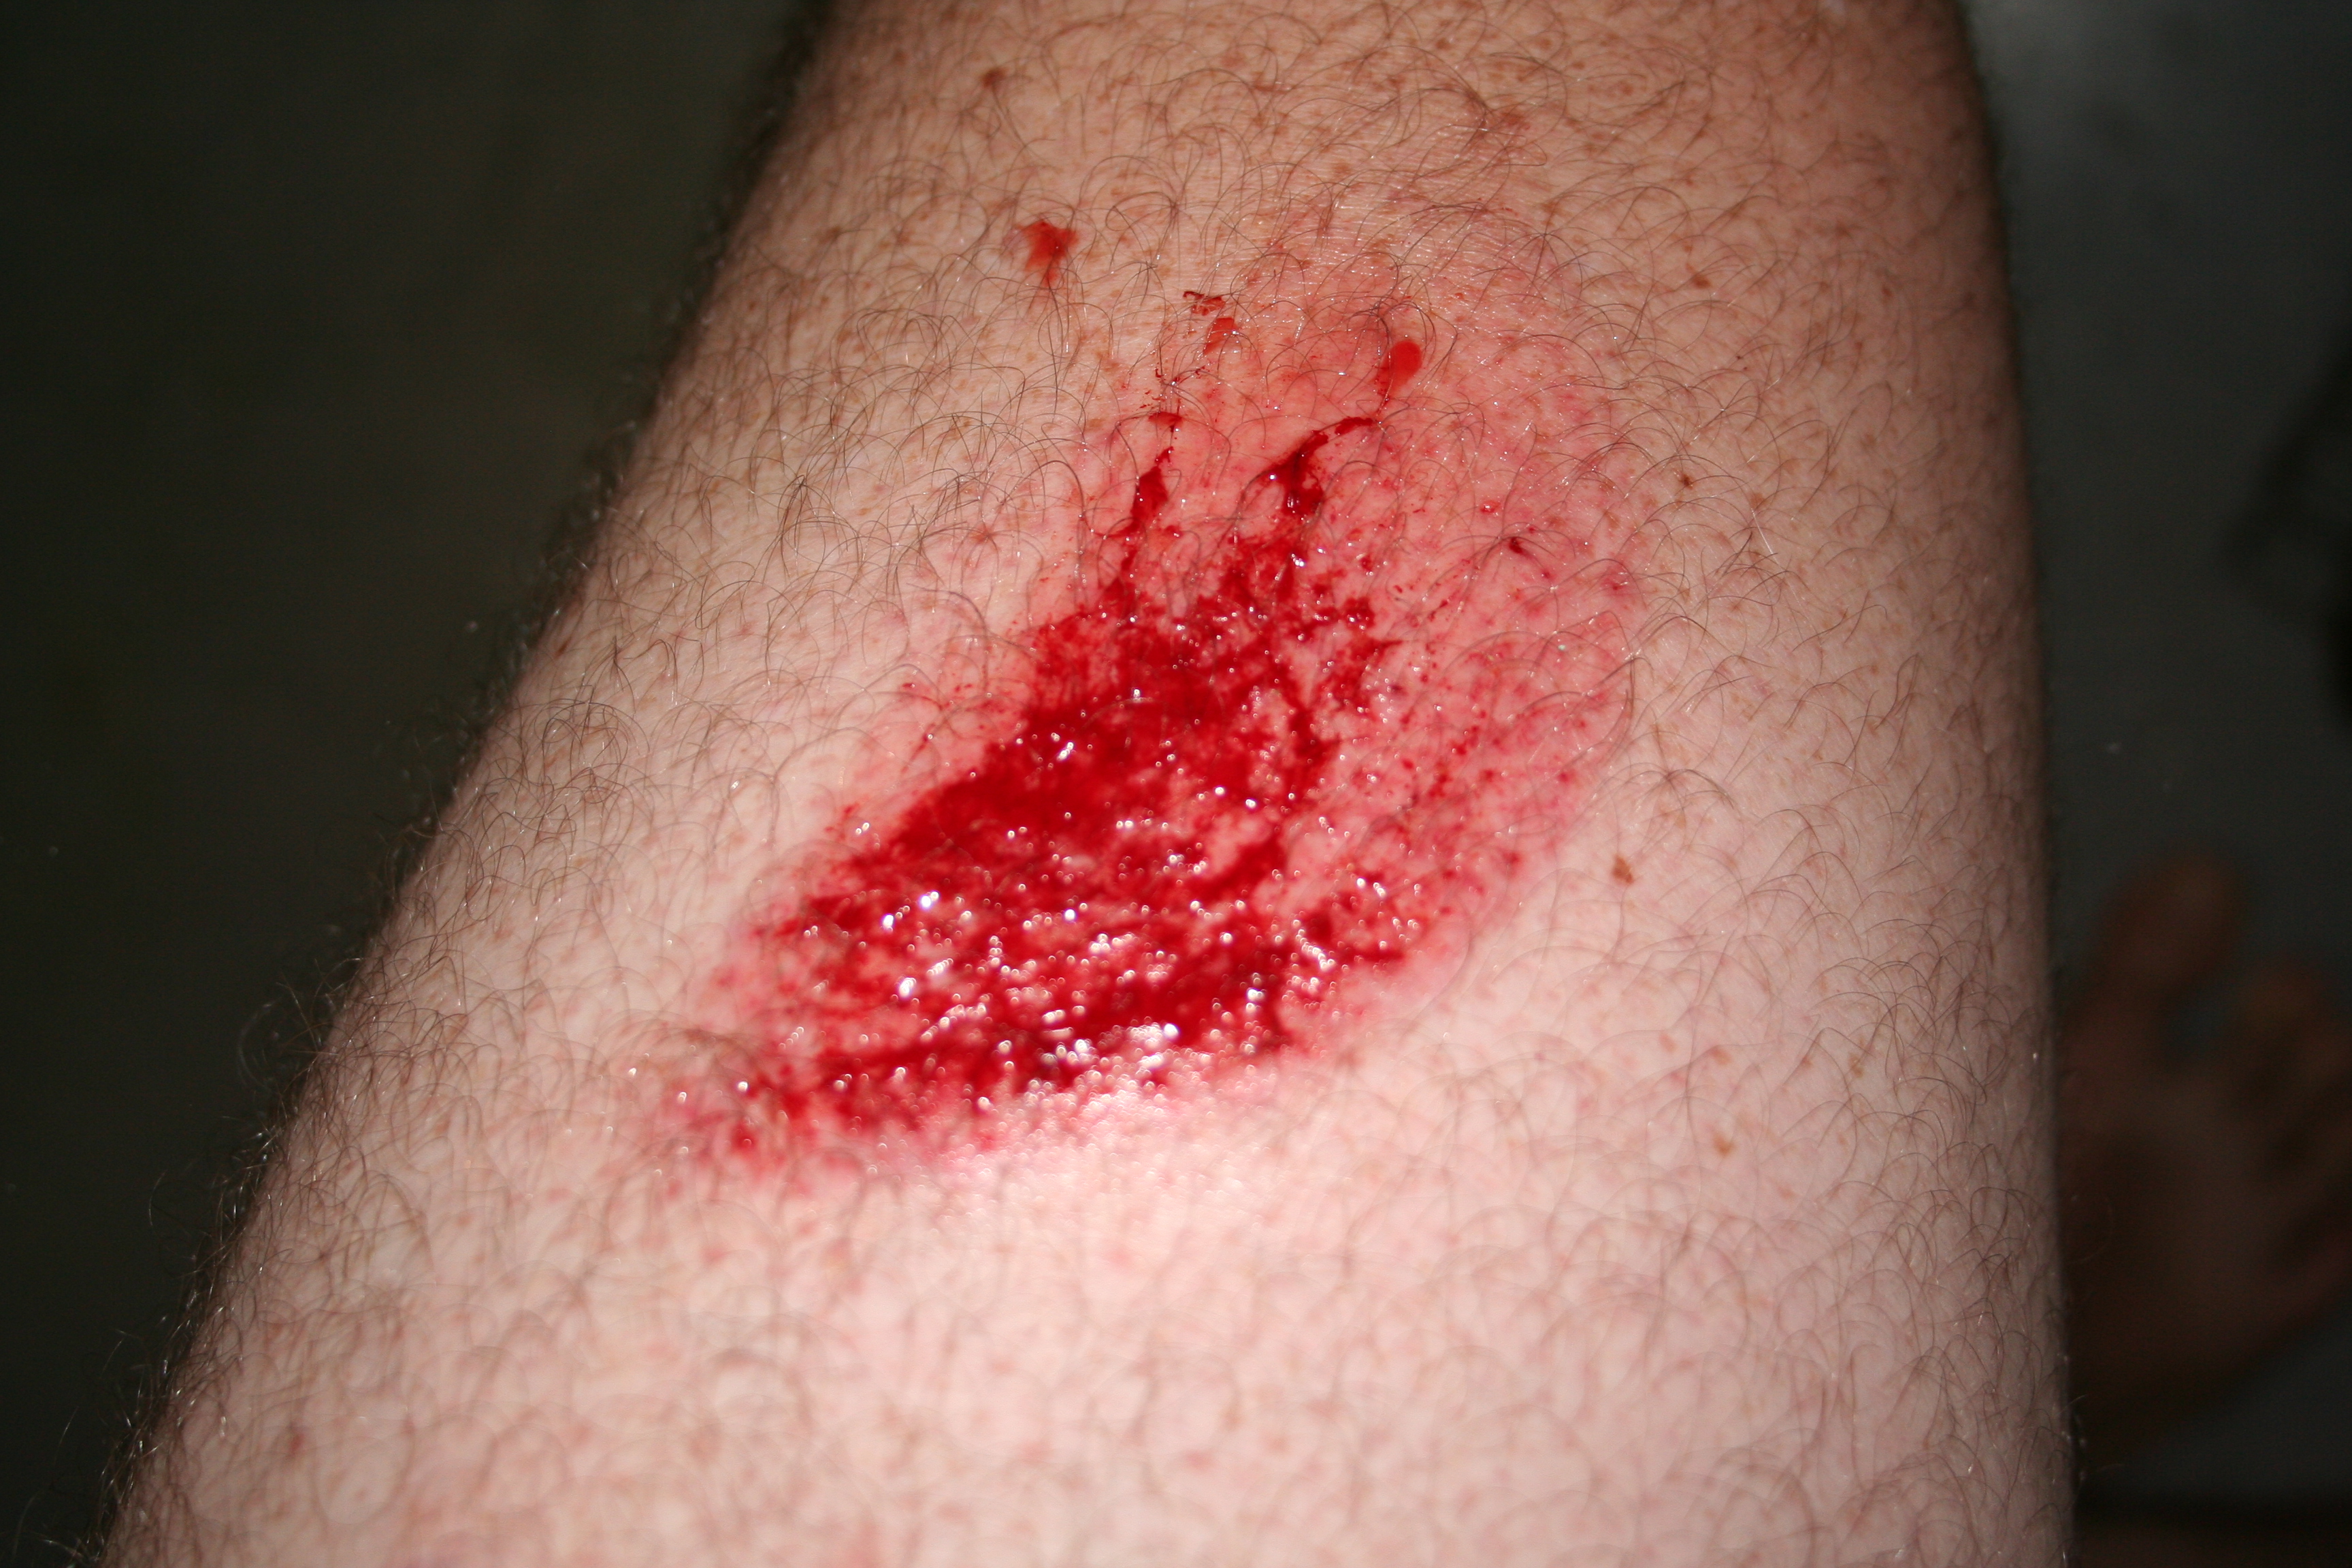
Read more about hell hole repair work here Read more about passenger side longitudinal repair work here Read more about floorboard and seat repair work here Read more about trunk repair work hear 10/20/2007I have decided that I want to get the bulk of the seam sealant removed from the entire car. You can't get it all with a grinder and knotted wire brush, but you can get most of it. So I spent a day or two working on this. It is a messy job. I am usually pretty careful about my angle grinders, but I had my first accident with one. It was warm so I was wearing shorts (mistake number 1) and I bent to my right to pick something up while the grinder was in my left hand (at full speed), I let my arm drop down and the brush just barely hit me left leg above my knee. It pulled up my shorts in a flash and pulled the first layer of skin off. I decided to call it a day after that.
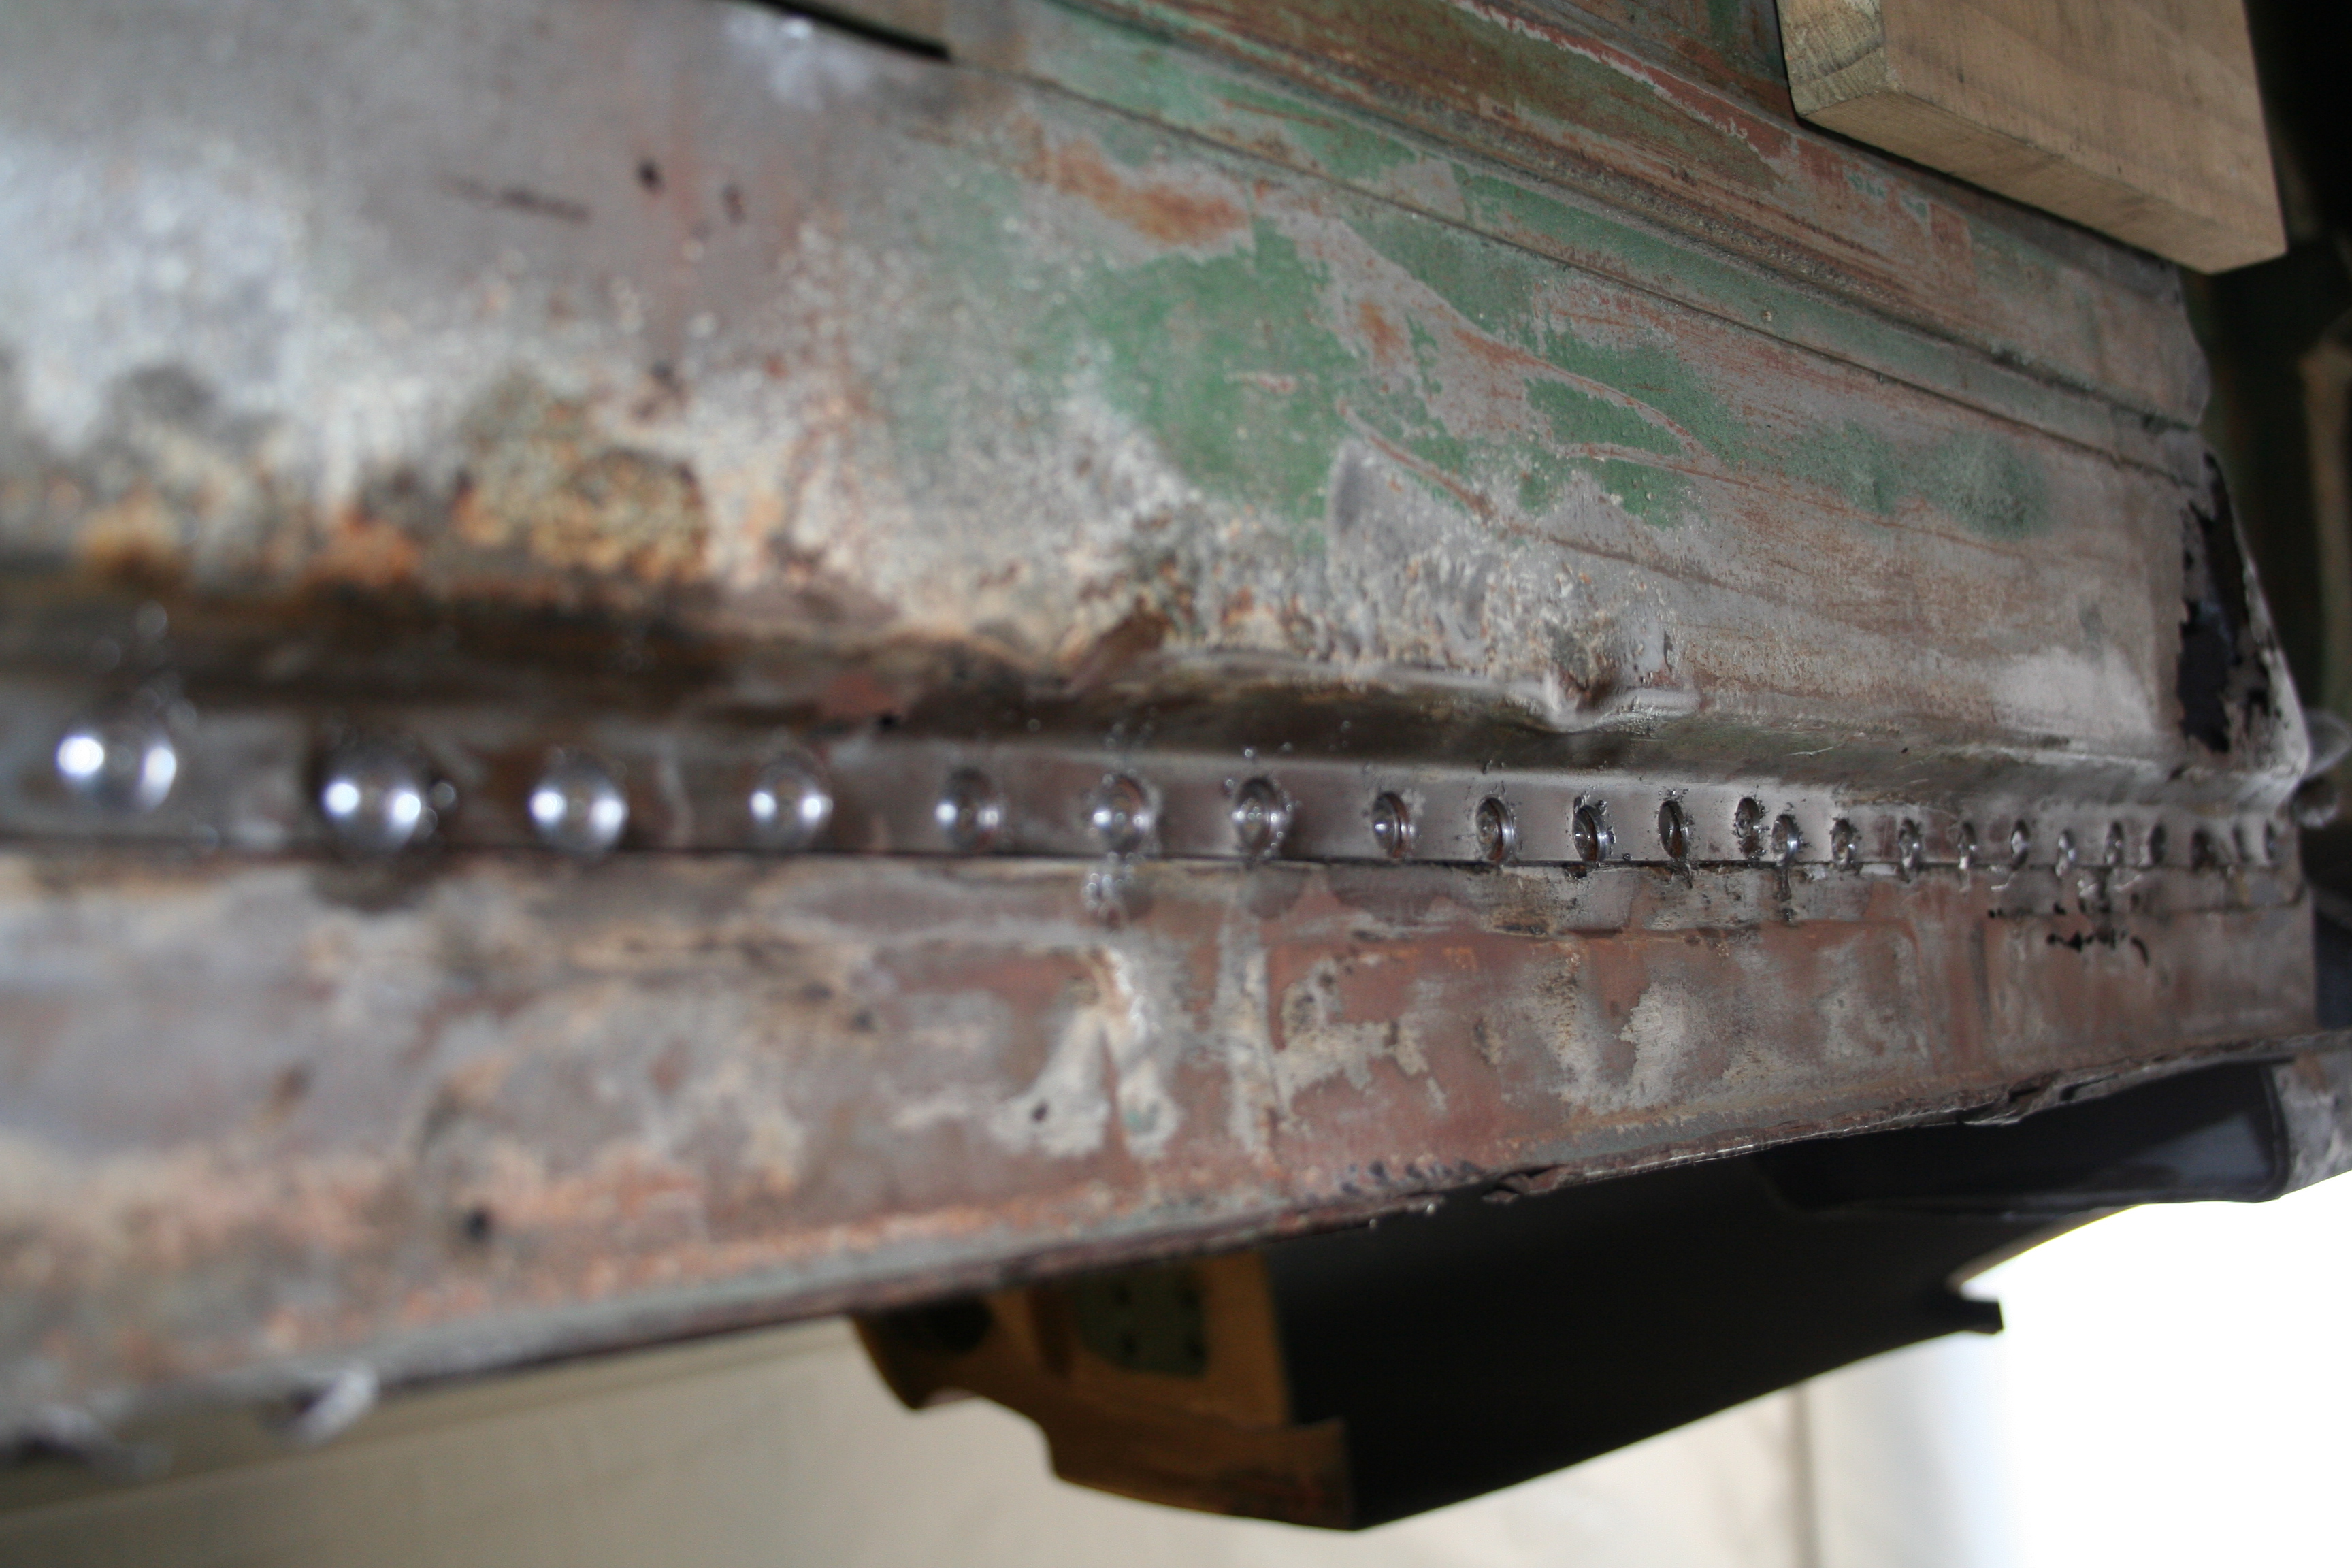
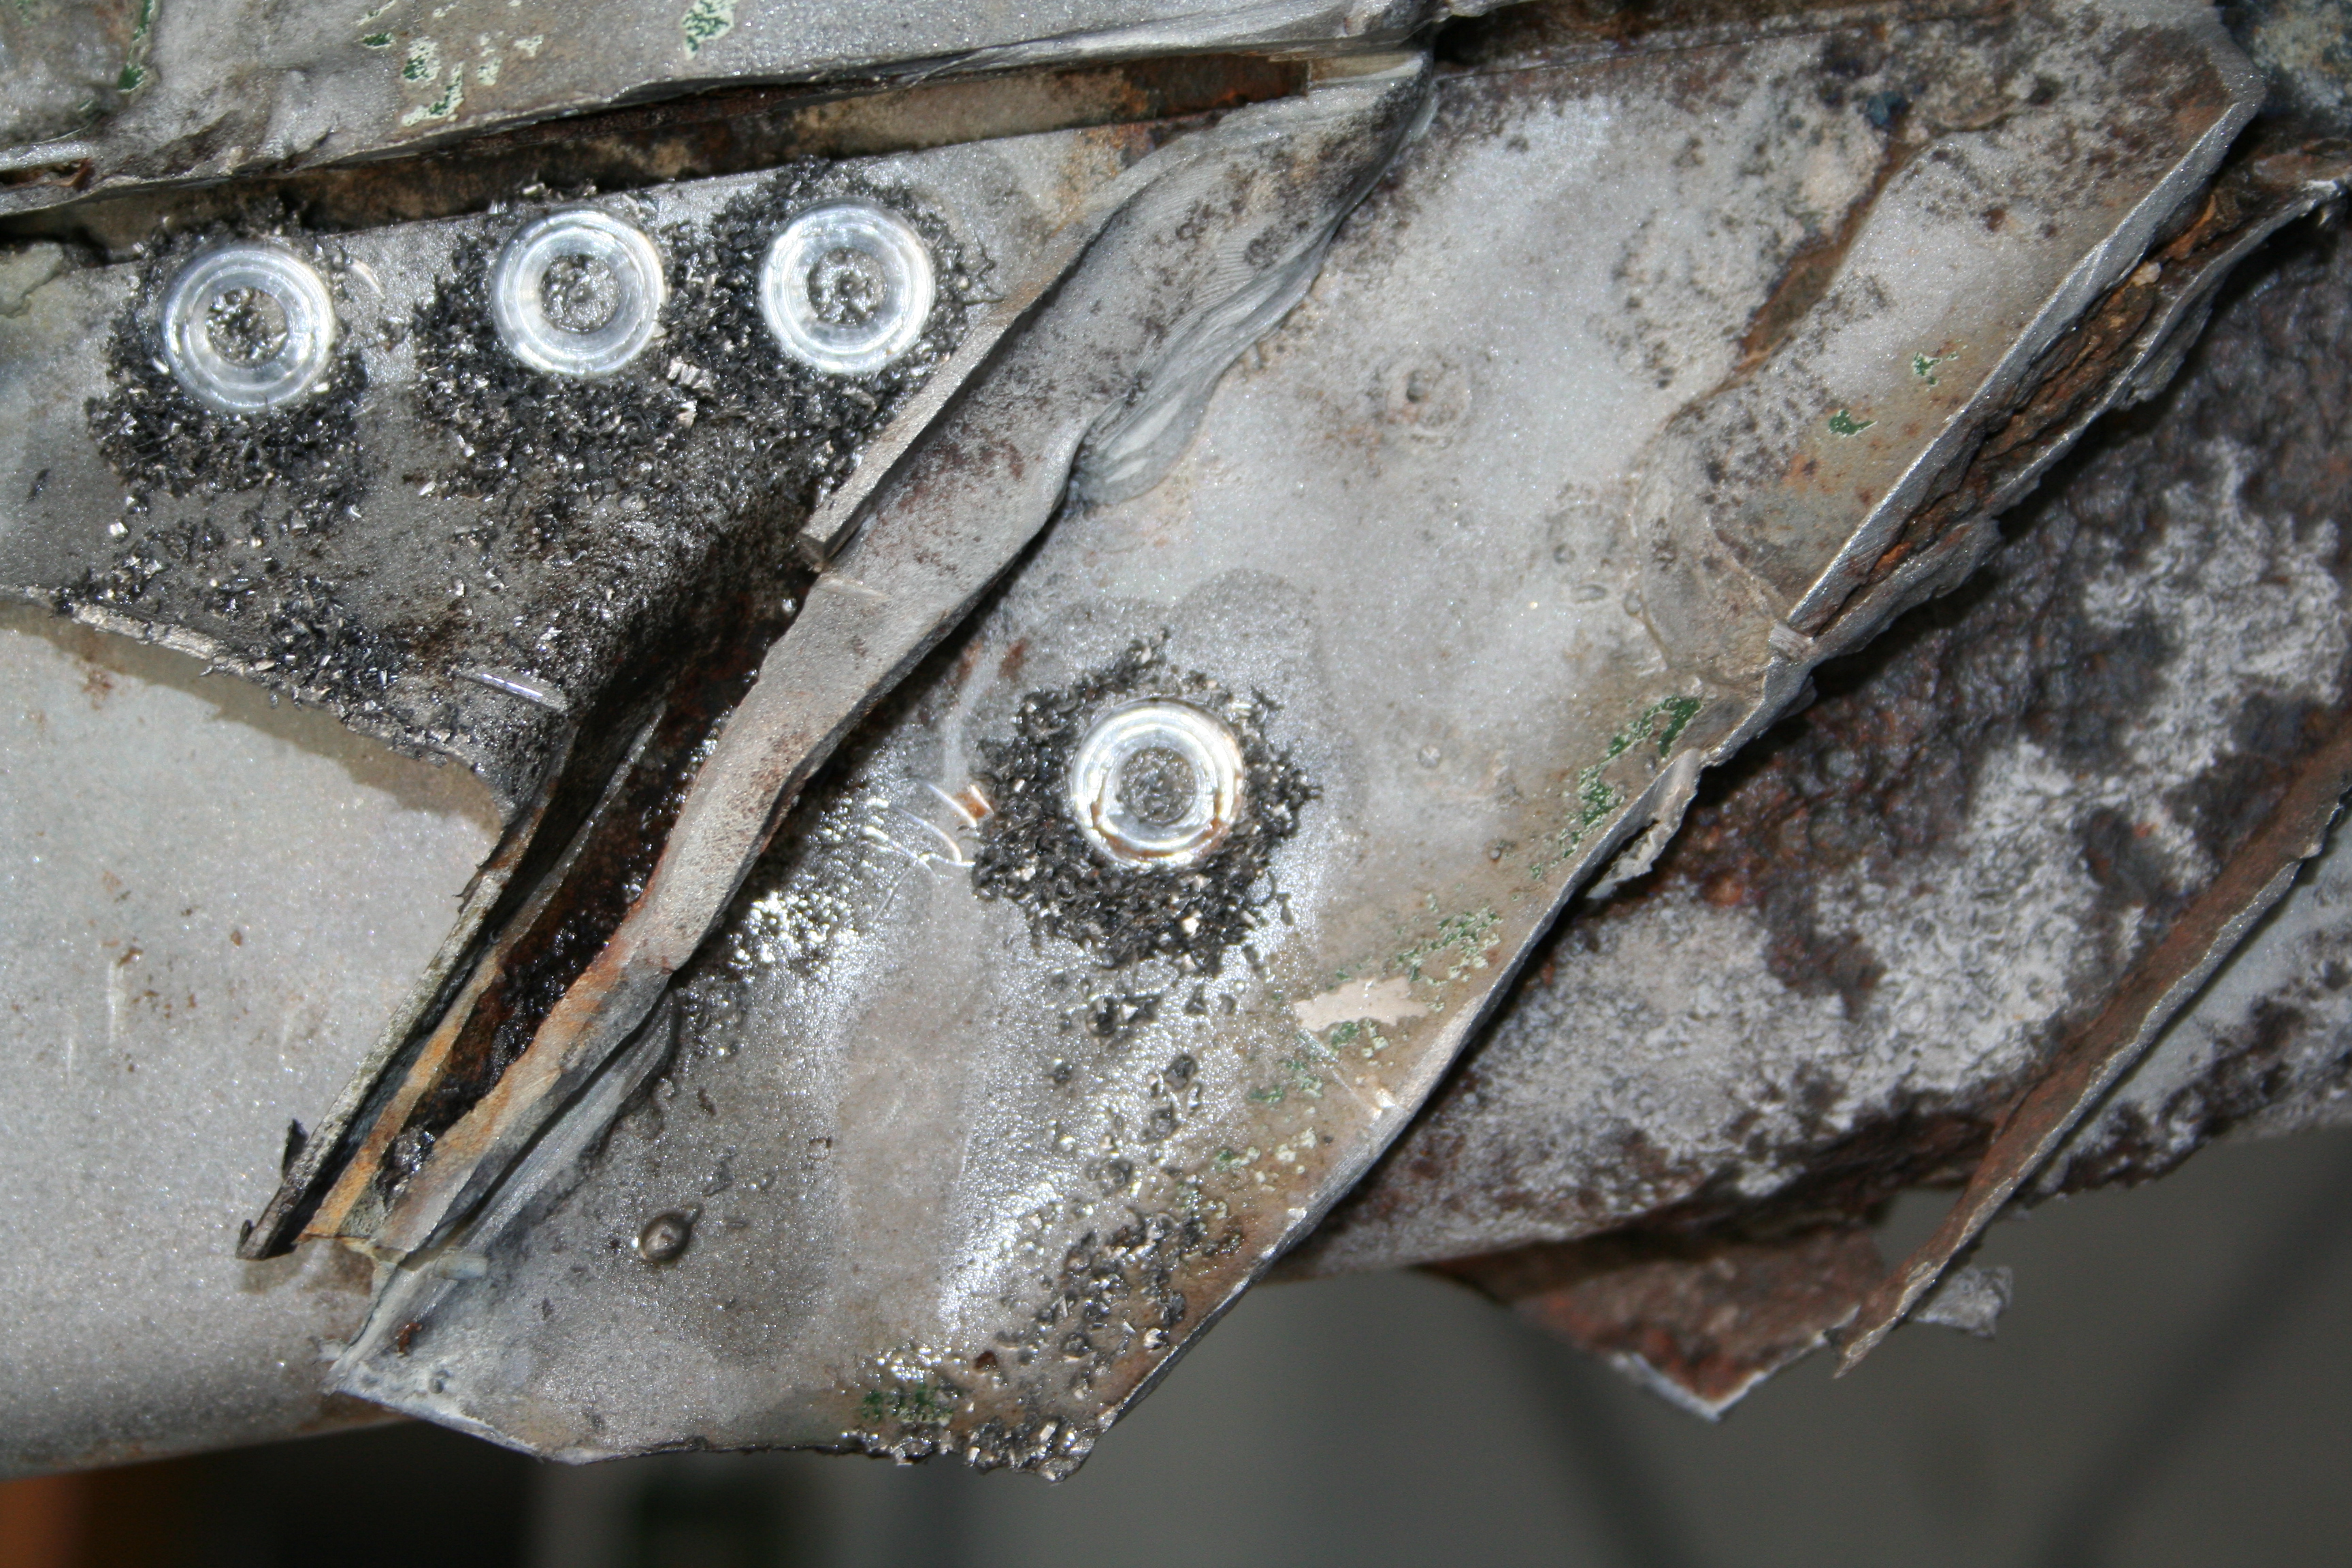
10/13/2007Working at removing bits and pieces so I can do rust repair. Here is a nice shot of what a "Blair Rotabroach" spot-weld bit will do. It is a great tool It cuts around the spot weld and makes it relatively easy to separate two items that have been spot welded together. It is imperative that you oil the bit as you use it. I burnt up 3-4 bits quickly before I realized this. My current bit has cut as many or more spot welds than the previous 3-4 combined now that I have been religious about oiling it as I use it.
It is pretty easy to do if you know where the spot weld was done. For un-rusted metal this is usually pretty obvious as you can see the spot-weld. But if the metal is rusted, you can't see the weld. Then I usually just pry up on the edge and see where it doesn't want to pull apart and and then drill out that spot. Read more about passenger side longitudinal repair work here
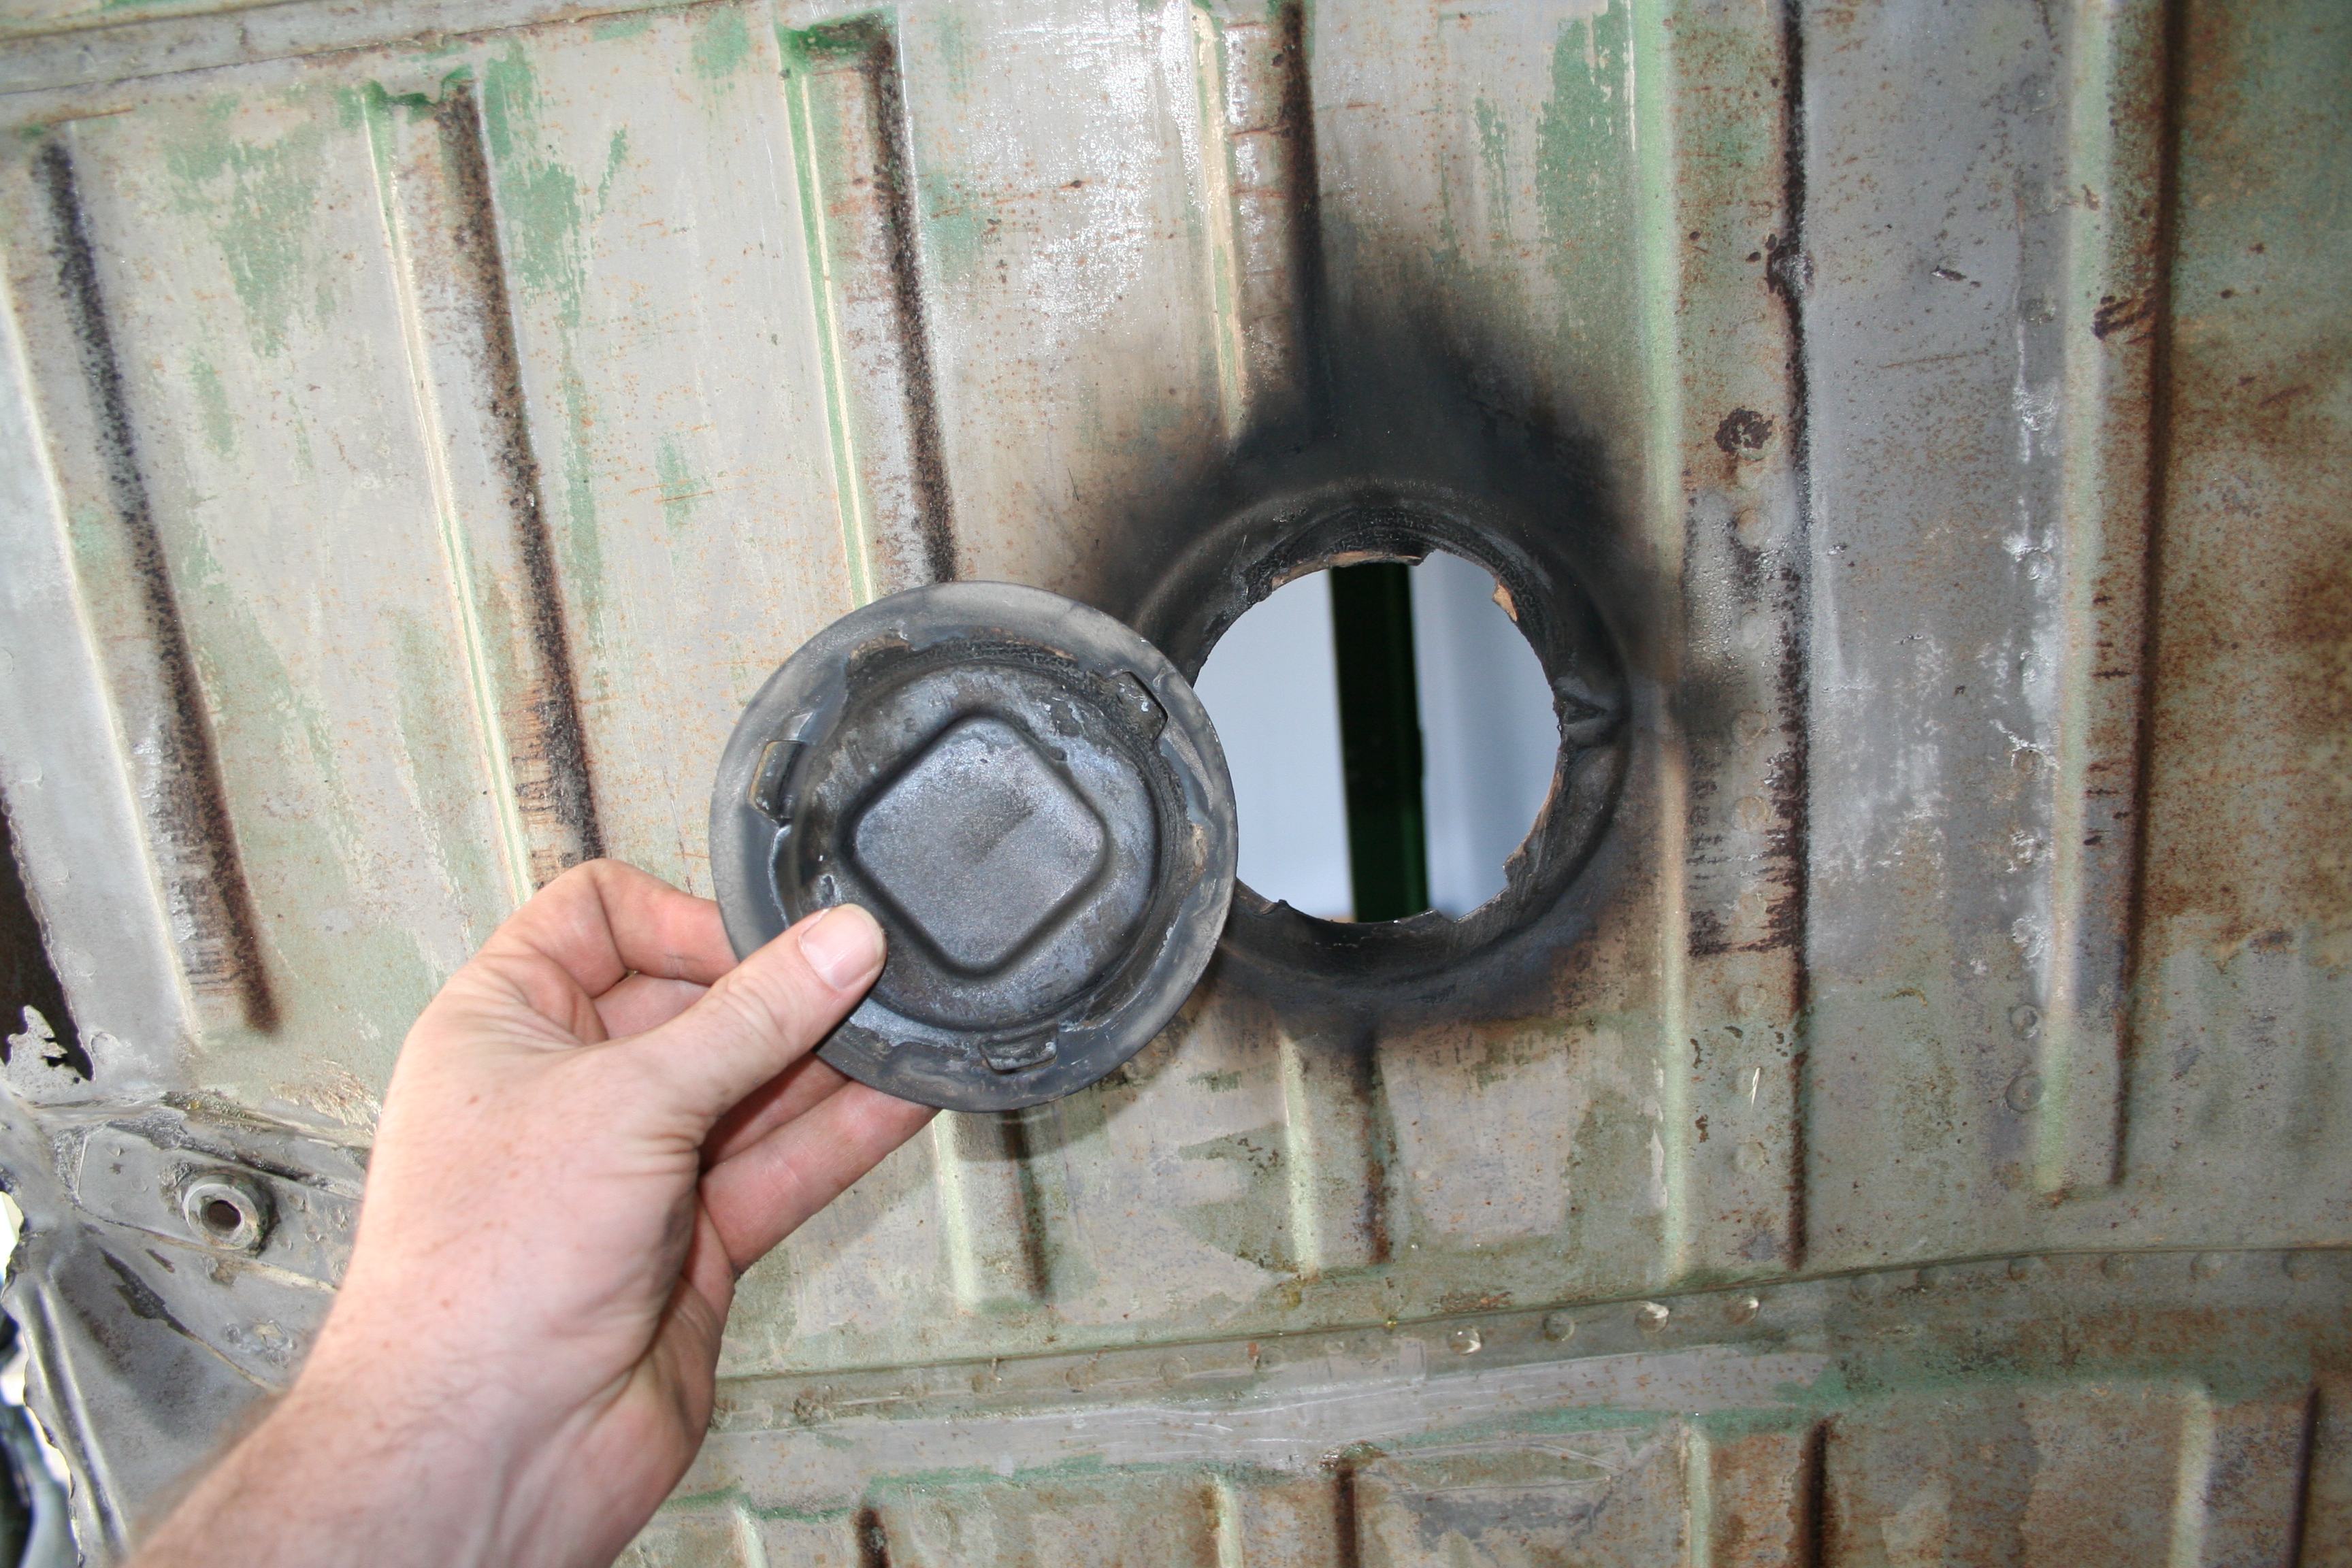
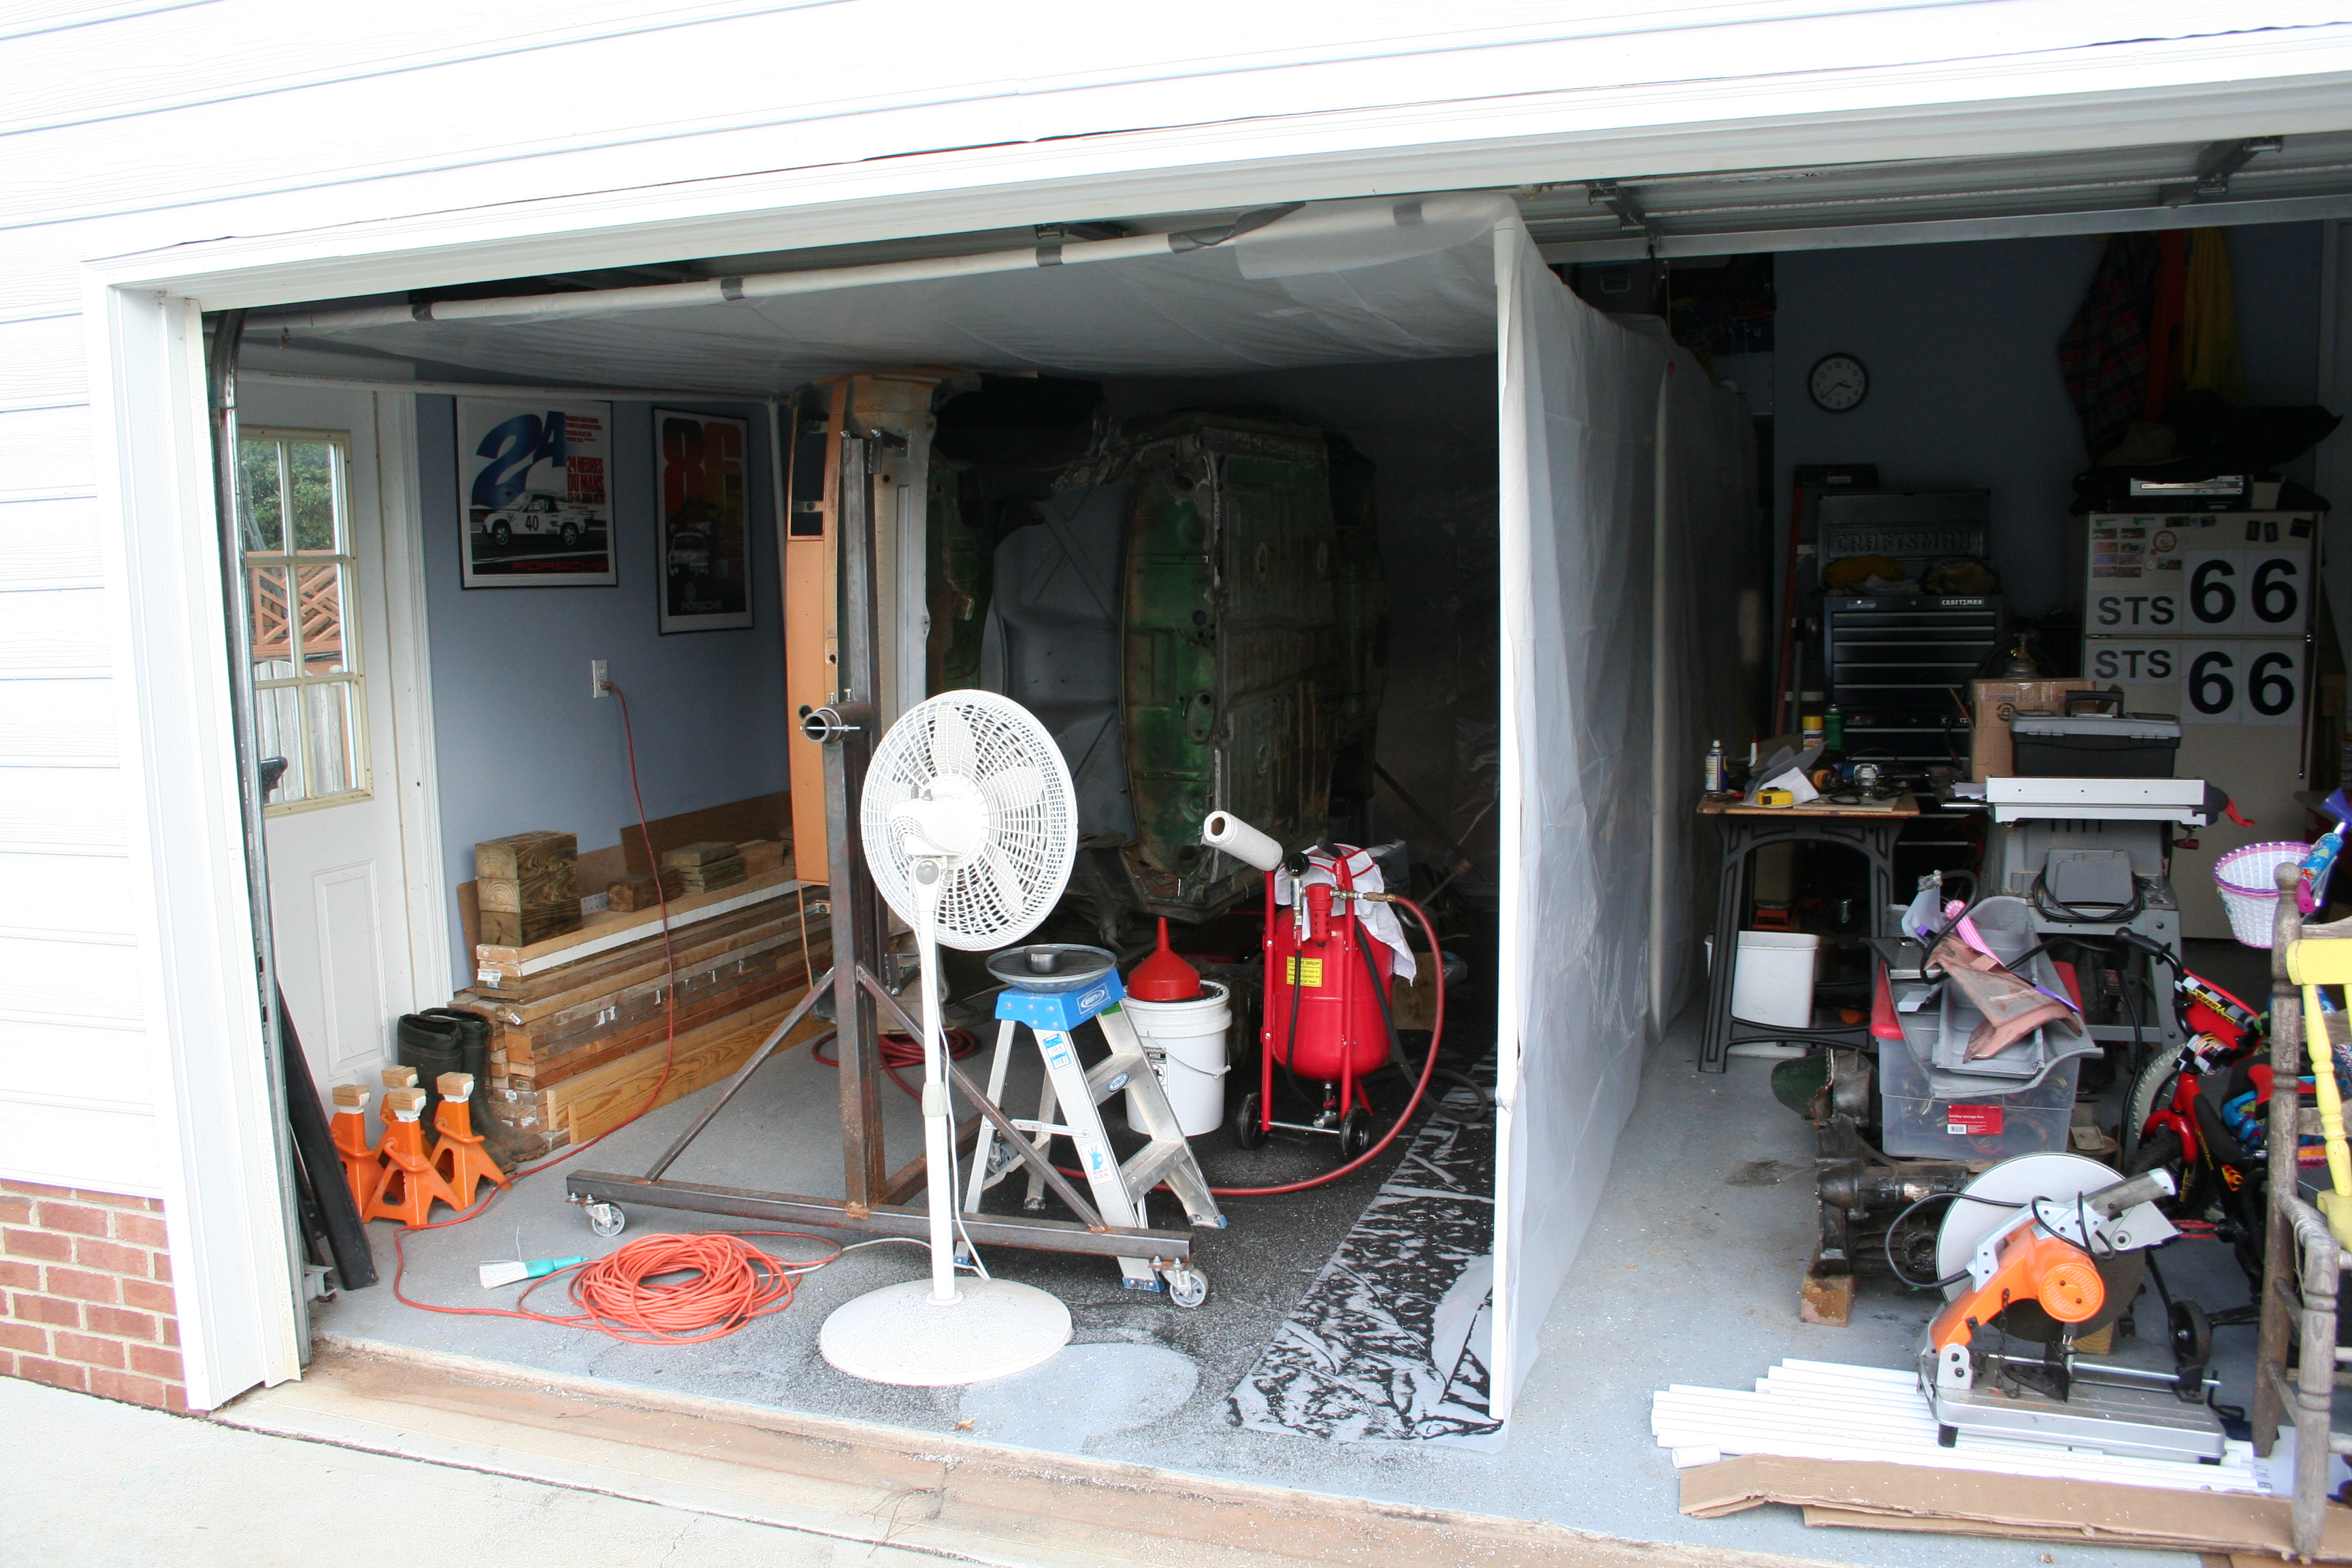
I have also been wanting to remove the access plates in the body. There are a handful of them. I wasn't sure how to do this. They rotate and lock into place and are also glued into place using seam sealer. I decided the best (only?) way is to grind as much of the seam sealer away using a knotted wire brush on my angle grinder. Then I used a torch to heat the metal to soften the remaining sealant and then I am able to rotate and unlock the plate. I will put them back in, but only after I have used epoxy primer and/or POR15 on the holes and plates. Read more about floorboard and seat repair work here 10/12/2007Finally sold the Riviera wheels that came with the car. I had a ton of "tire kickers" no pun intended. Didn't get as much out of them as I had hoped, but the money is now stashed into the "Car Fund". 10/4/2007Replacement trunk and driver side front fender showed up today. Parts are off a yellow car (Sunflower Yellow?). It is a pretty color and almost makes me want to reconsider my decision to go with the stock color. But I am sticking with Irish Green. :D 9/22/2007I bought one of the inexpensive pressure pot media blasting systems from Harbor Freight. I had been planning on just having a local guy media blast the entire car. But I ended up being concerned about how long the car would be unprotected from moisture and the resulting surface rust. Ideally as soon as the car is blasted, I would use a phosphoric acid product (Ospho or Metal Ready) to coat the car with a zinc phosphate protective layer and then paint the car with an epoxy primer. But I need to do substantial body work in some places and I just can't primer the car like I want. So I decided that I would do the above, but section by section instead of the entire car all at once. This will allow me to do the body work on my own schedule. So along with the pressure pot, I put together a tent in the garage so I could try to keep blasting media and dust localized. This same tent (with new plastic) would also serve as my paint booth in the future. It is constructed from 1" PVC pipe and some existing 6mil plastic that I already had. Ideally the entire thing would be plenty tall and wide to give me more room. I ran into issue with regards to the garage door. First I needed to be able to open the door, so that limited the height and second, I couldn't extend beyond the middle of the door as to miss the drive system in the middle, it would require me to make the tent so low the car could not rotate on the rotisserie. So far it works pretty well. My only concerns (which I may fix) are, first that I may want to use eight legs instead of six as it reduces some of the drop caused by the weight of the plastic. Second, I used the 6mil plastic as I had some already. While it is nice and strong and thick, it is heavy and is both causing drop of the pipes as well as making it hard to keep the top pulled tight. So at some point, I will probably use a thinner plastic.
Here is the tent. You can see it barely clears the door.
Pressure pot and media all over the floor. The media I am trying out is a Coal Slag product that is sold under a number of brands (Black Diamond, Black Beauty, etc). I don't have much experience with different media types, but so far it seems to work well and there isn't much dust.
Example of media blasting on a rusted area.
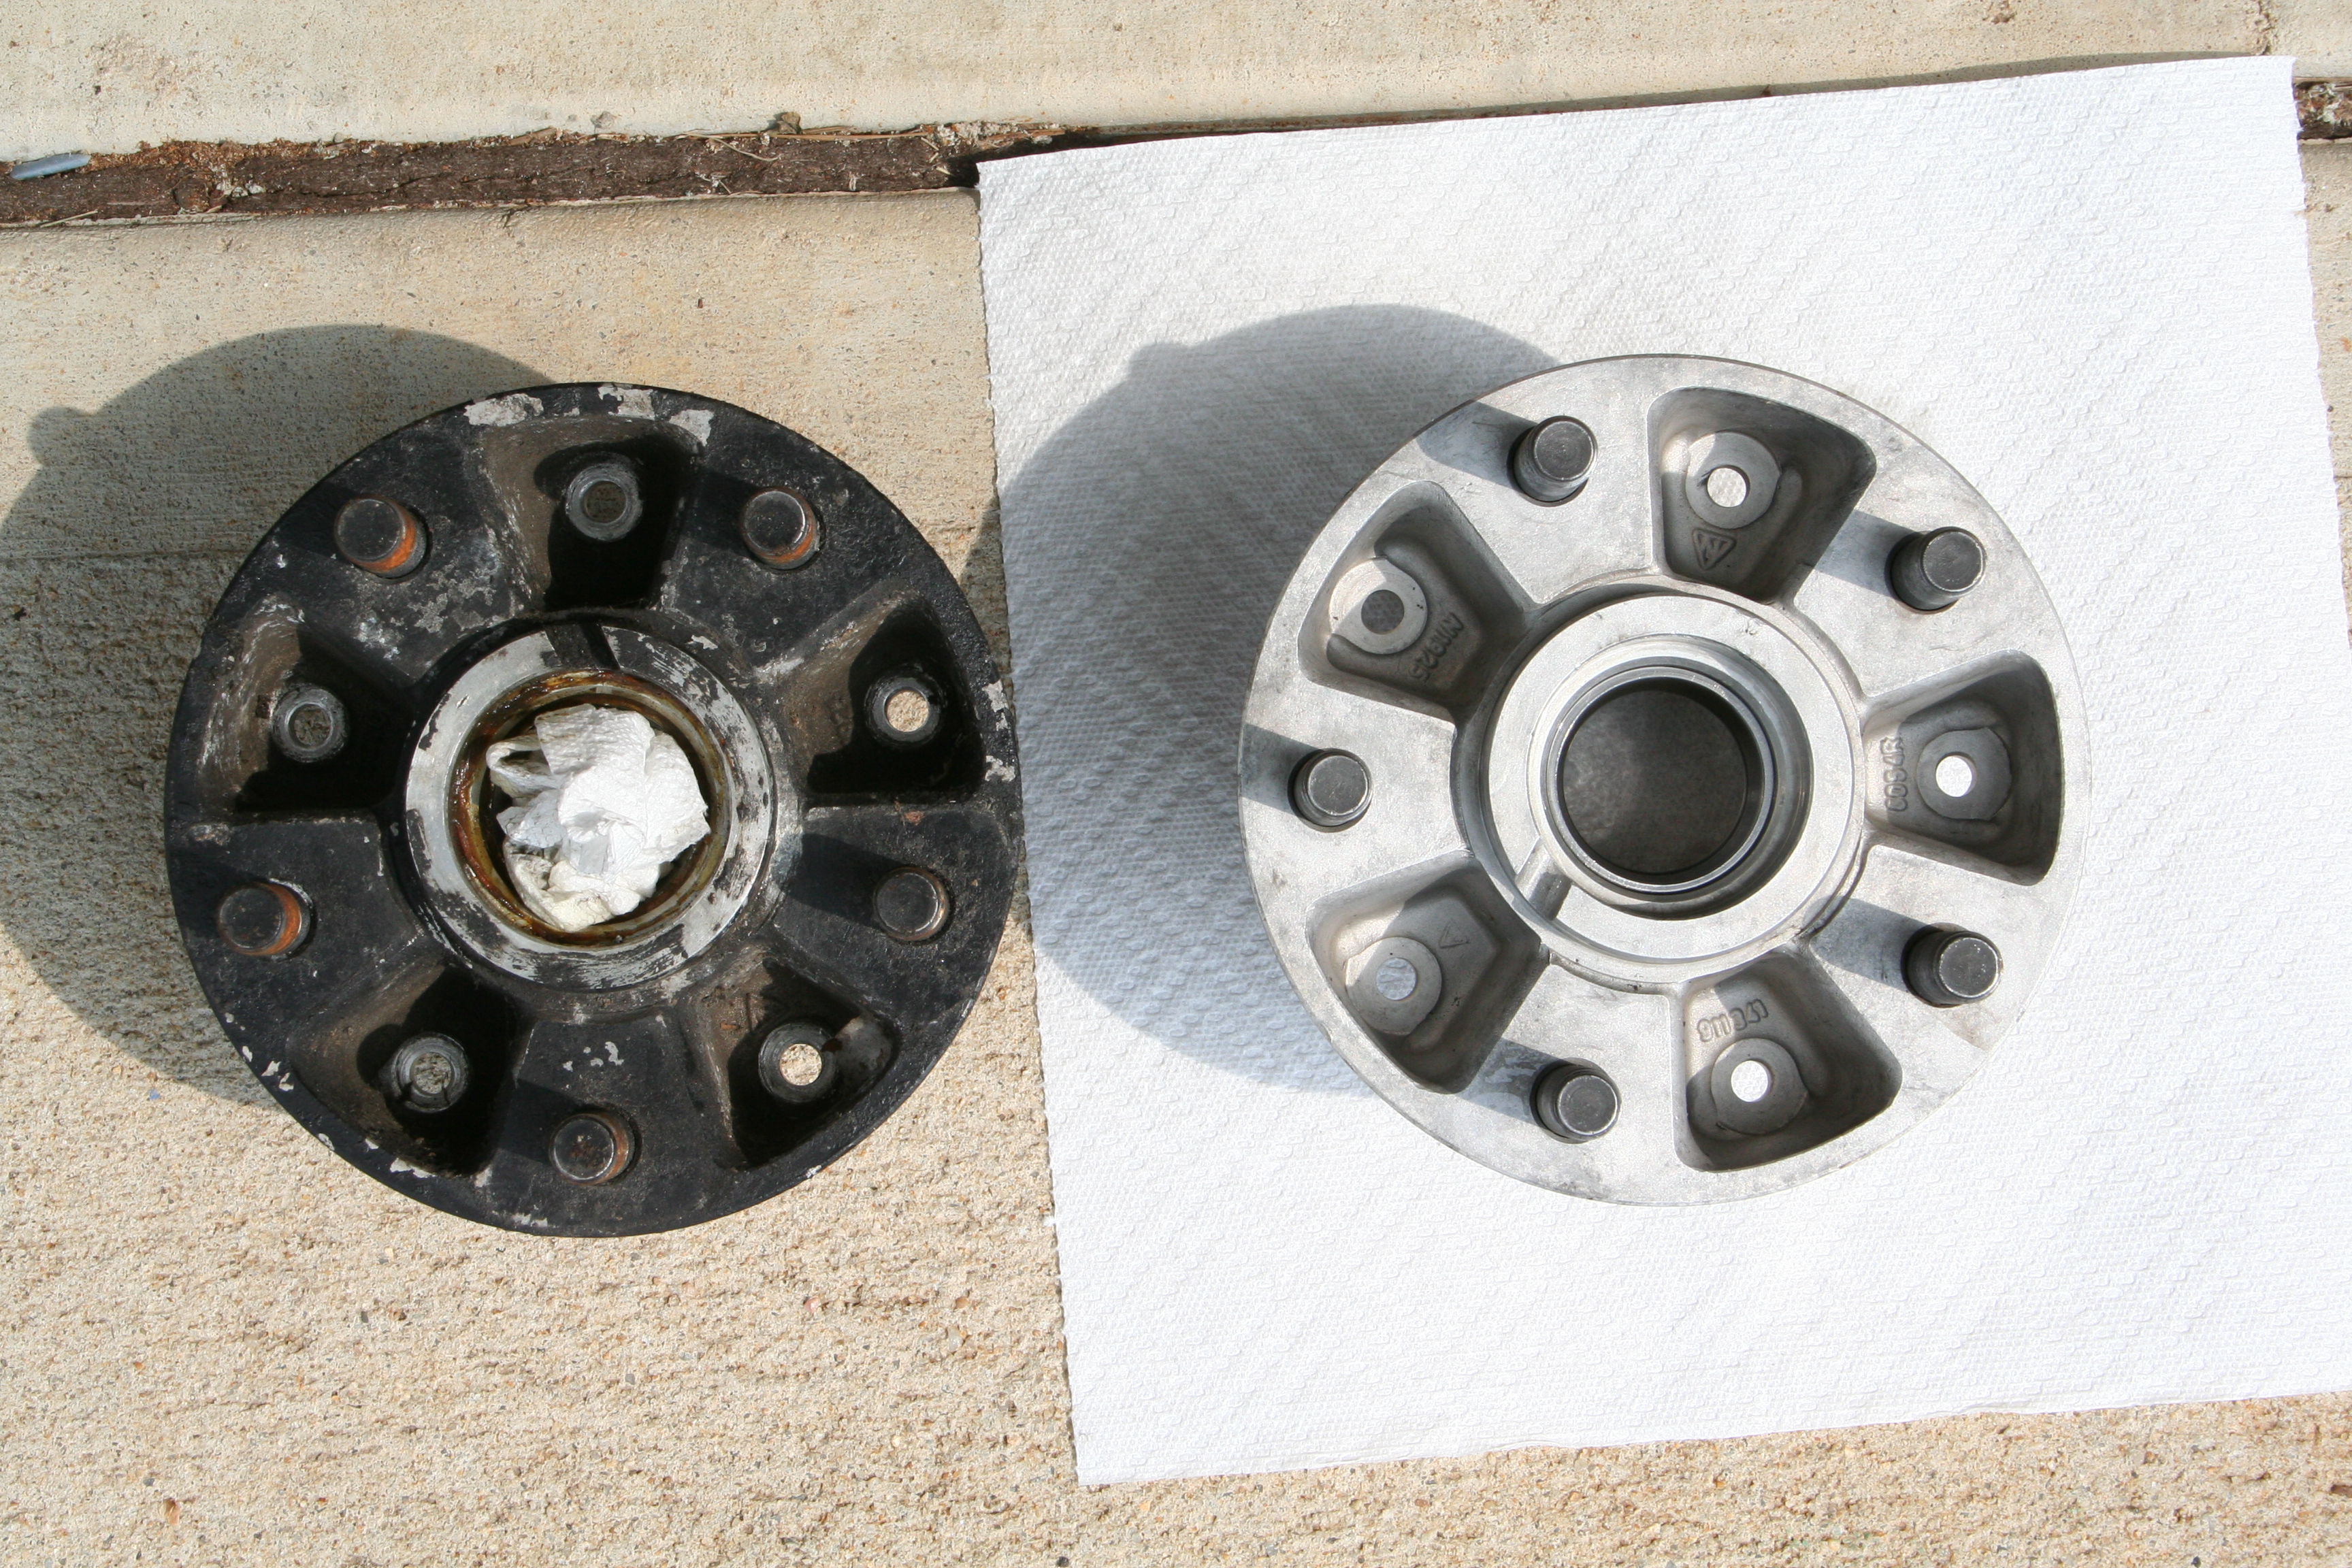
I did a really fast pass on the bottom of the car using a lower air pressure. It mostly just knocked off the first layer of grime and some of the paint. 9/10/2007I am currently sourcing a replacement front trunk and driver side front fender section. Took some photos with suggested cut lines to the person I will be buying these from. Weather is a bit more manageable. It is now only in the mid 90's vs. consistent 100+ days. So I am able to get back to work on the car. 8/30/2007Media blasting is so cool! I decided to clean up the two hubs. Photos below are of one that is yet to be cleaned and one that has been cleaned via glass bead media blasting.
8/26/2007It is just about two years into the project. I really need to get this done. I am putting a line in the sand and now want to get the car done by end of 2008. This allows me to have the car ready in 2009 which will be the 40th anniversary for 914s (1970 model year was produced in 1969). The month of August here in the Triangle has been the hottest since they started keeping records in 1944. It beat the previous record that was set in 1950. We had a number of 100+ days as well as tying the all time record here of 105 and setting individual records on a number of days. The point being it has just been too hot to work on the car. Even with the fan running and in the shade I do noting but sweat. So with serious work out of the question, I have played around with the front struts. 7/25/2007With the help of some friends from the Tar Heel Sports Car Club we mounted the car on the rotisserie! It was kind of scary and exciting at the same time. Before everyone left we did a 360 roll of the car. I think everyone (but me) was surprised at the amount of rust the fell out. The passenger longitudinal had a good bit laying in the bottom and a good bit of it found it's way out.
Left to right is Johnathan, Bernie, me, Charlie and Michael.
All the dirt, rust, etc. that fell out of the car on the 360 roll.
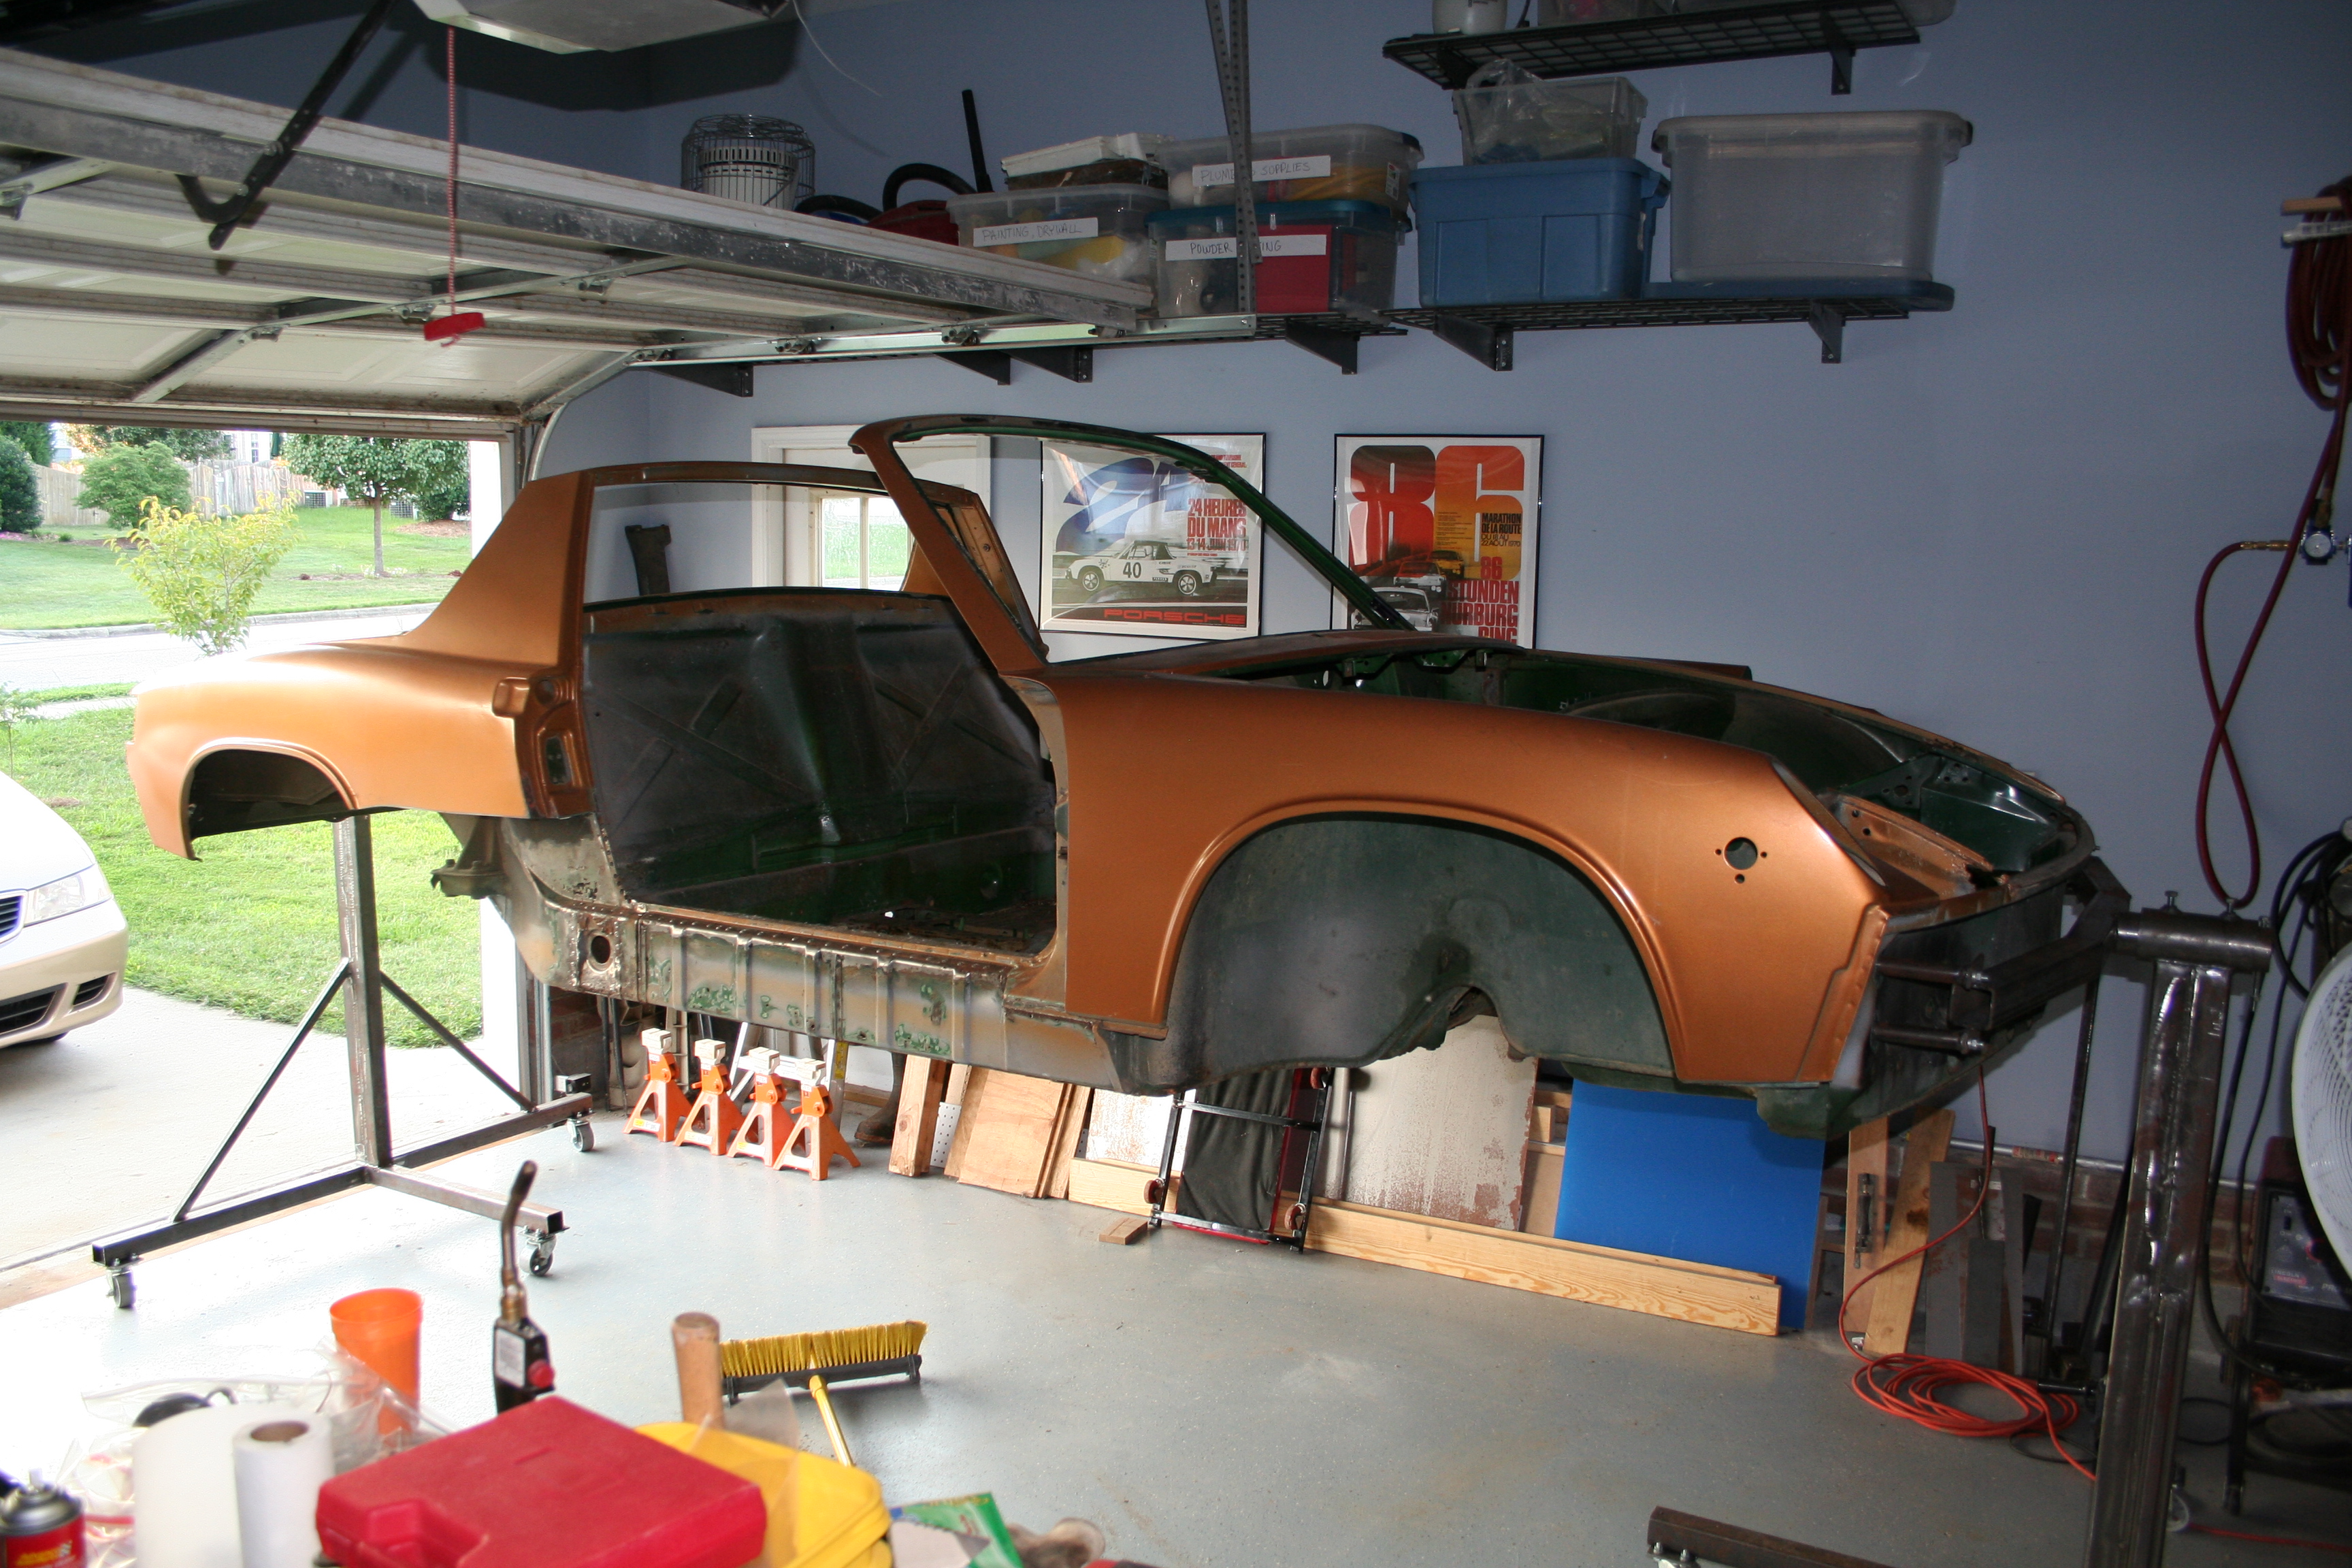
Kind of weird seeing it up so high.
See, it will rotate without hitting the open garage door!
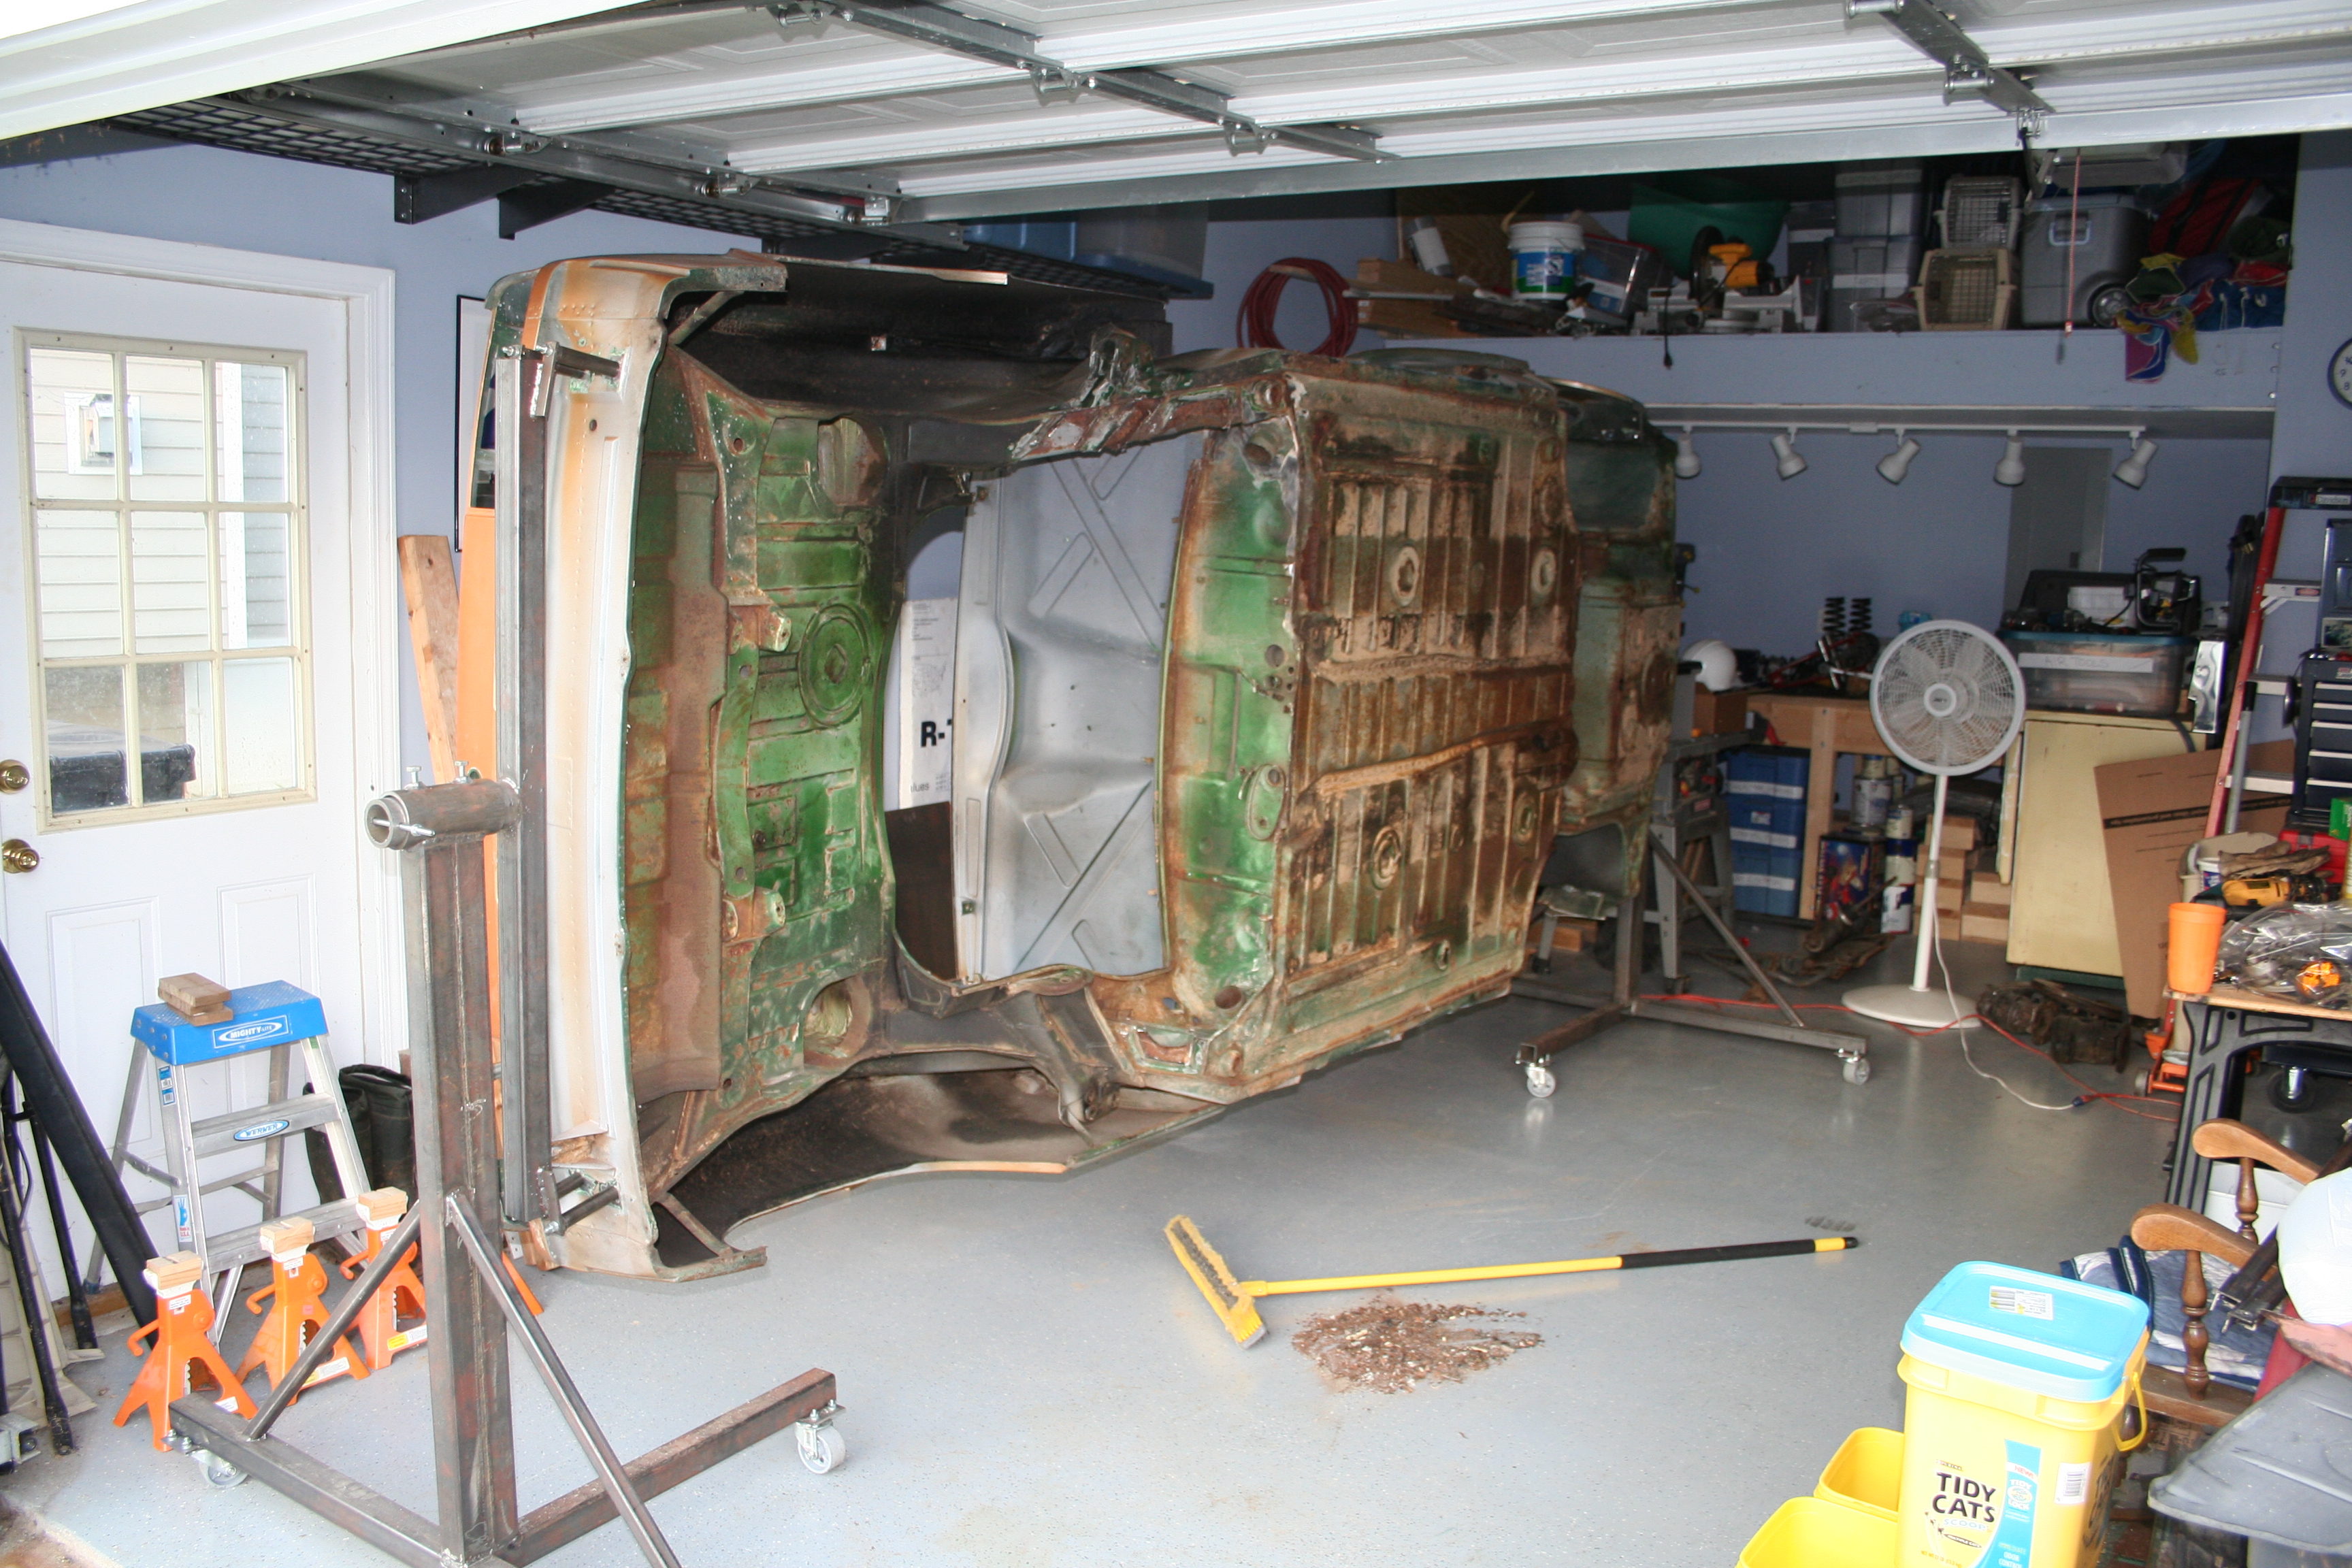
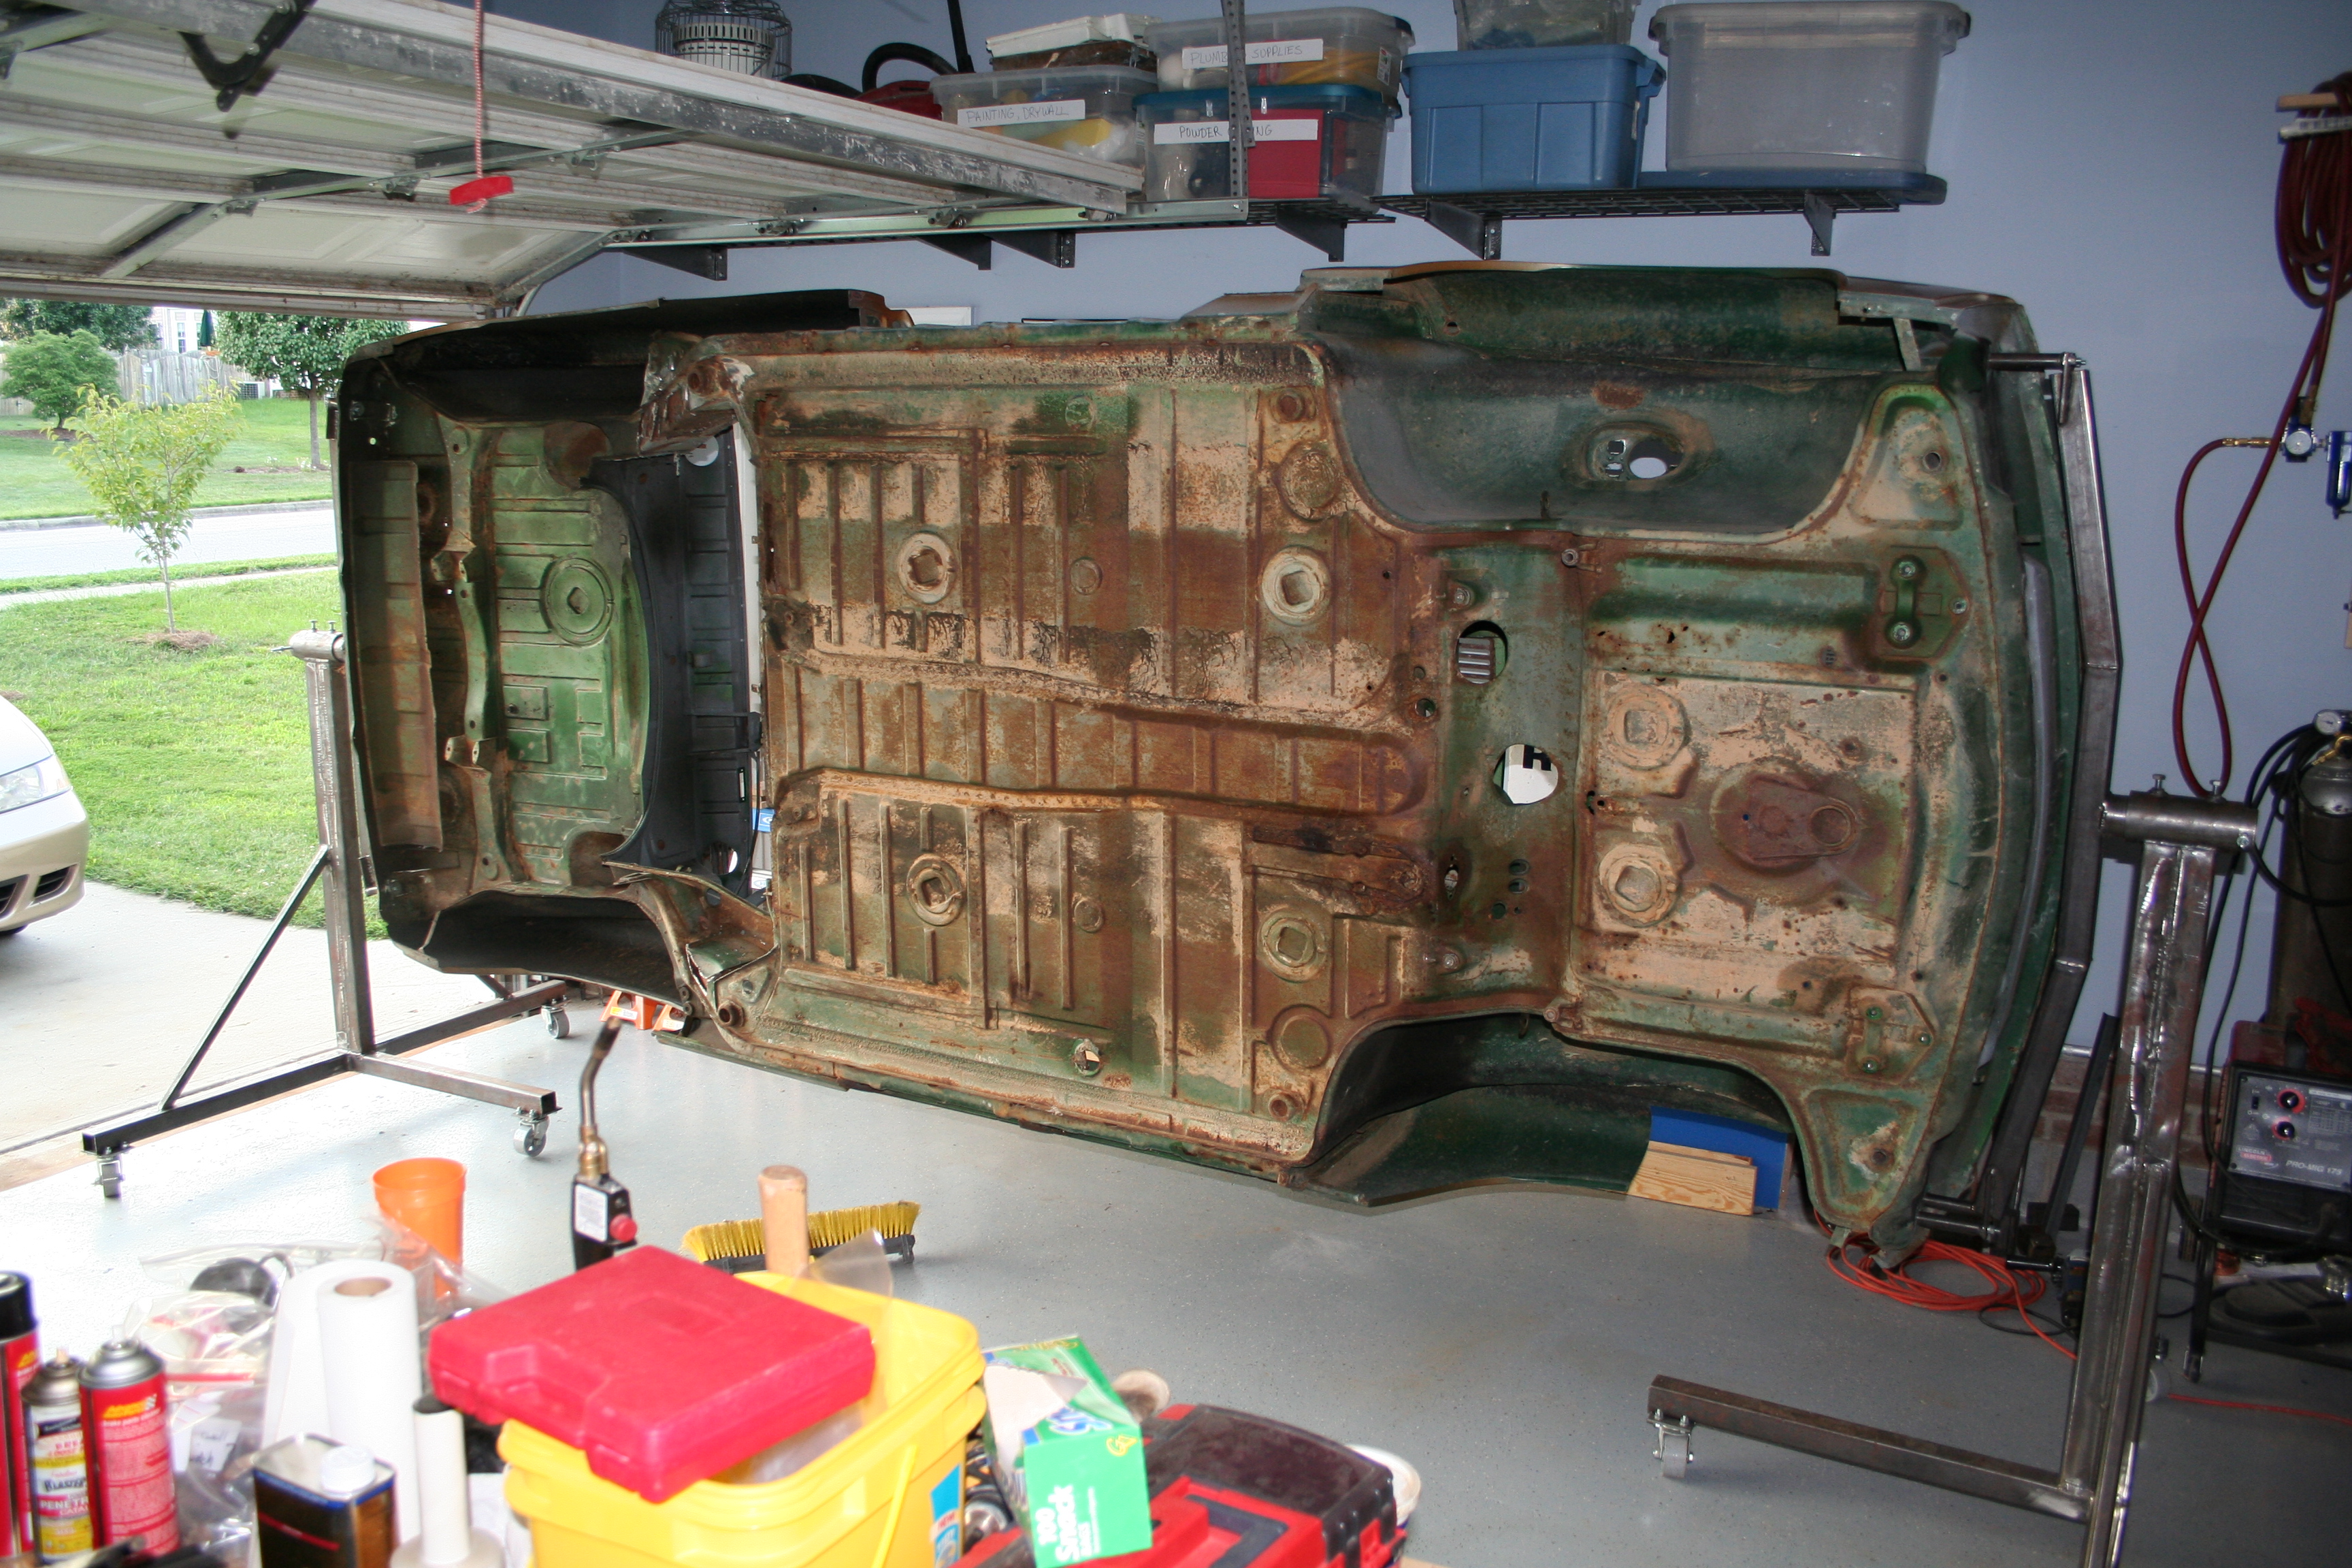
Ready for easy access to the bottom.
Rear attachment.
Front attachment 7/8/2007Cutting in to get access to the passenger side jack point and to ultimately replace the exterior of the passenger side longitudinals.
6/29/2007Removed tar from interior. Heat gun and flat blade scraper does the trick!
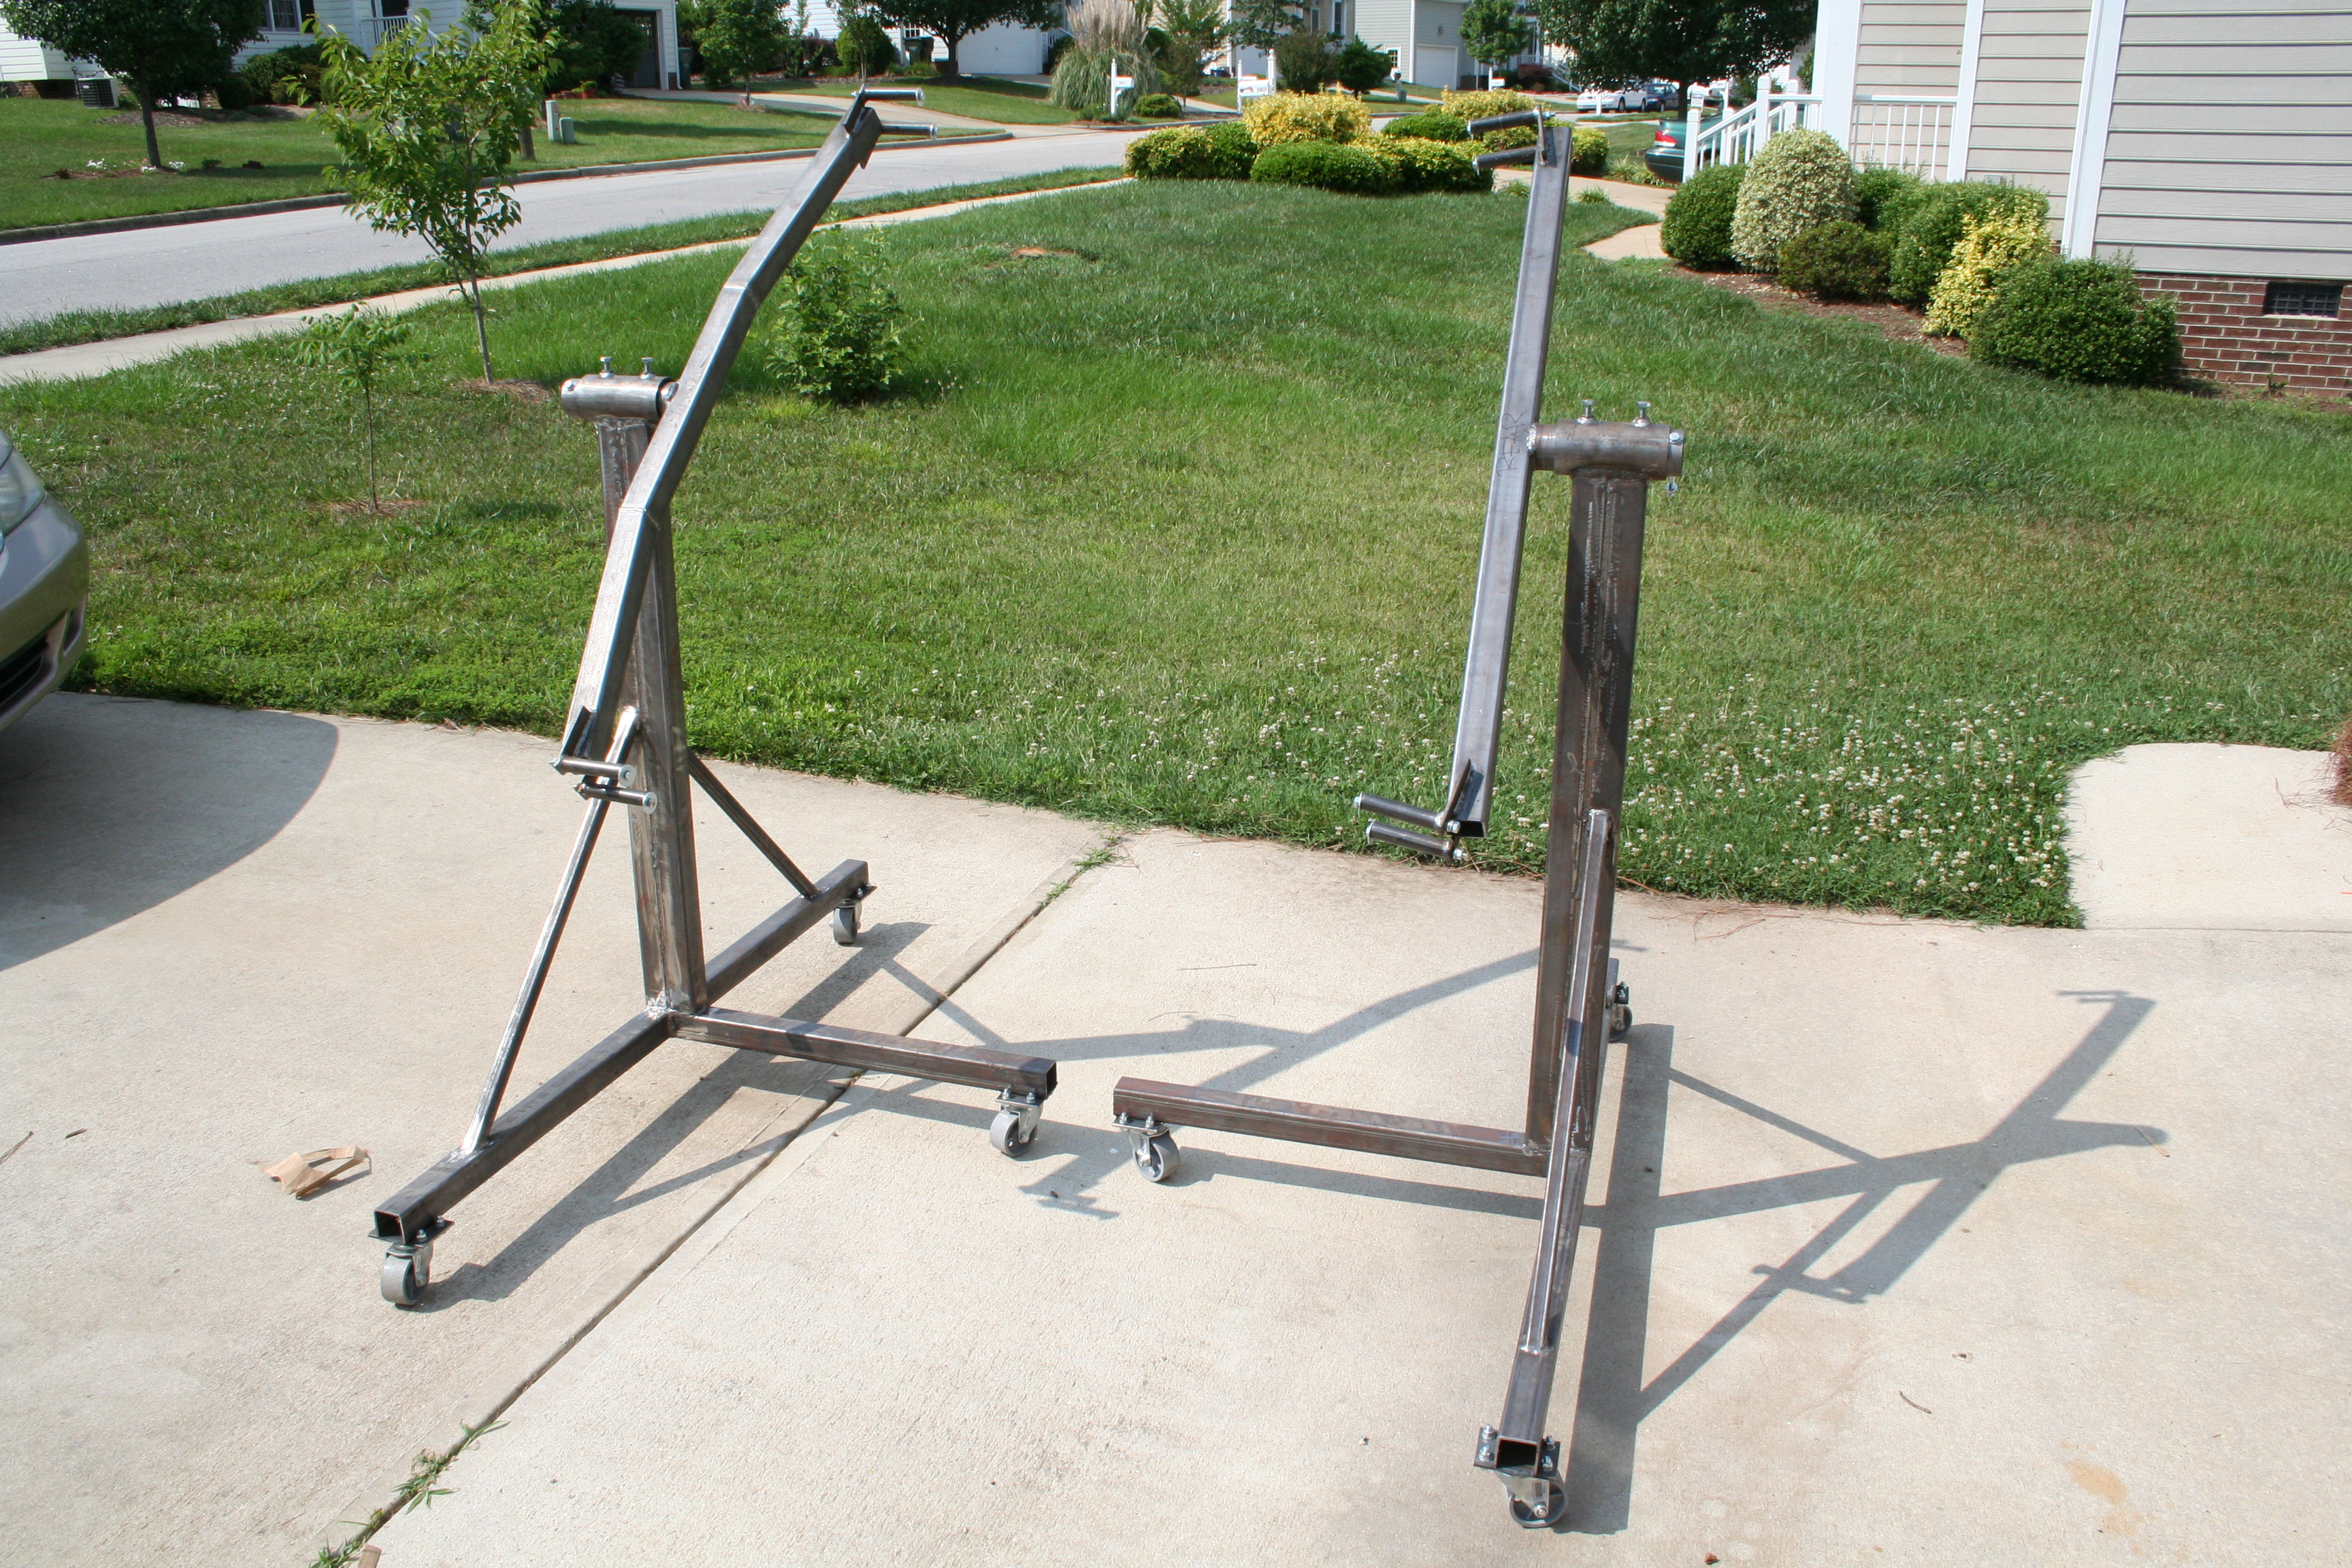
6/9/2007Finally finished up the rotisserie. You can read and see more about it here, but here is a photo of the finished product.
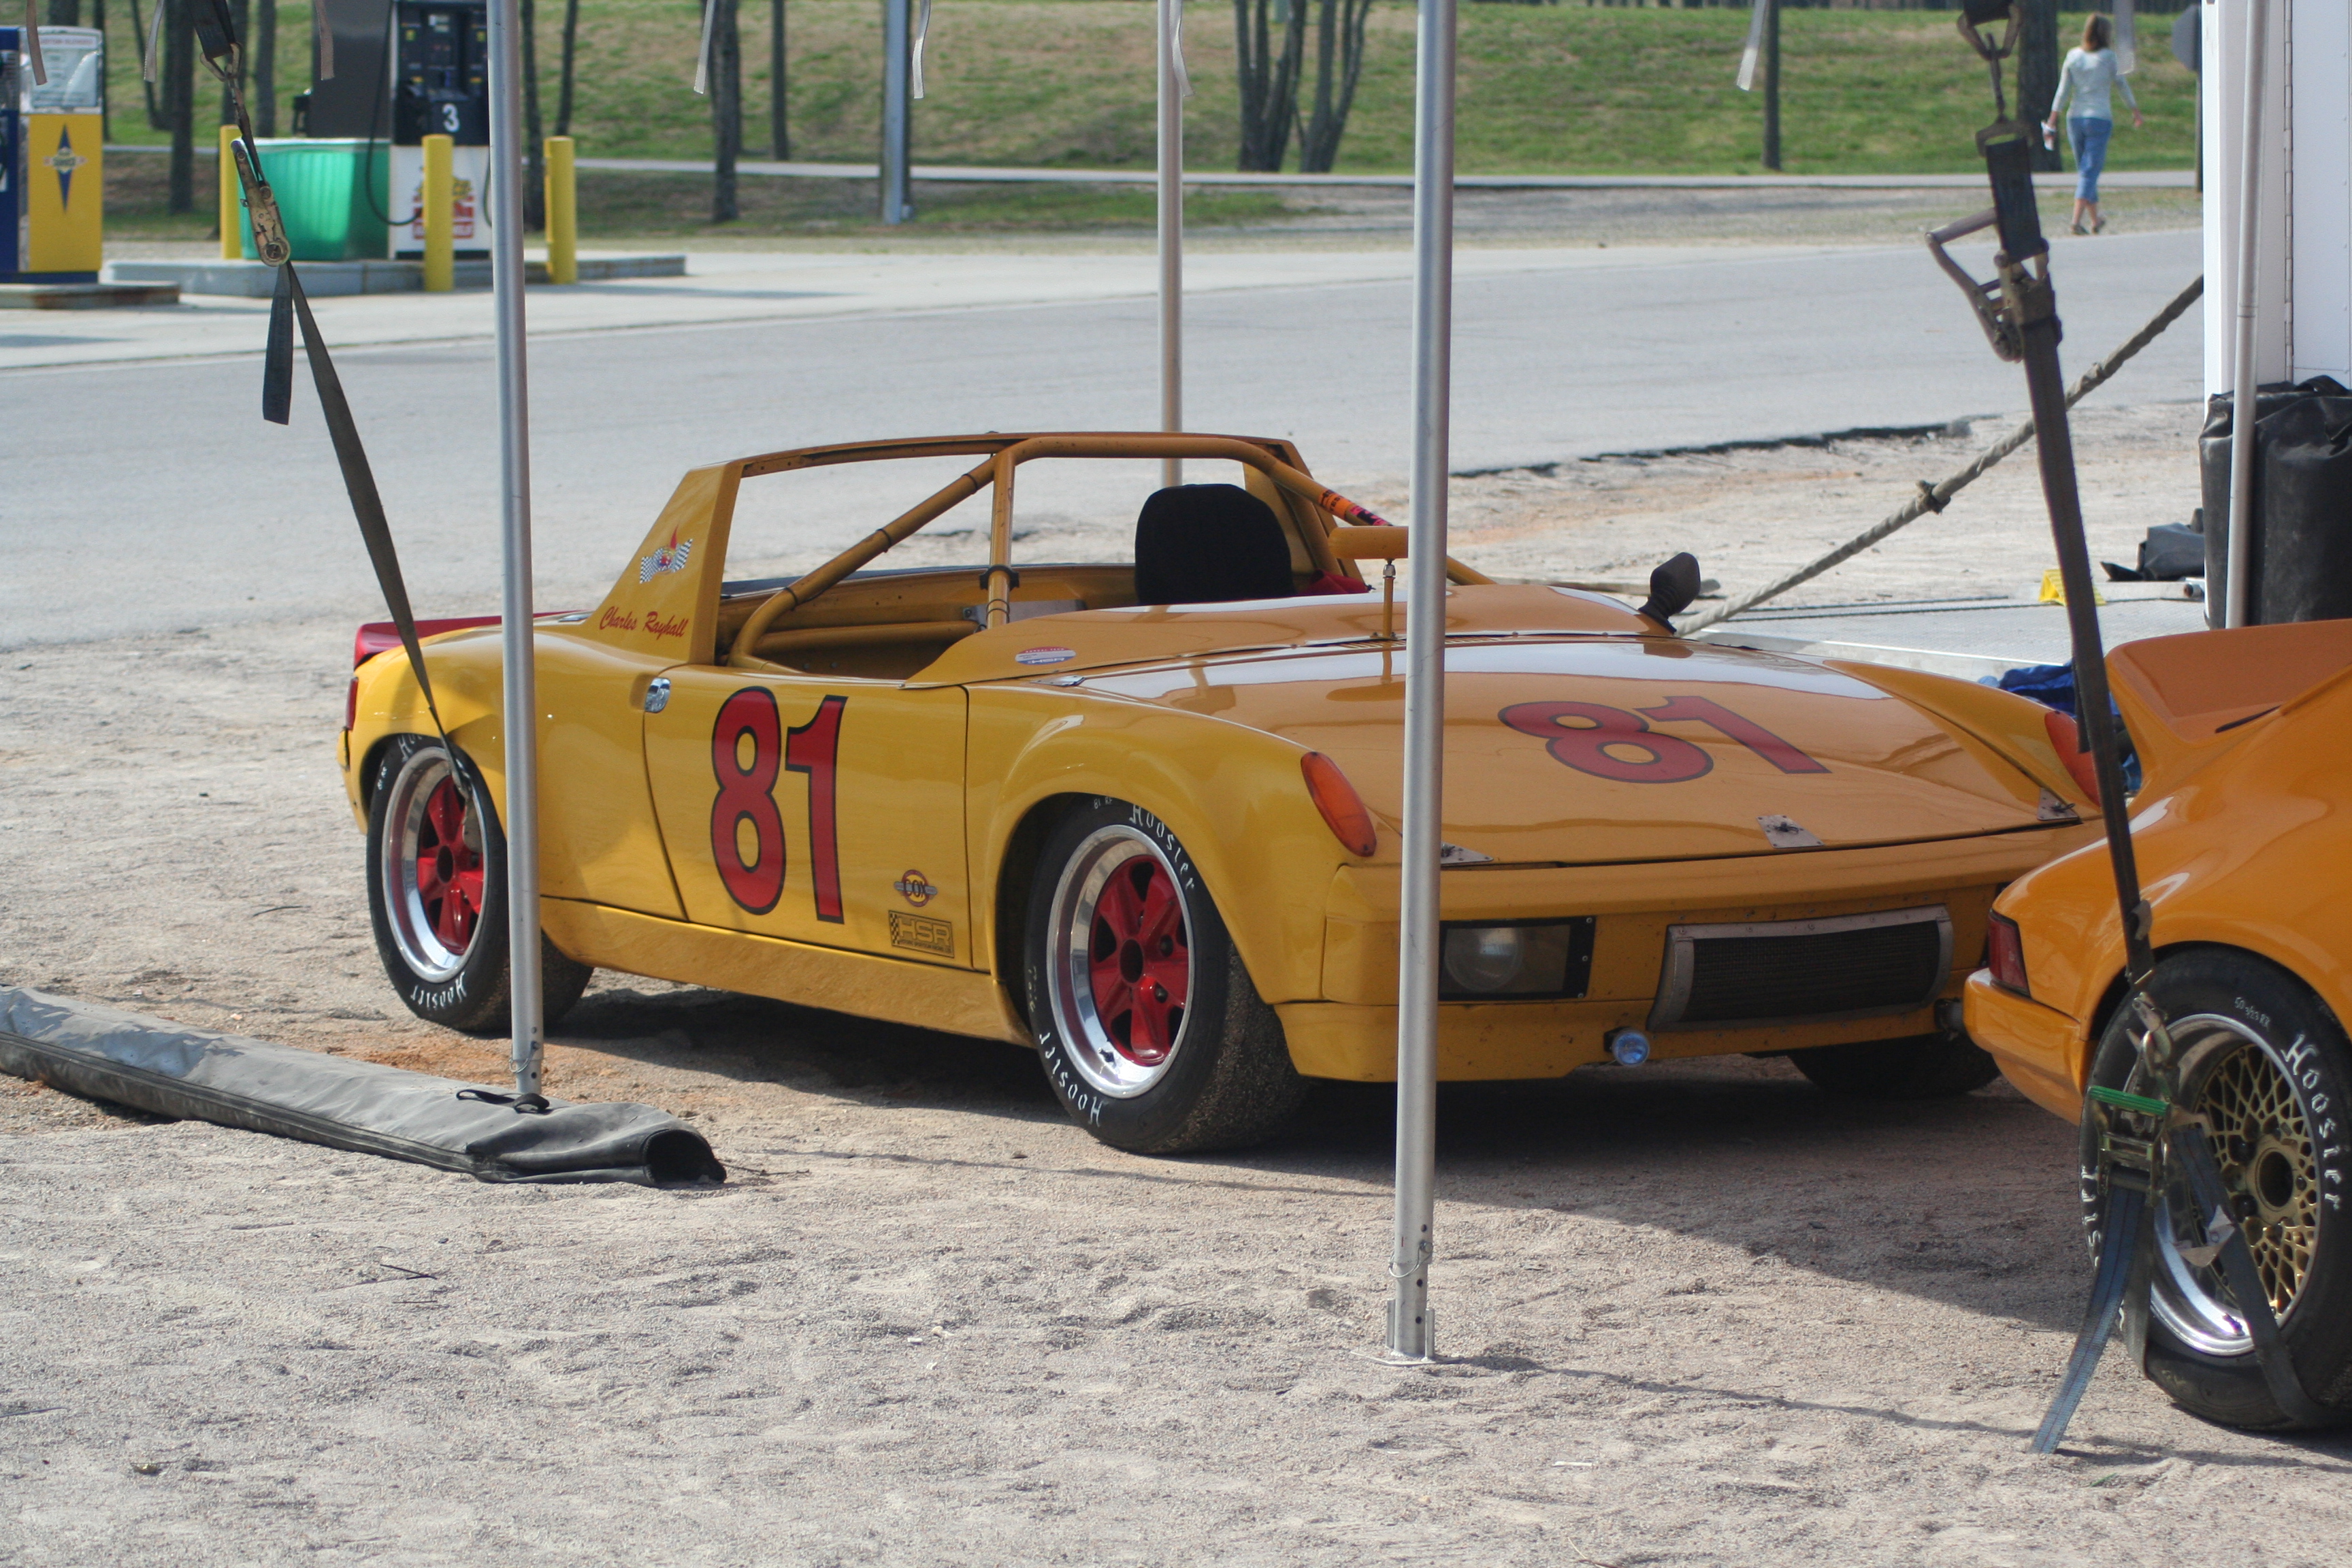
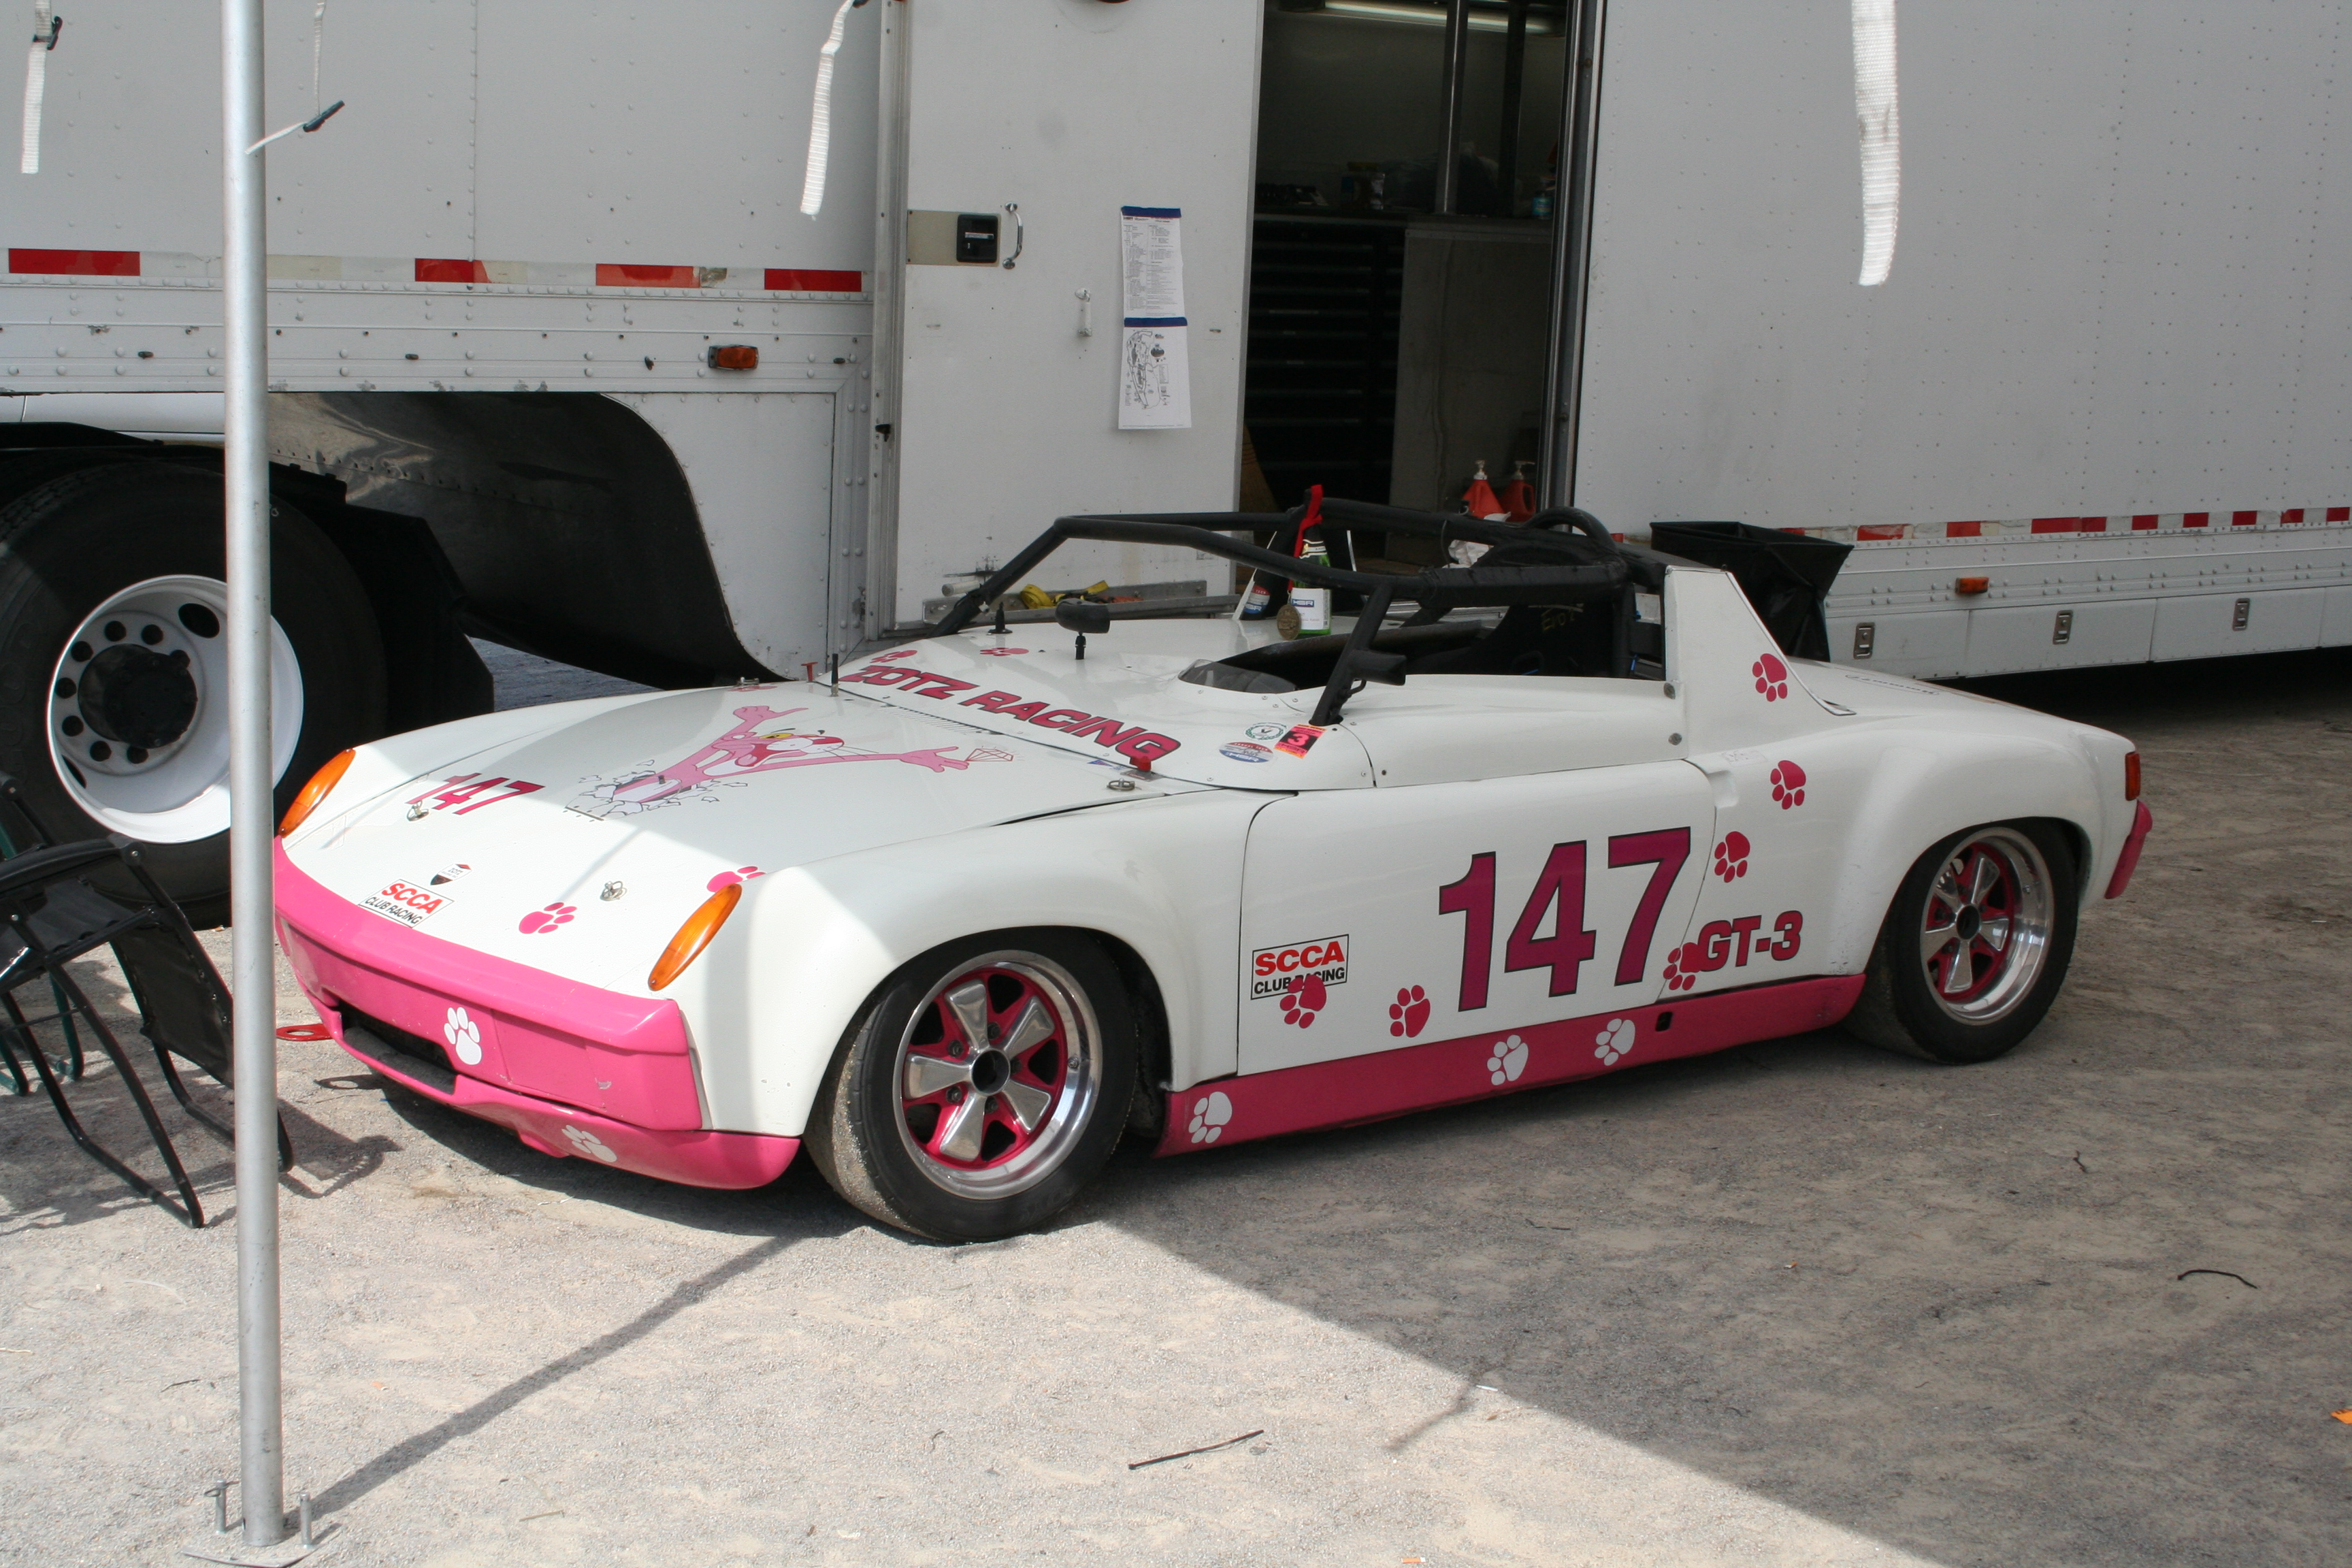
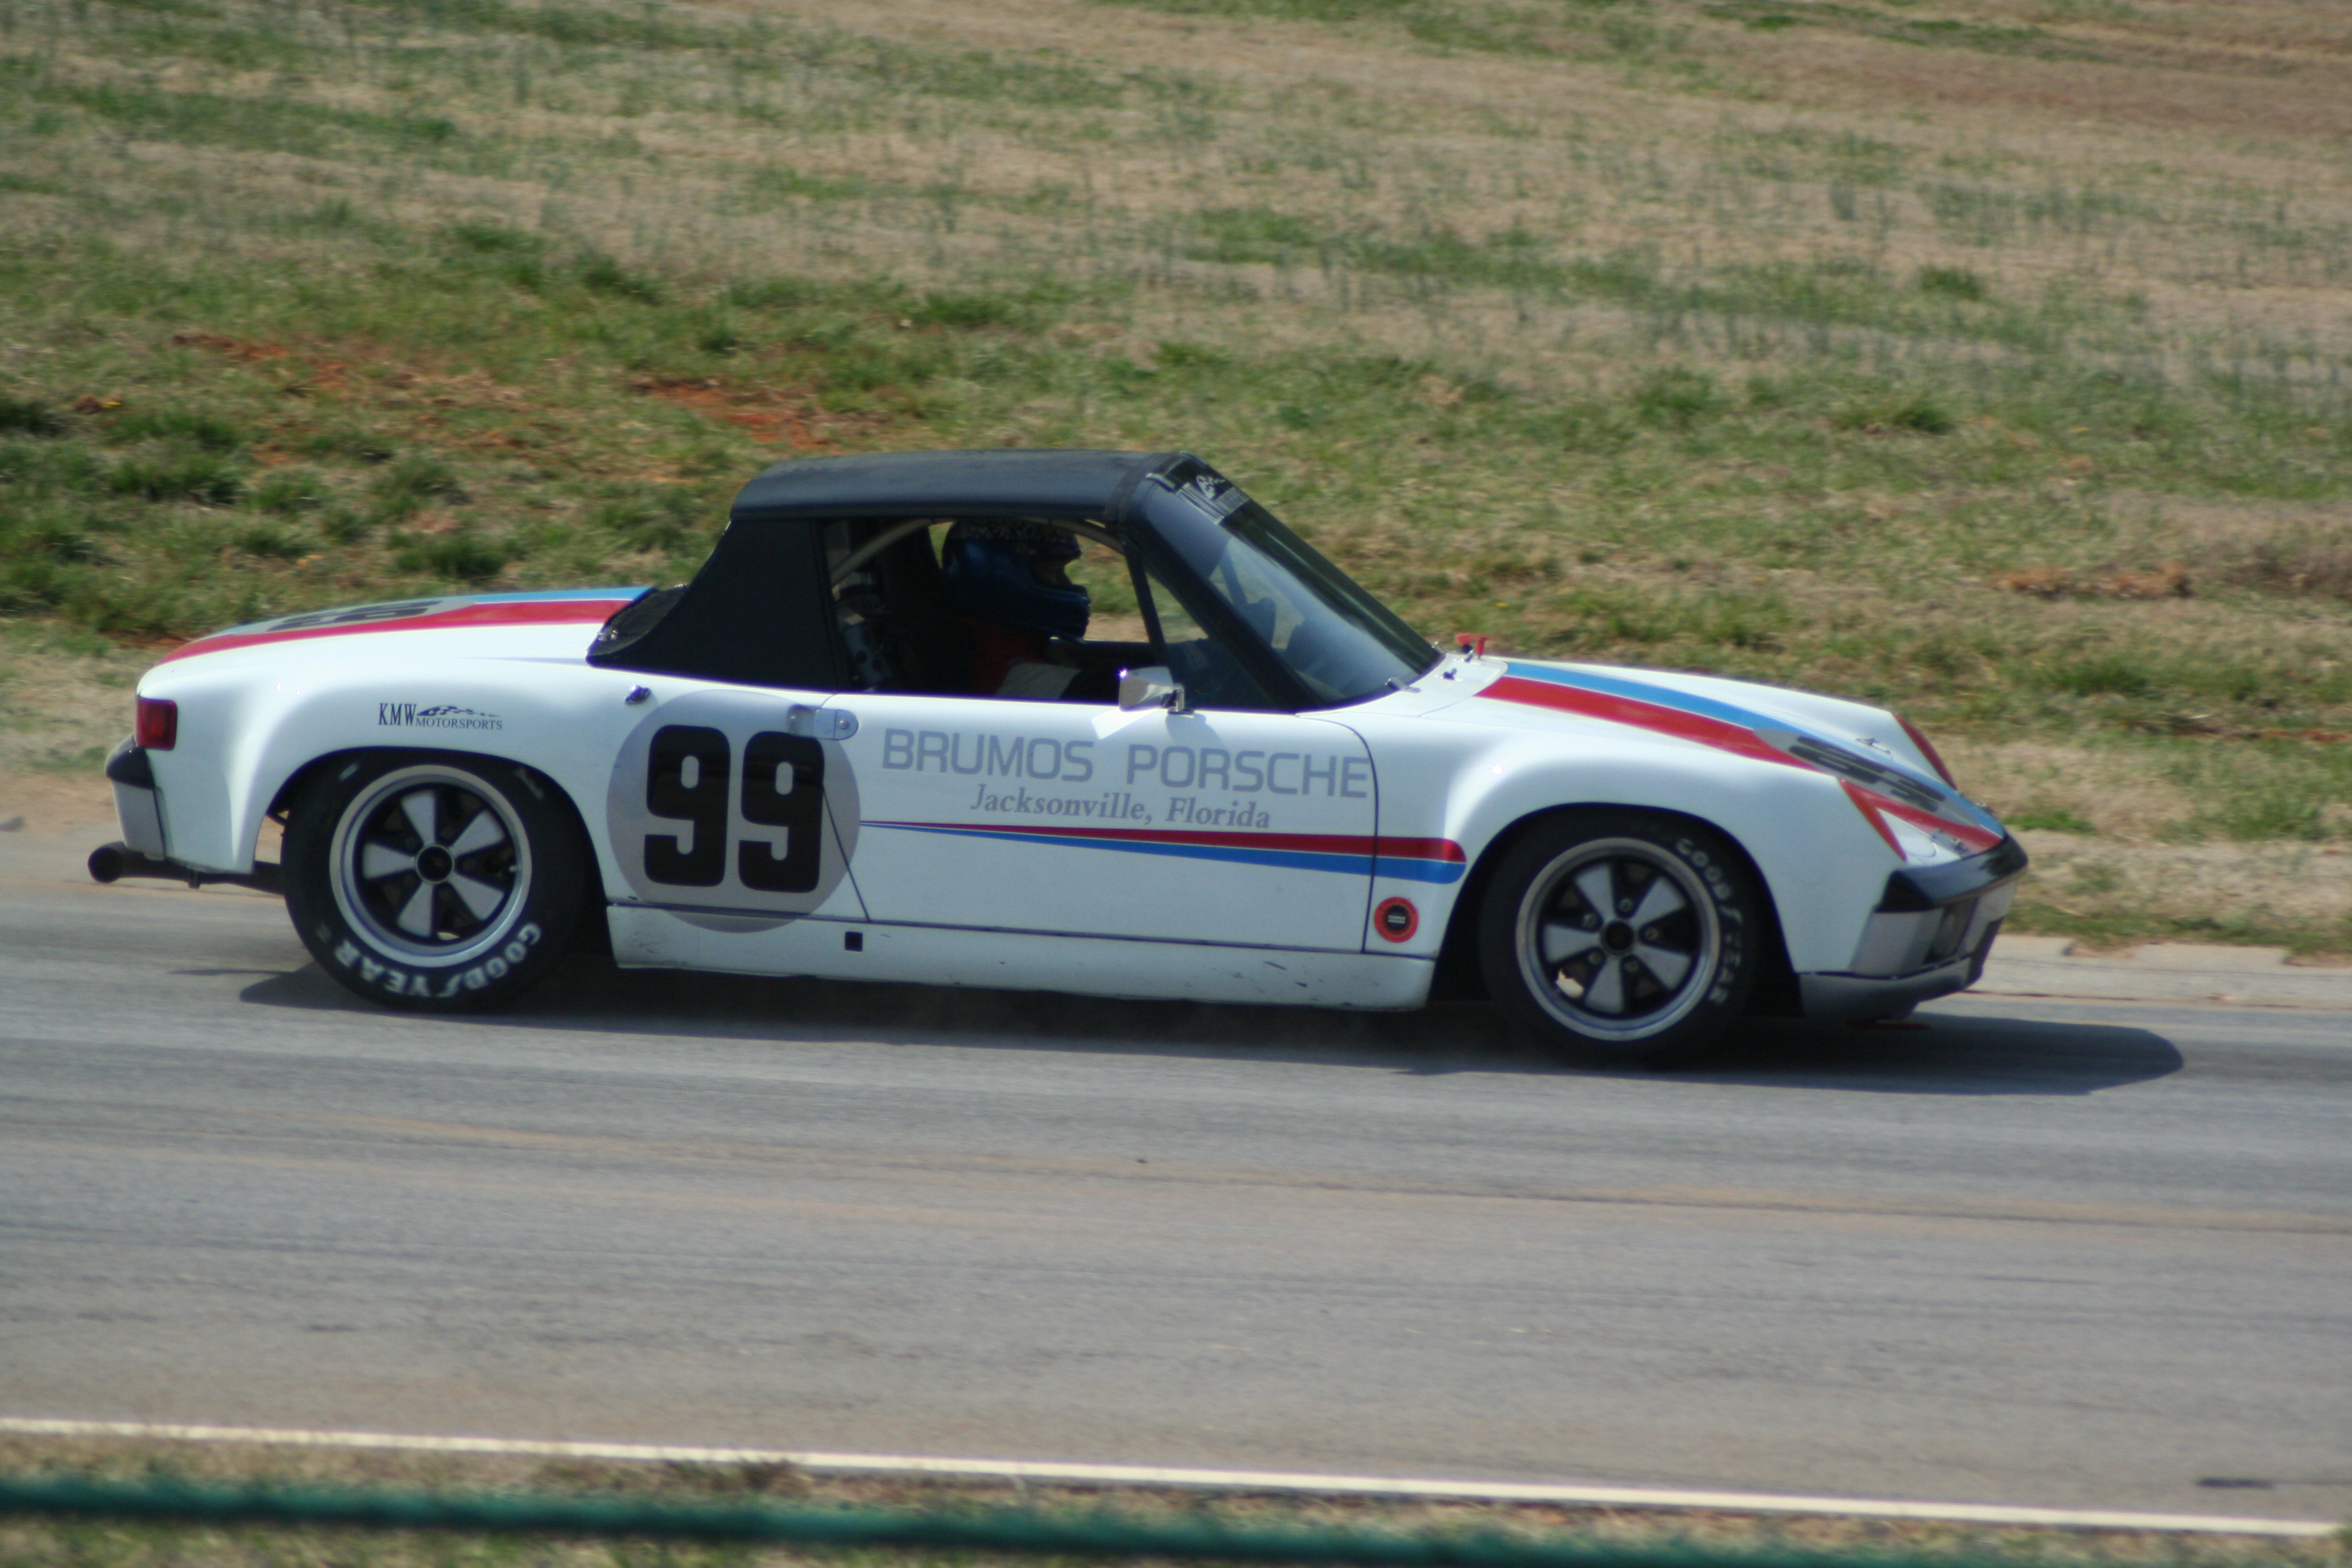
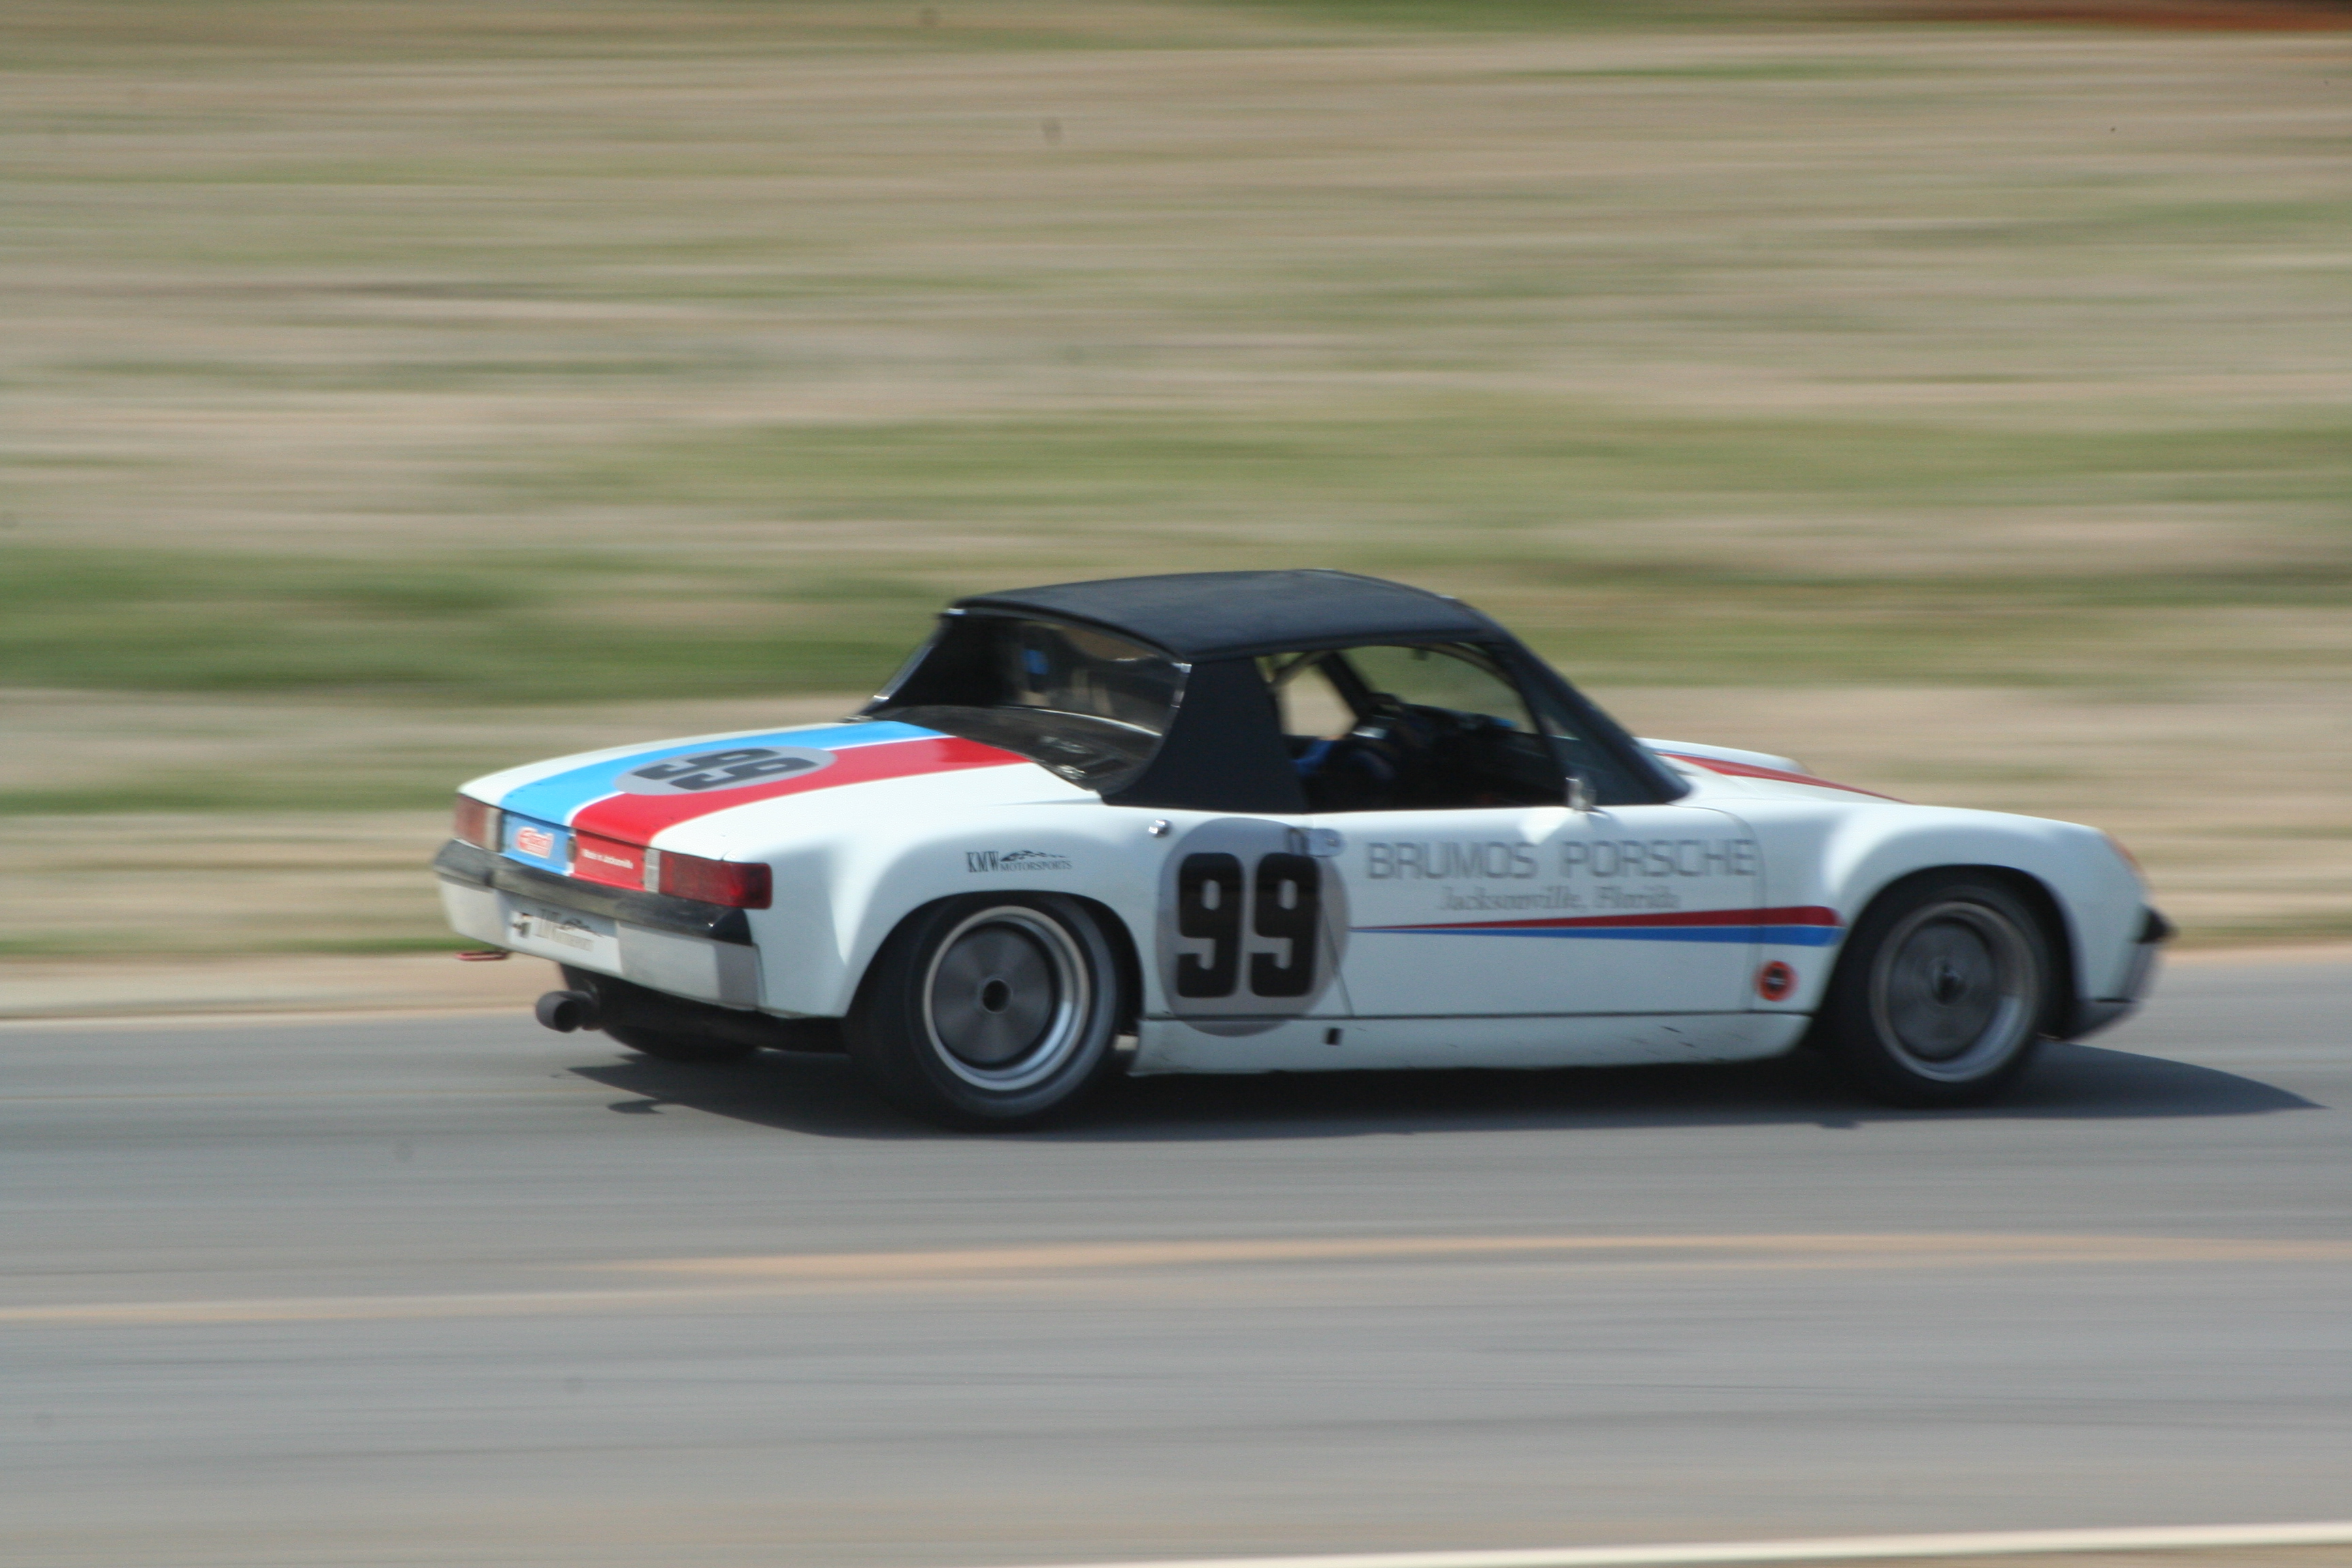
5/2/2007It was a late night, but the wiring is now out and I am enjoyed a bottle of Champaign. I am going to shave off my beard in the morning! 4/18/2007Finally I have started to tackle the removal of the wiring. I have considered this to be a benchmark moment as I consider this to be the last major component to remove as part of the general disassembly. Earlier in the year I had told myself that I would not shave off my beard that I had grown over the winter until the wiring was out. 4/14/2007More work on the rotisserie. Removed the shift linkage and lever. 4/4/2007More work on the rotisserie. 3/31/2007More work on the rotisserie. 3/25/2007All work and no play makes Jack a dull boy! I attended the historic races at VIR with some guys from the local 914 group. There was some nice 914 race cars in the pits and in the race. The Brumos 914 sounded awesome! The entire event was really laid back and was very different from the circus that is something like an Indy Car or F1 race.
3/24/2007Been working on the rotisserie. You can read and see more about it here 3/17/2007Dash is now out (but still connected to the wiring harness). I don't look forward to put it back in. 3/13/2007More work on removing the dash. 3/7/2007 - 3/8/2007Not much happened over the winter. I don't know why. Probably a combination of busy doing other stuff and not wanting to working a cold garage. However I did work on getting into the ventilation system as well as removing the dash. I also did some research regarding the color of the car. |
|