![]()
![]()
|
|
|
|
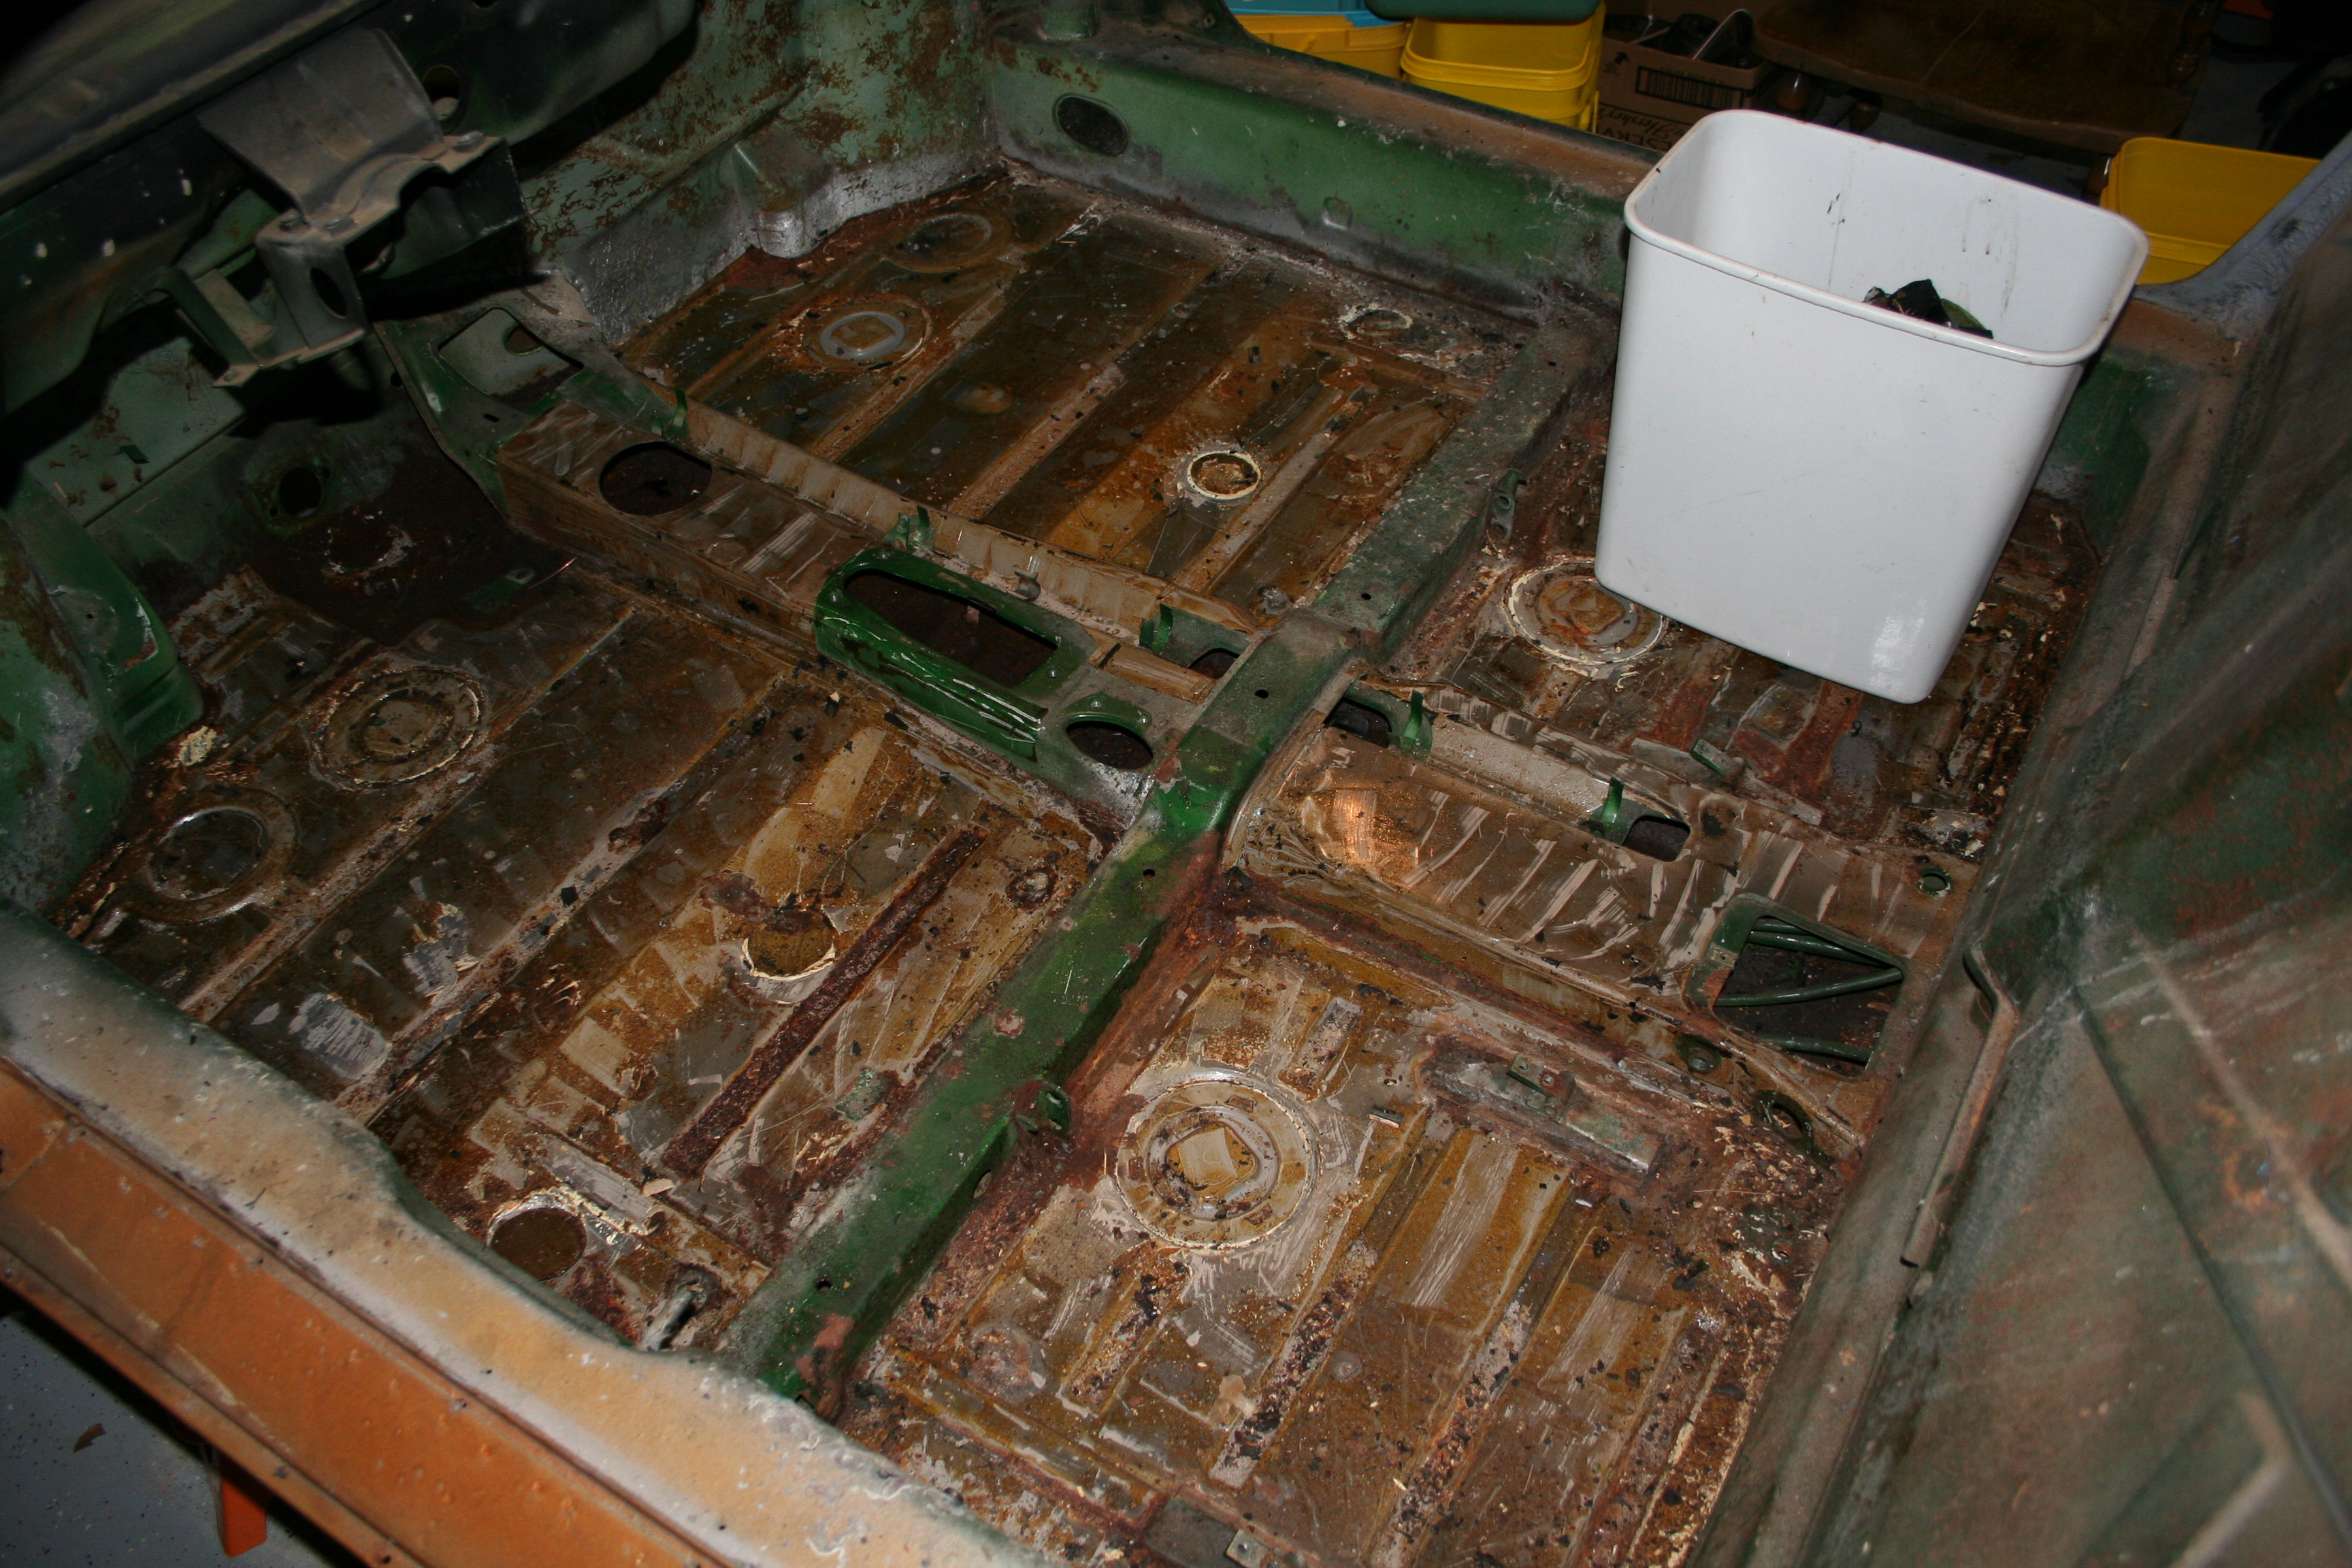
1972 Porsche 914Repair and Restoration - Part 18 - Floorboard and Seats6/29/2007Removed the tar on the interior. Heat gun and flat blade scraper worked great! I kept all of the tar so I could weigh it.
9/22/2007I bought a Harbor Freight Pressure pot media blaster and decided to work on the rear floor near the firewall as well as the longitudinals.
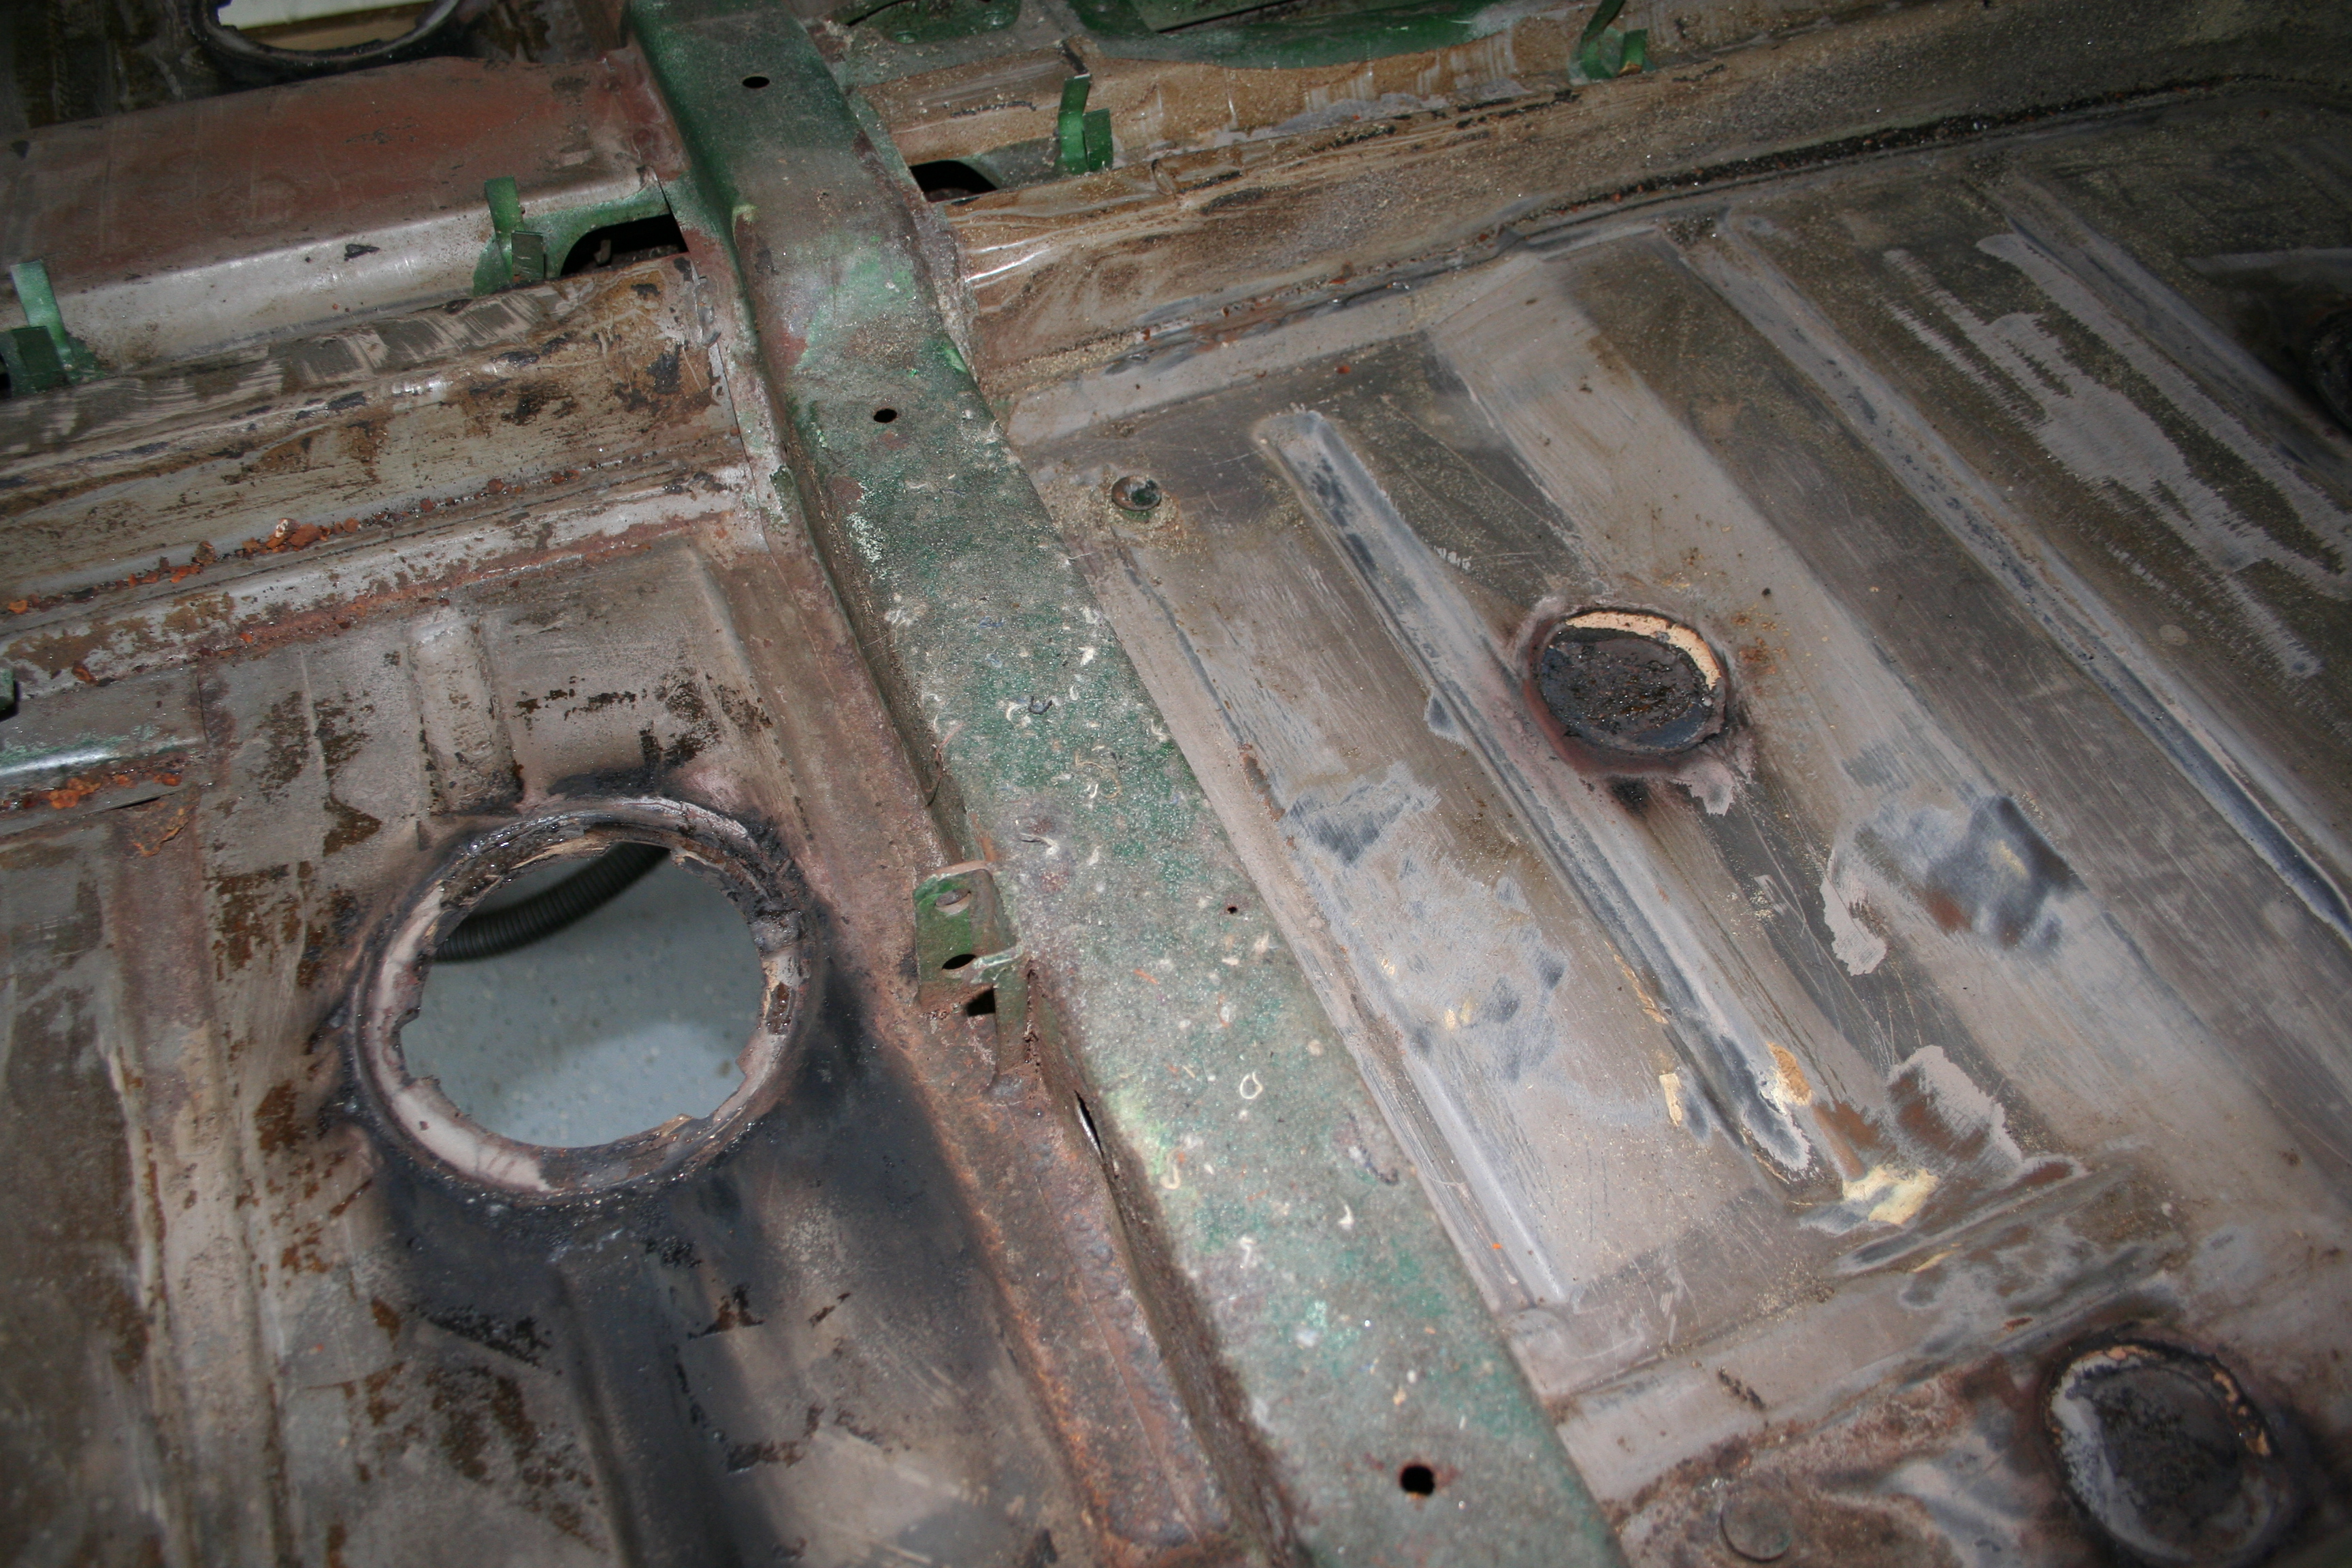
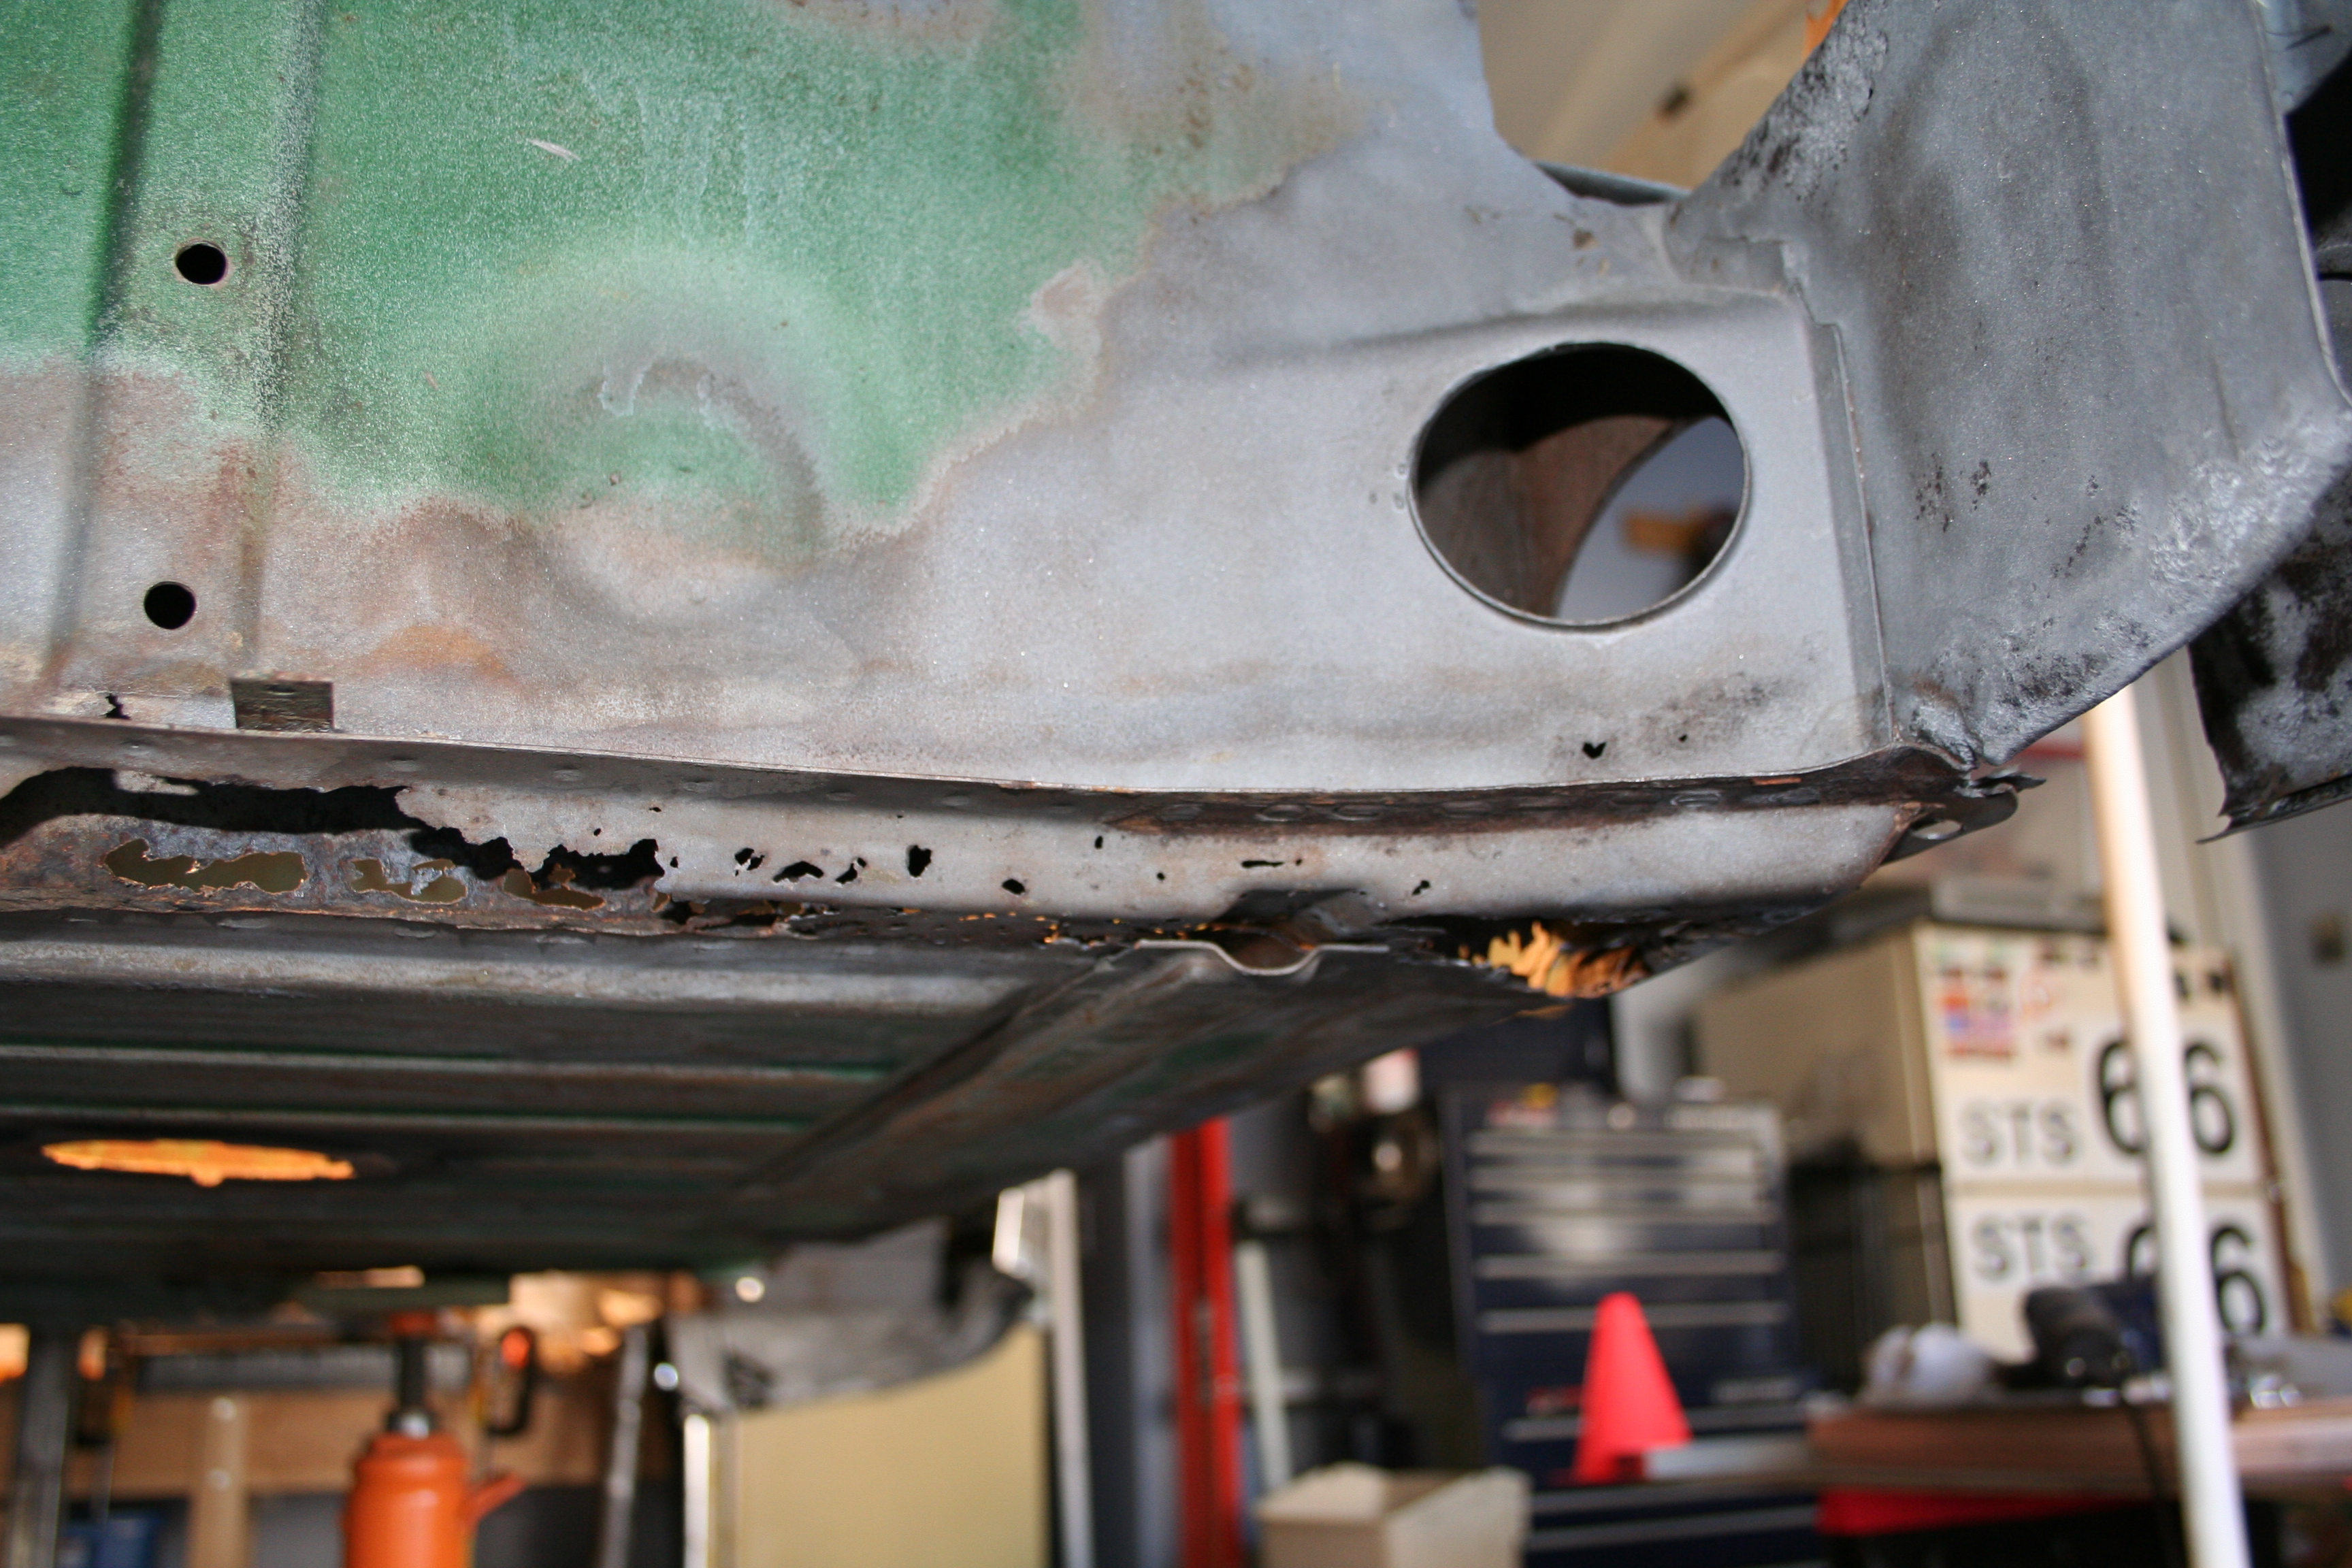
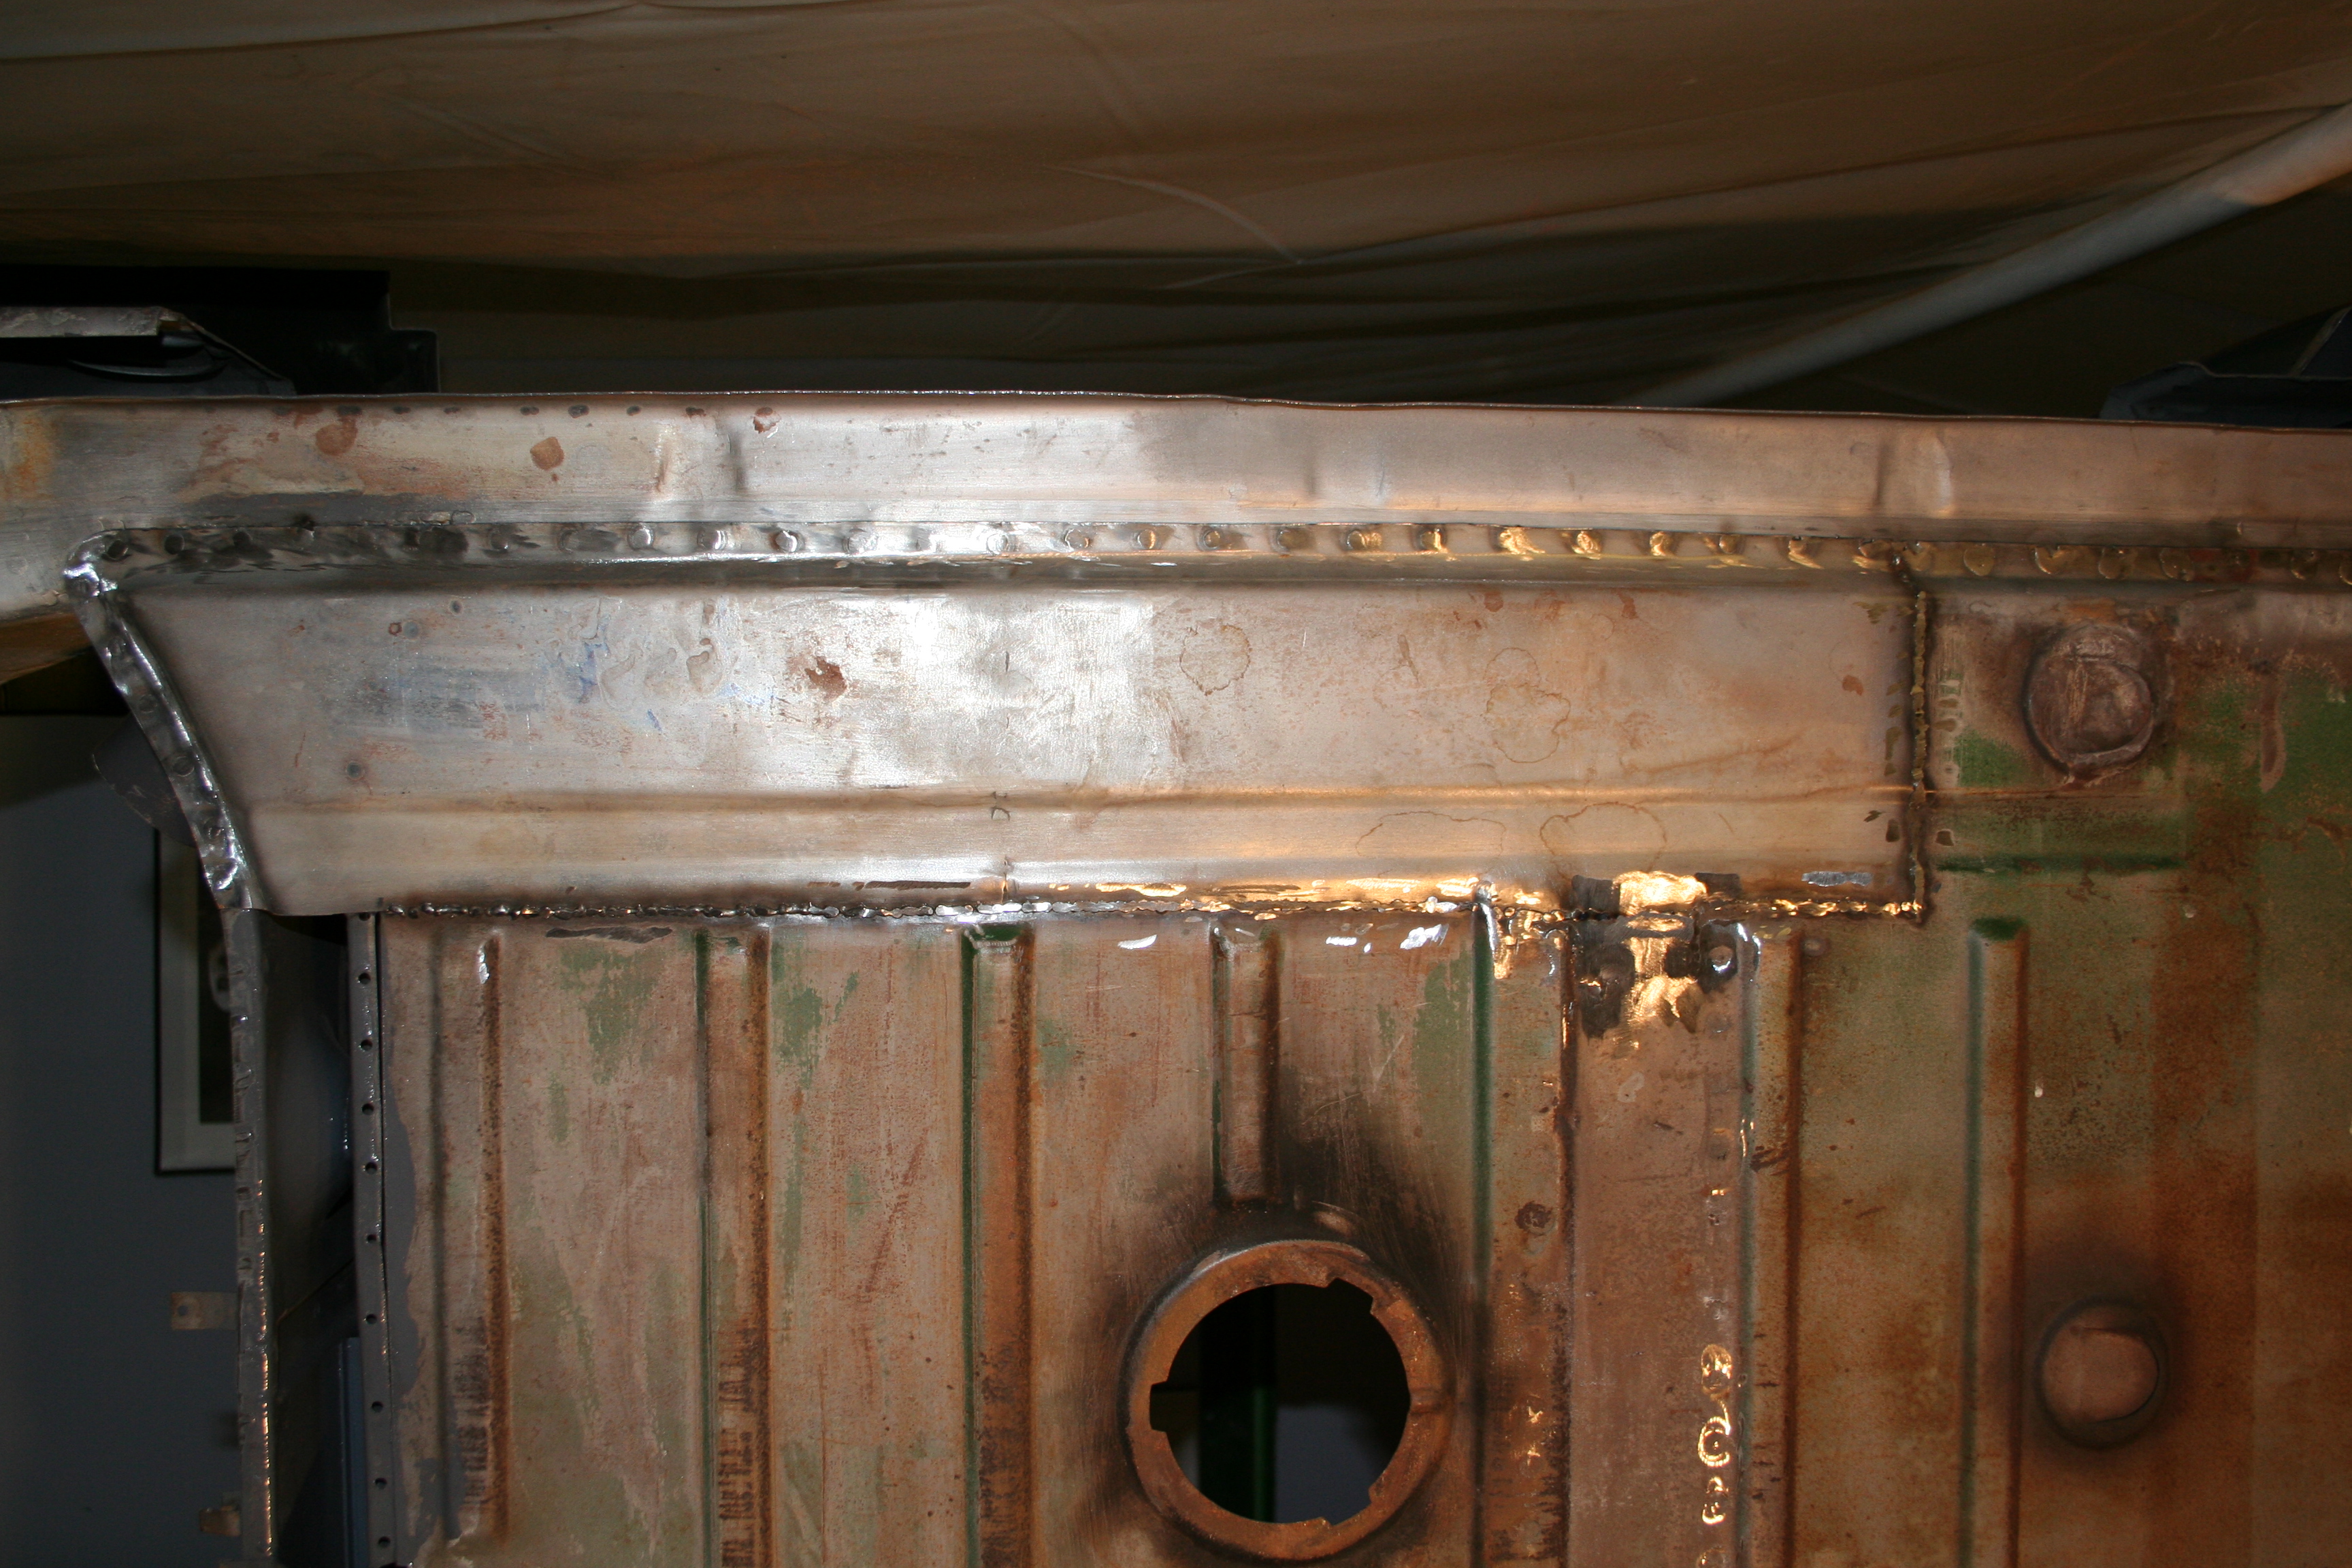
This is the passenger side. The driver side is not as bad. I still haven't figured out how I want to do this. I have no experience with forming sheet metal. I would like to replace the section above down to where they are spot welded to the longitudinal as well as the firewall, but this would require a lot of complex metal forming. While I had intended on doing this first, I think I may put it off.
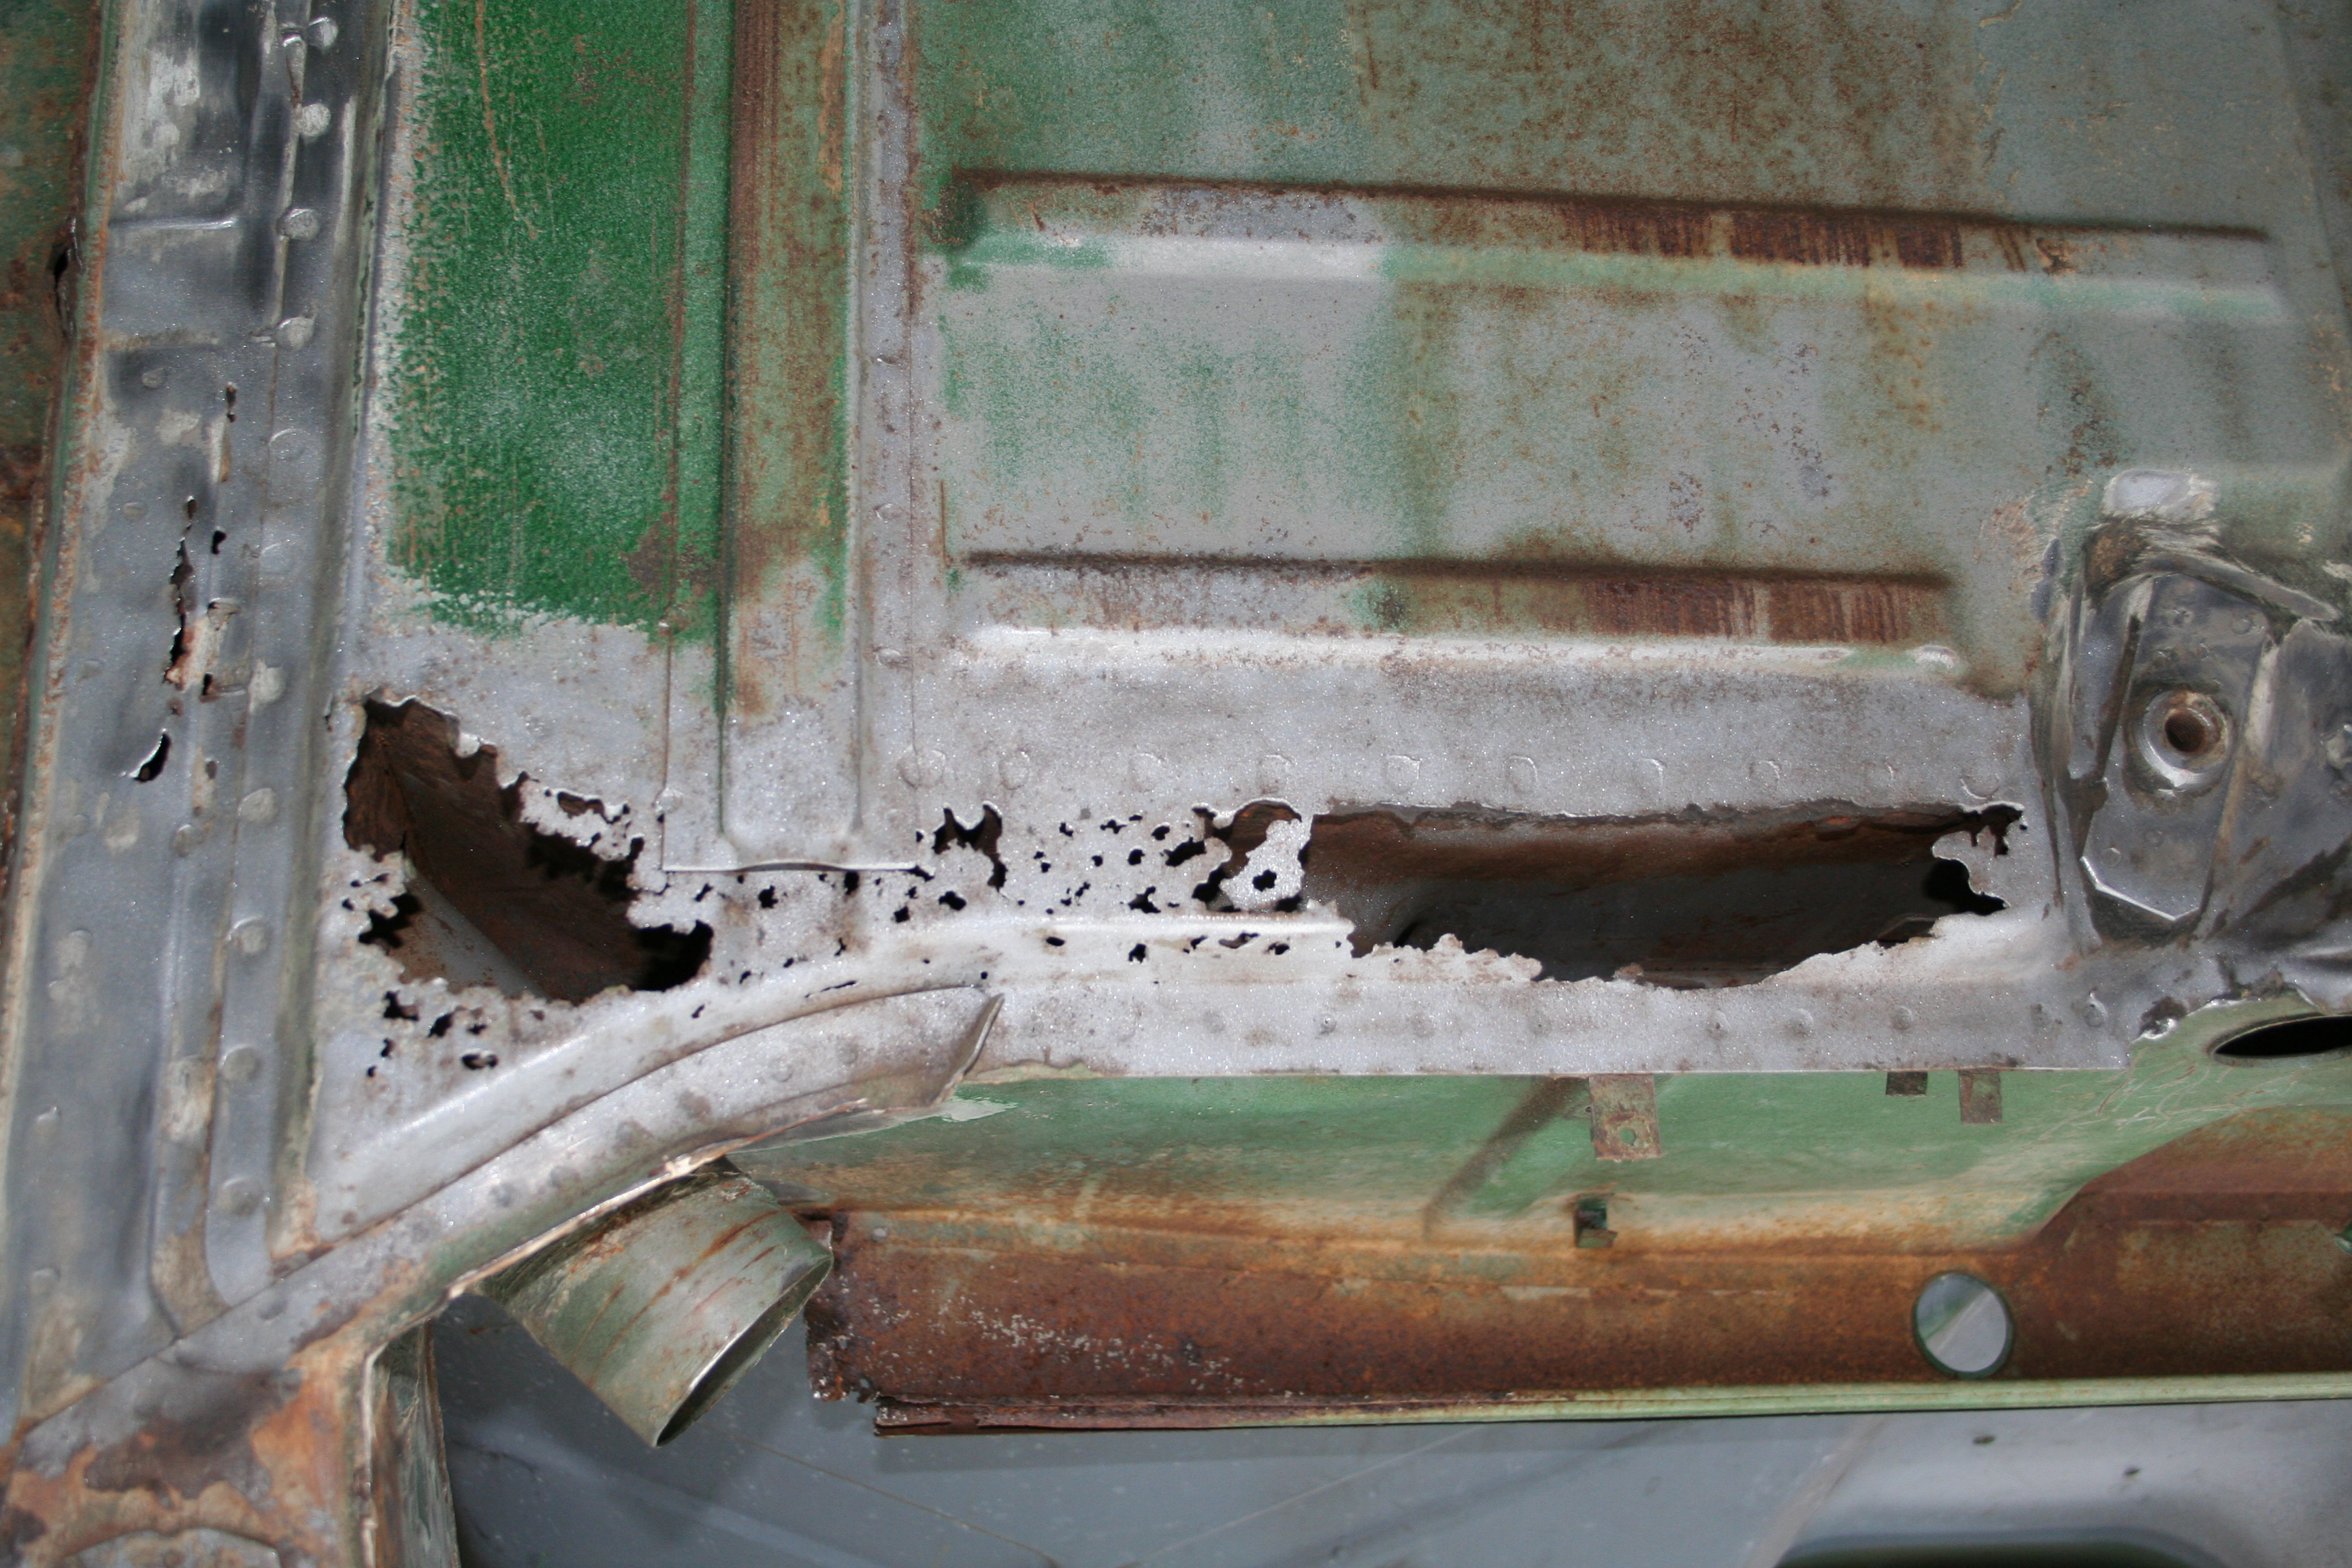
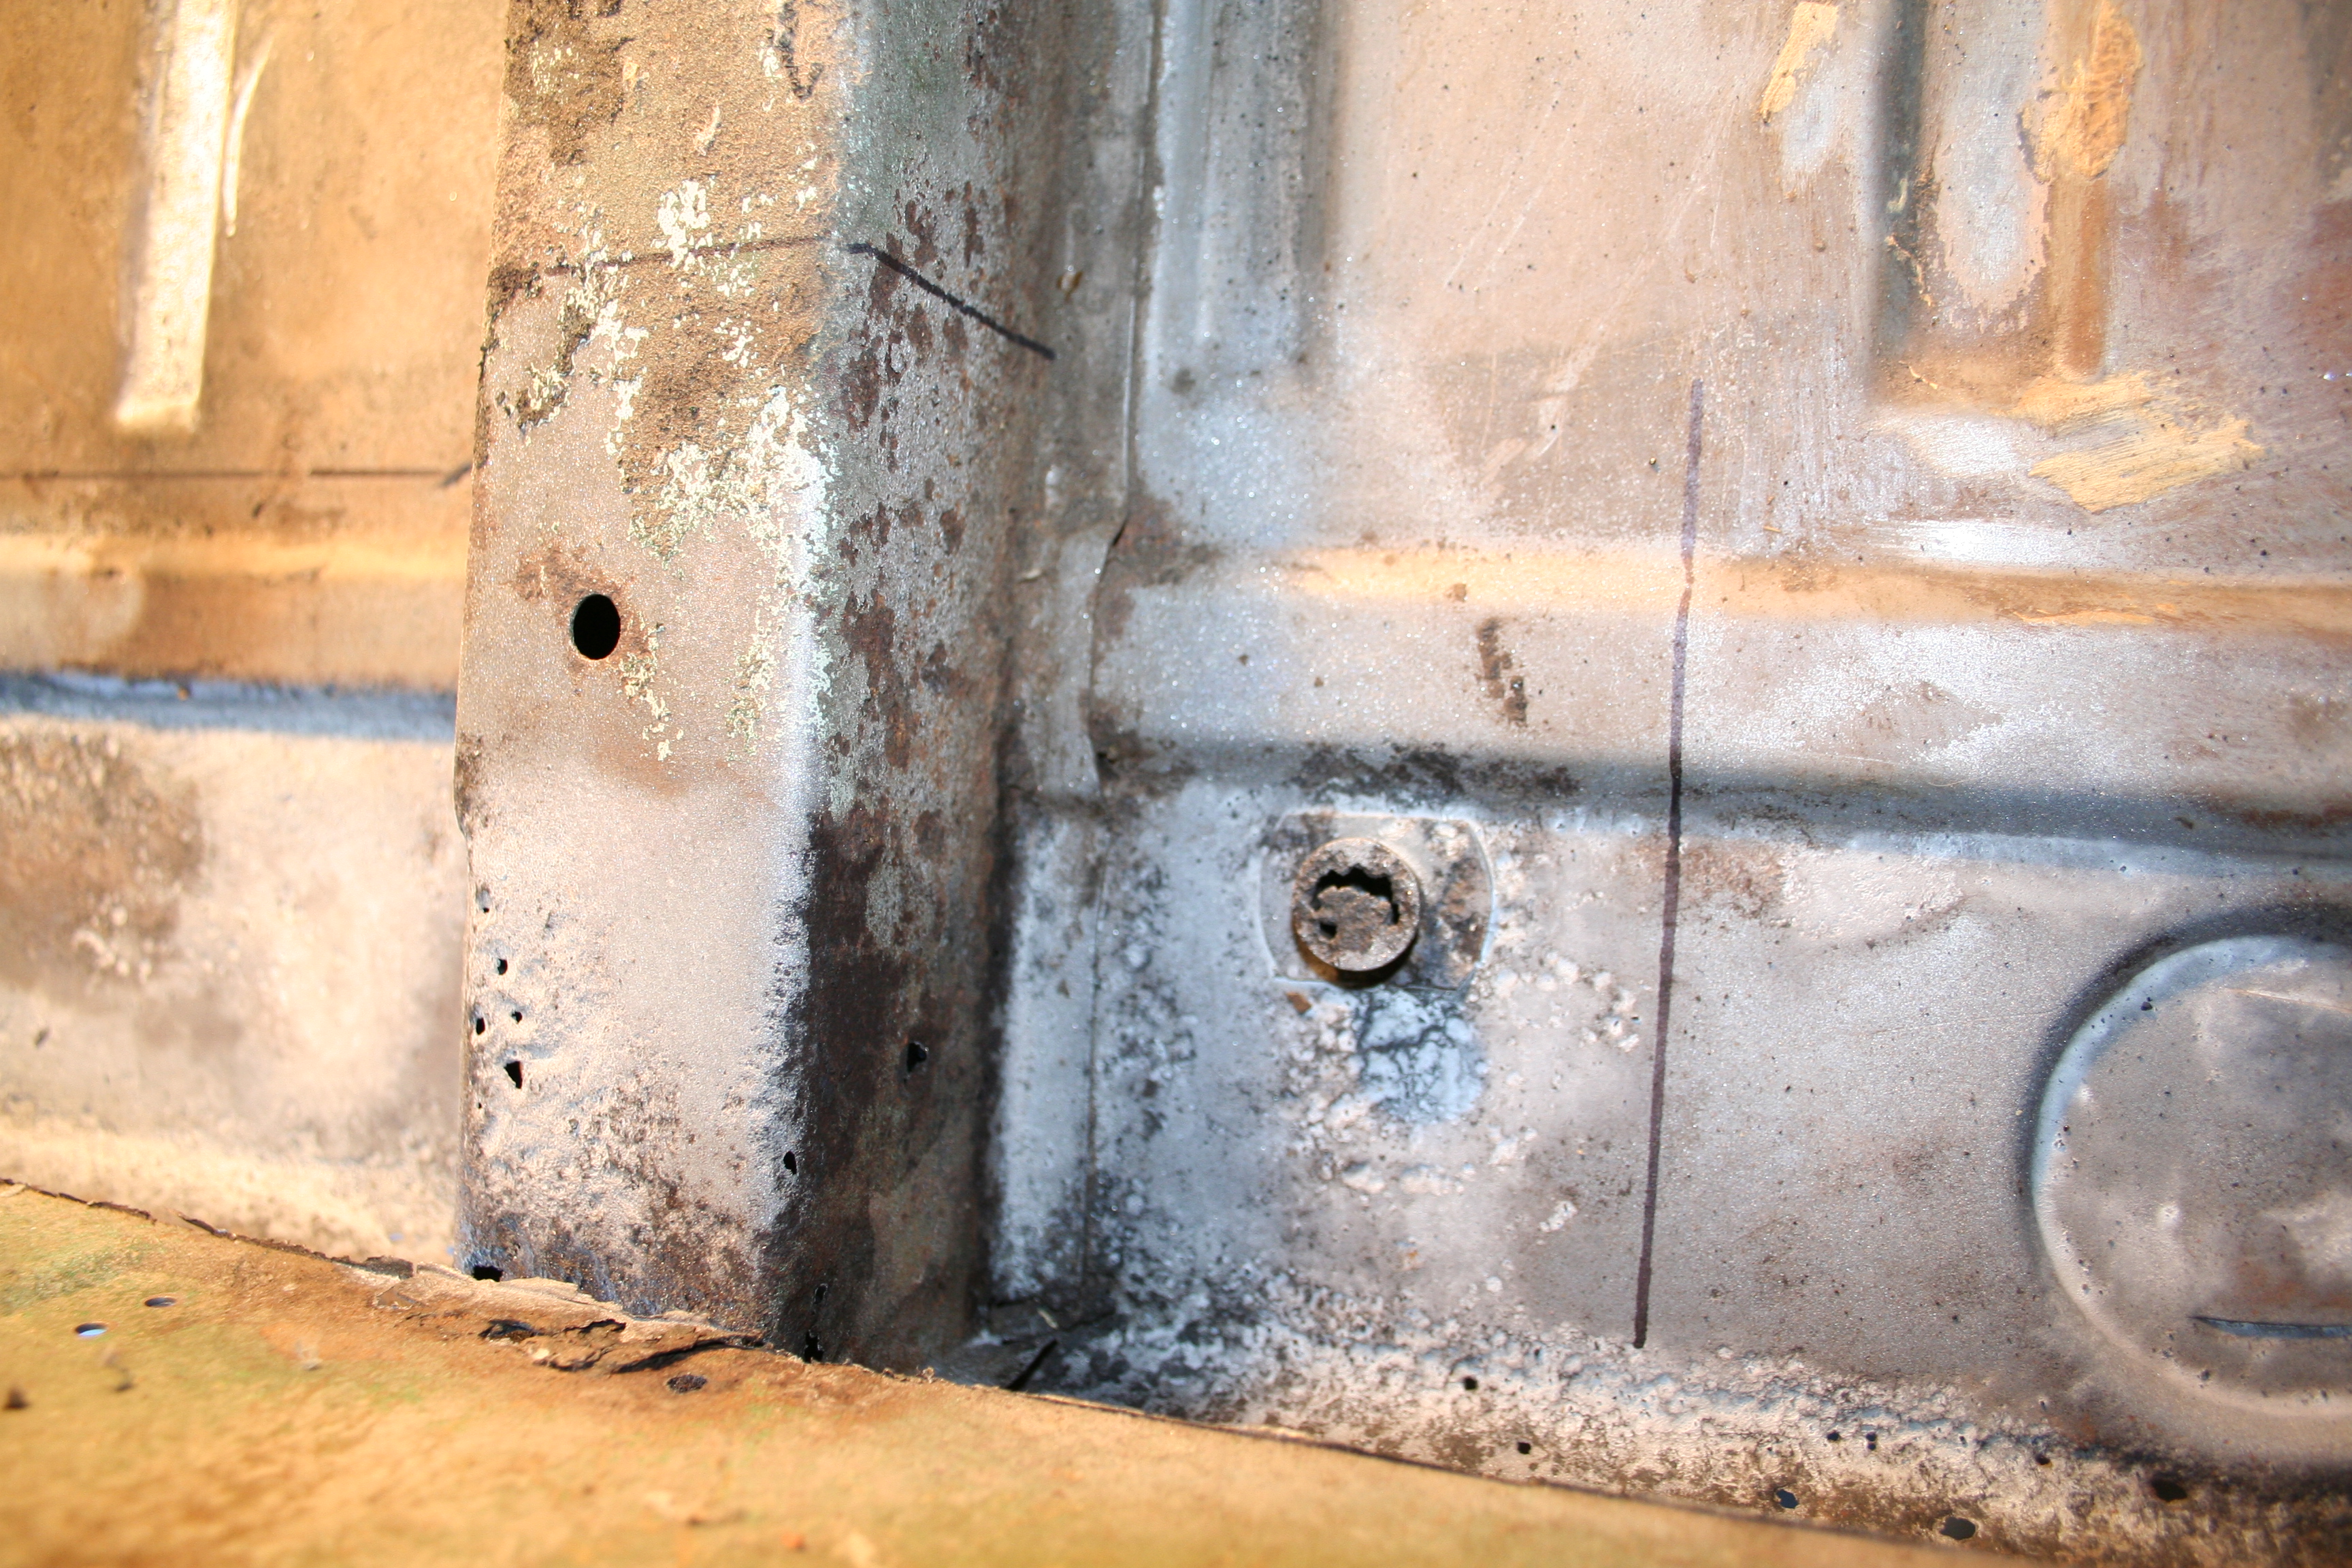
A wider shot with the seam sealant removed via knotted wire brush on angle grinder as well as media blasting with coal slag near the firewall. Mostly the media blasting was just to goof around and try it out to see how well it worked as well as try out my technique on body panels that are not seen very often. 10/13/2007I have been wanting to remove the access plates in the body. There are a handful of them. I wasn't sure how to do this. They rotate and lock into place and are also glued into place using seam sealer. I decided the best (only?) way is to grind as much of the seam sealer away using a knotted wire brush on my angle grinder. Then I used a torch to heat the metal to soften the remaining sealant and then I am able to rotate and unlock the plate. I will put them back in, but only after I have used epoxy primer and/or POR15 on the holes and plates.
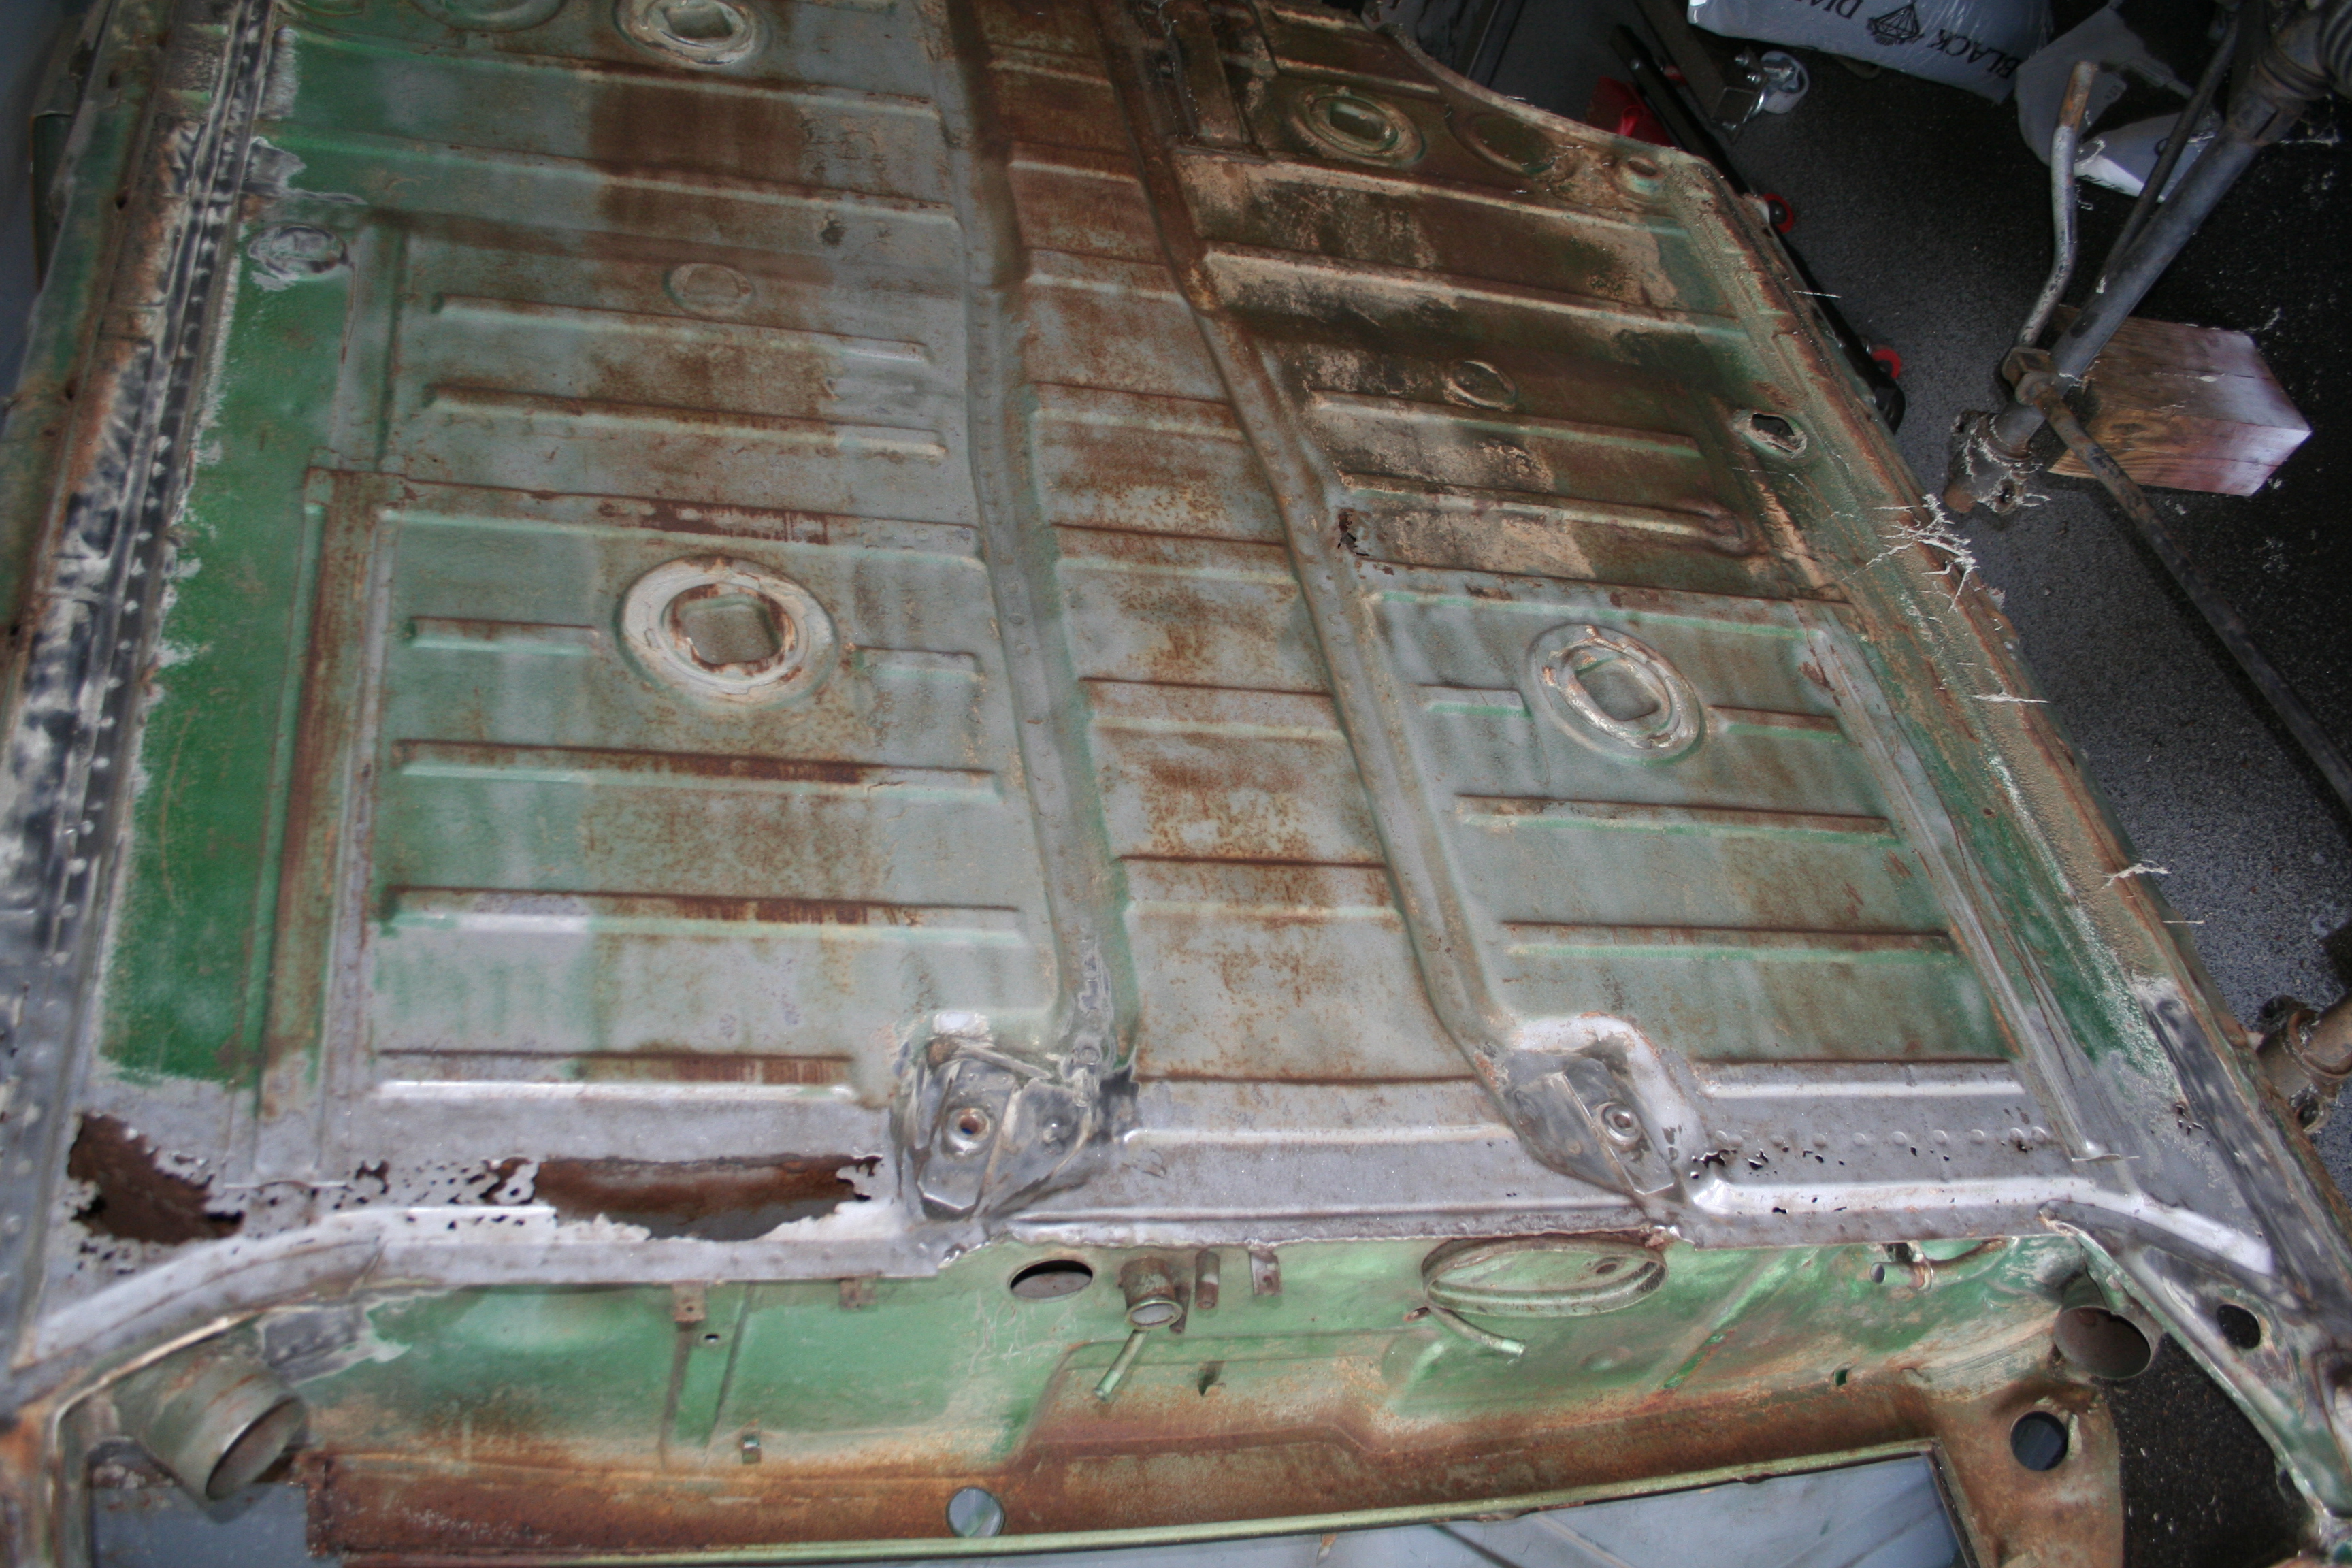
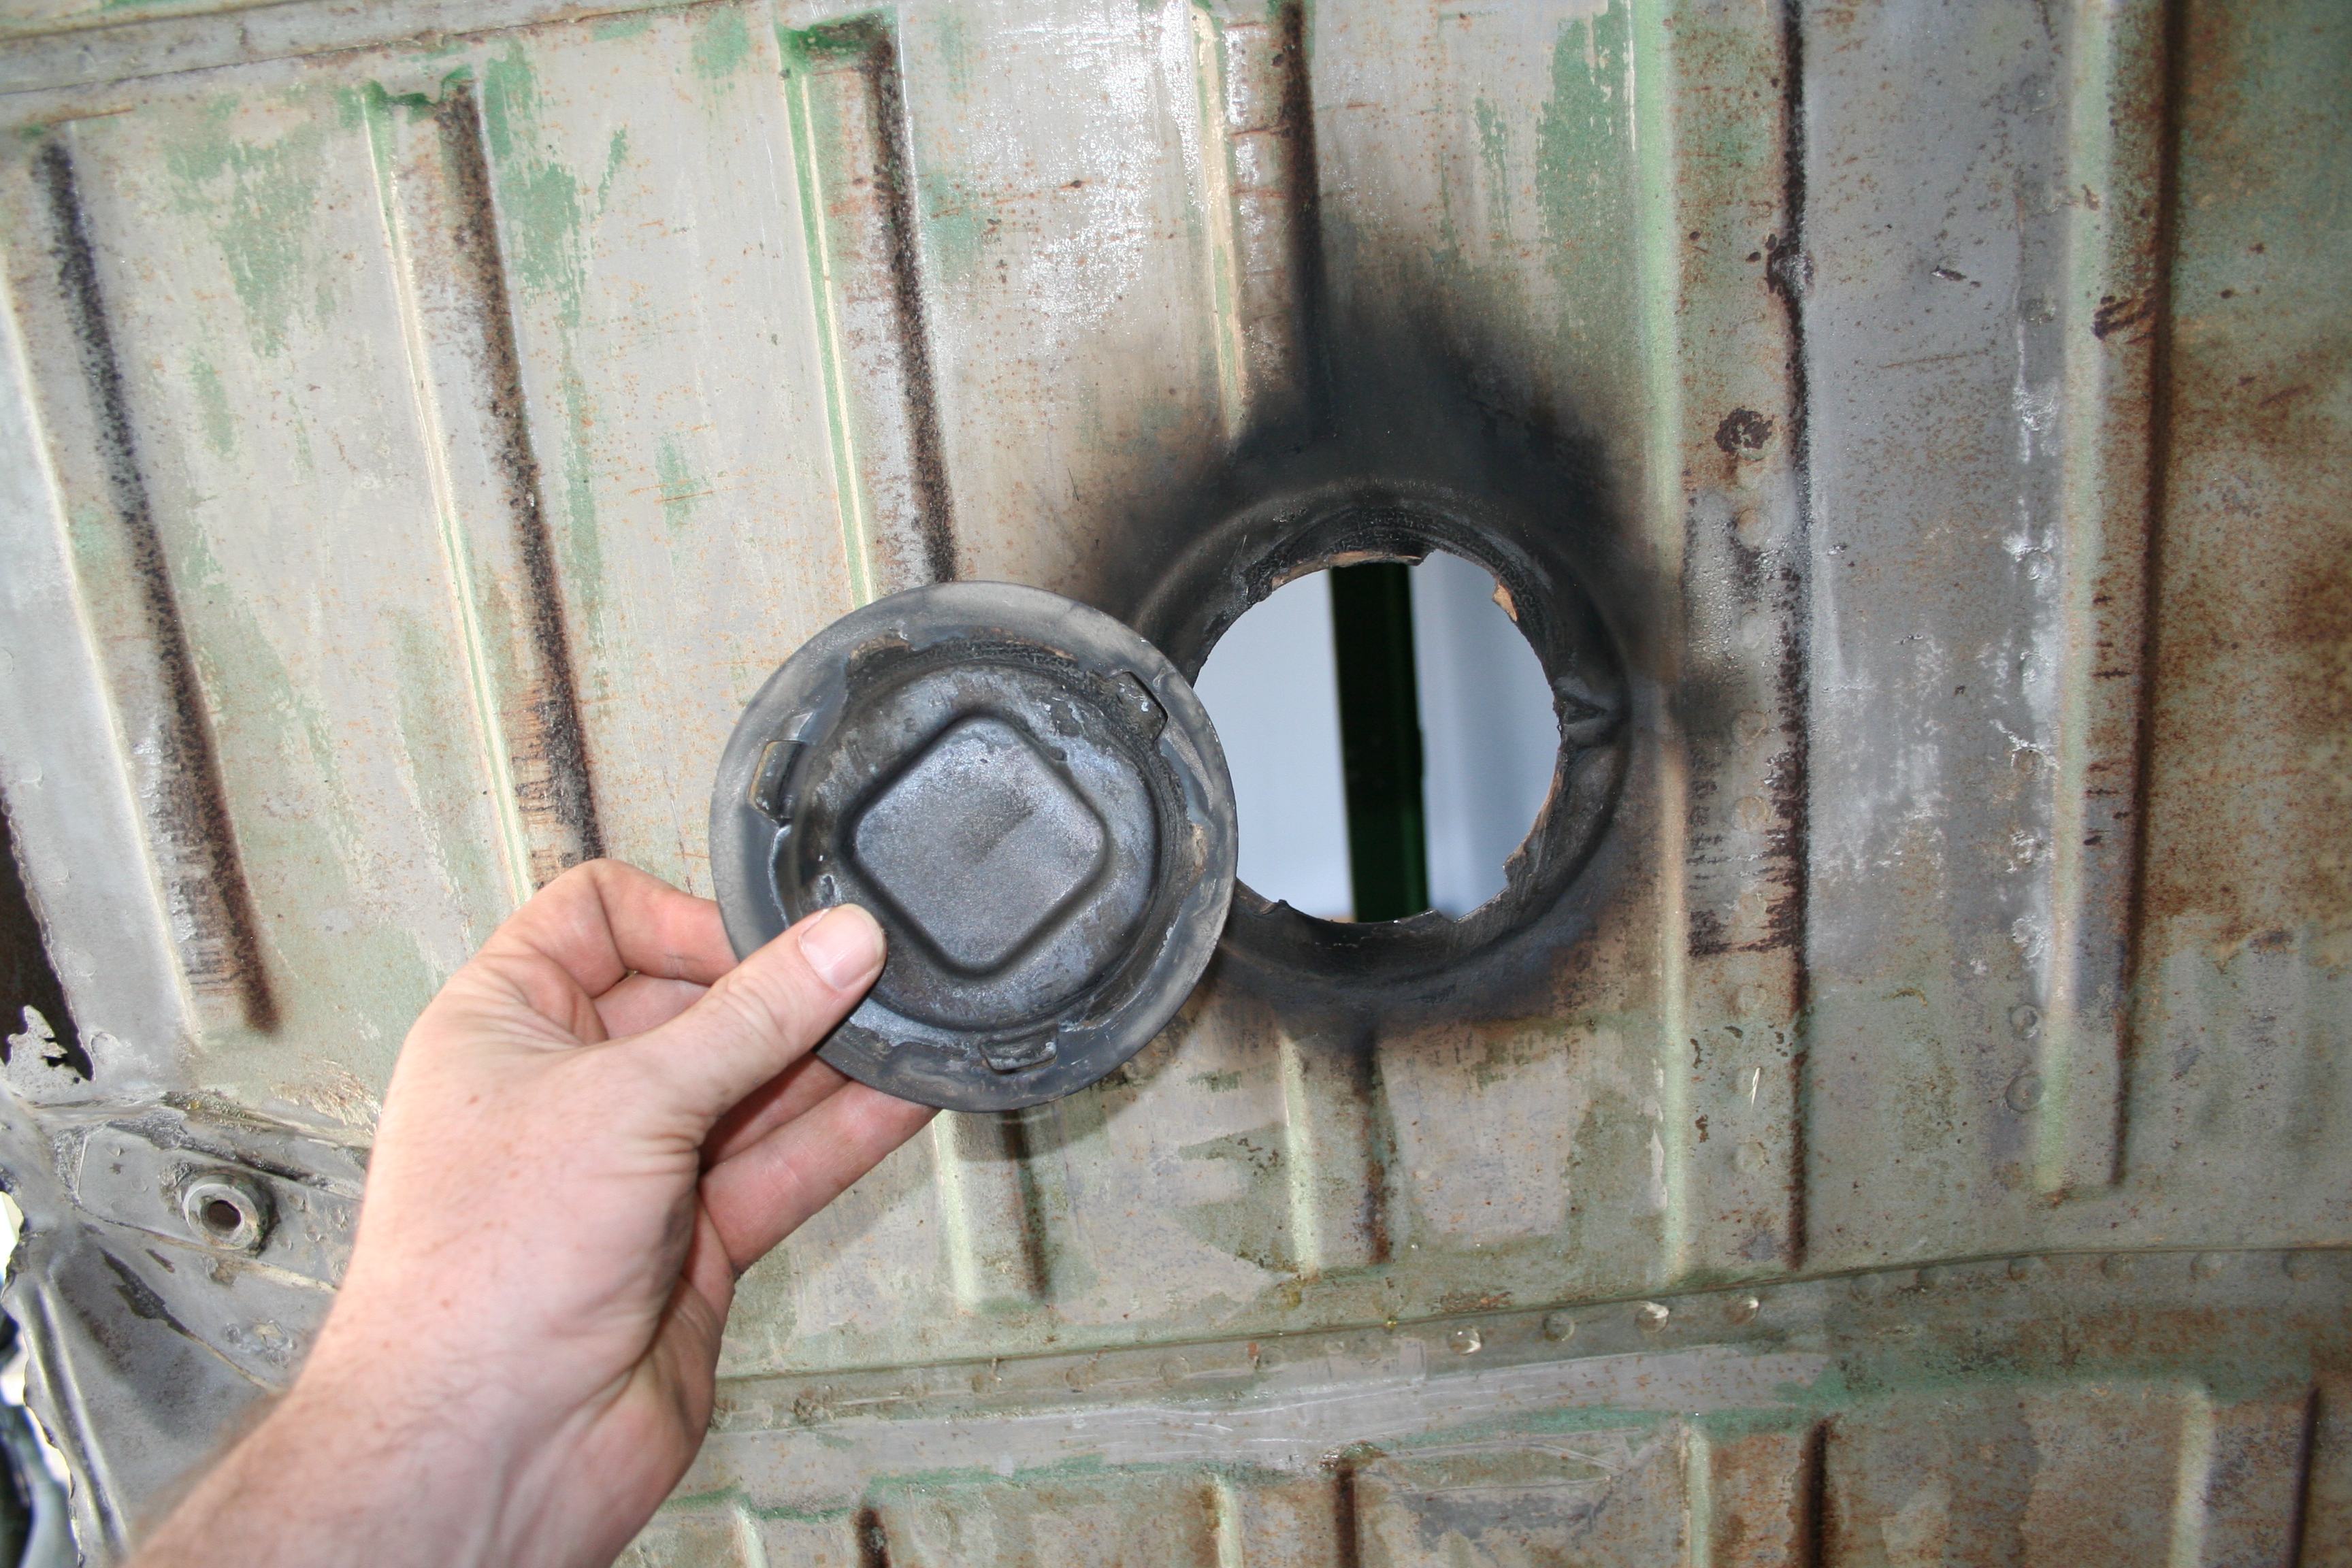
In addition to the plates that rotate and lock into place there are smaller plates that are just glued into place via seam sealant. I remove them in the same way.
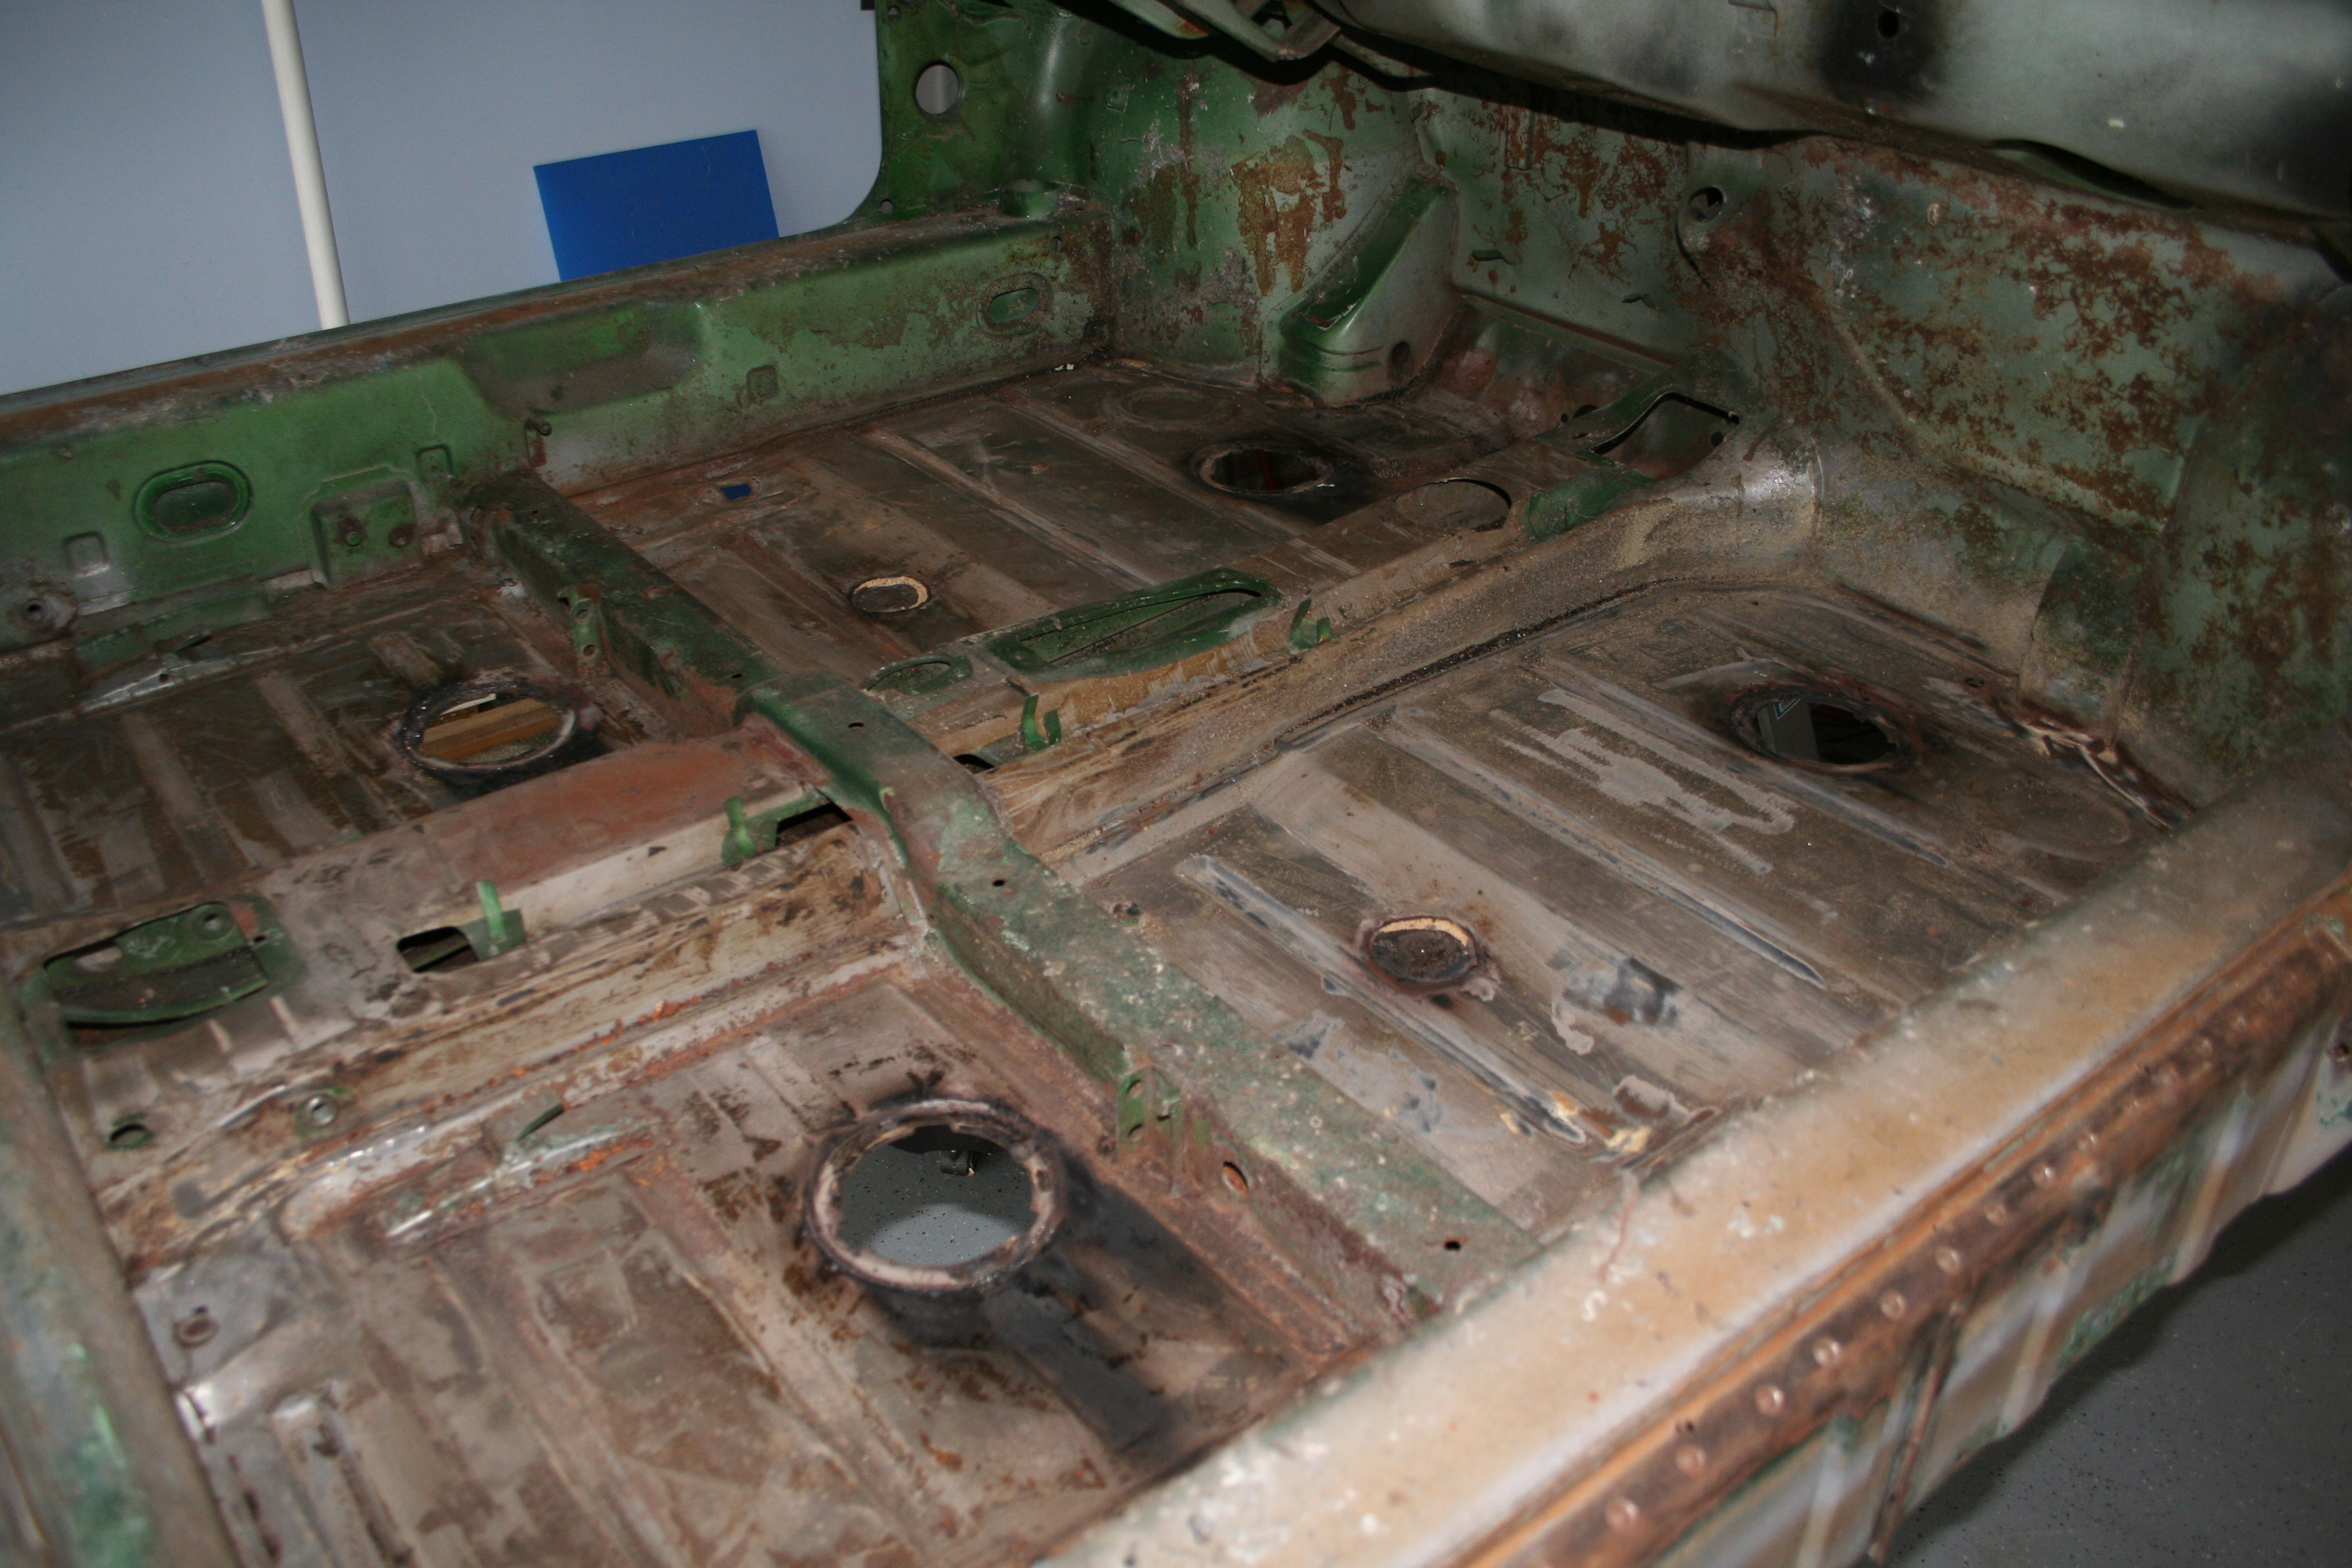
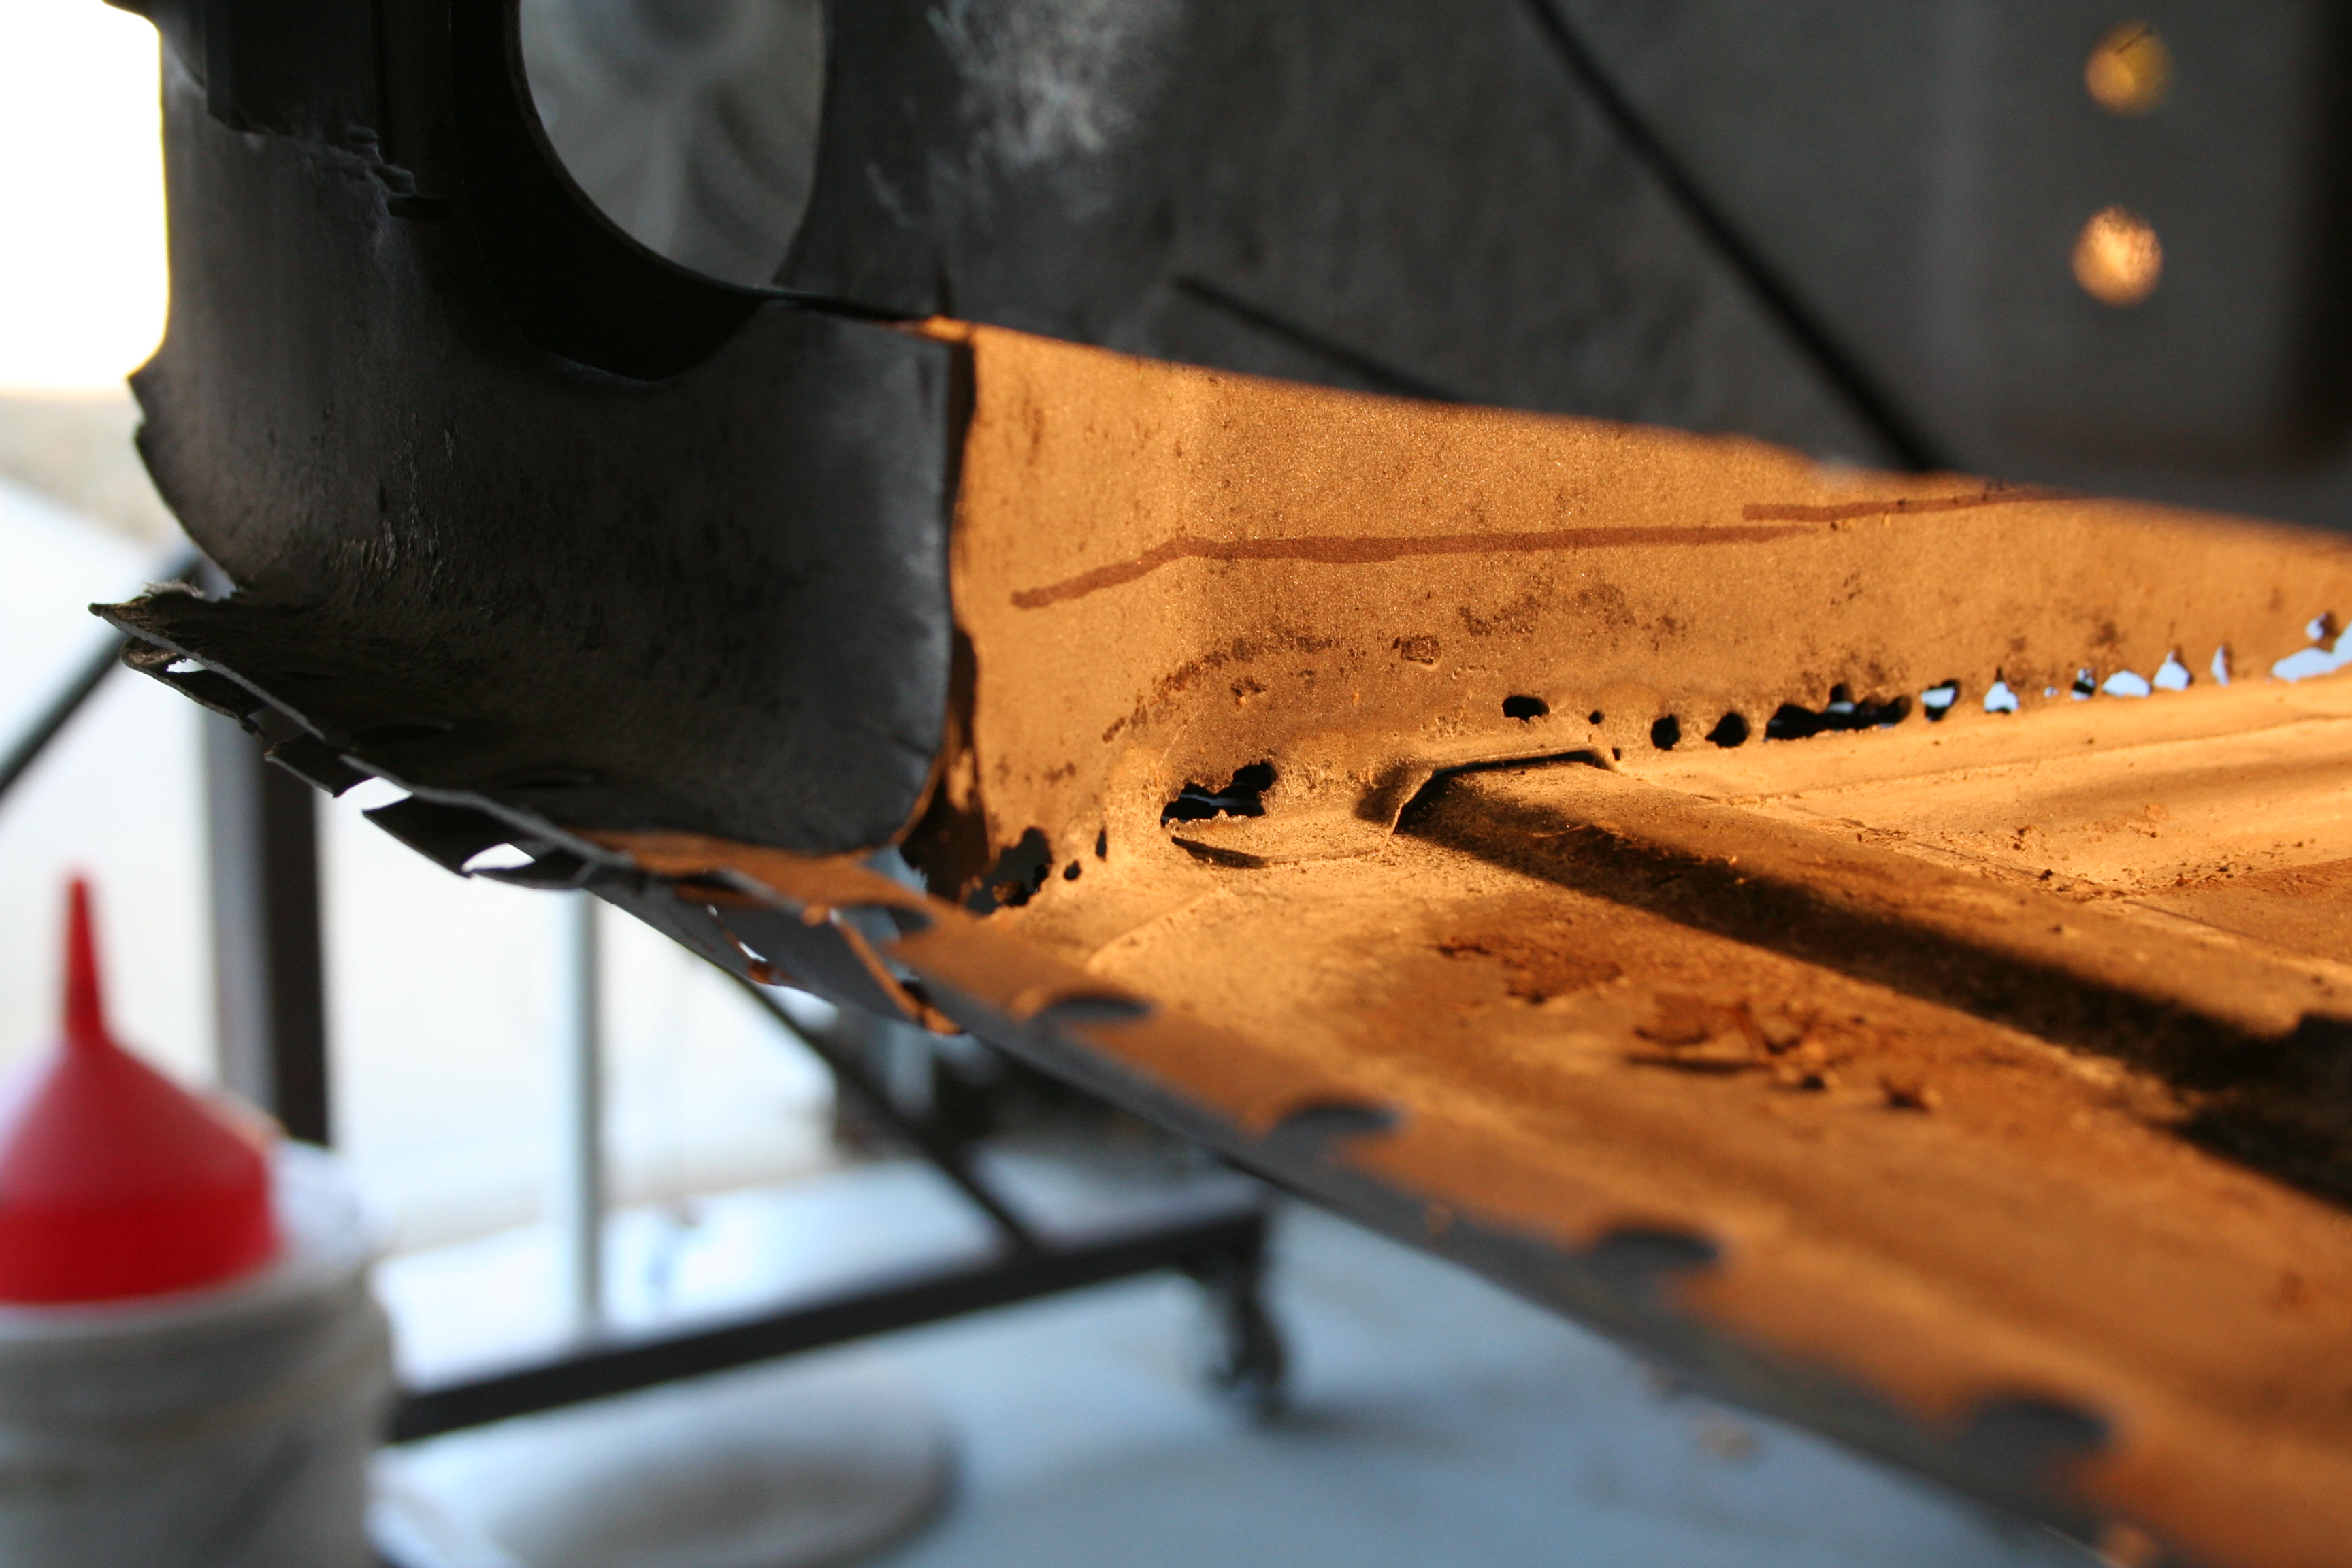
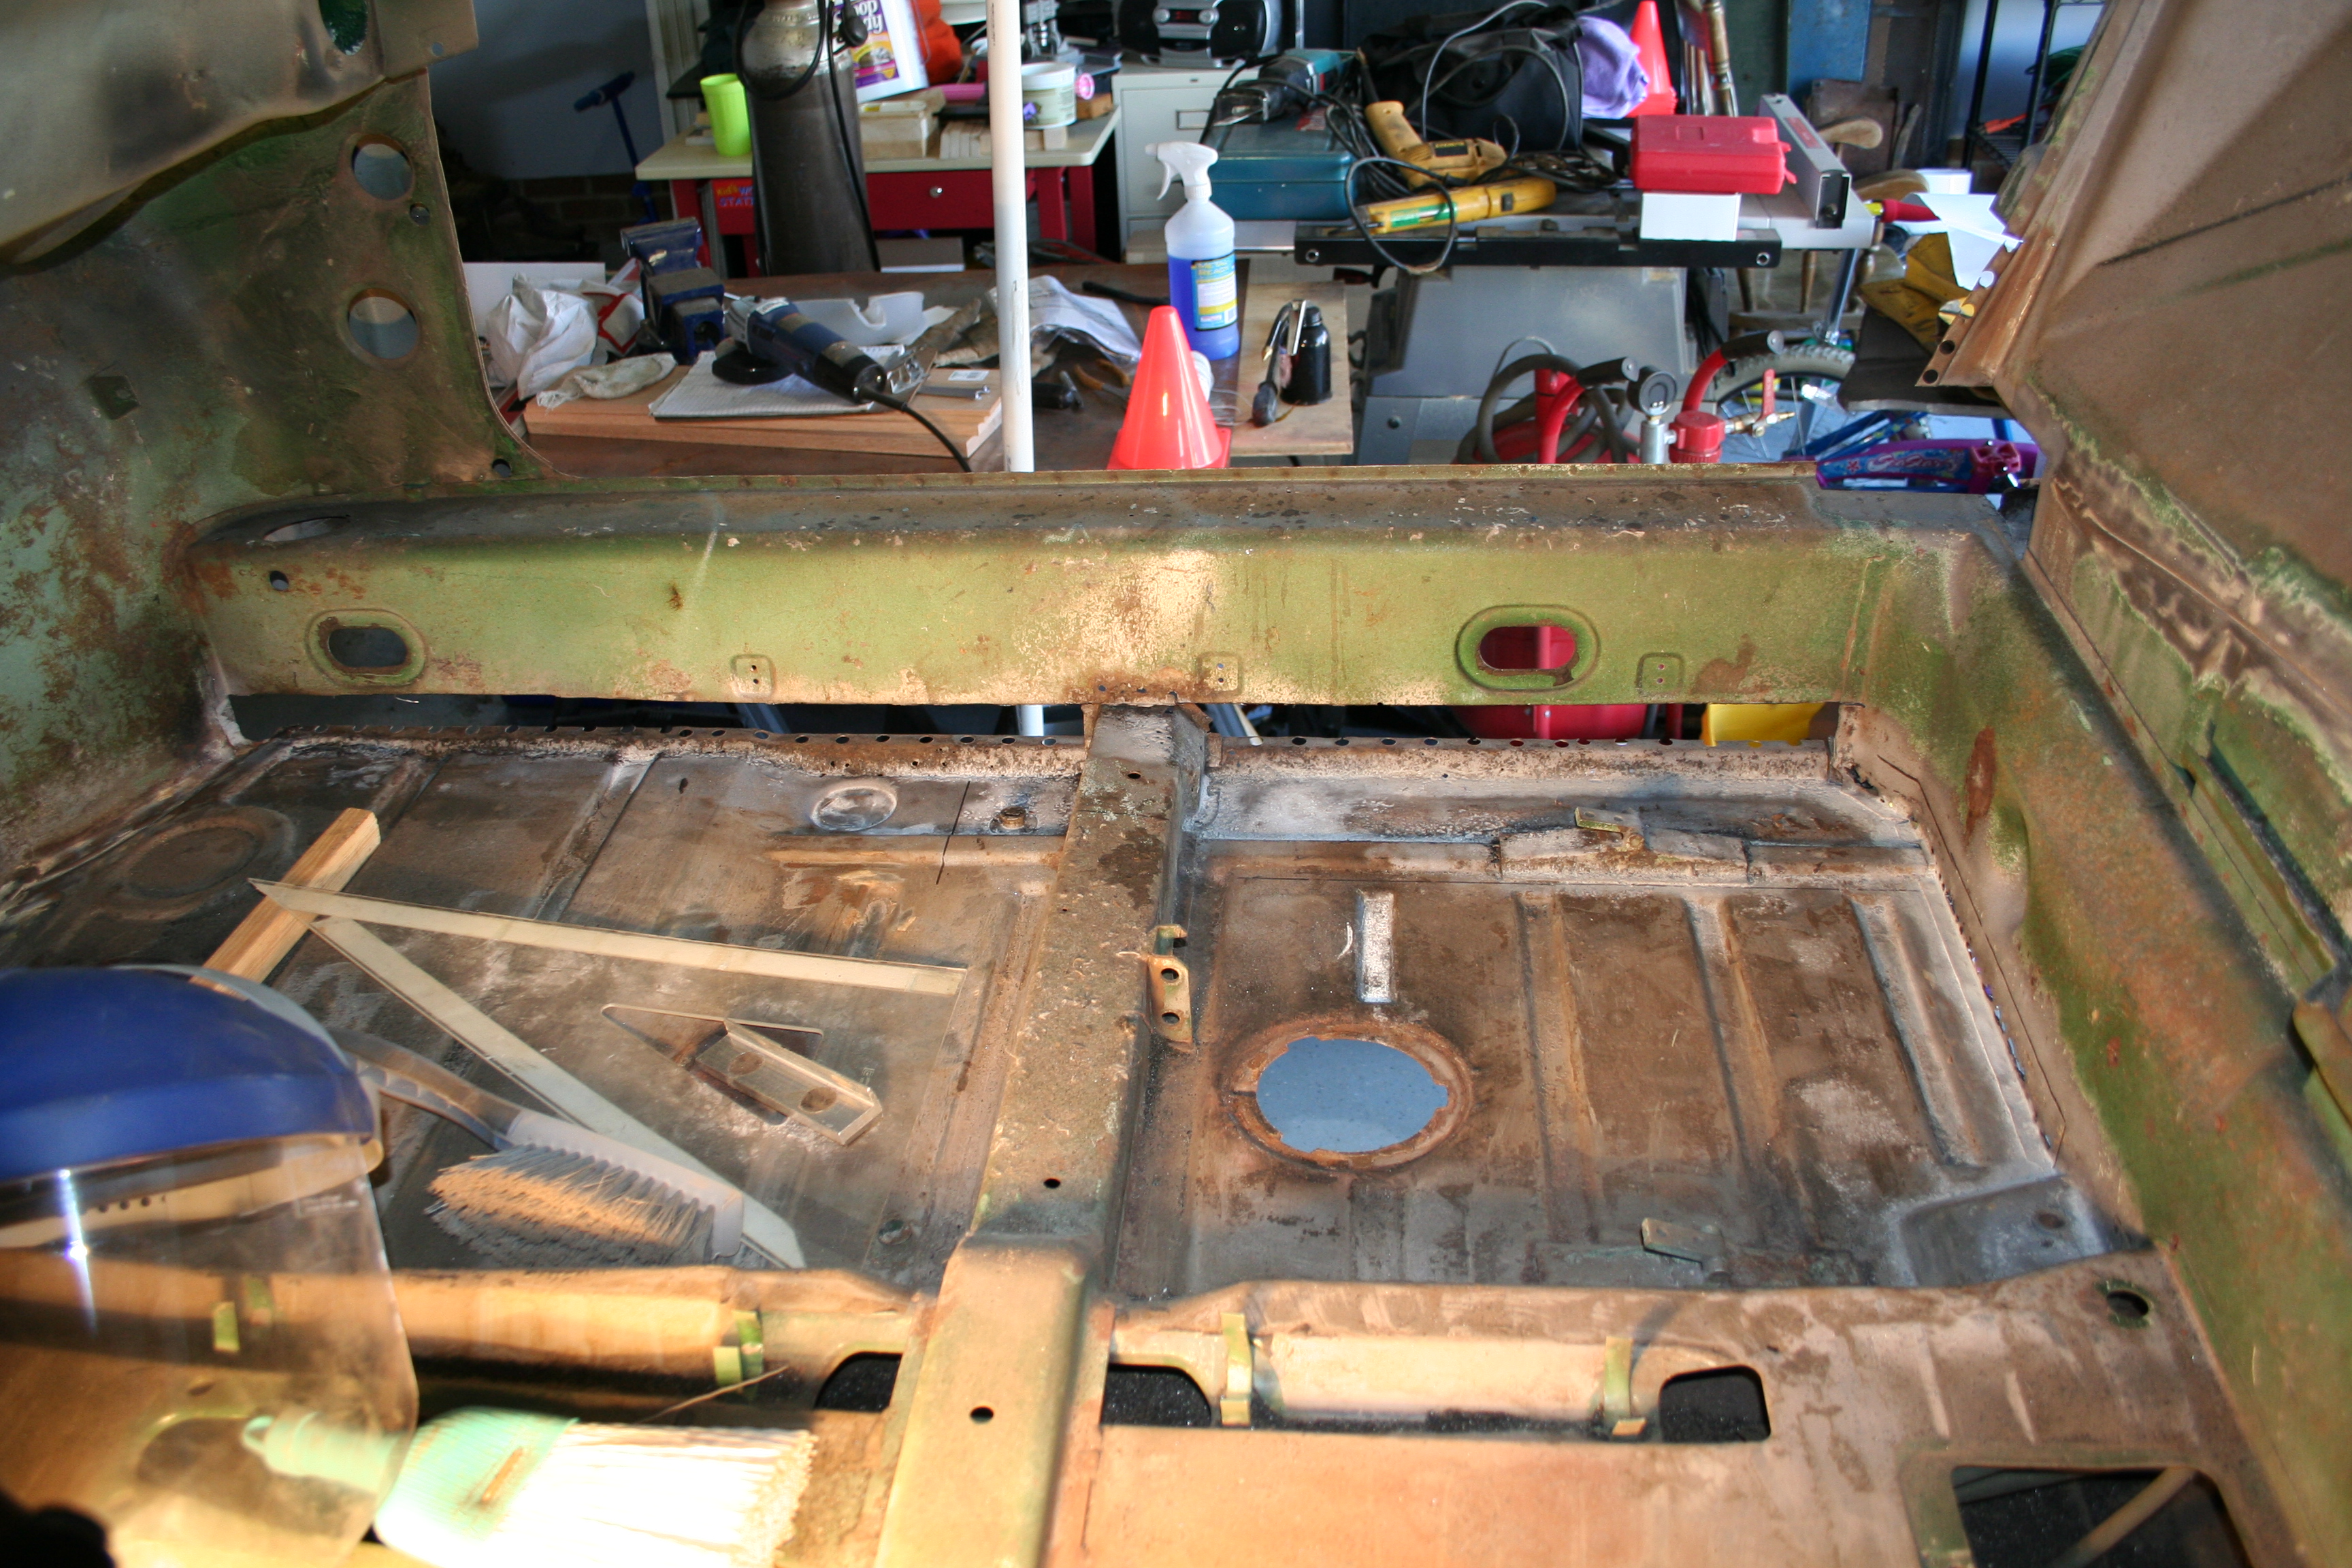
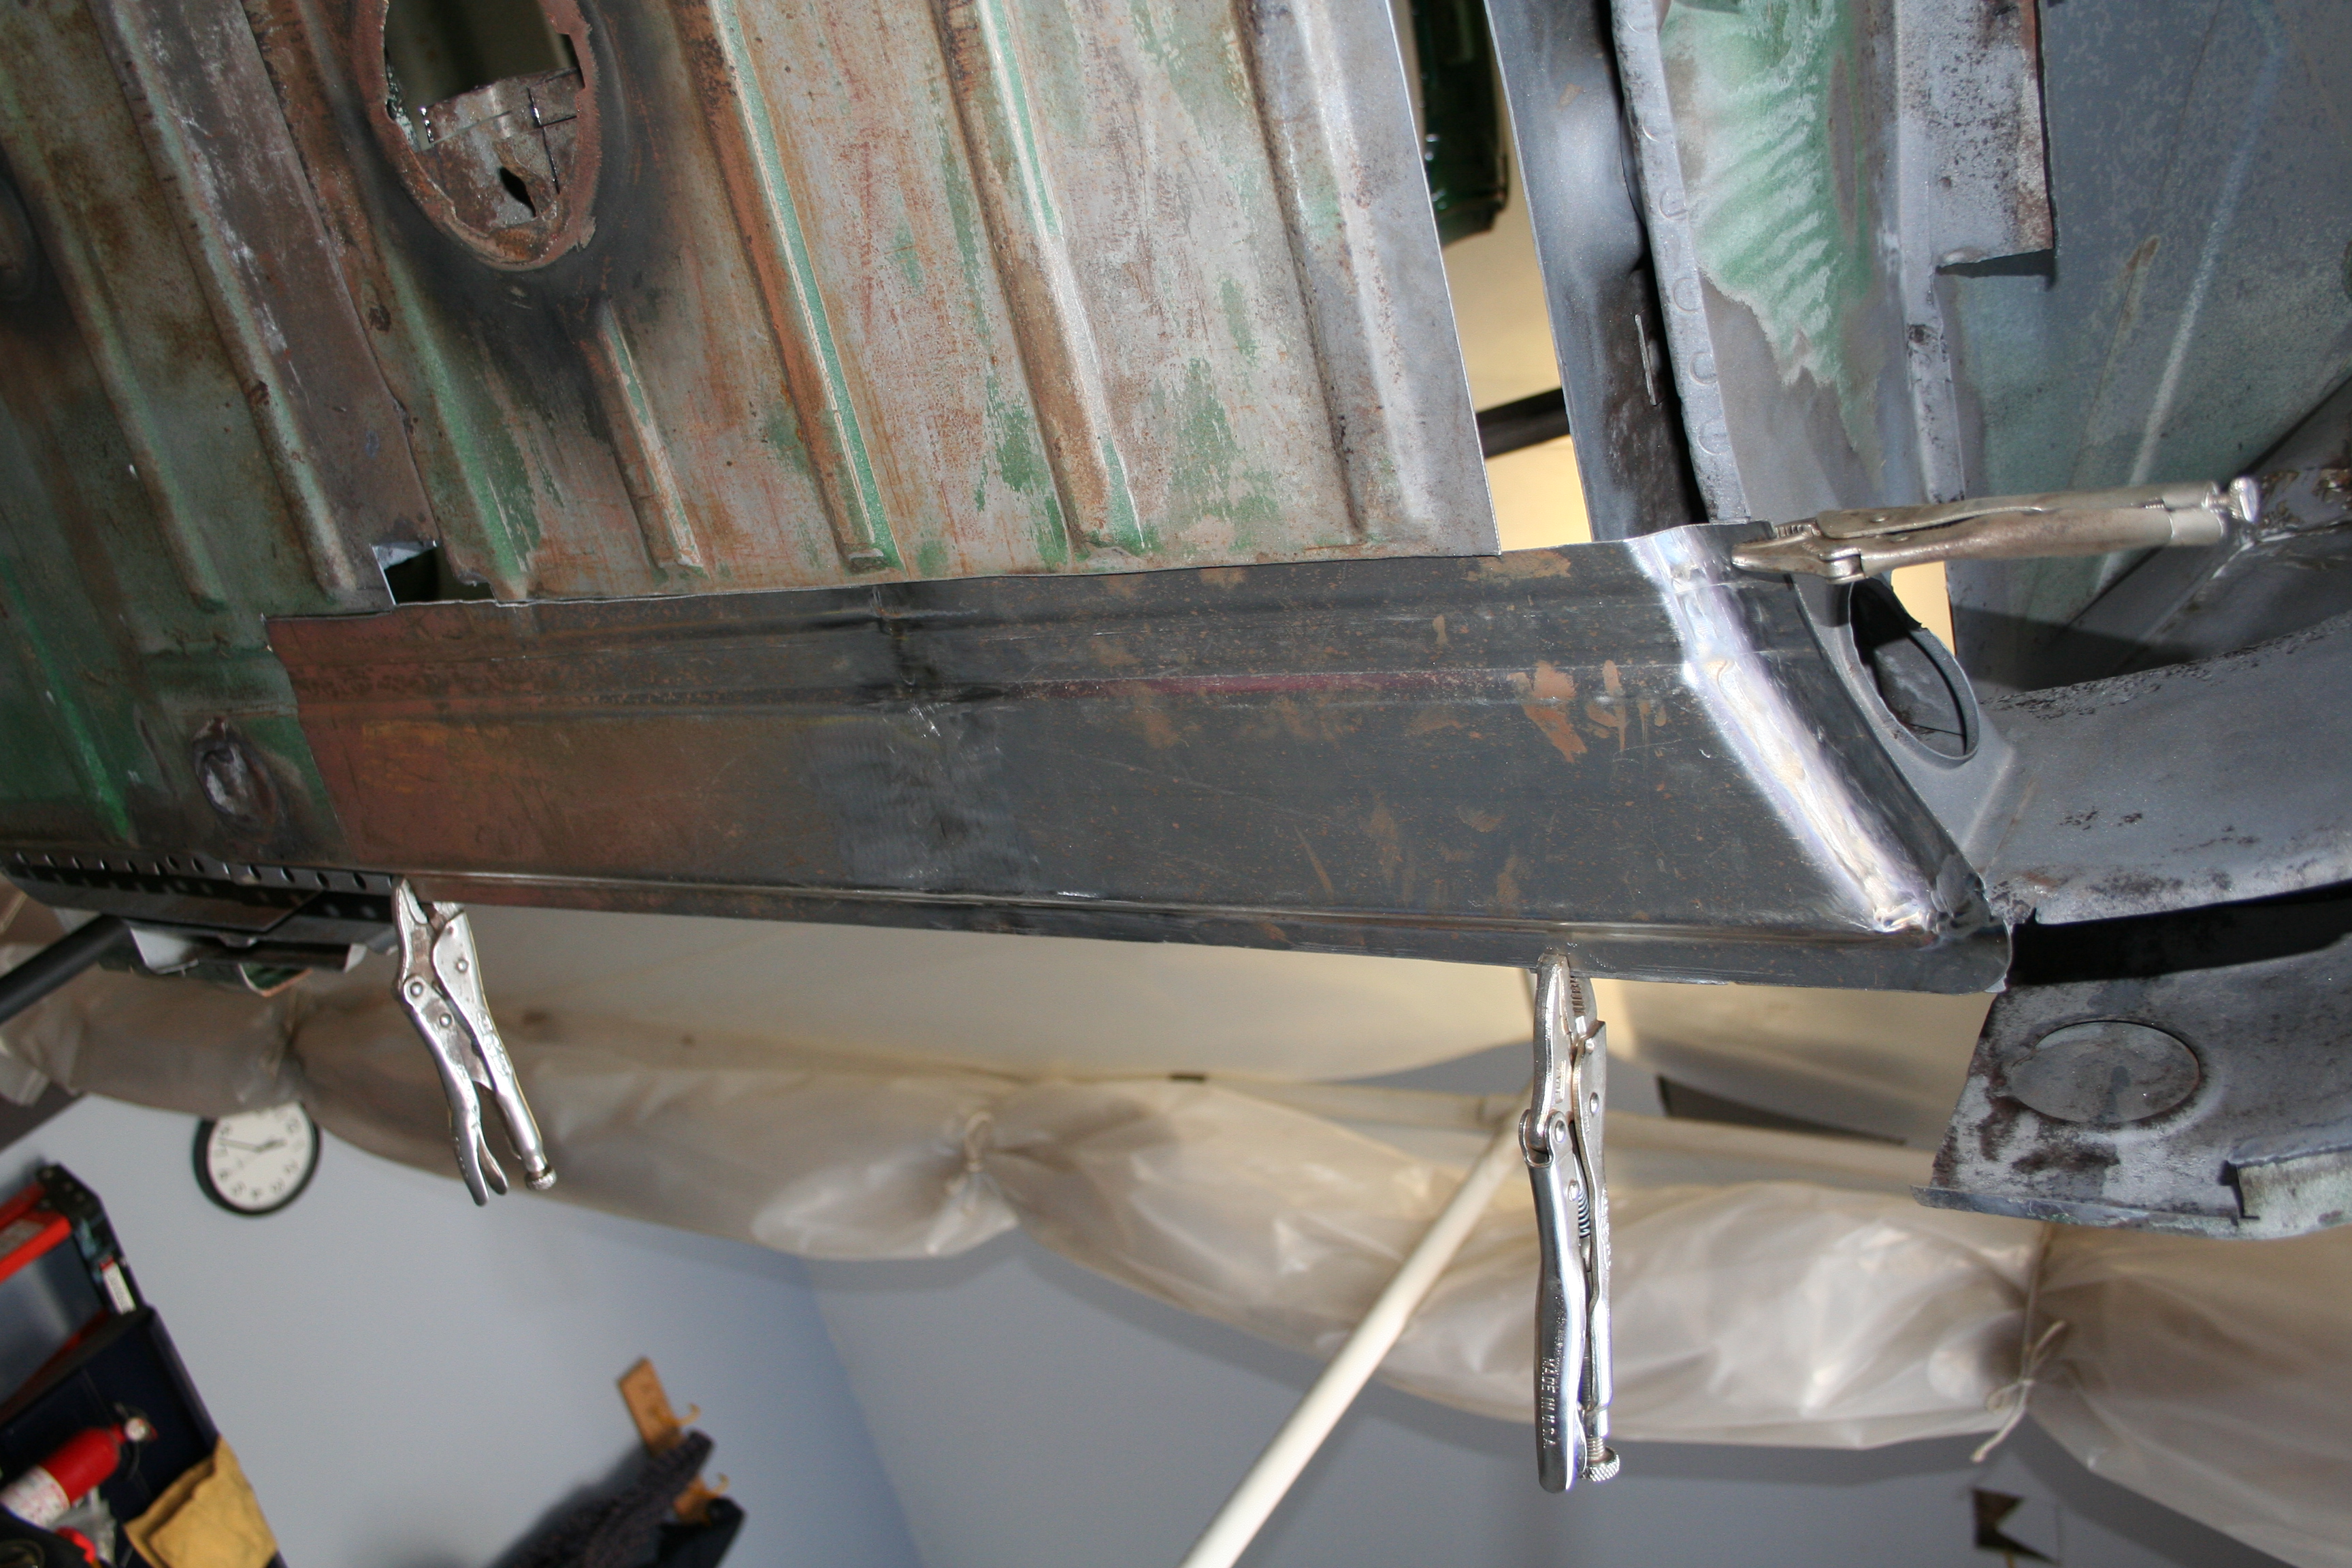
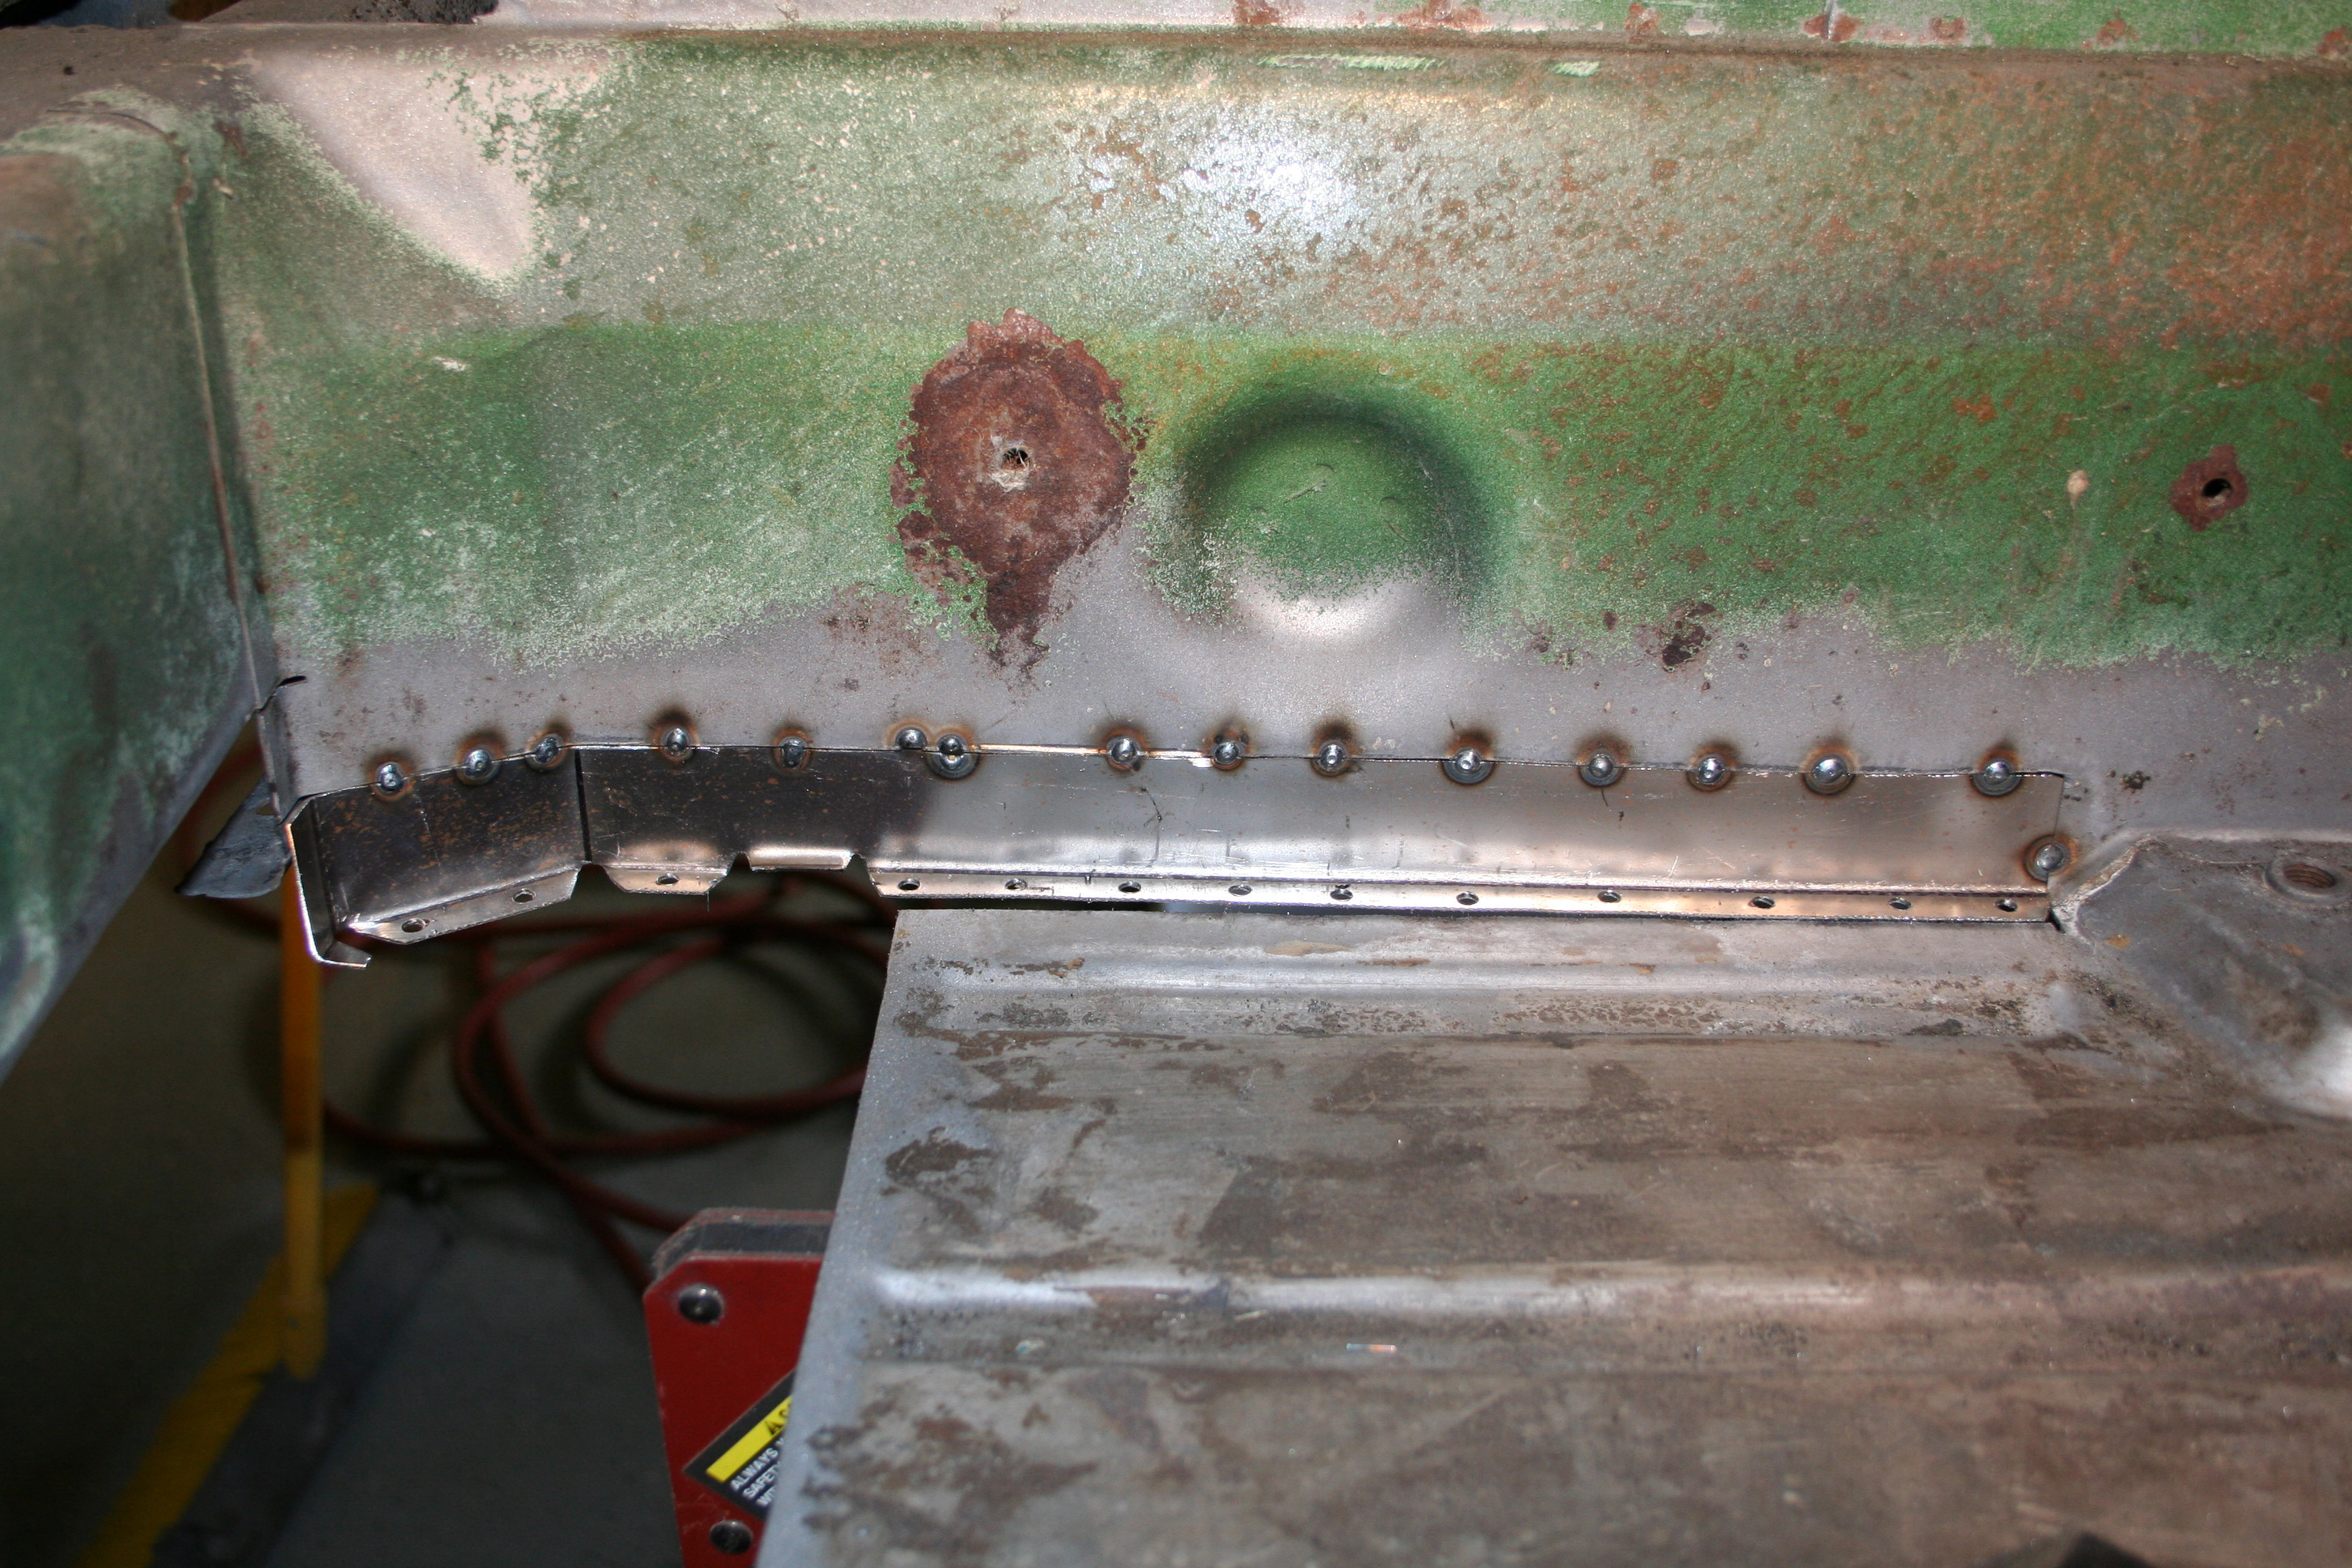
Overall view. 2/9/2008While working on the passenger side longitudinal, I realized that I really needed to weld the floor to the longitudinal before I buttoned it up and completed it. So that means I really need to address the passenger side floor before I do any more work on the longitudinal. This consisted of cutting out the bottom of the rear bulkhead as it was rusted where it meets the floor, removing pretty much the entire edge of the floor on the passenger side as it had pitting and pinholes. This also included the rail the holds the passenger seat as it was rusted through in places and part of the cross member that runs along the foot of the chair area.
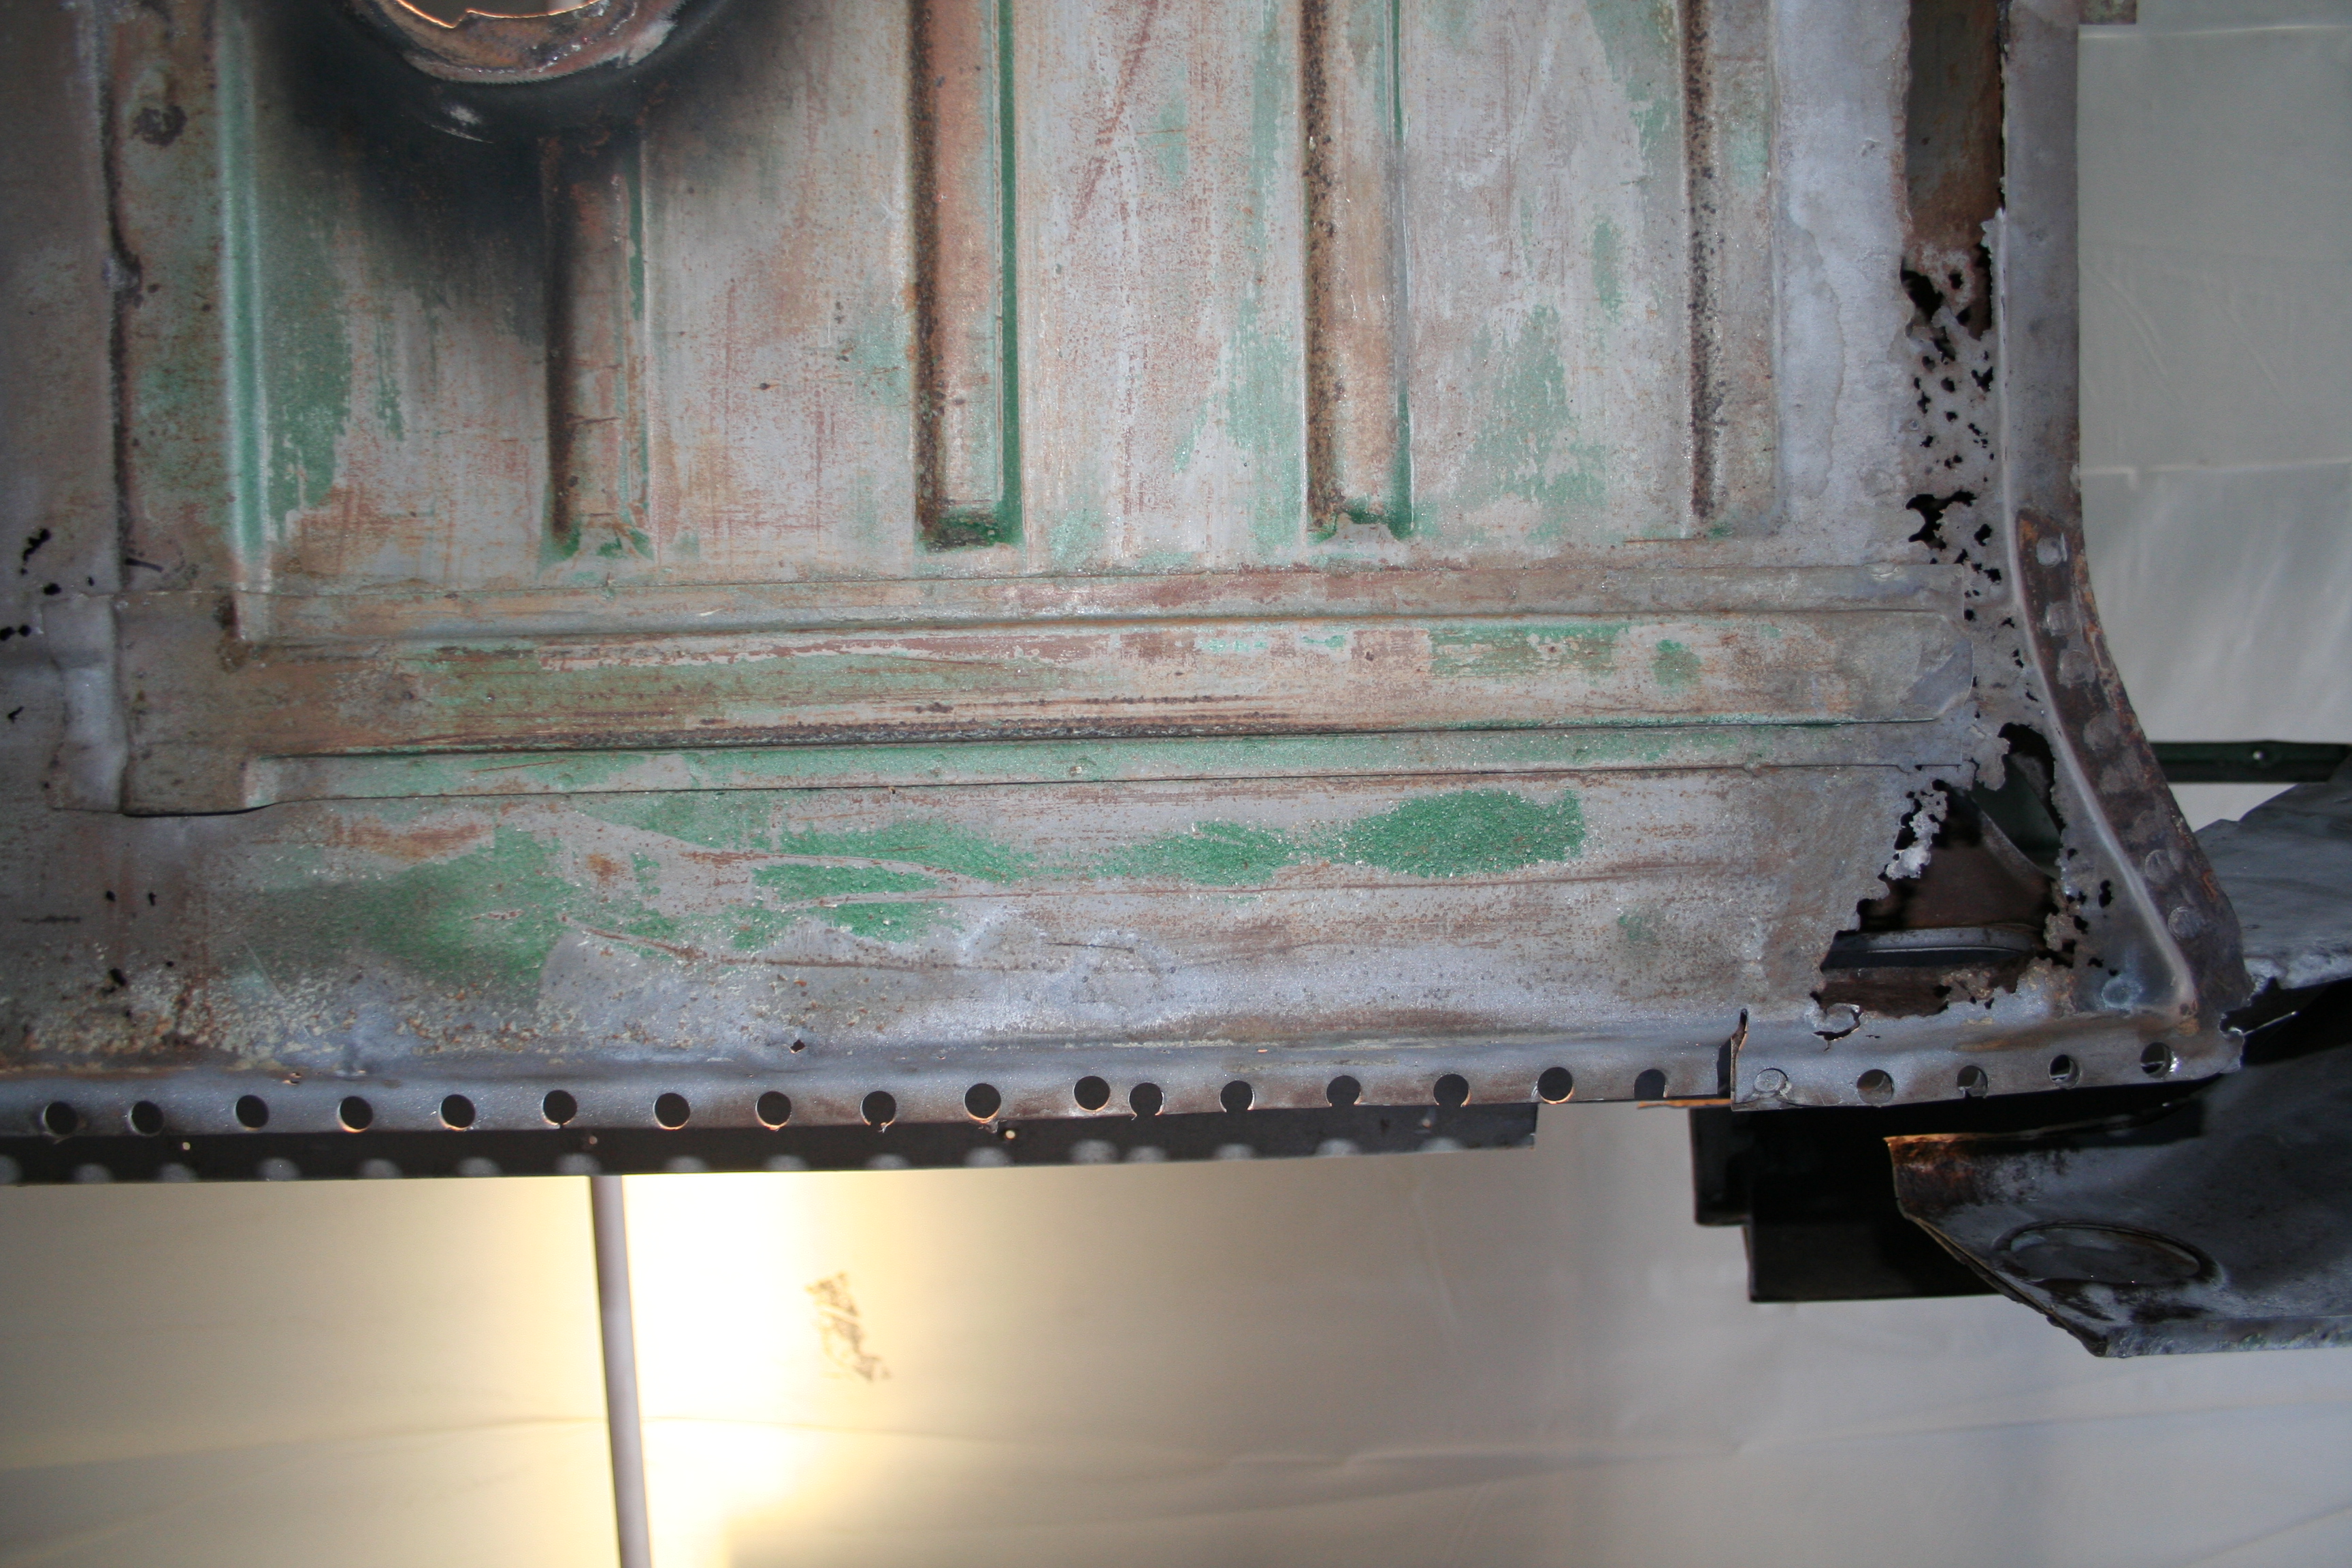
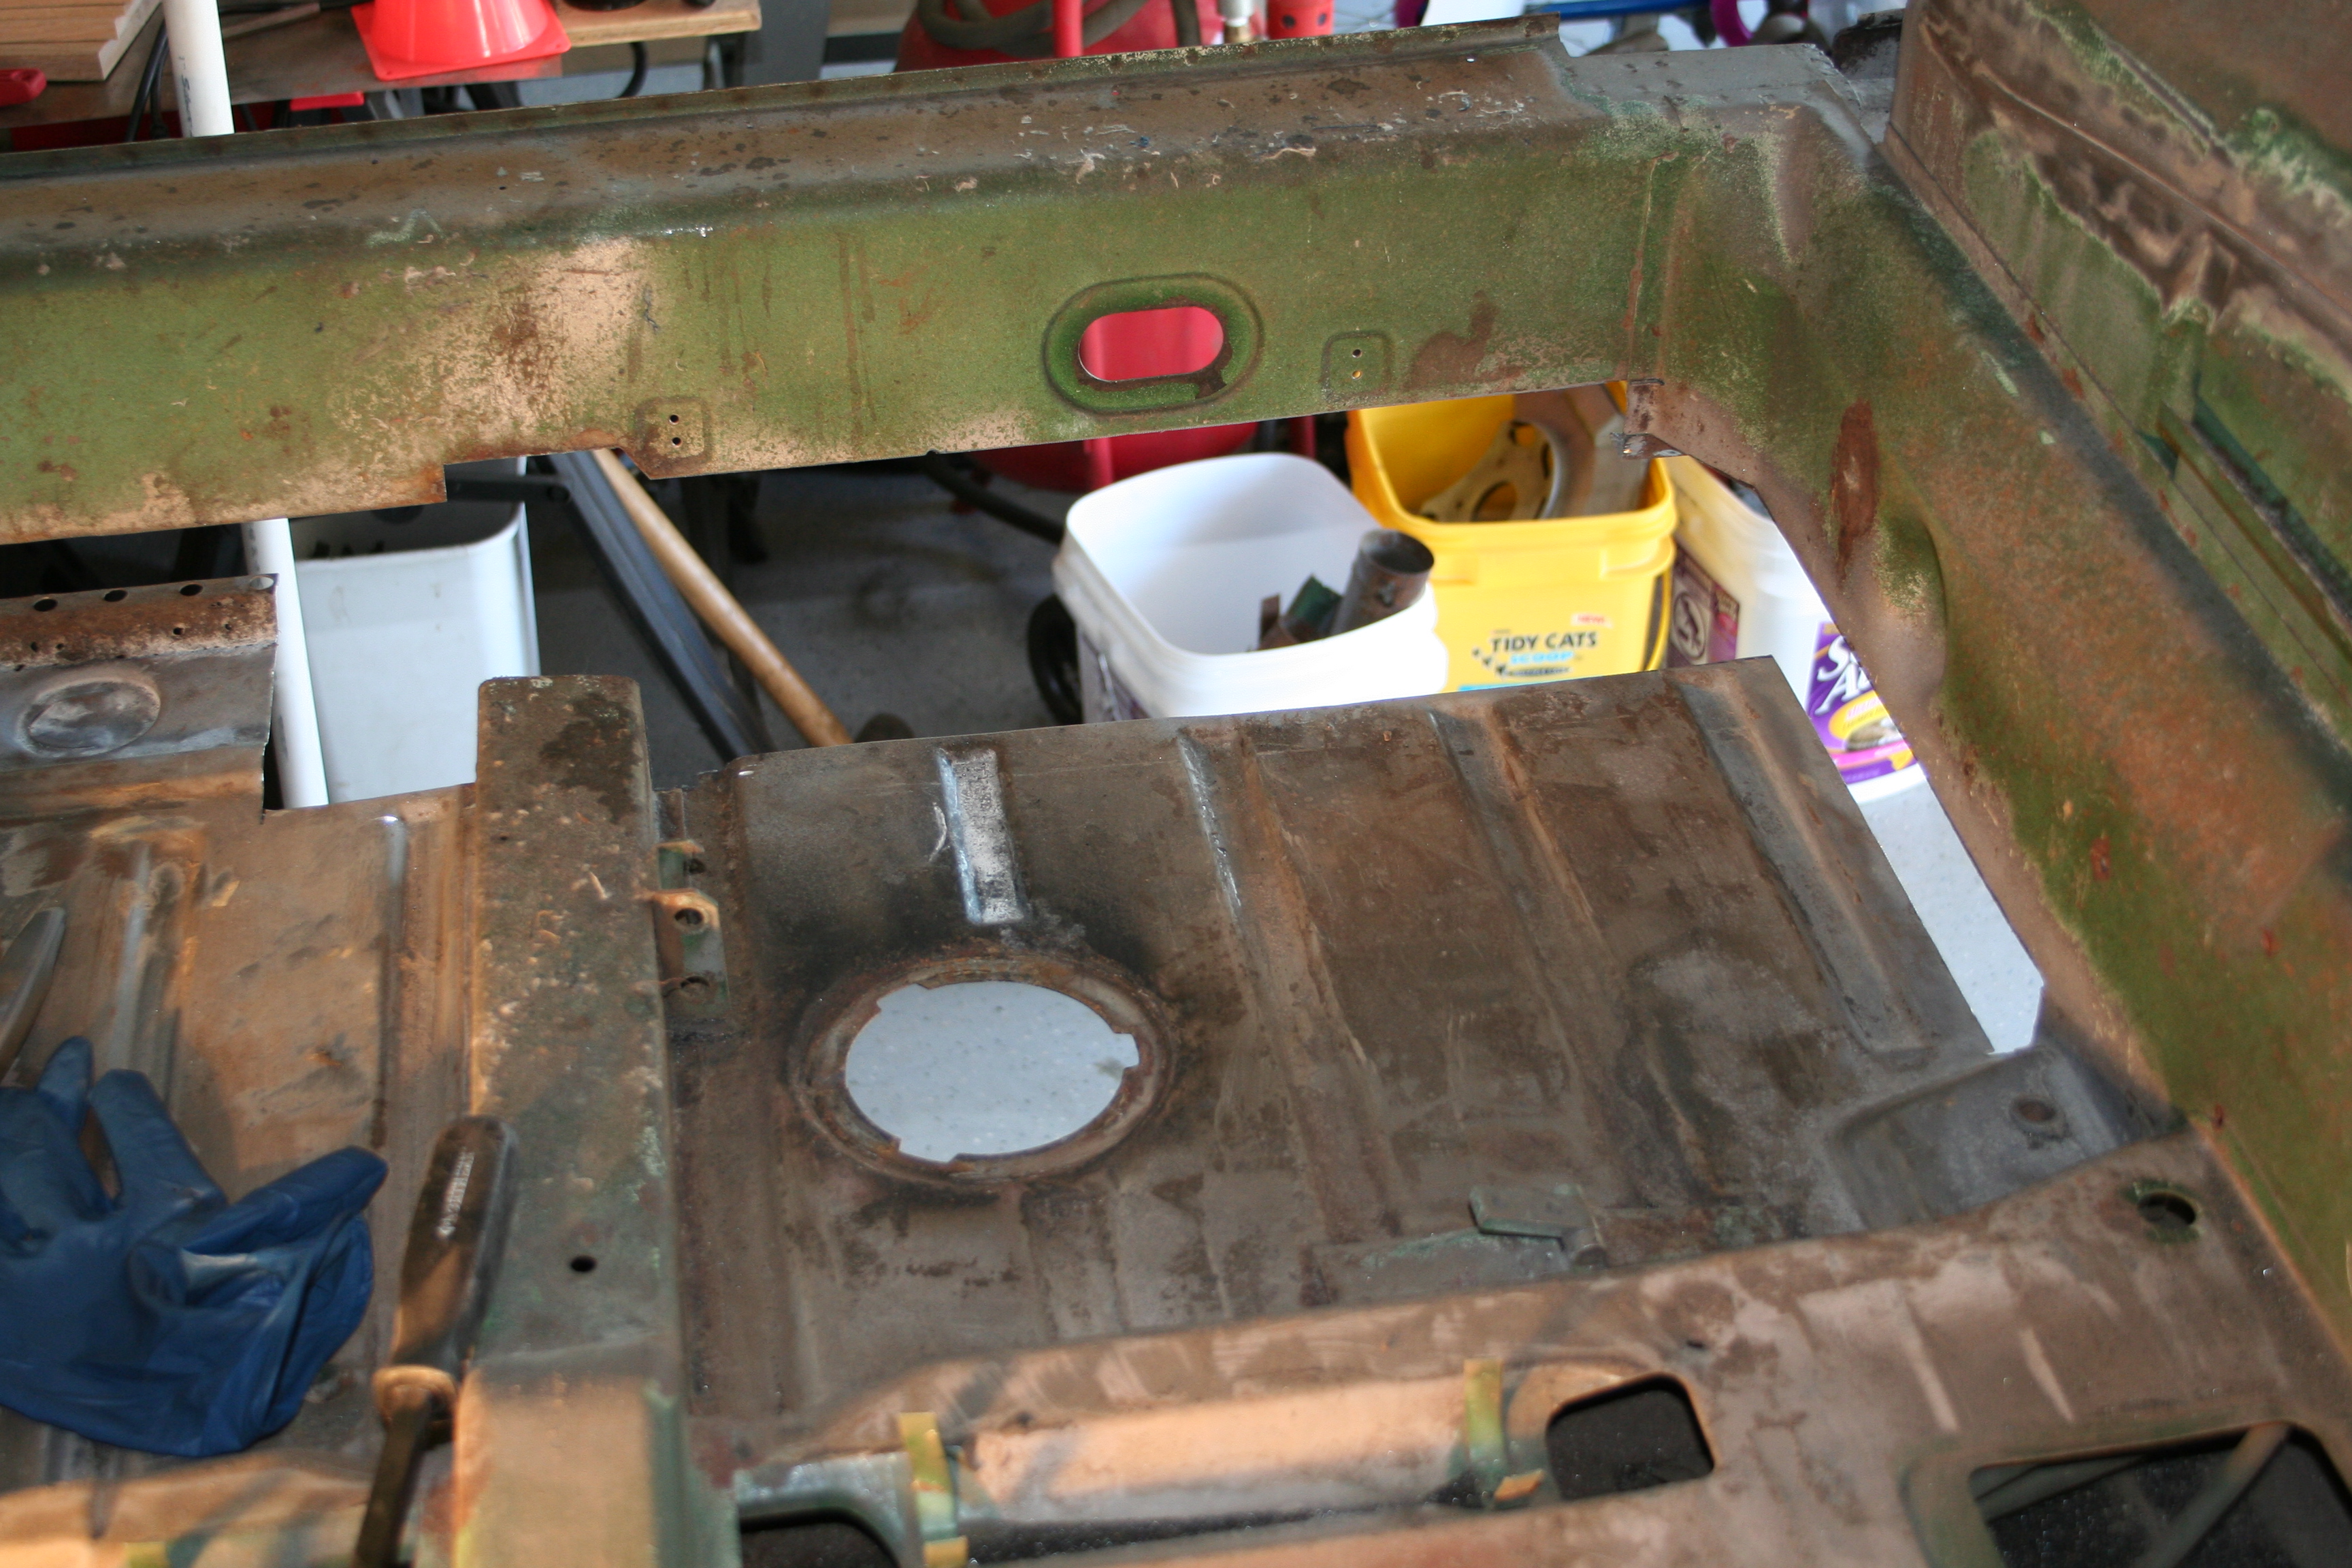
Here you can see cut marks of where I plan to cut.
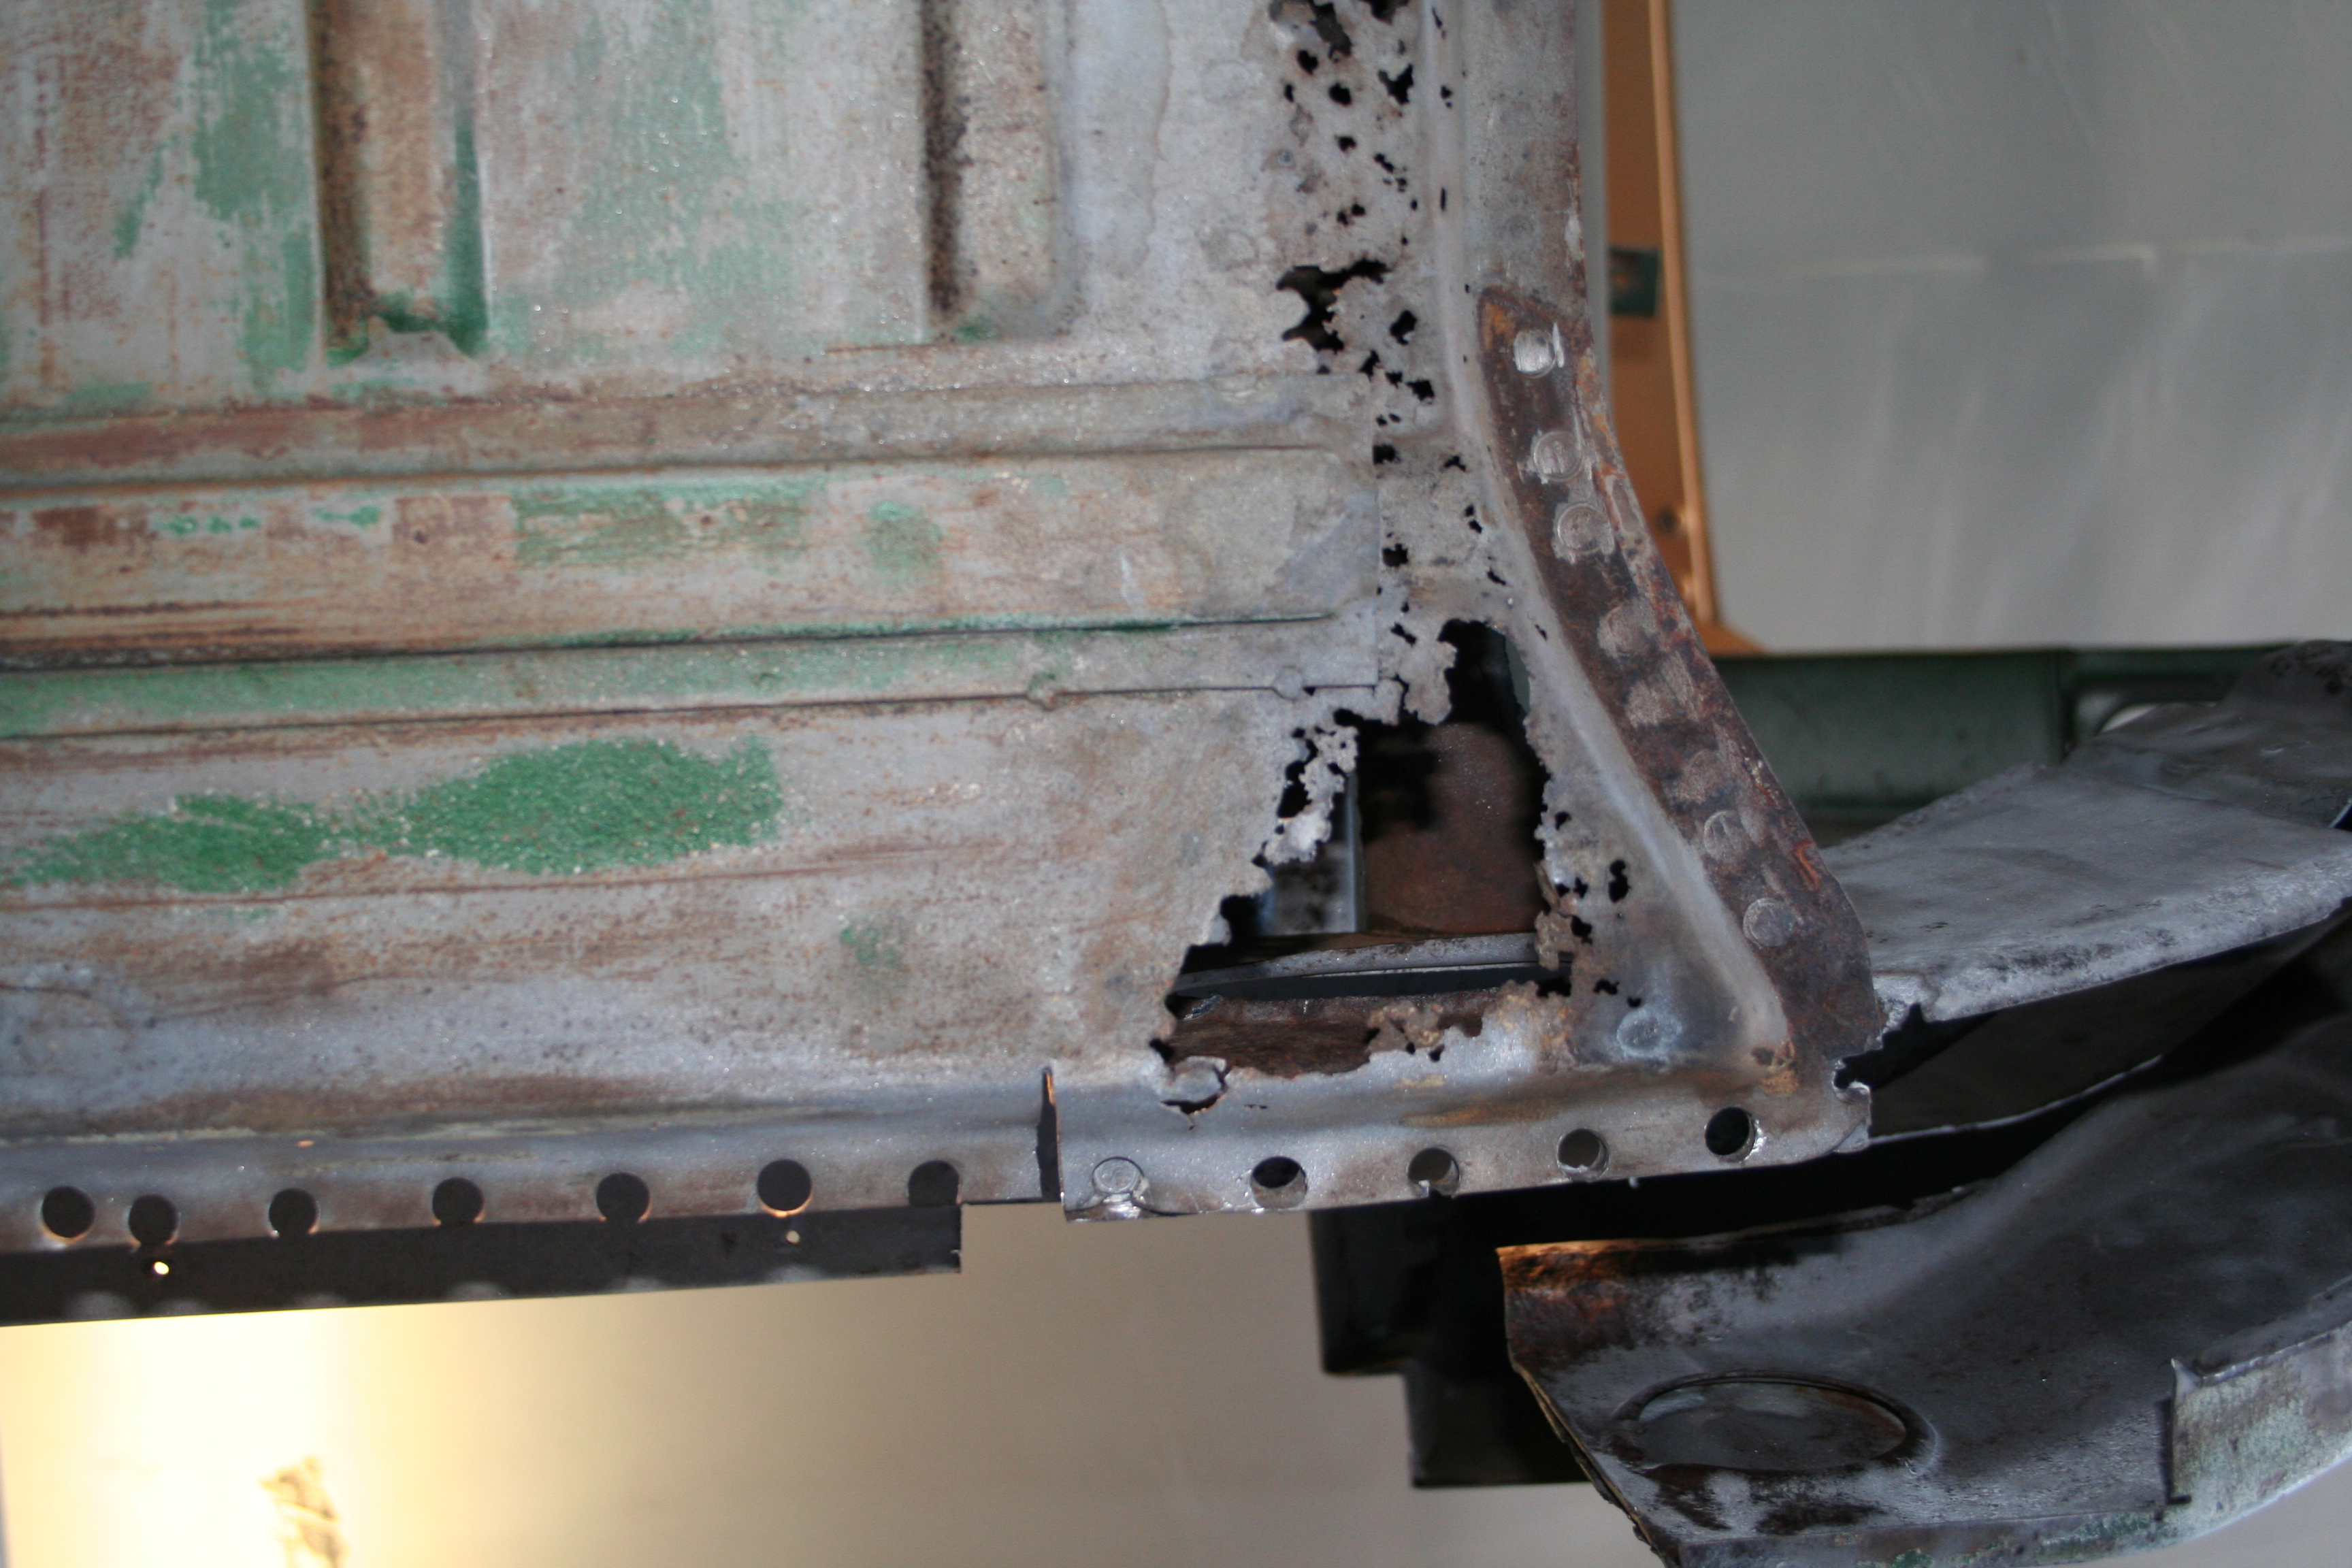
More cut marks including sectioning out part of the cross member as it is badly rusted on the passenger side. I also wanted to get in and try to evaluate the health of floor under the cross member.
View from outside to show how it intersects with the longitudinal
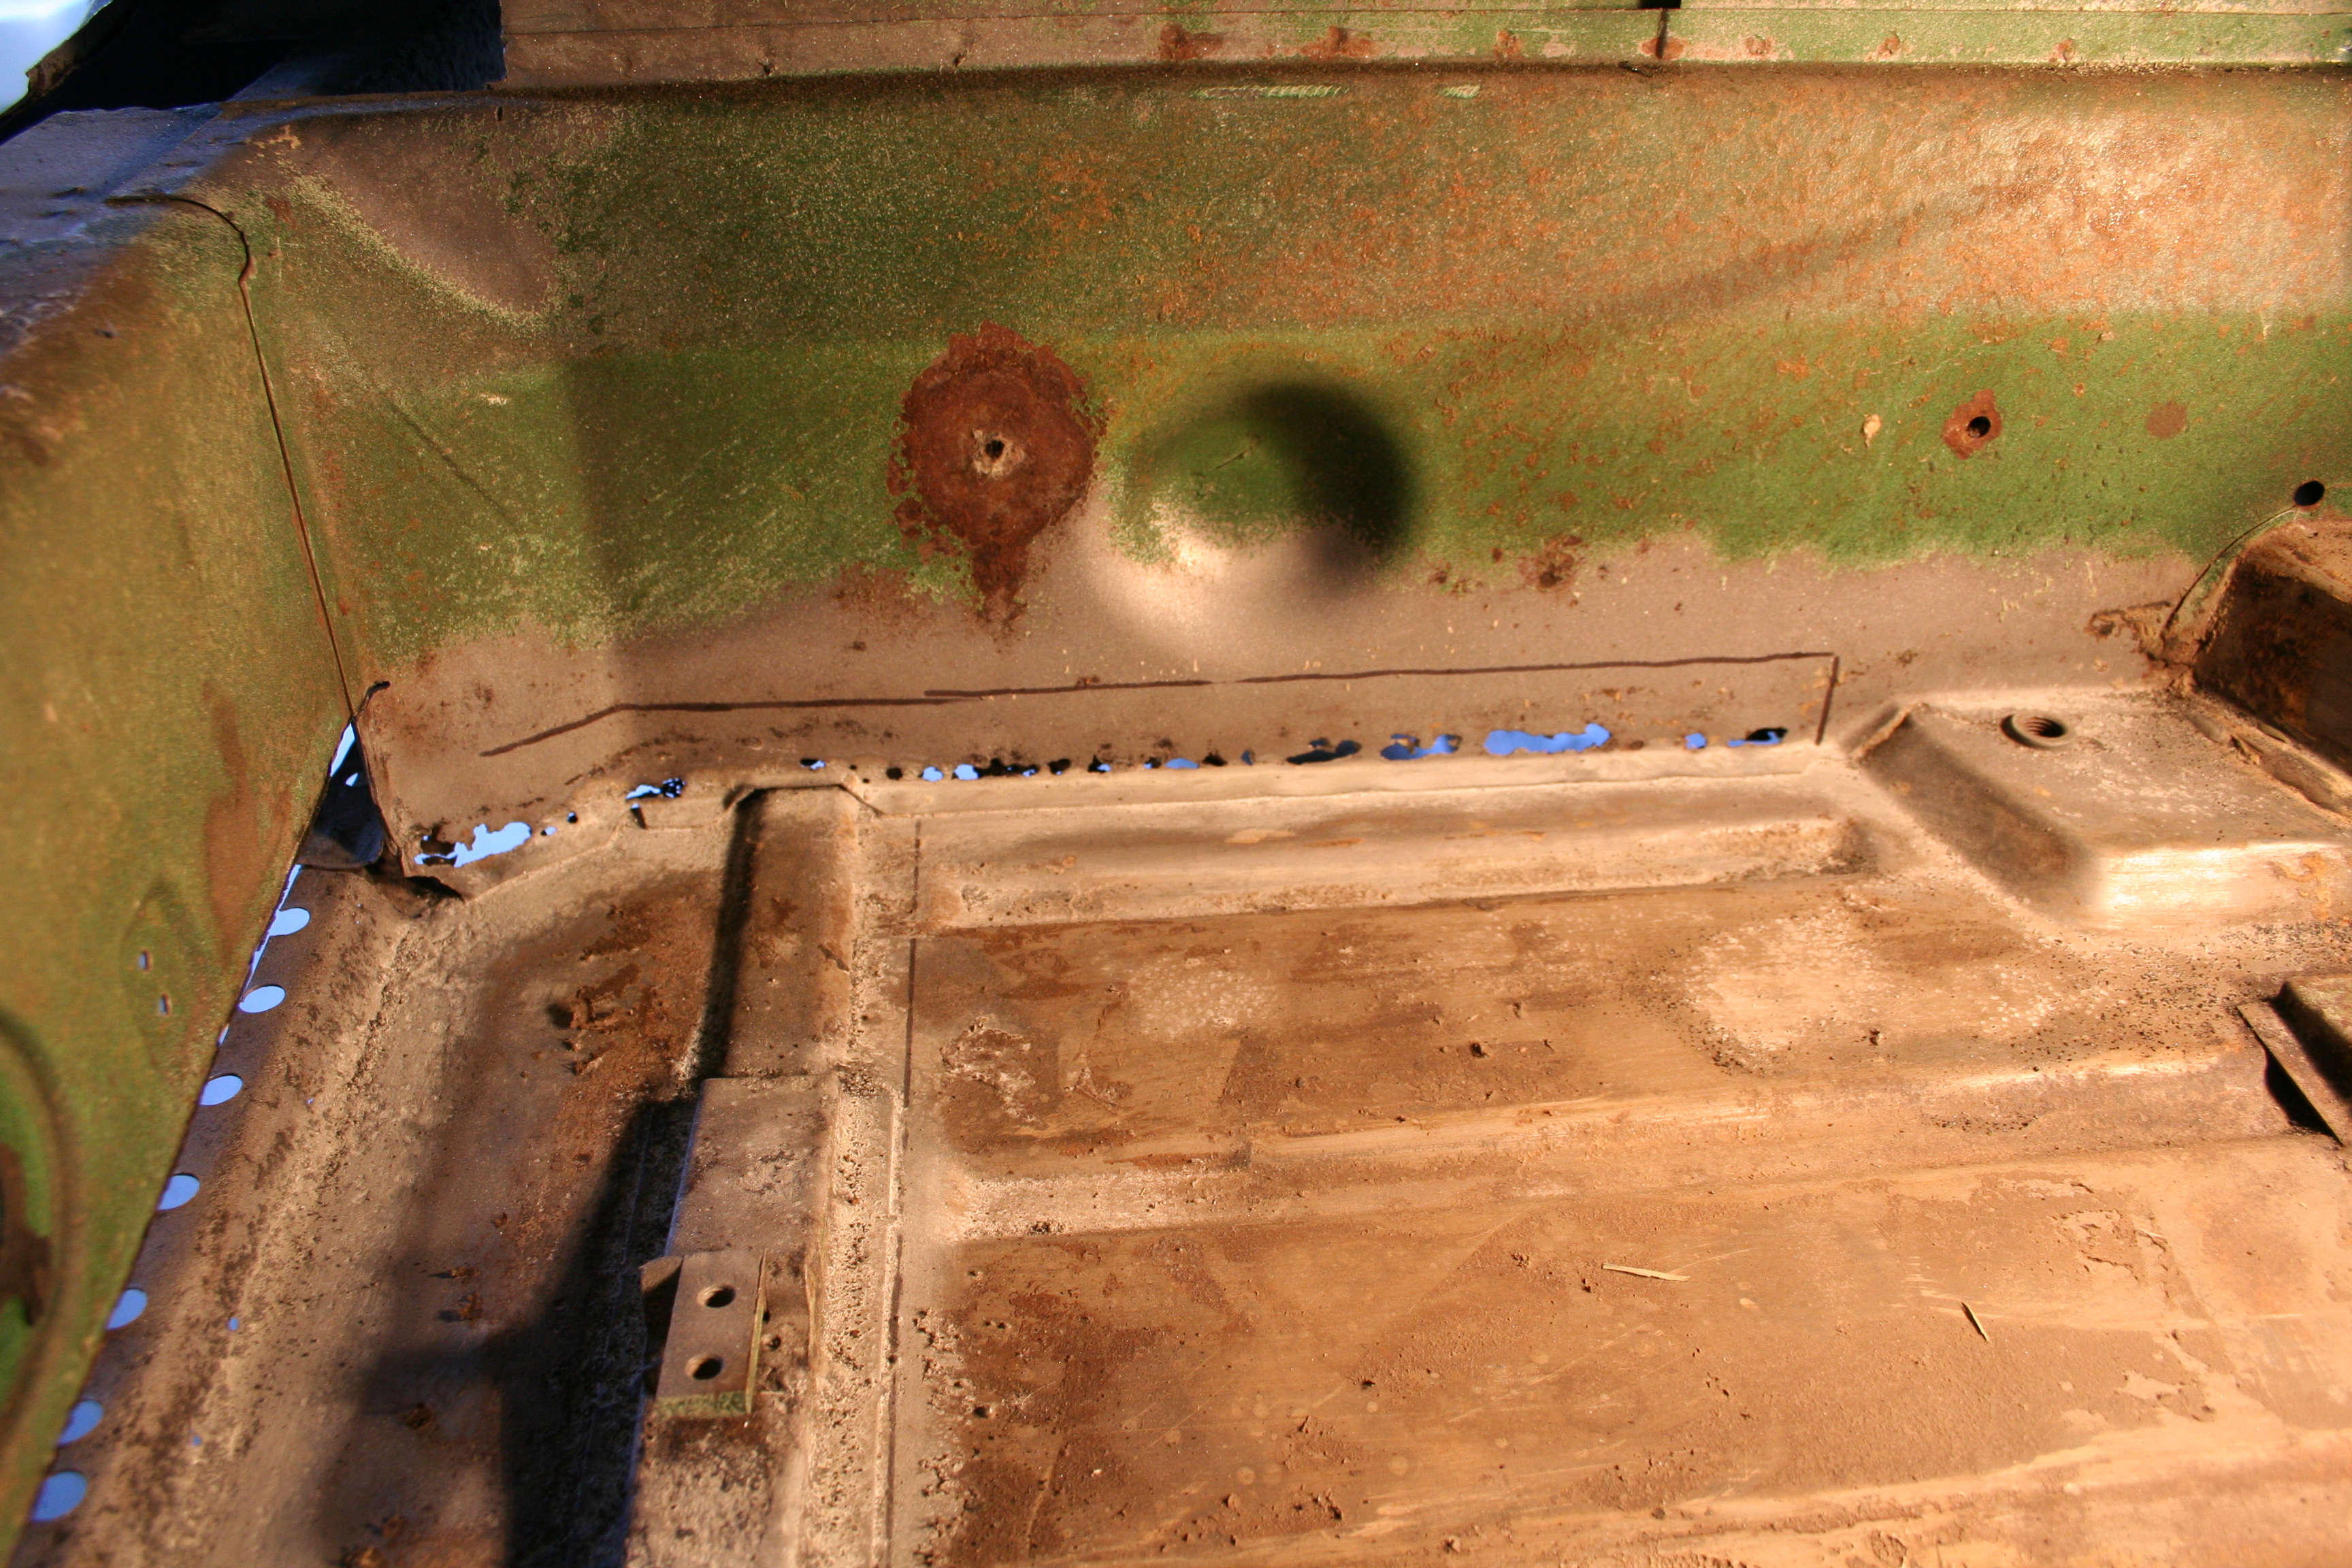
Views from the bottom that shows how badly rusted it was below the hollow bulkhead.
Back of the bulkhead
Inside looking out prior to cutting.
All cut out.
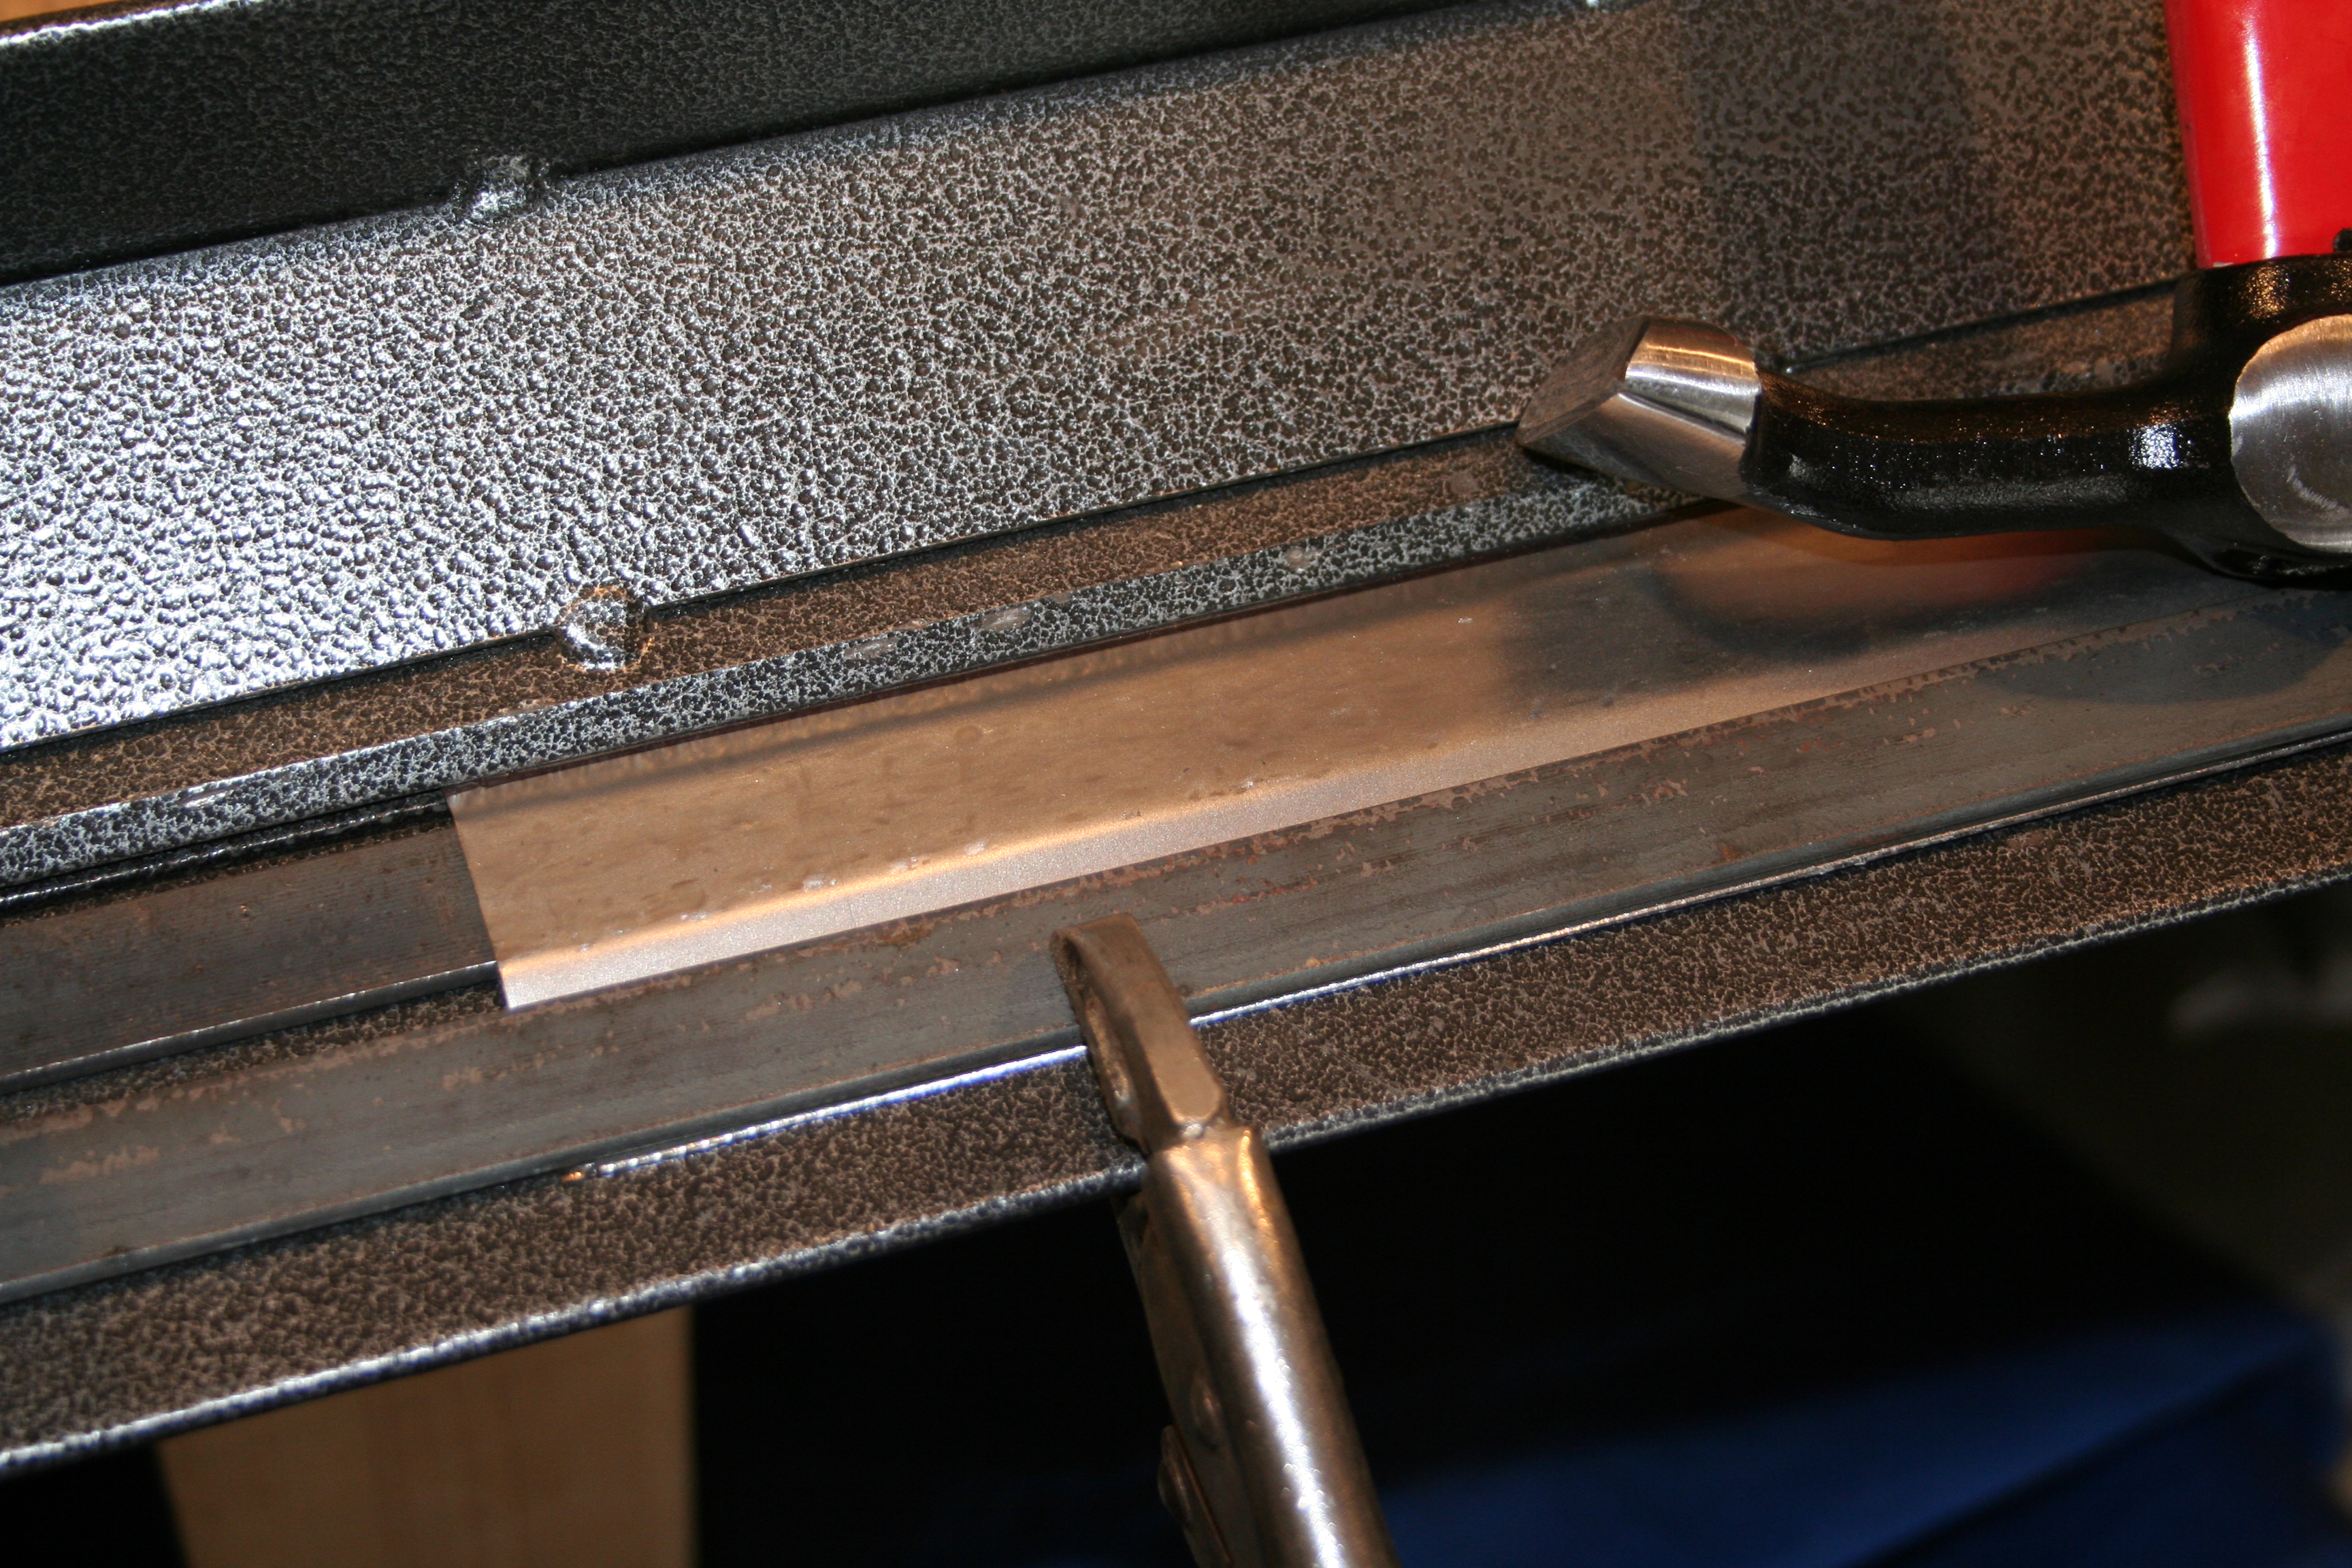
Looking up into the hollow bulkhead. It actually looks good inside. 2/23/2008 - 2/24/2008Ok, I am ready to form the replacement for the section near the bulkhead and under the seat. One real challenge is that I haven't figured out an easy way to create "S" bends on the metal break if they are very small. To create a channel, you need to sets of S bends. What I have found is that I may be able to make the two outside bends, but then I have to hammer form the deep part of the channel. Luckily it seems that the metal bar I have on hand works pretty well for this.
Here I am hammer forming (with use of a clamp to hold channel over form. I think in a "real" shop you wouldn't hammer form directly on your metal brake. But this is a cheap brake and if it lasts the life of this one project I will be happy.
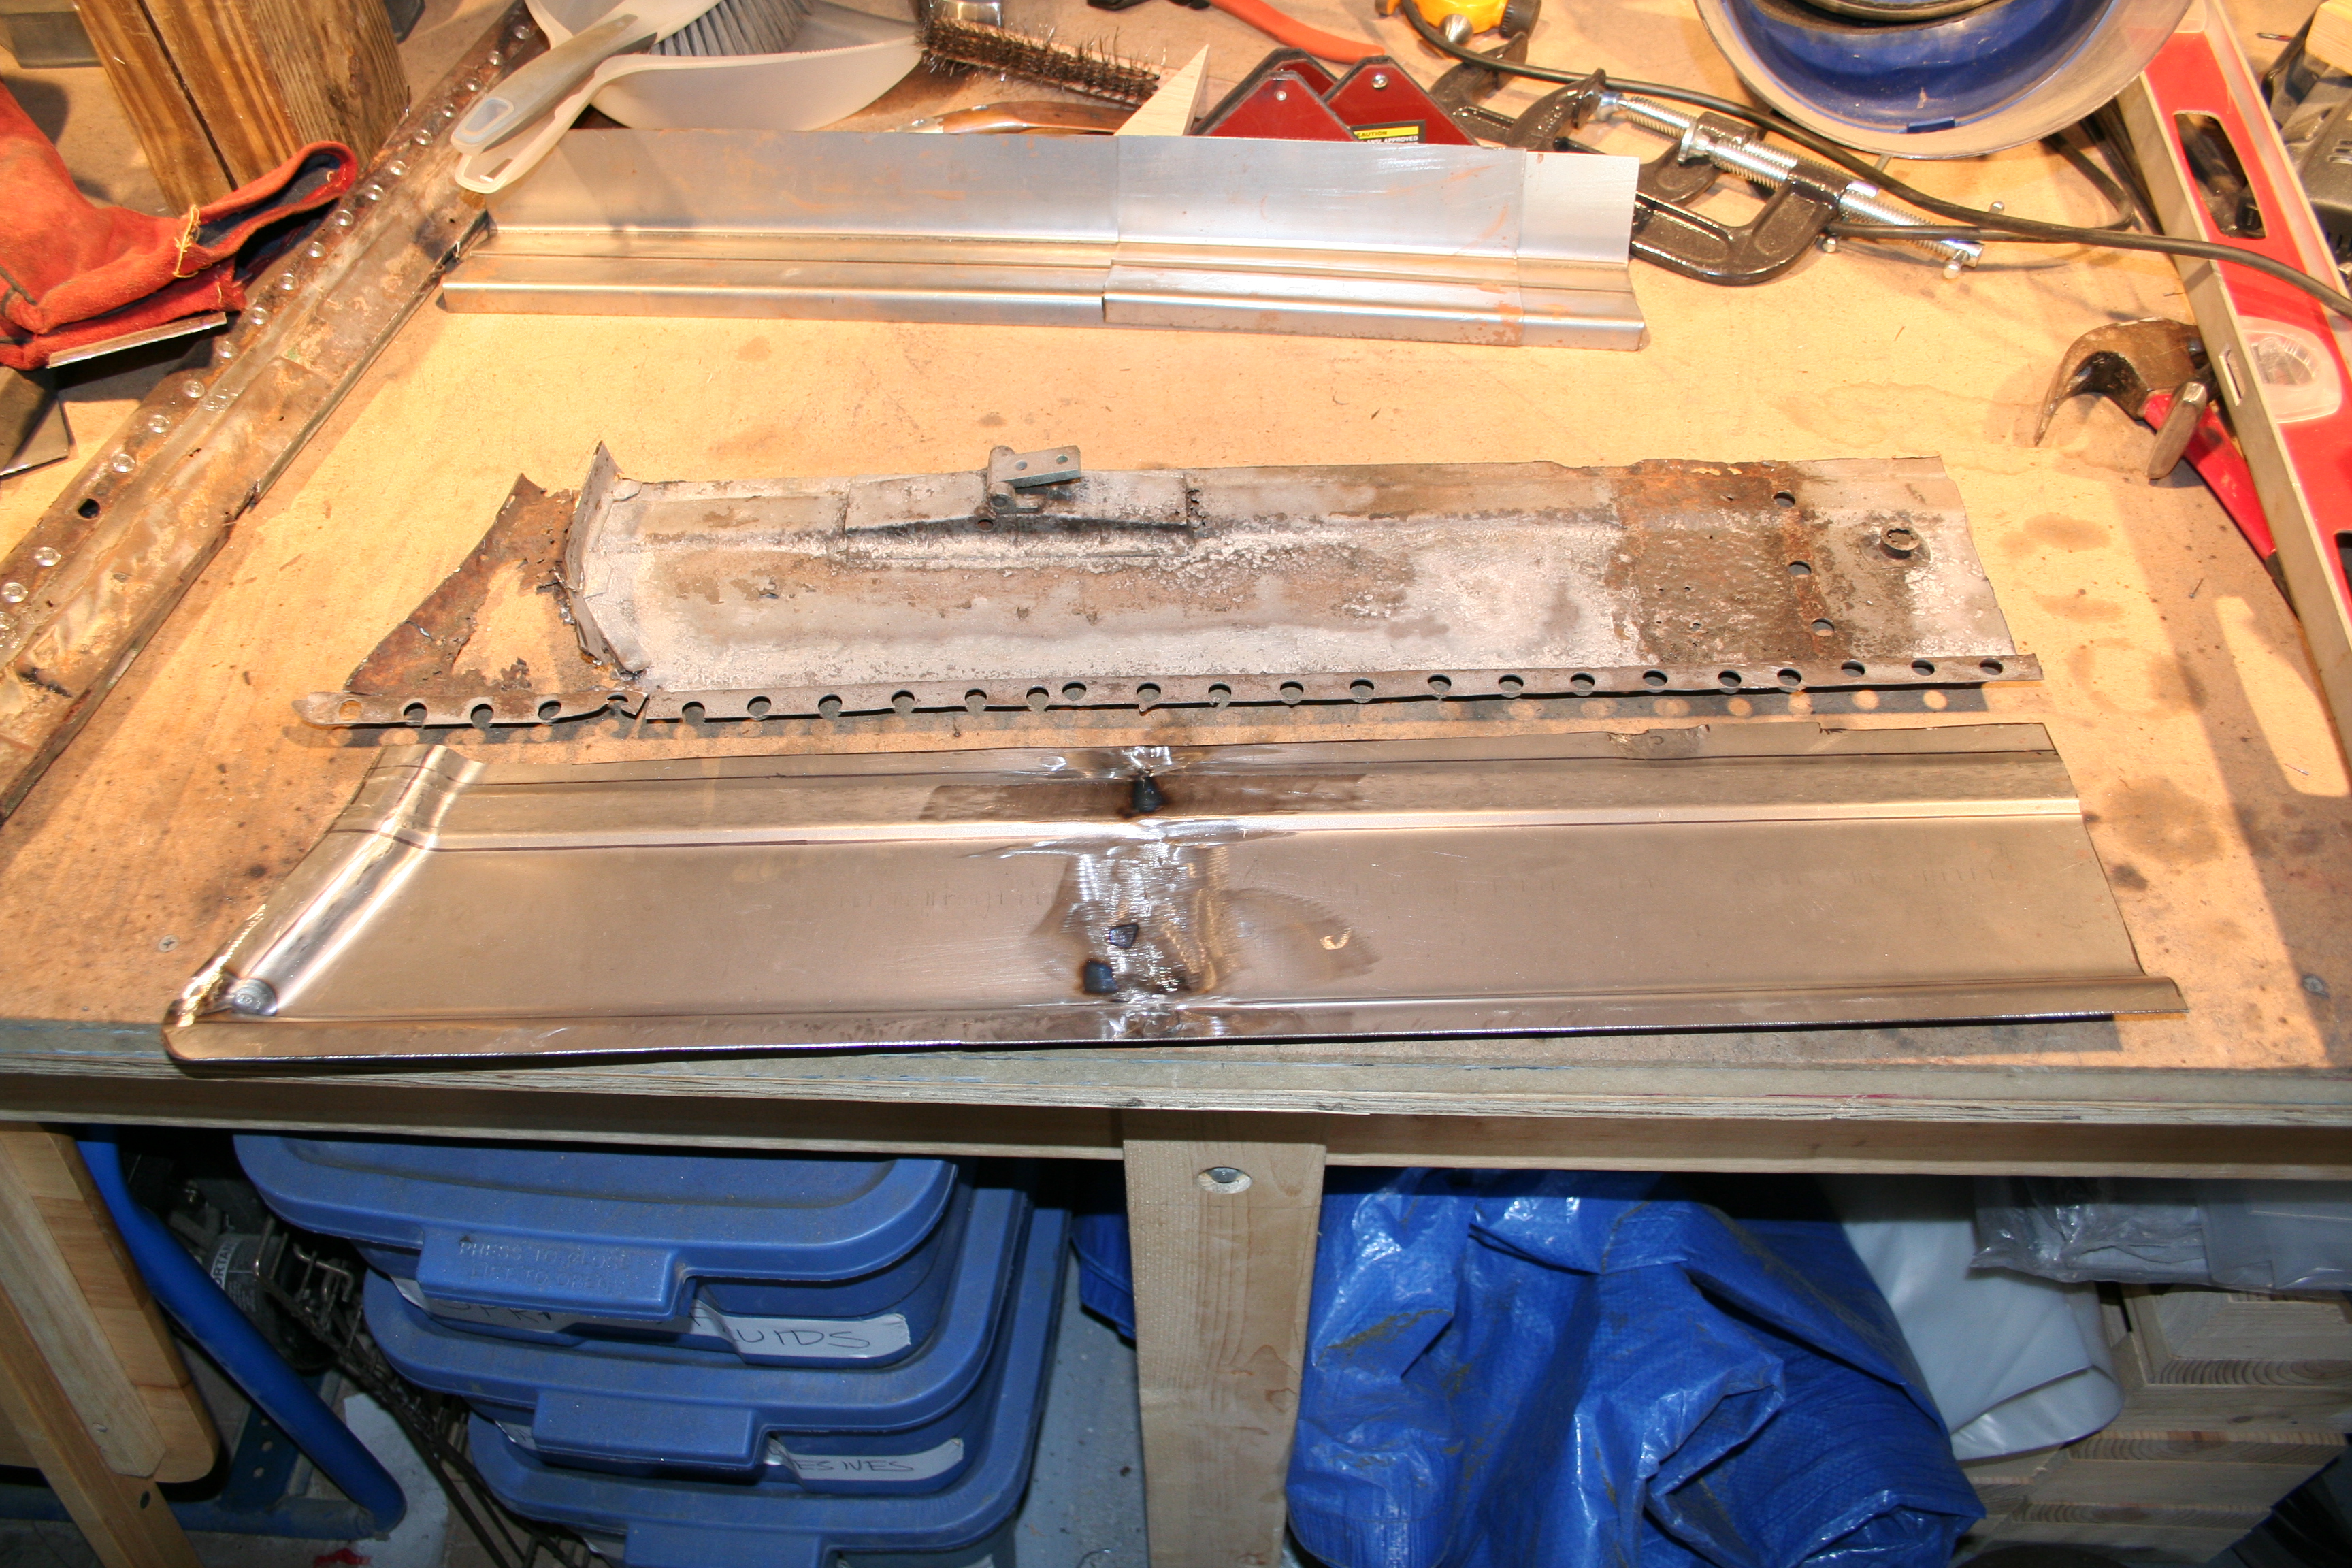
Here you can see the reproduction channel on the bottom and the original on the top.
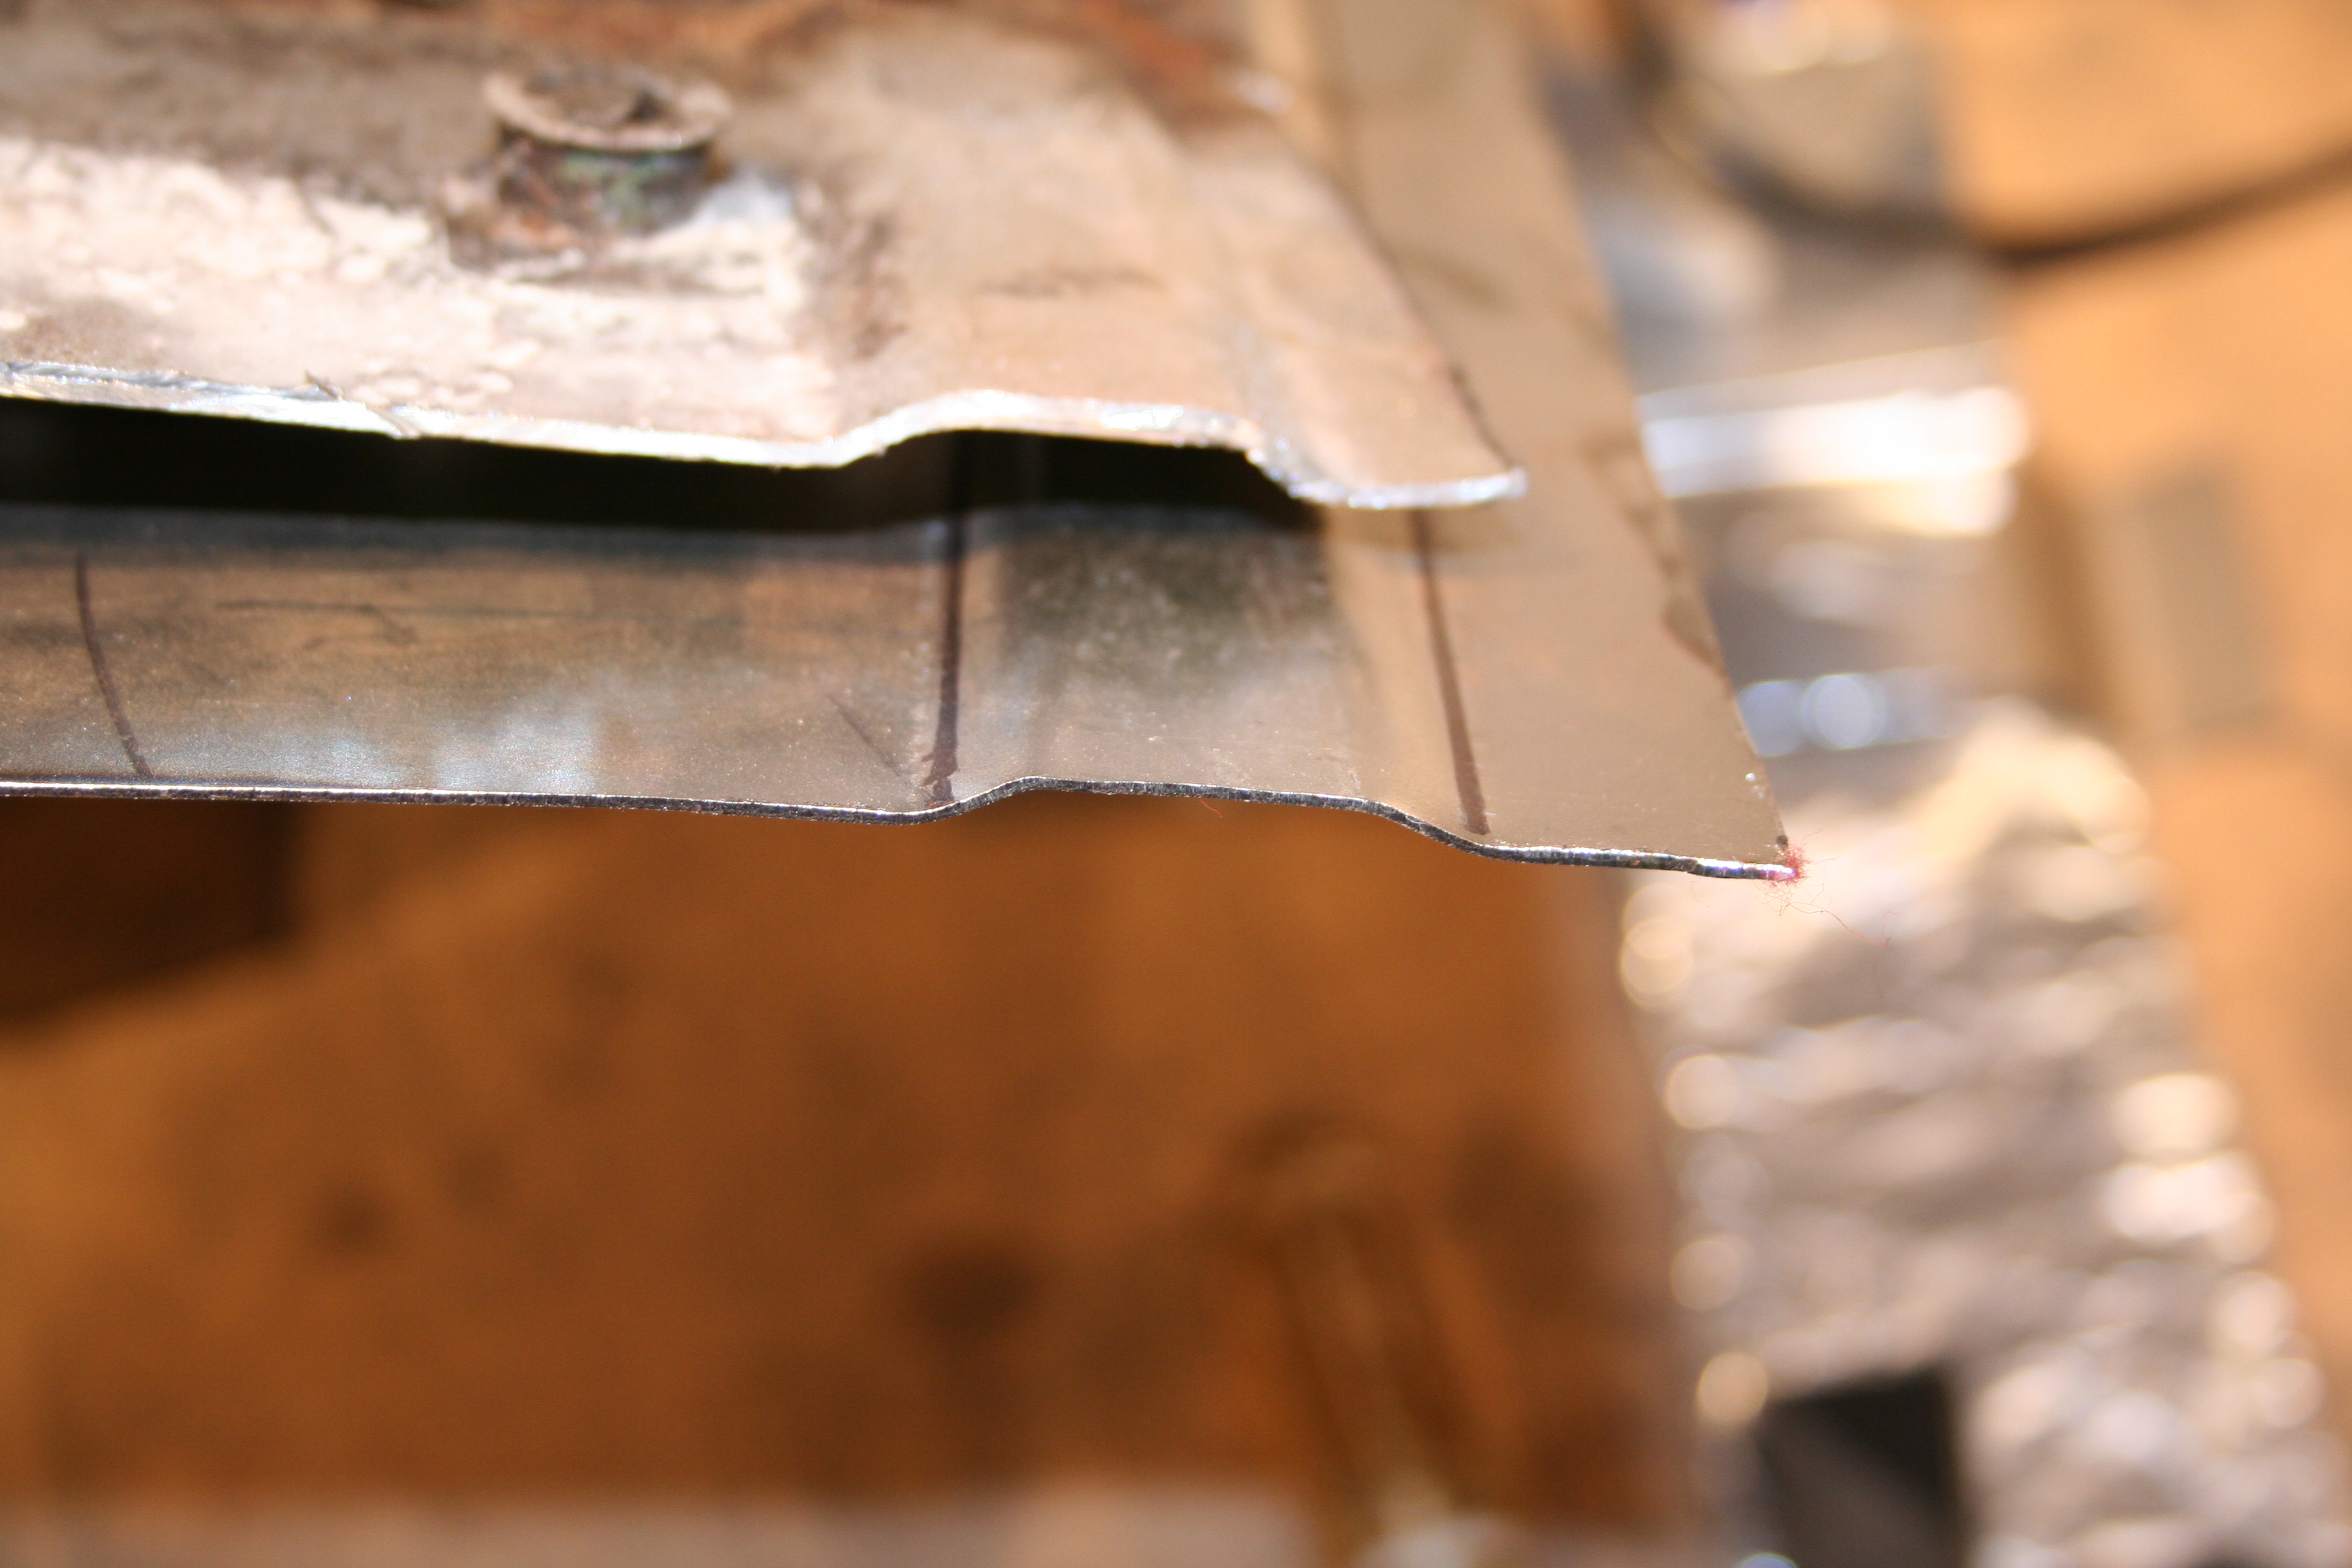
Ok, so far I am dealing with straight bends, but the rear of this reproduction part needs to end with some curves right under the bulkhead and near where the "donut" is by the rear suspension ear. To do this I hammer form again. I bought some hardwood (Oak) planks from Lowes and cut a section to replicate the curve and angle of the bevel. I also had to cut a relief into it so that the channel would drop into the form. I then hammer formed the end over this. I wish I had taken a photo of the hardwood form. The photo above shows the replacement next to he original part.
Another shot of the replacement part. I still need to clean it up some. I also cut the corner so I could fold the edge around. I will weld the cut, grind it down and it should be nice and smooth. The flange is also wider than it needs to be and I will do a final trim on it when I test fit everything together. Overall, I had stressed somewhat about how hard it would be to do this, but it was amazingly easy. It's not as nice as it could (or will) be, but it went pretty quickly. 3/2/2008The fun continues! I worked on joining my two sections together that makes up the floor right under the passenger seat. I had to make this in two sections because my metal brake is not wide enough to do it as one section. I sort of wish I had bought a wider brake as while I am able to join these together, it is hard work. But it is good practice for butt welding thin metal.
A few spot welds after getting it aligned
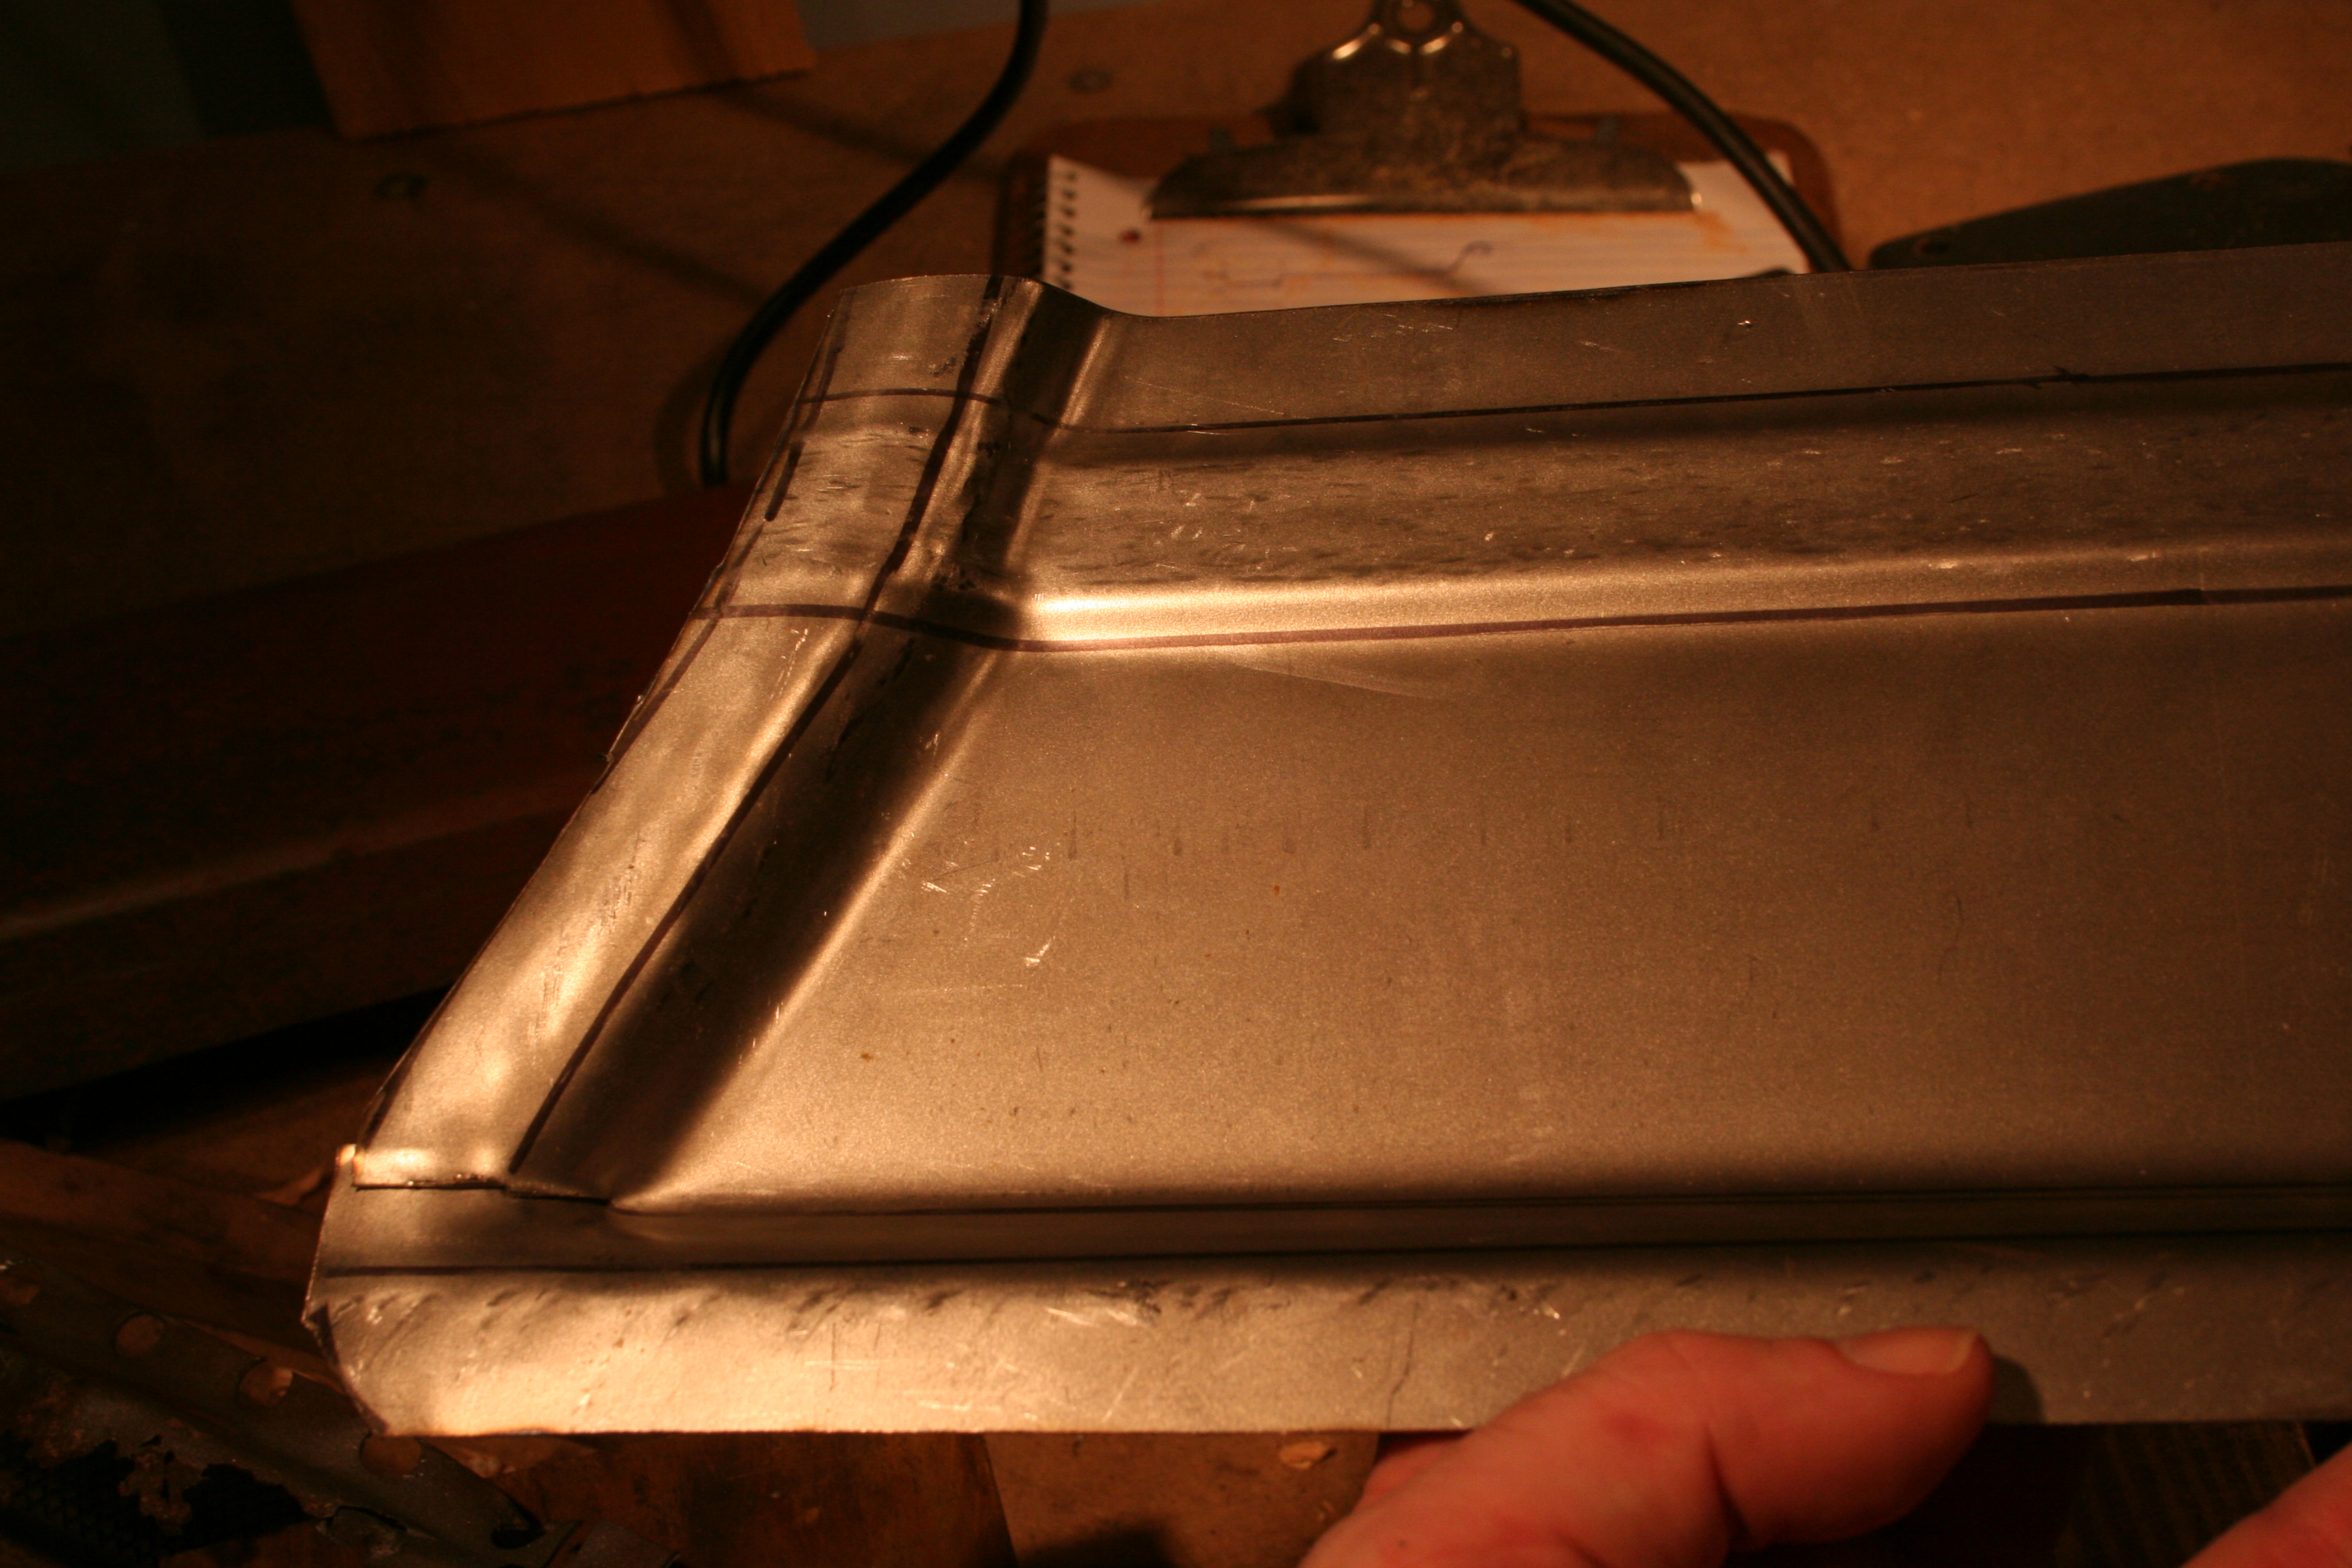
Test fitting so I can mark out final trim. The part was made larger on purpose so I could do final sizing on the car.
Pretty much the final product. You can see the original behind it. I still need to remove the reinforcement that is on the bottom (can't see it in the photo above) and then weld that to the new part. 3/8/2008 - 3/9/2008Before I weld in the floor part I have been working on, I want to do this small section of the lower bulkhead. This is because once that is in place, I can paint the inside of the bulkhead with POR-15 and then weld in the floor section. You can see from earlier photos above, what I had cut out.
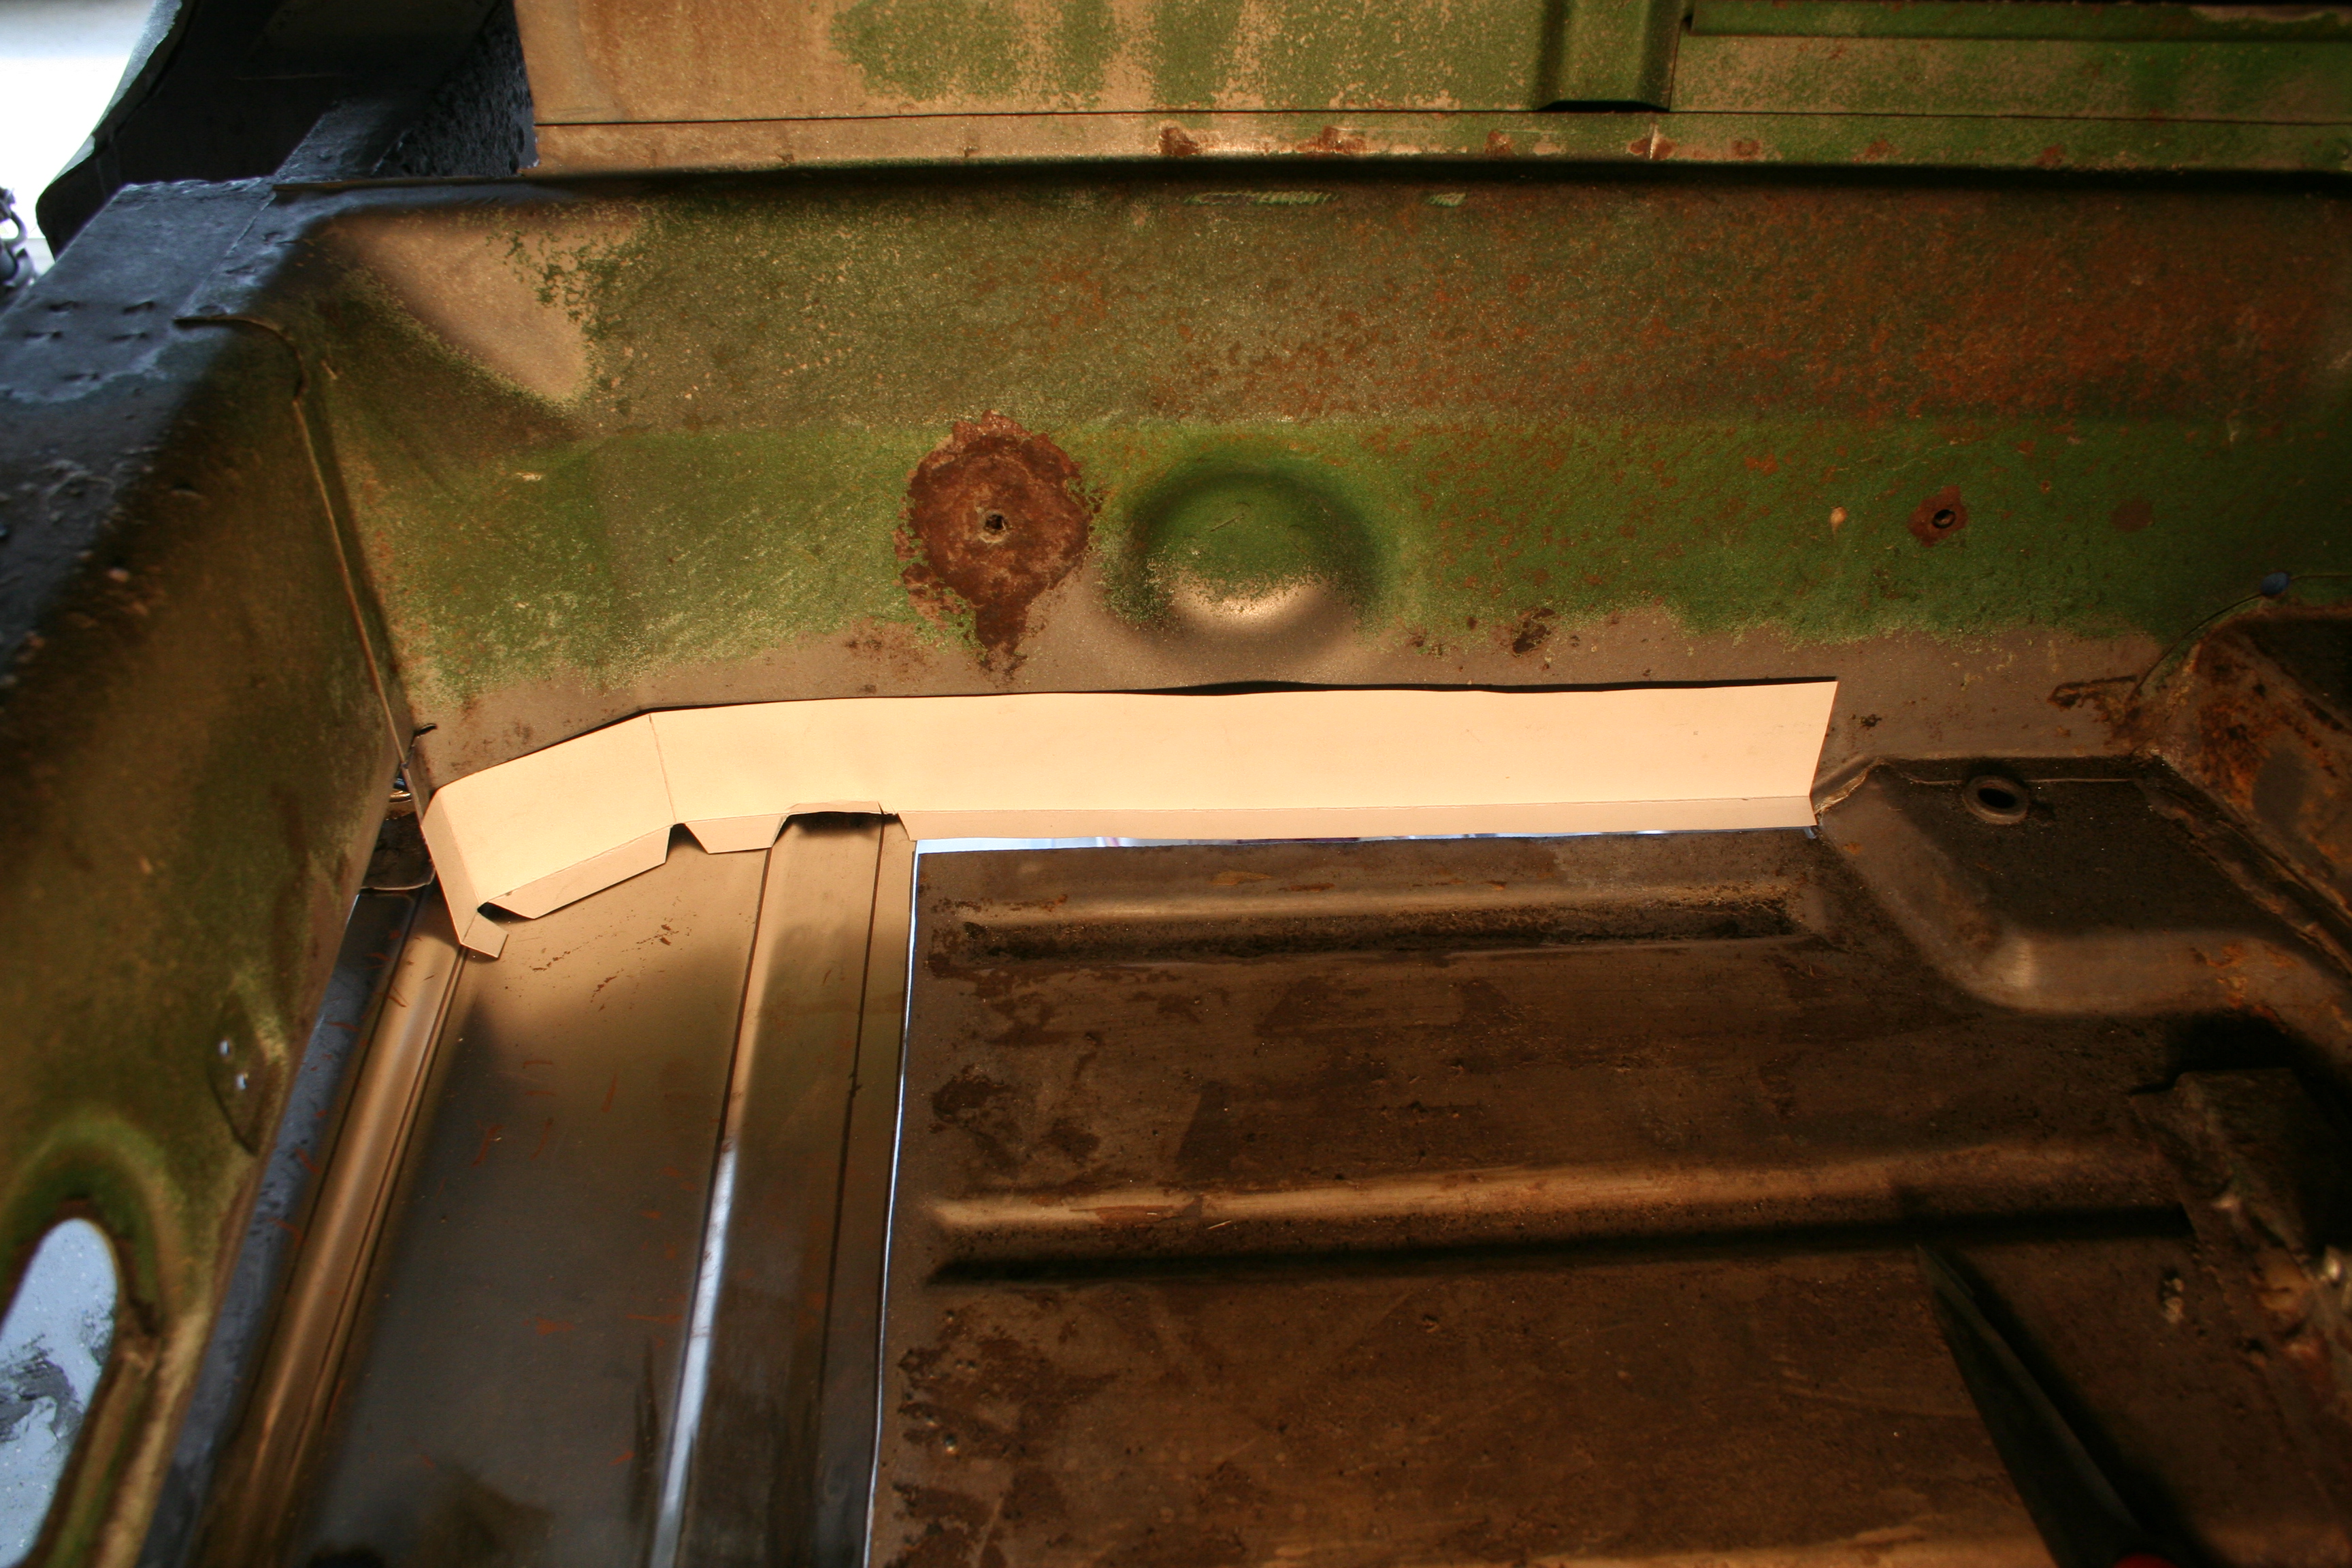
Test fit of a paper template.
Part based upon template and trimmed to fit. A lot of trim and test, trim and test, trim and test.
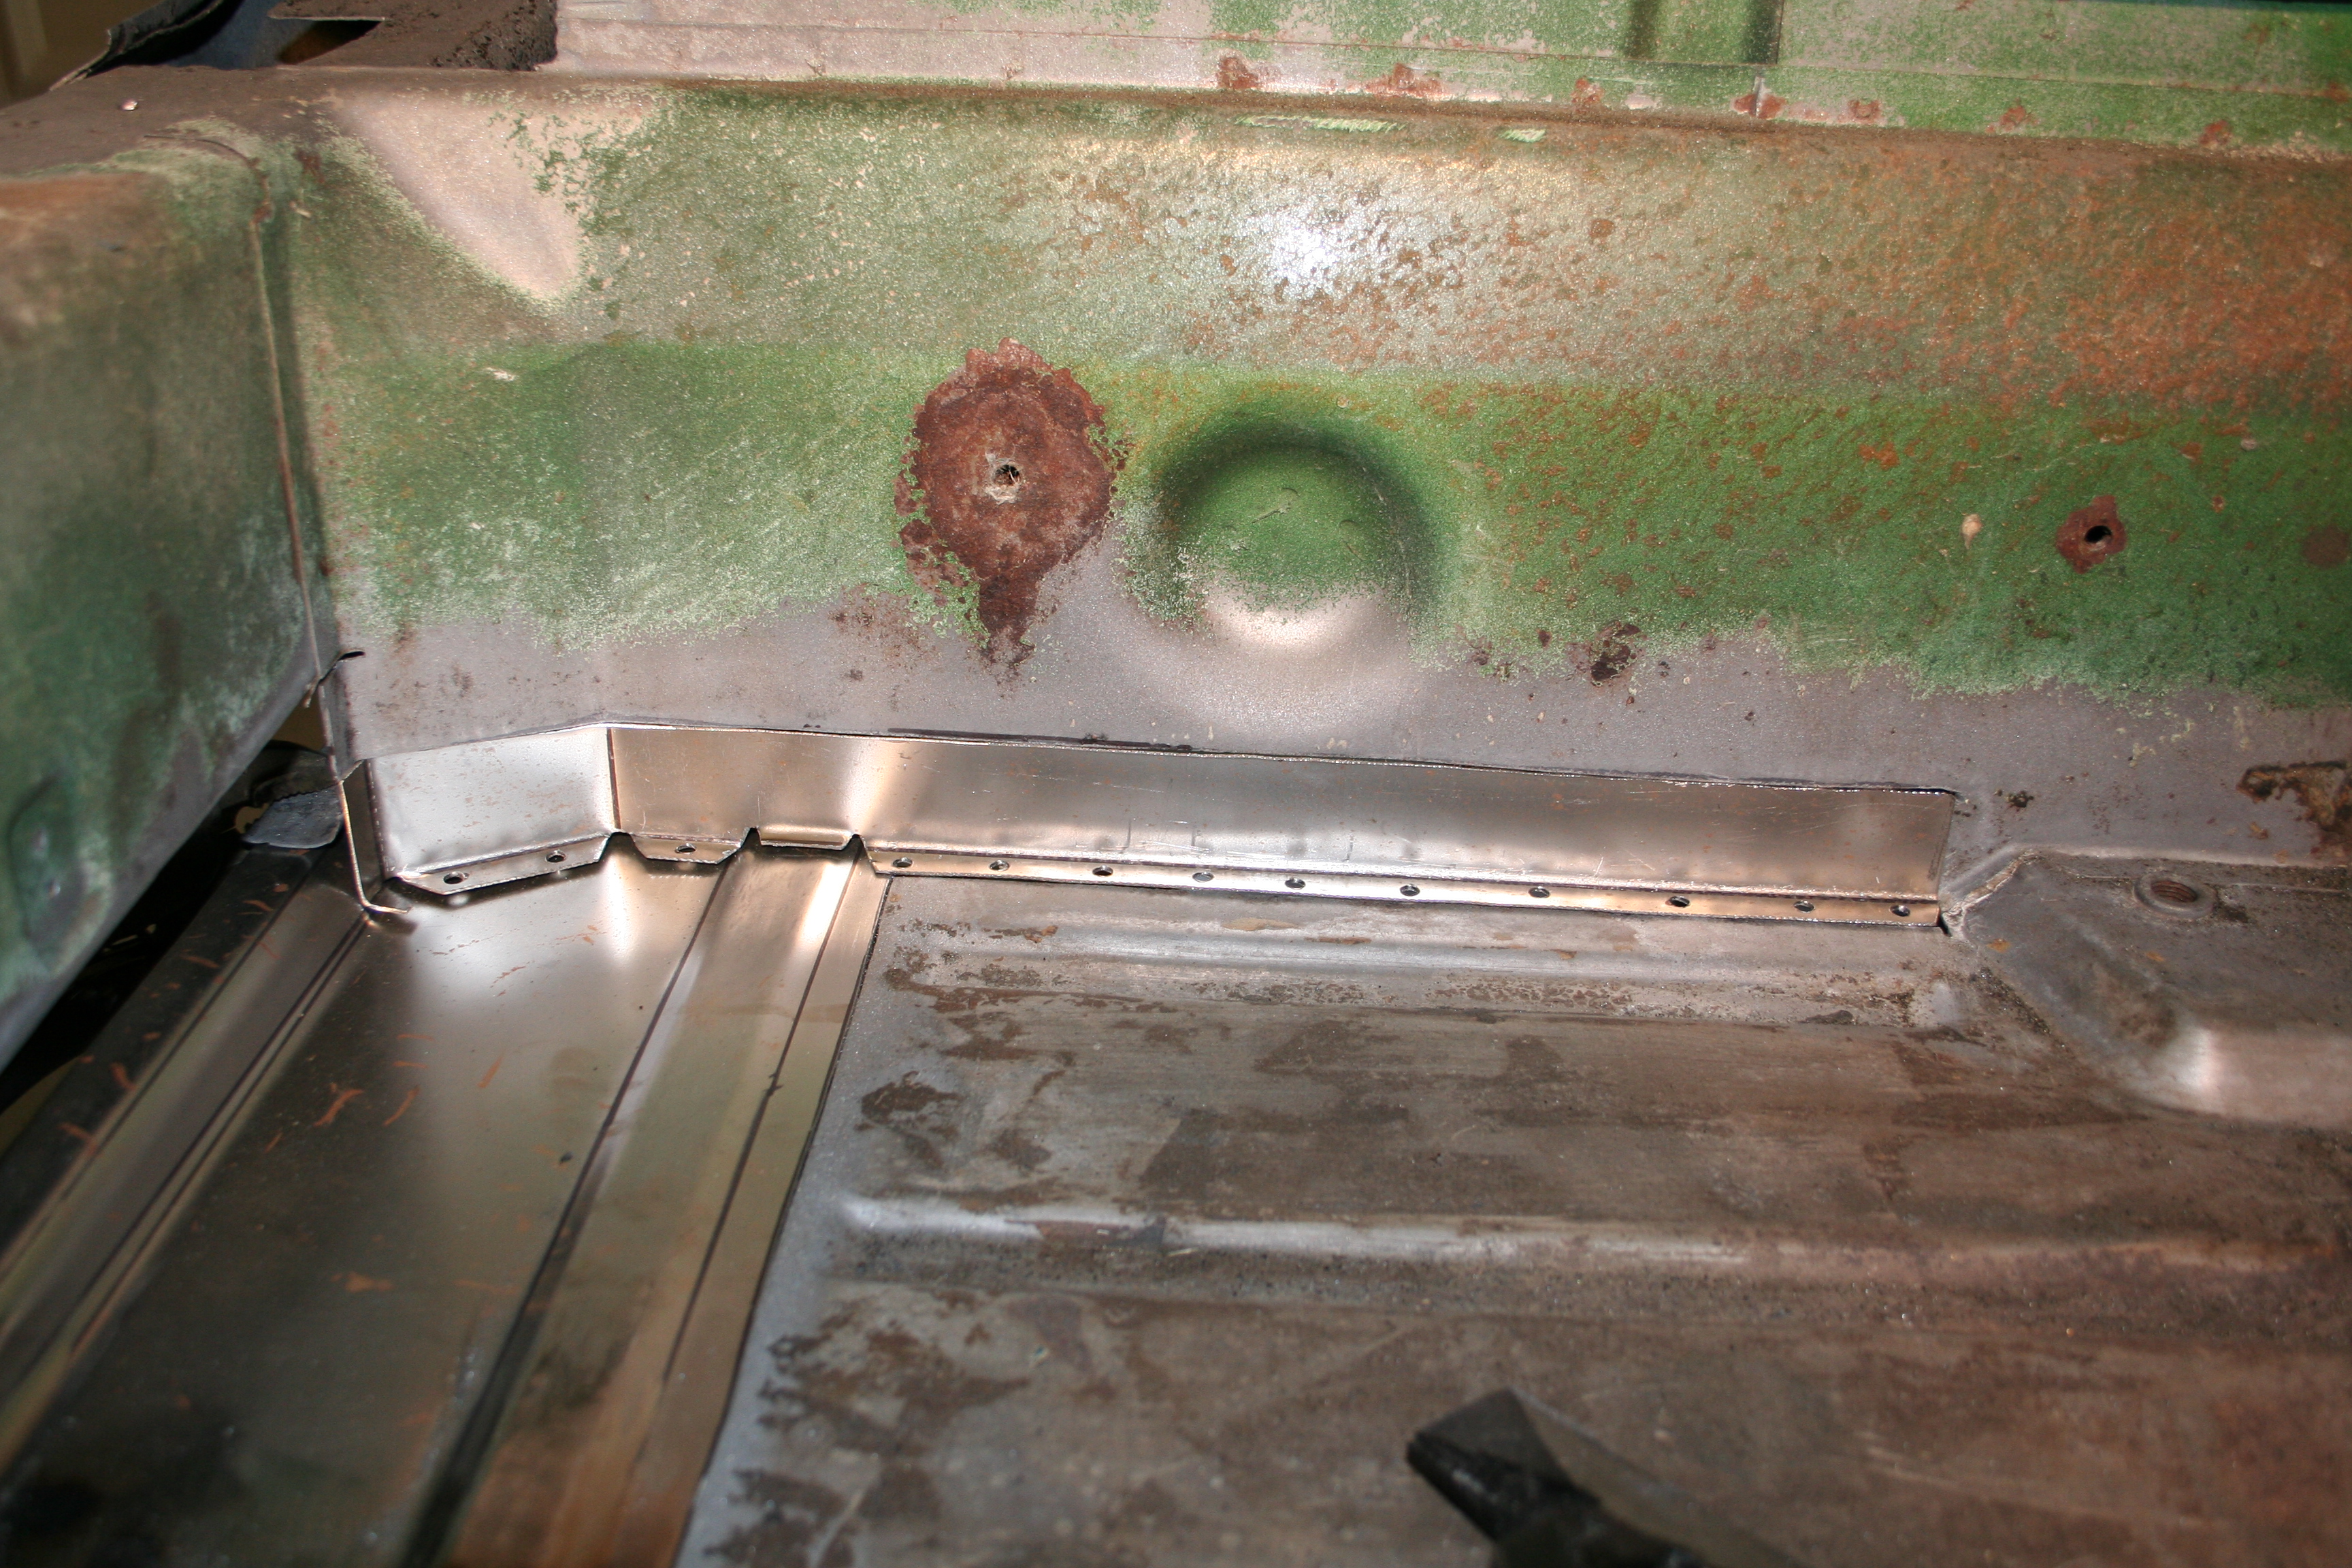
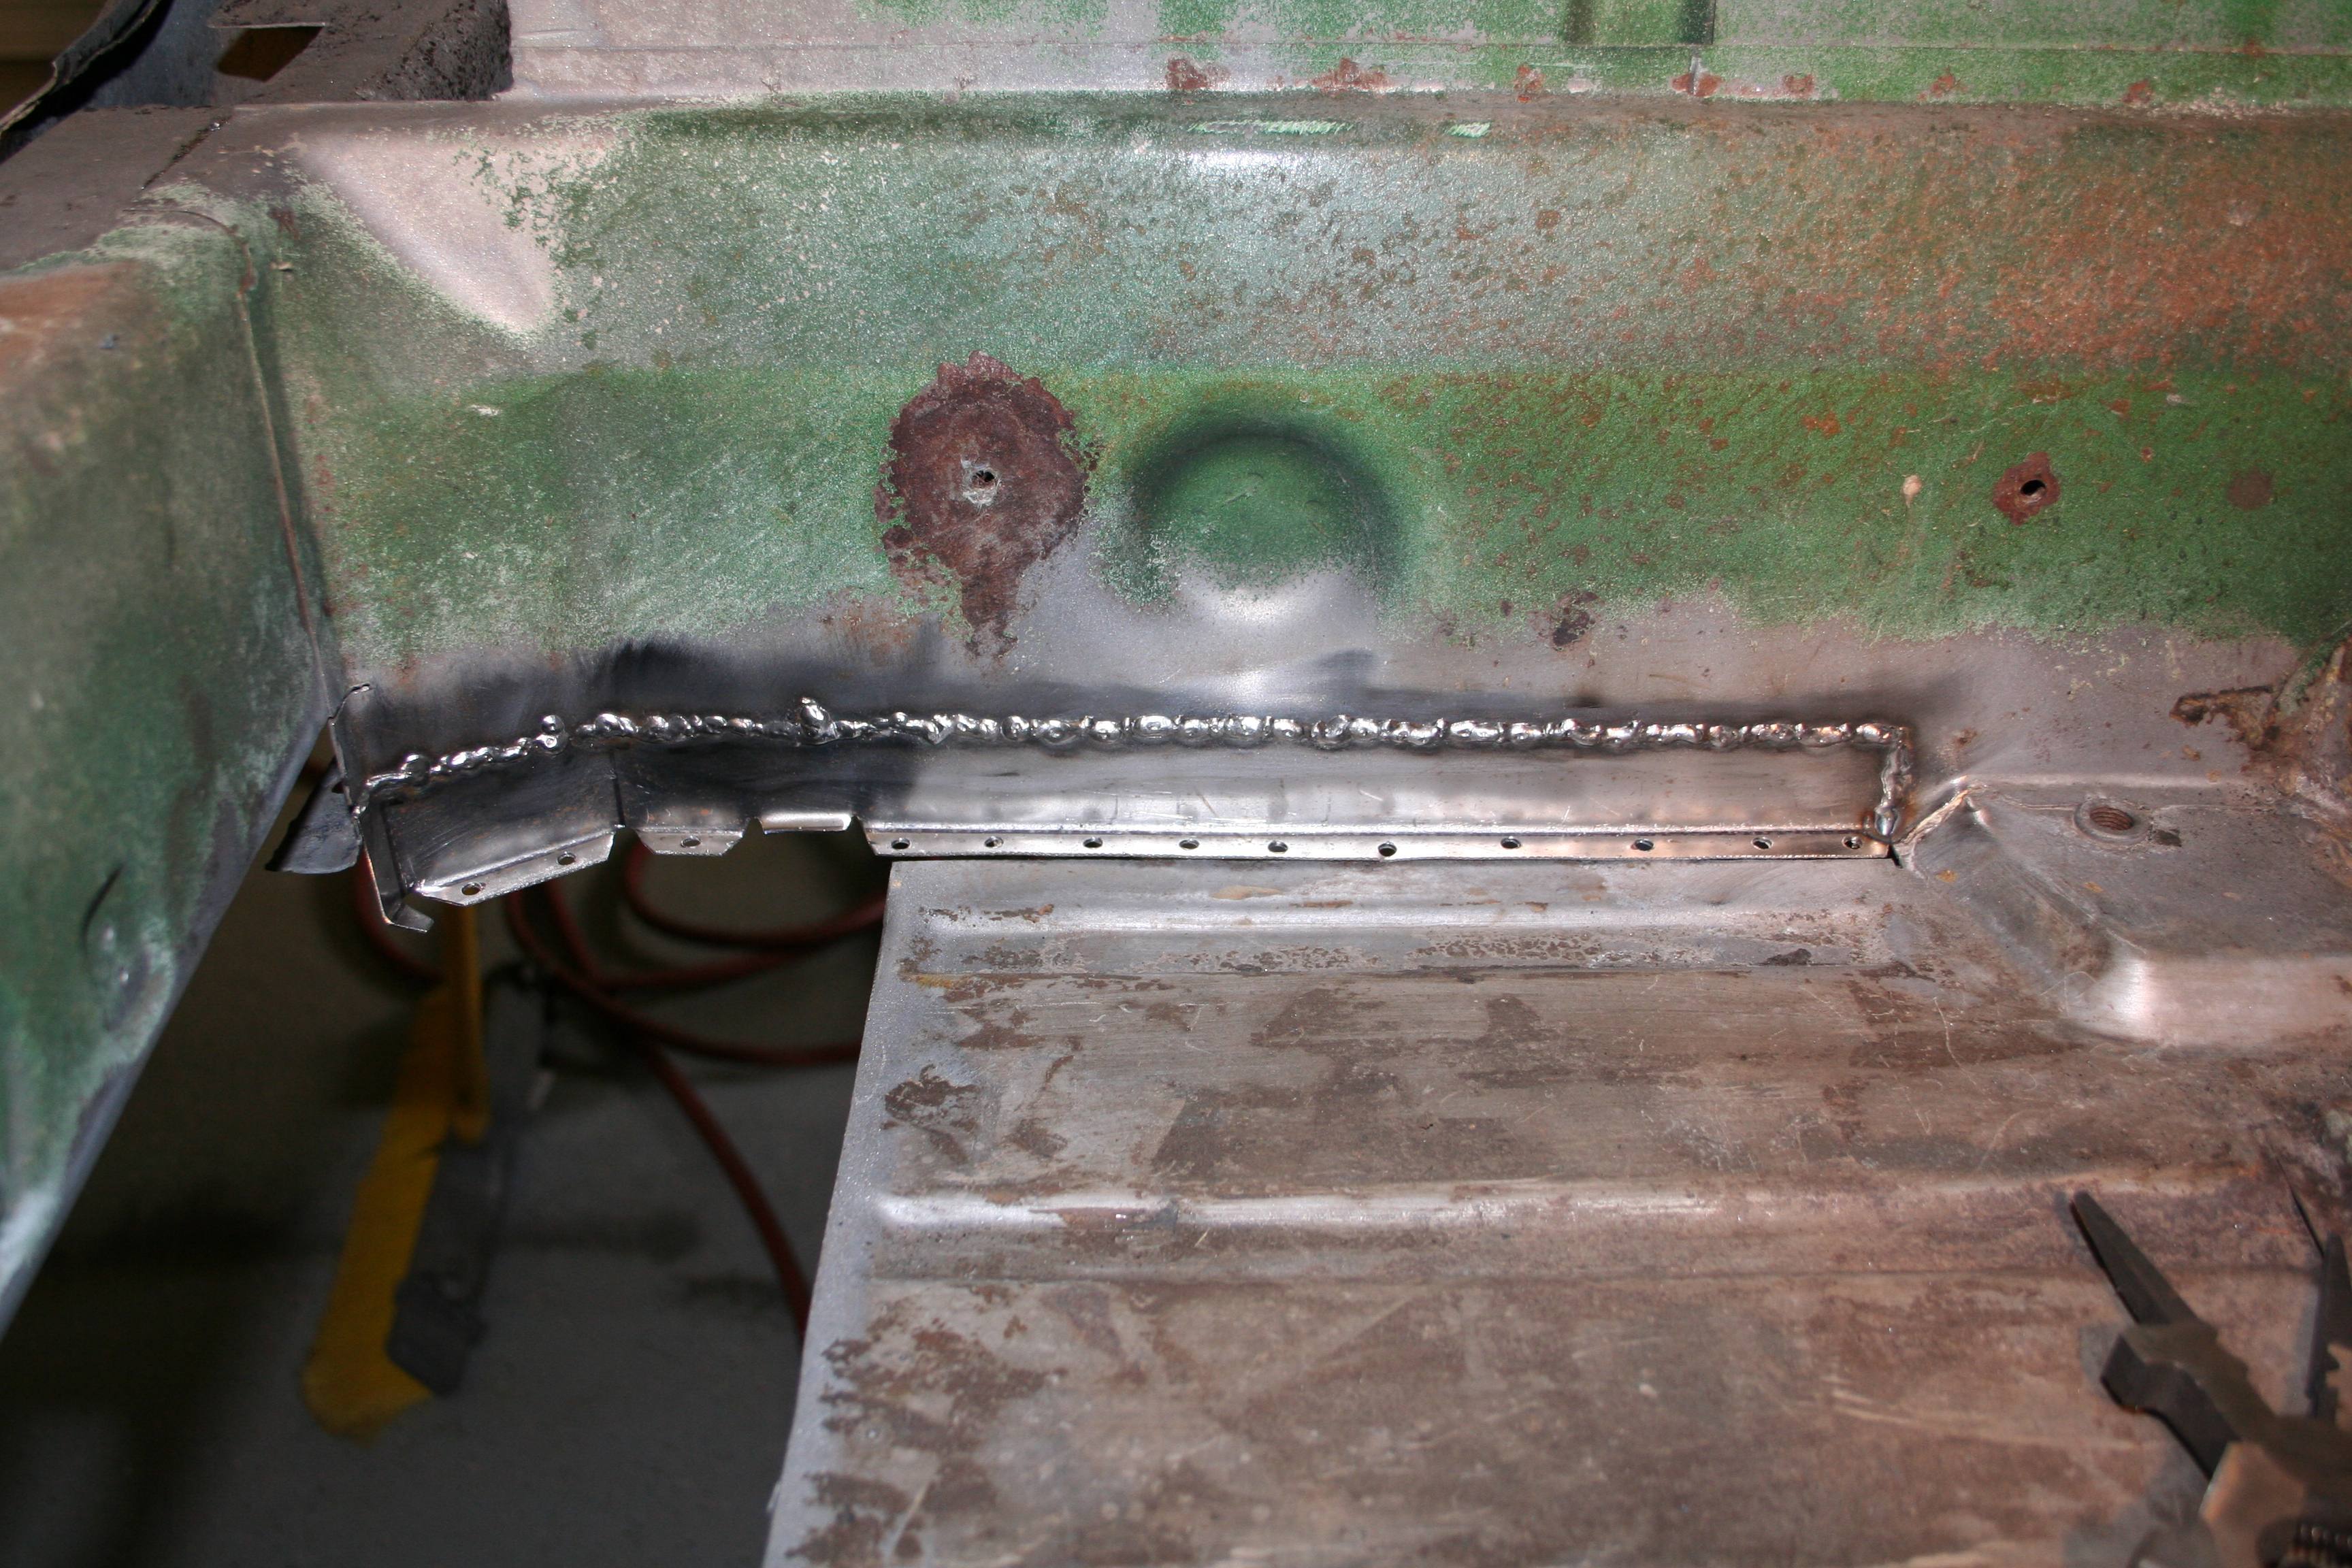
Tack weld in place. I really wanted to make sure it was flush as I did this. I used magnetic welding aids to hold it in place. Holes drilled in flange are for later when I weld to the floor. I will do a rosette weld in those holes to simulate spot welds.
Here it is after a slew of short 1/2" welds. You can't just start welding a long bead because the metal will heat up and warp and/or burn through. So I would weld, move to another section weld and then let it all cool down. I had a few places on the left in which I was not patient enough and burnt through. I had to weld up those holes.
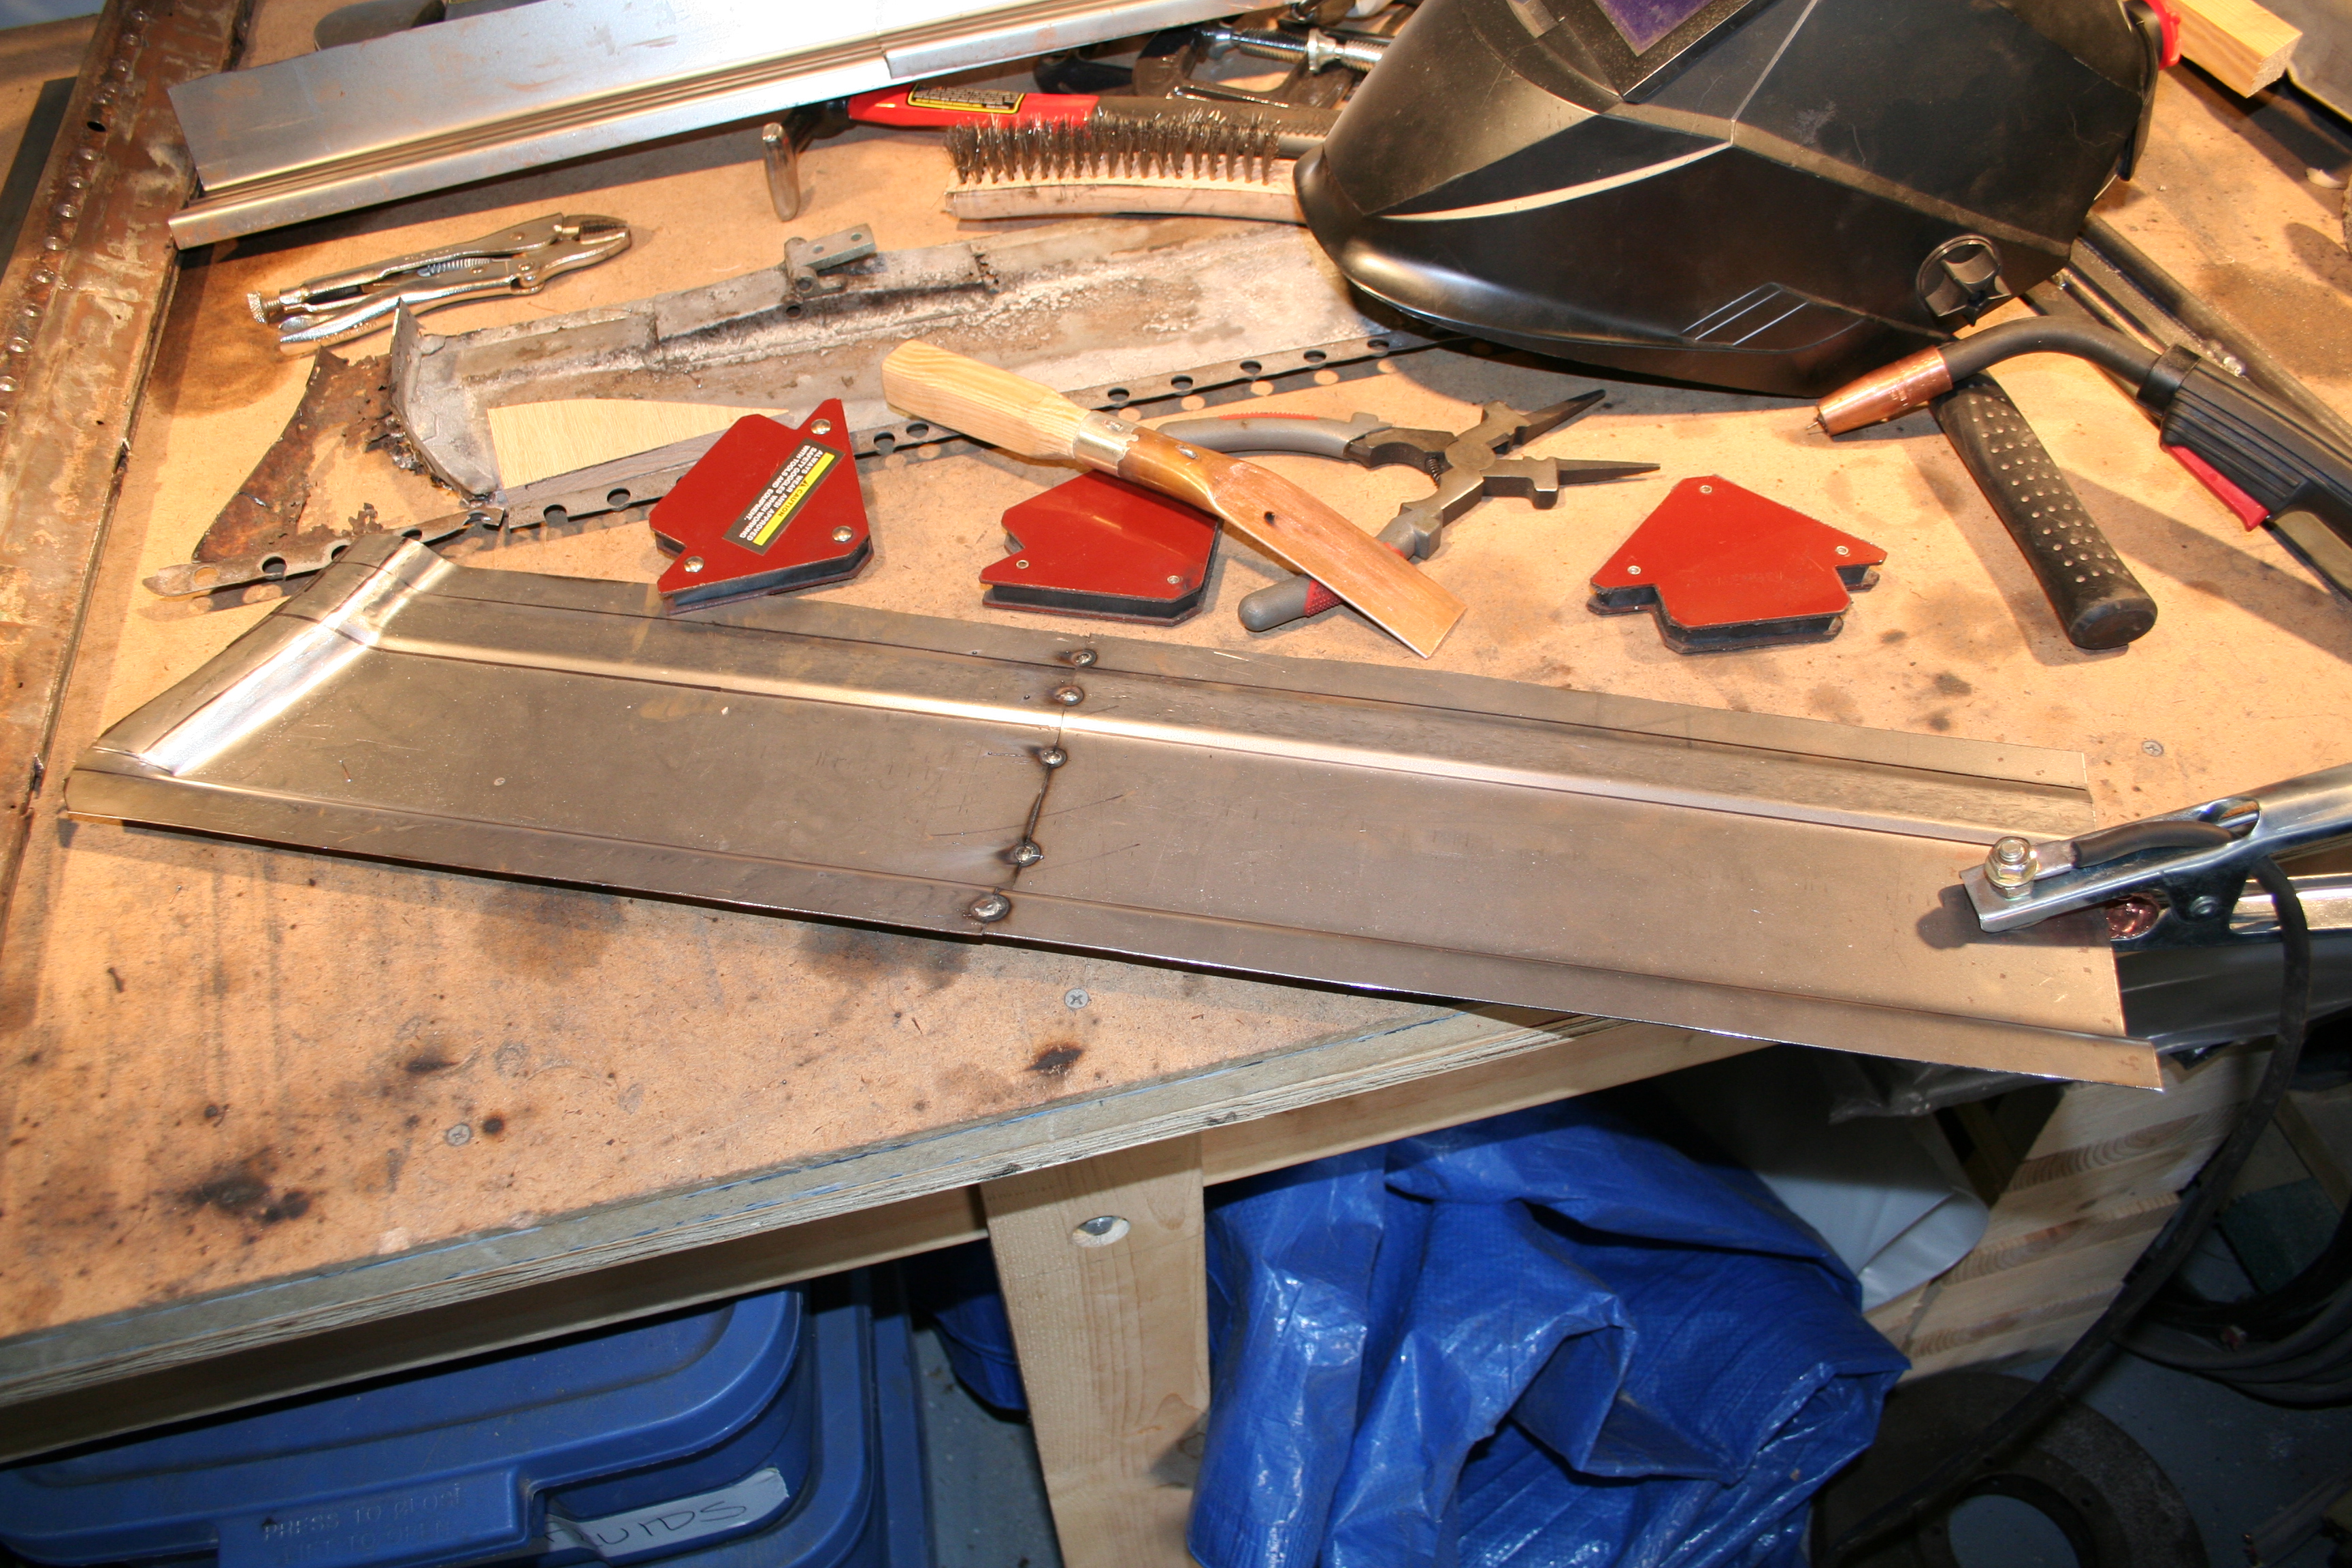
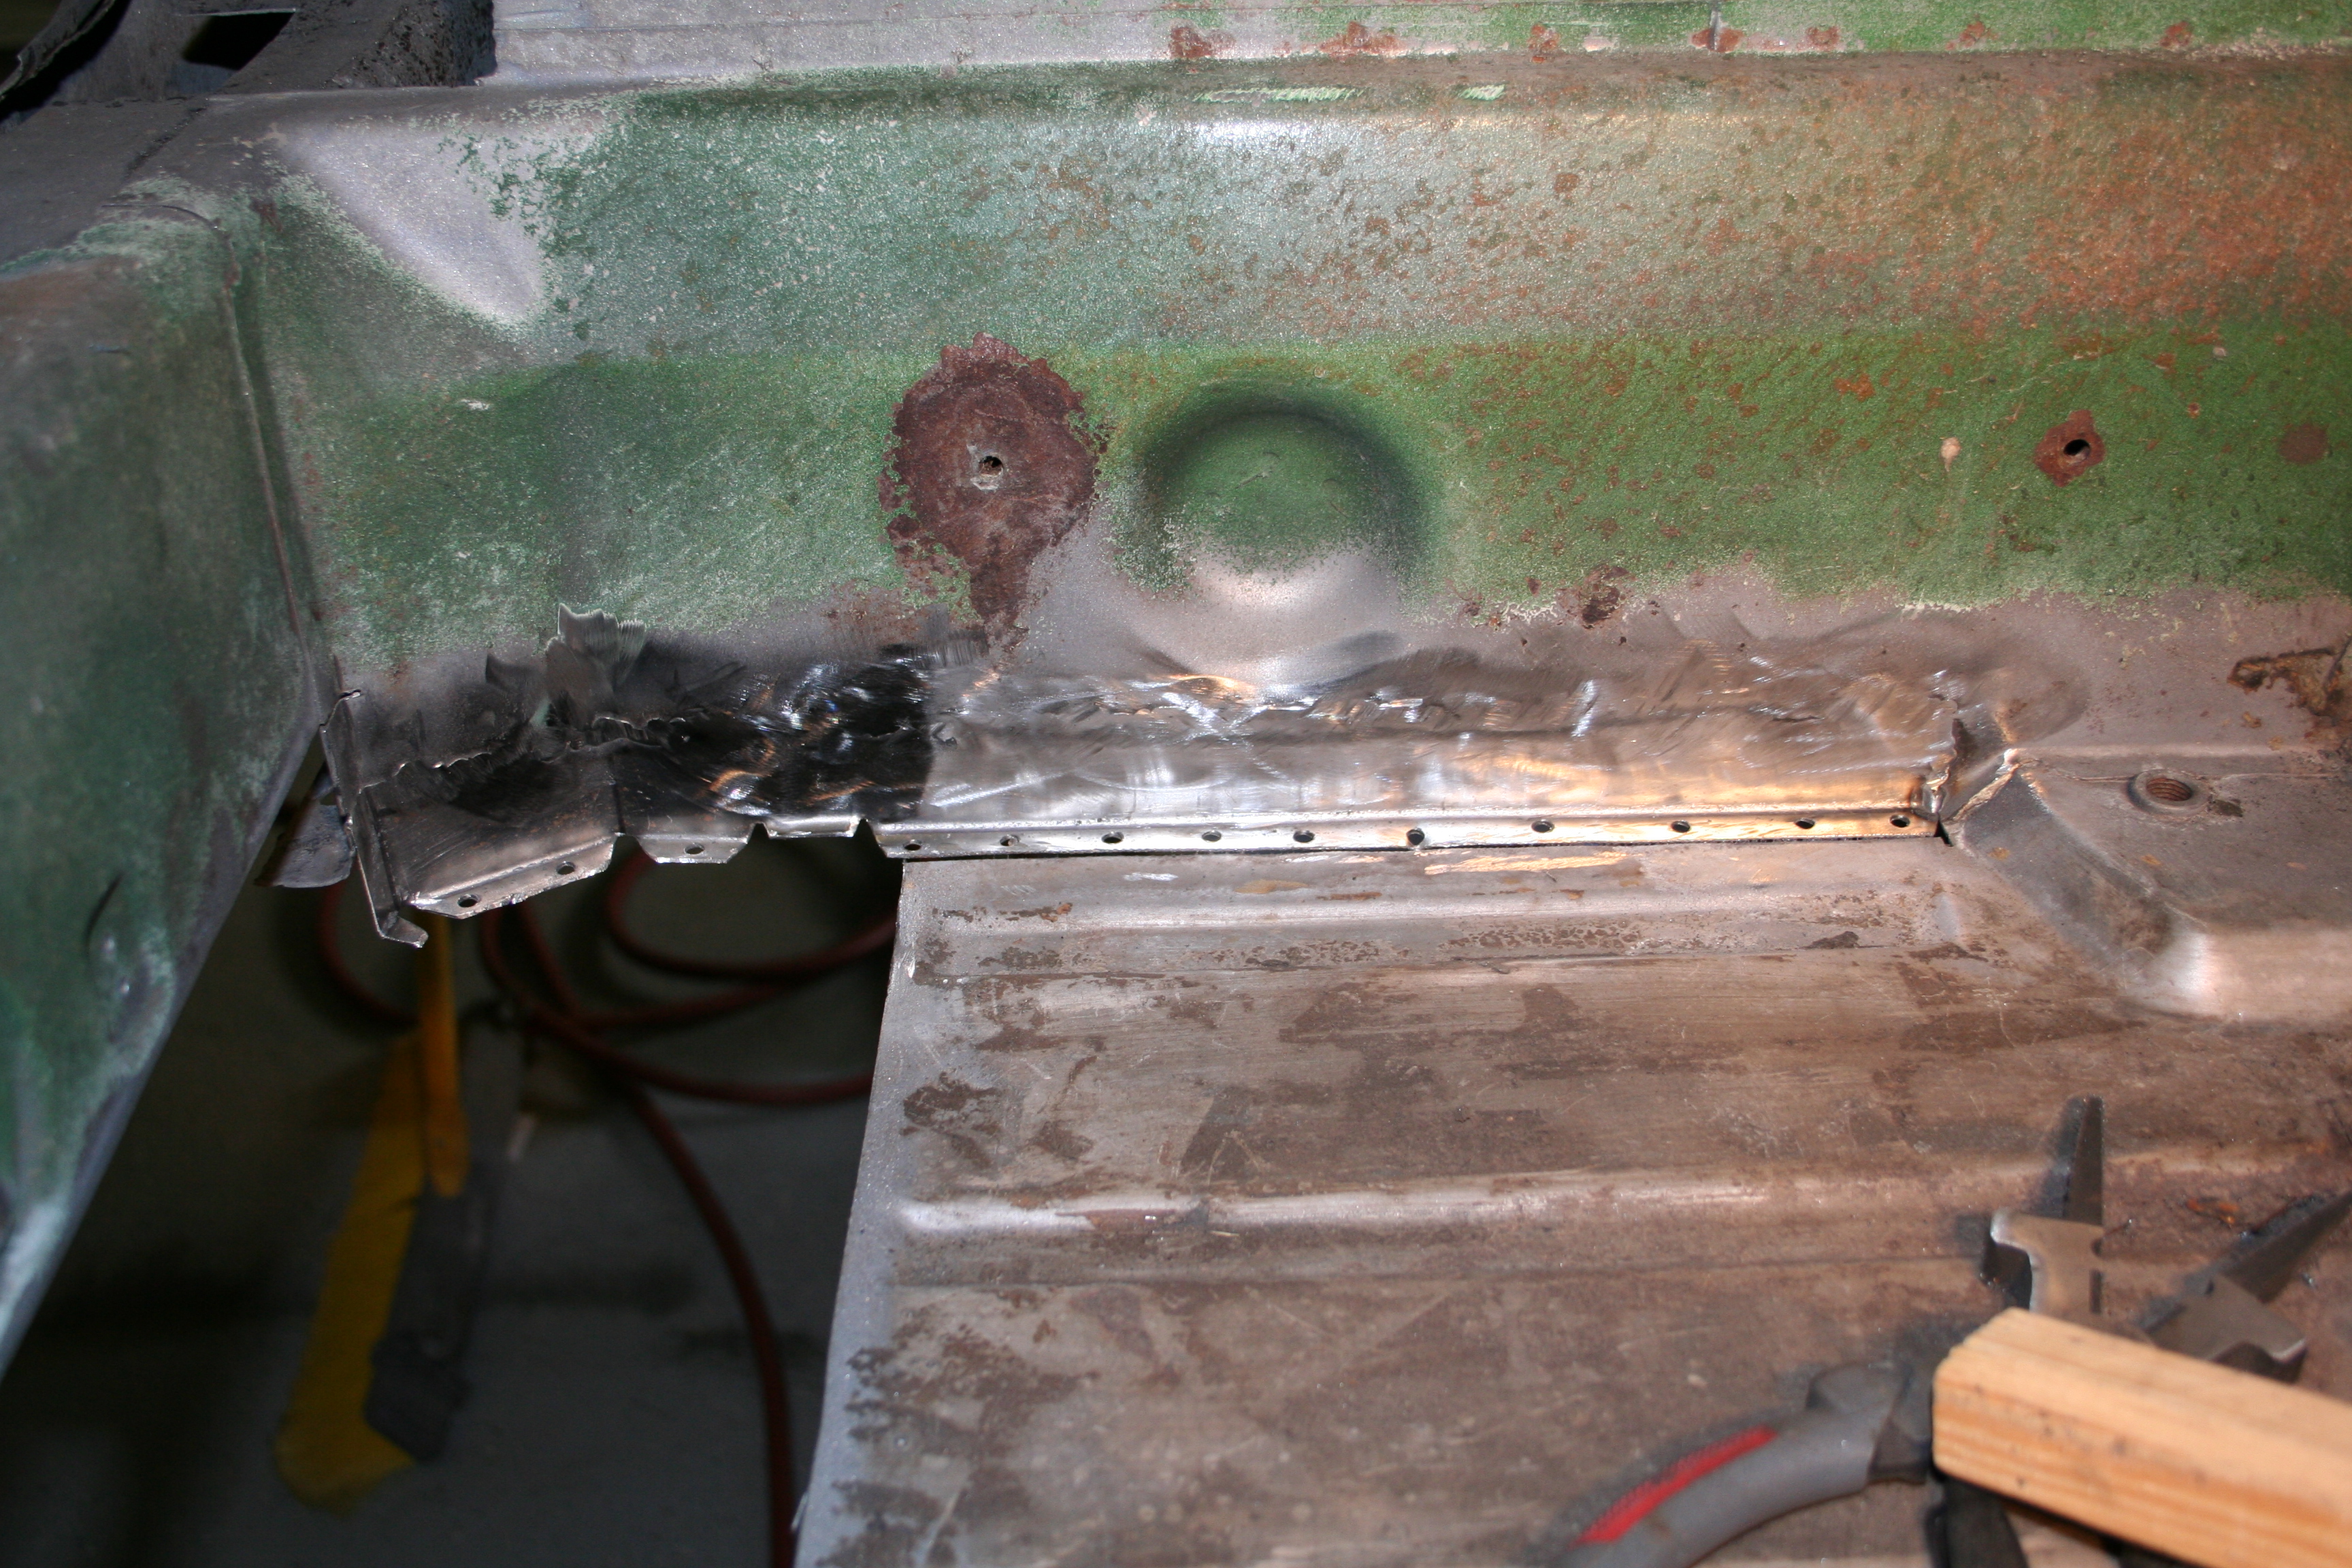
Here is the 90% finished product. I still have some grinding to do. I need to get a flapper wheel with a larger grit (current flappers are too fine of grit) to finish this up. It looks pretty good I think..
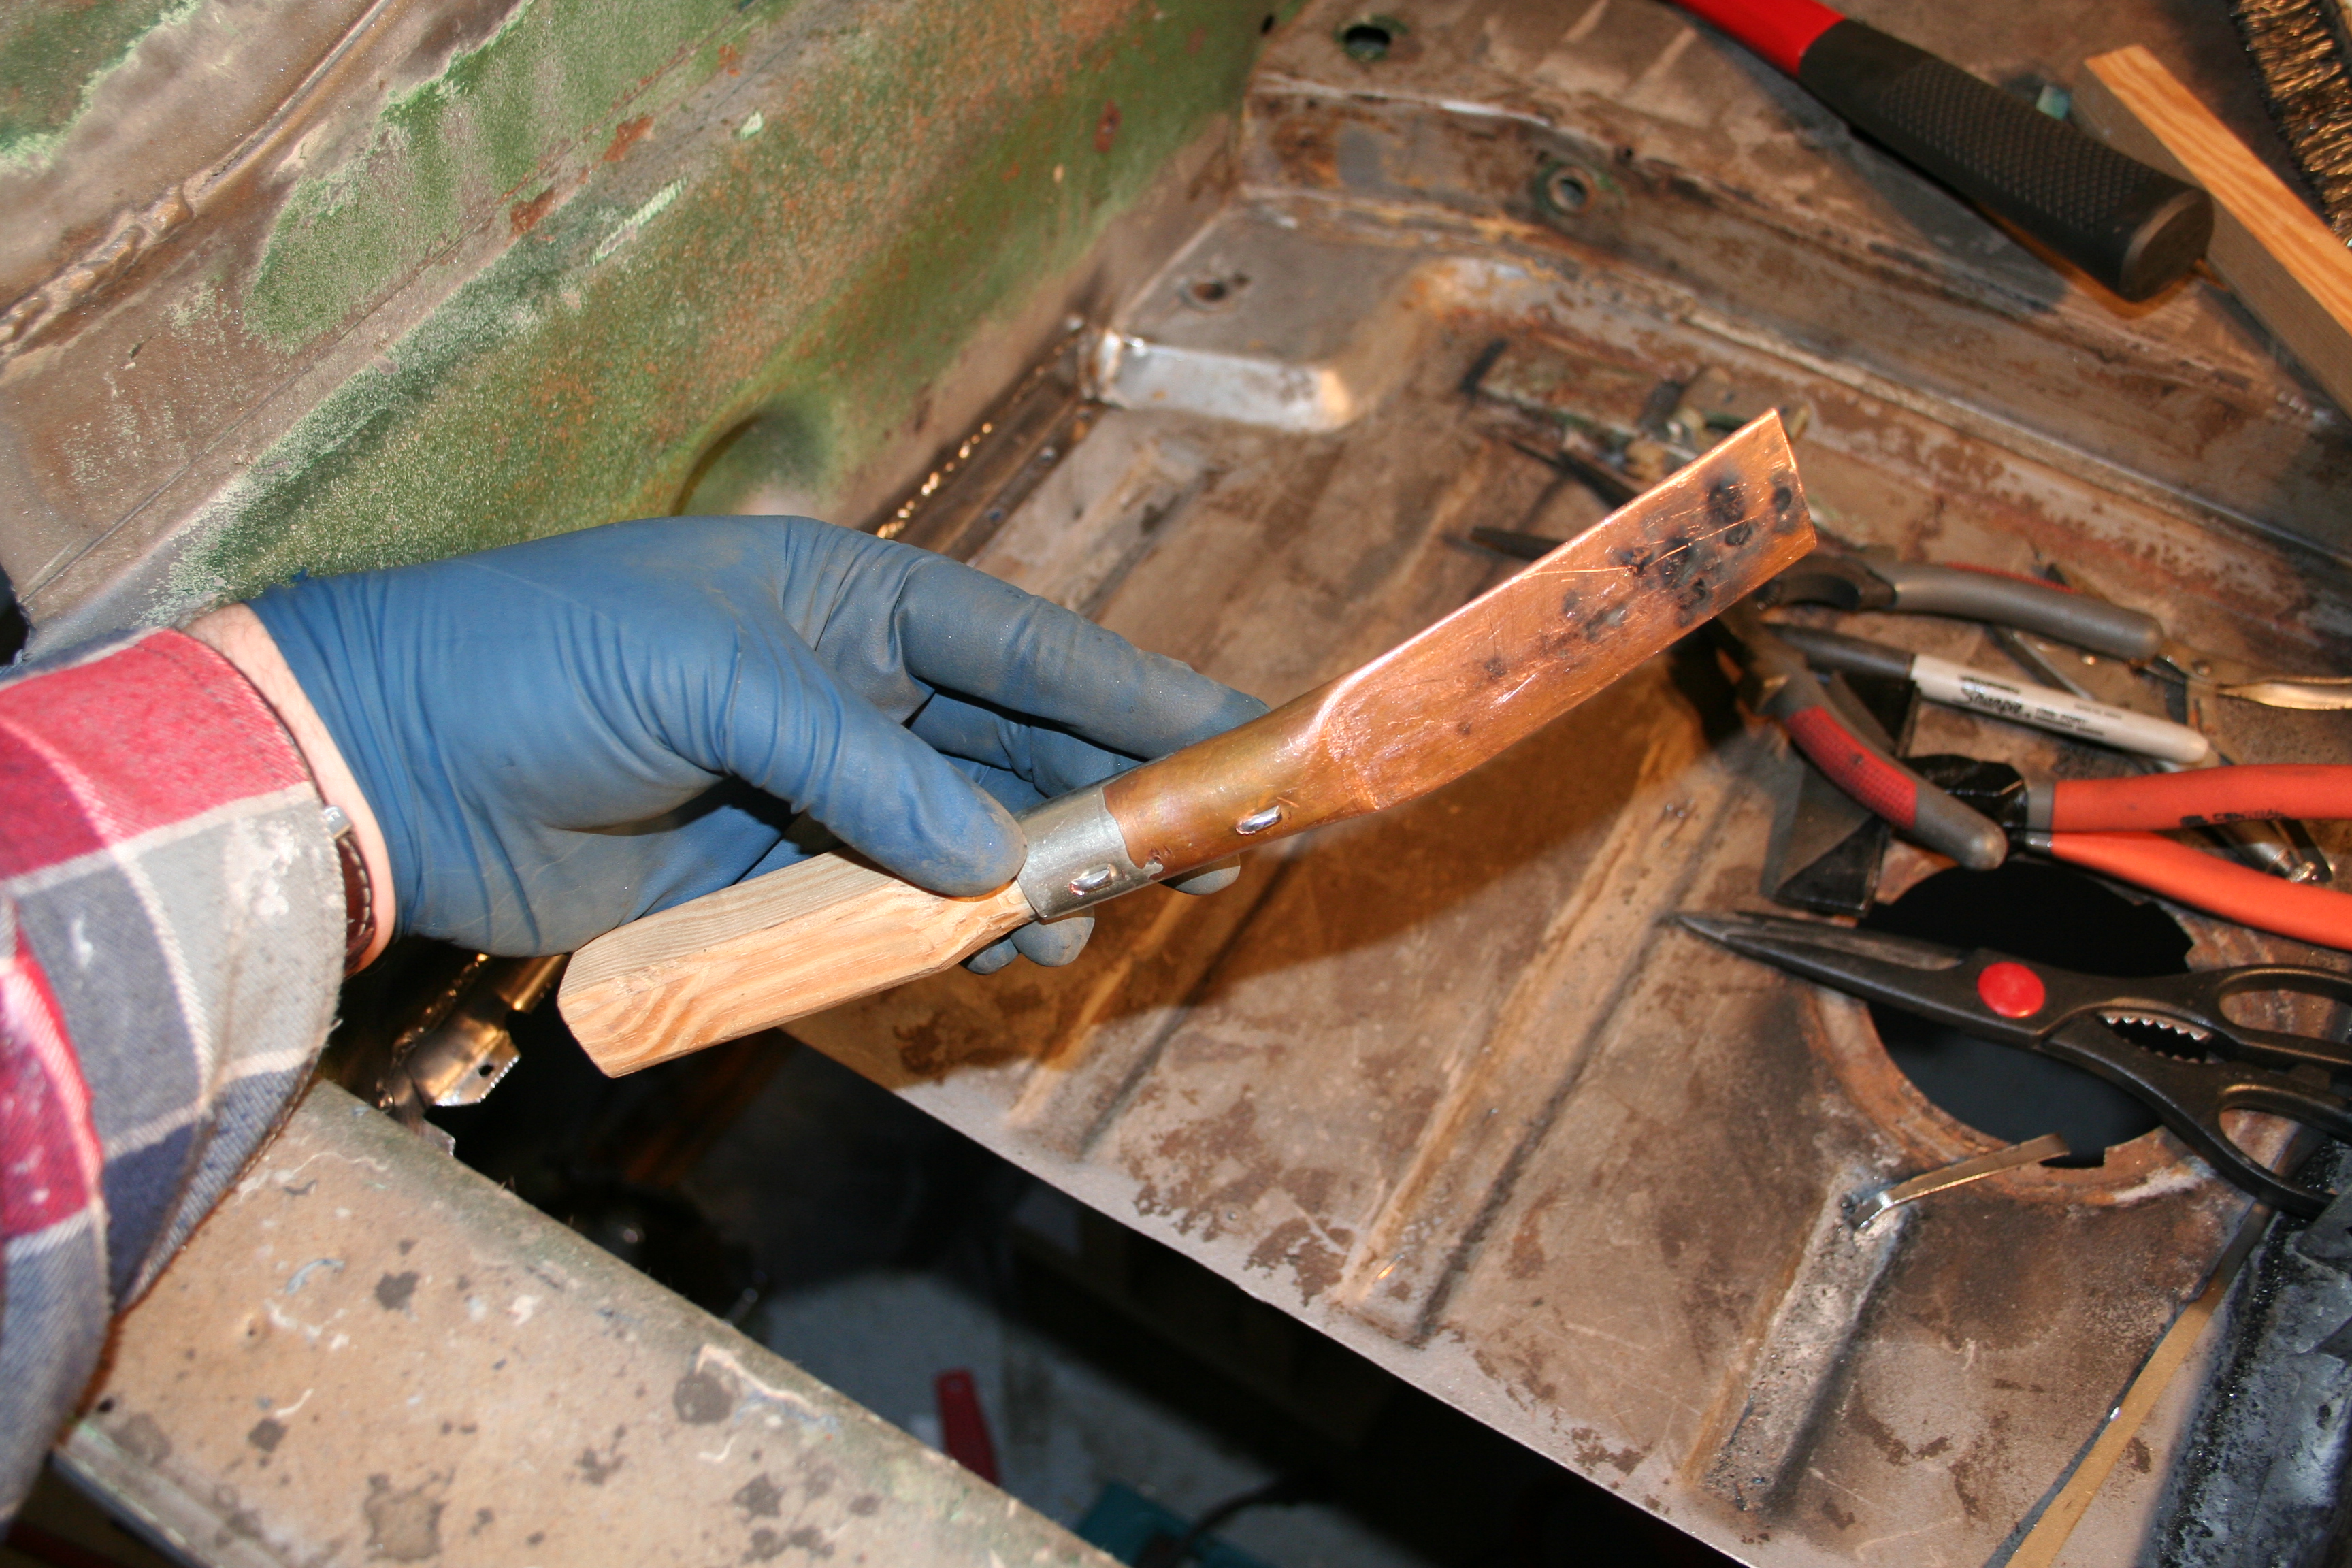
Backing/chill plate I made up based upon a description someone posted on 914world.com. It is basically a copper pipe with a wood handle in one end and pounded flat on the other. In helps absorb some of the heat and prevents burn through on thin metal. And if I do burn through, it provides something to weld against to fill the hole. The point of the copper is that the molten pool will not stick to it. I would just hold it up behind the section I was welding. It seems to work pretty well. 1/4/2009It's hard to believe that it's been nearly a year since I created the replacement floor section, but it is now welded in. I figured I deserve an "action" shot of me working on the car. If I knew I was planning on doing this, I might have taken a shower beforehand. However this is my "roll out of bed and start grinding welds in a cold garage" look.
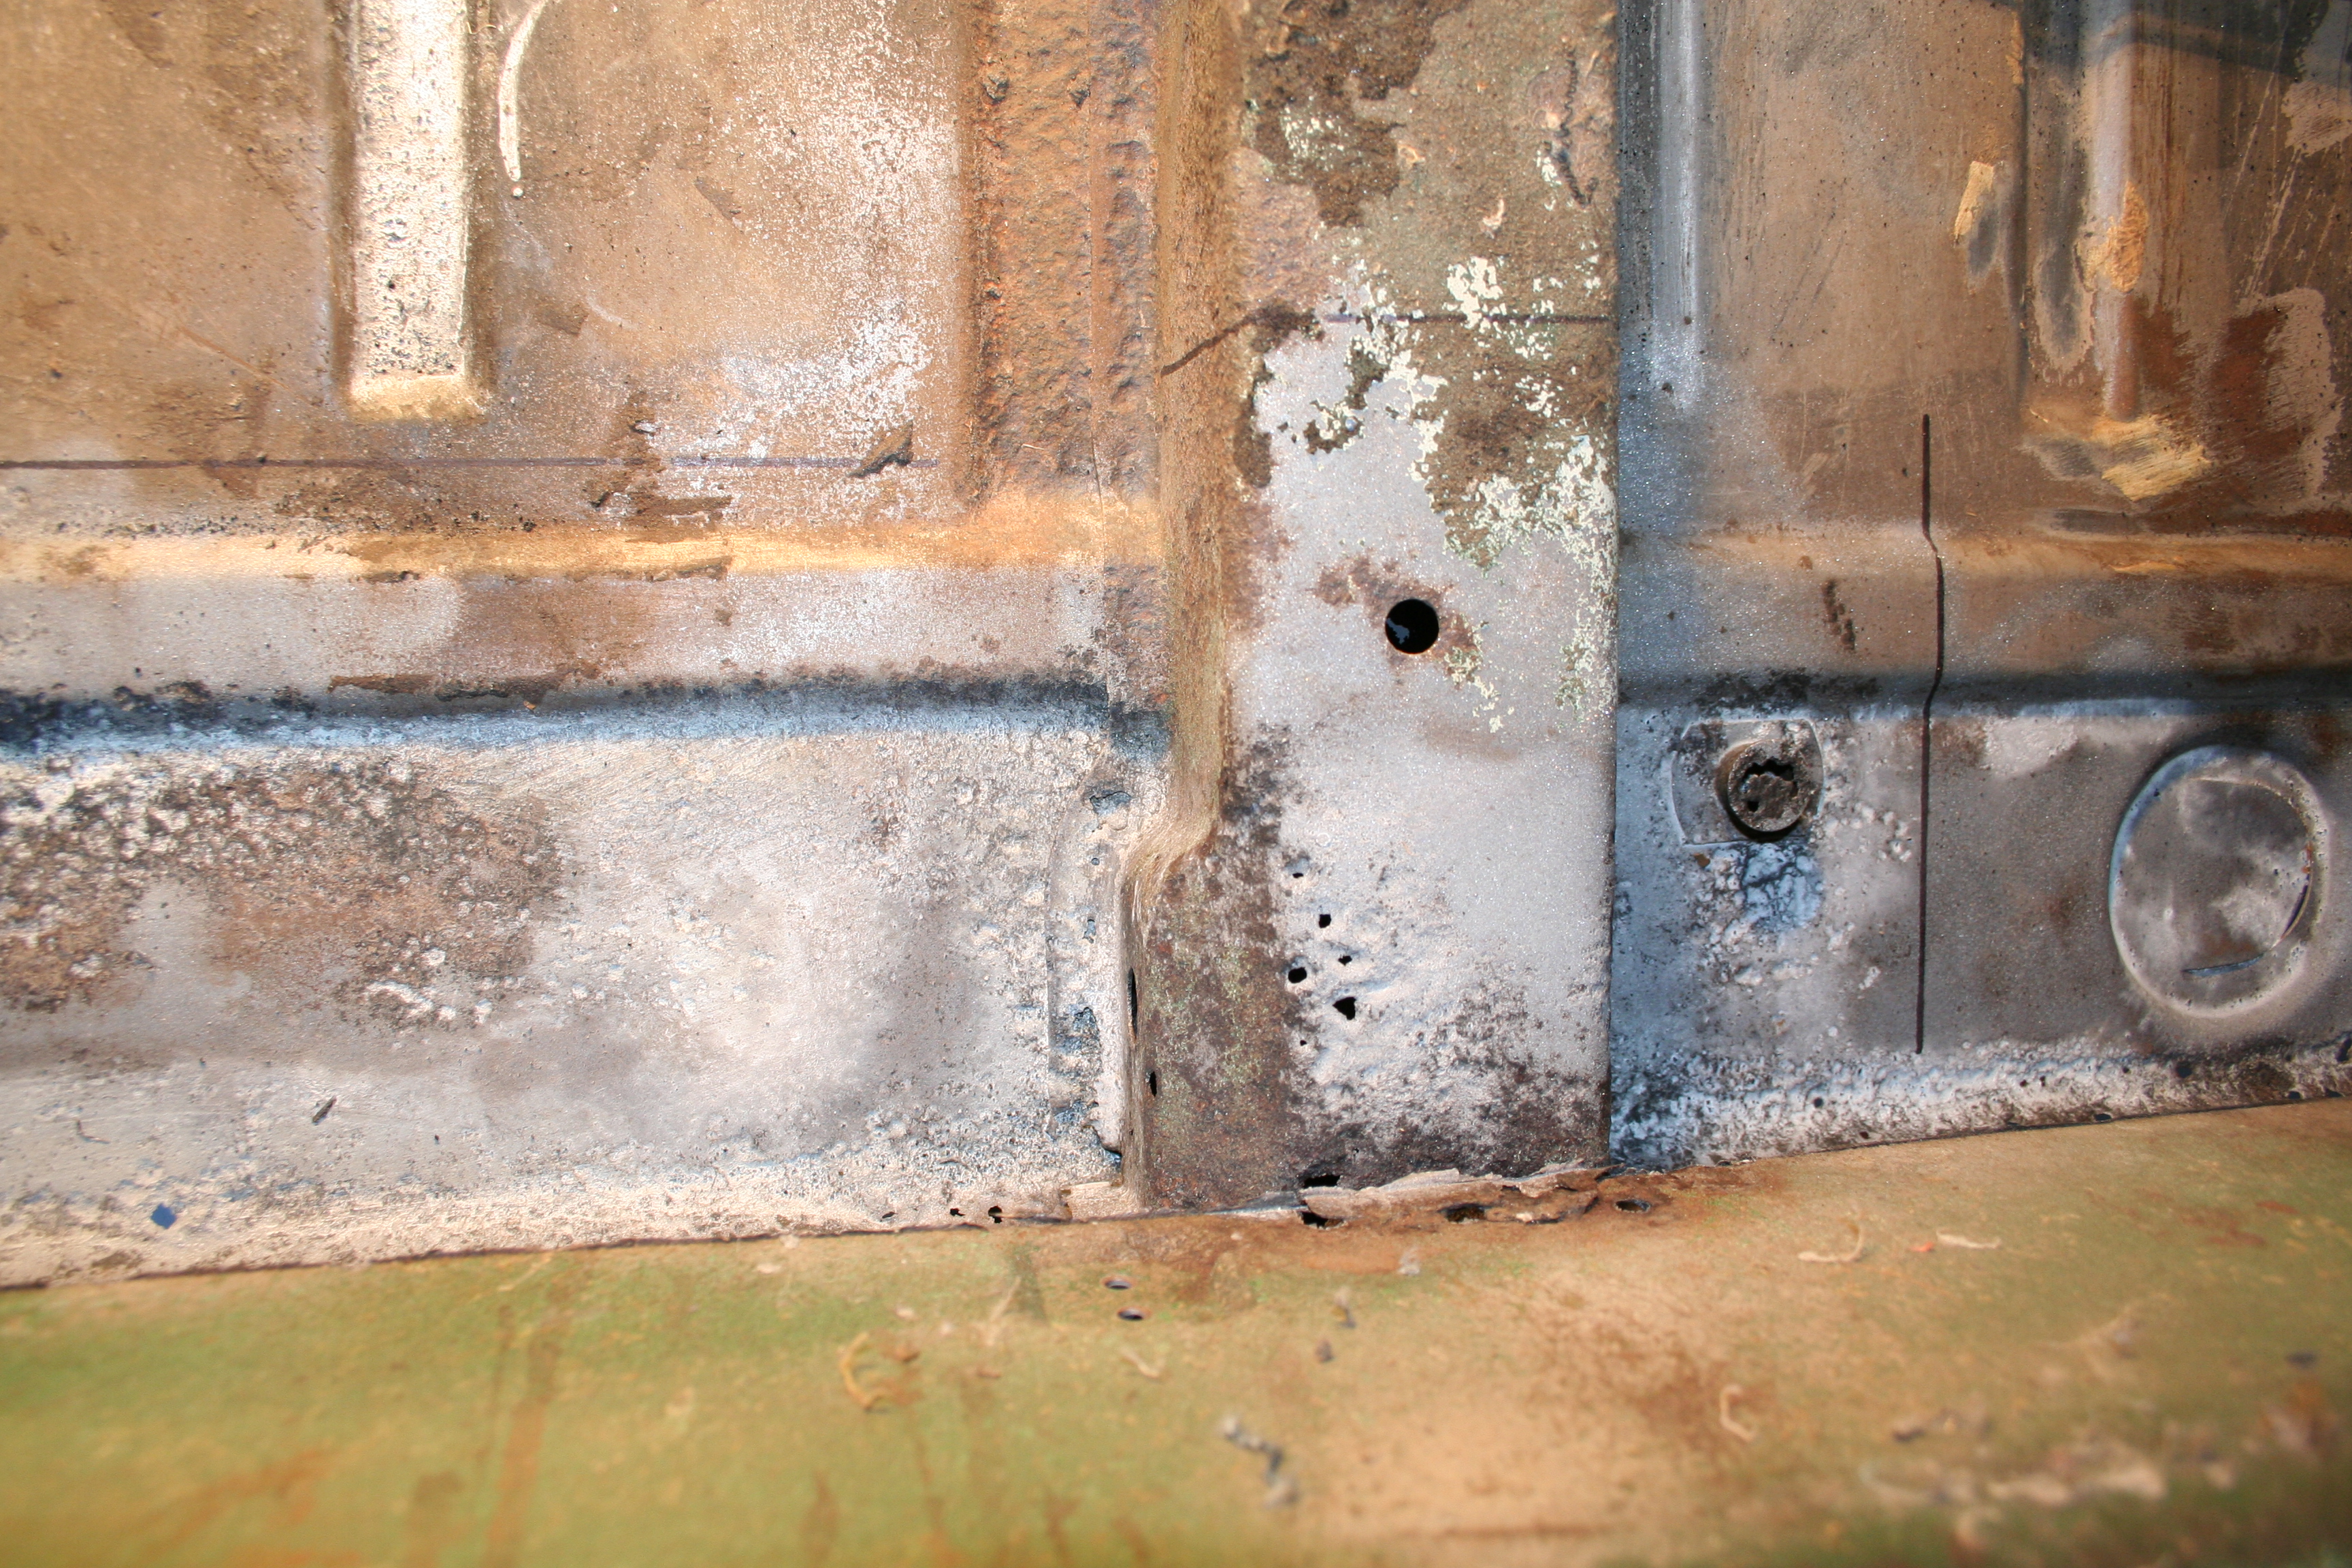
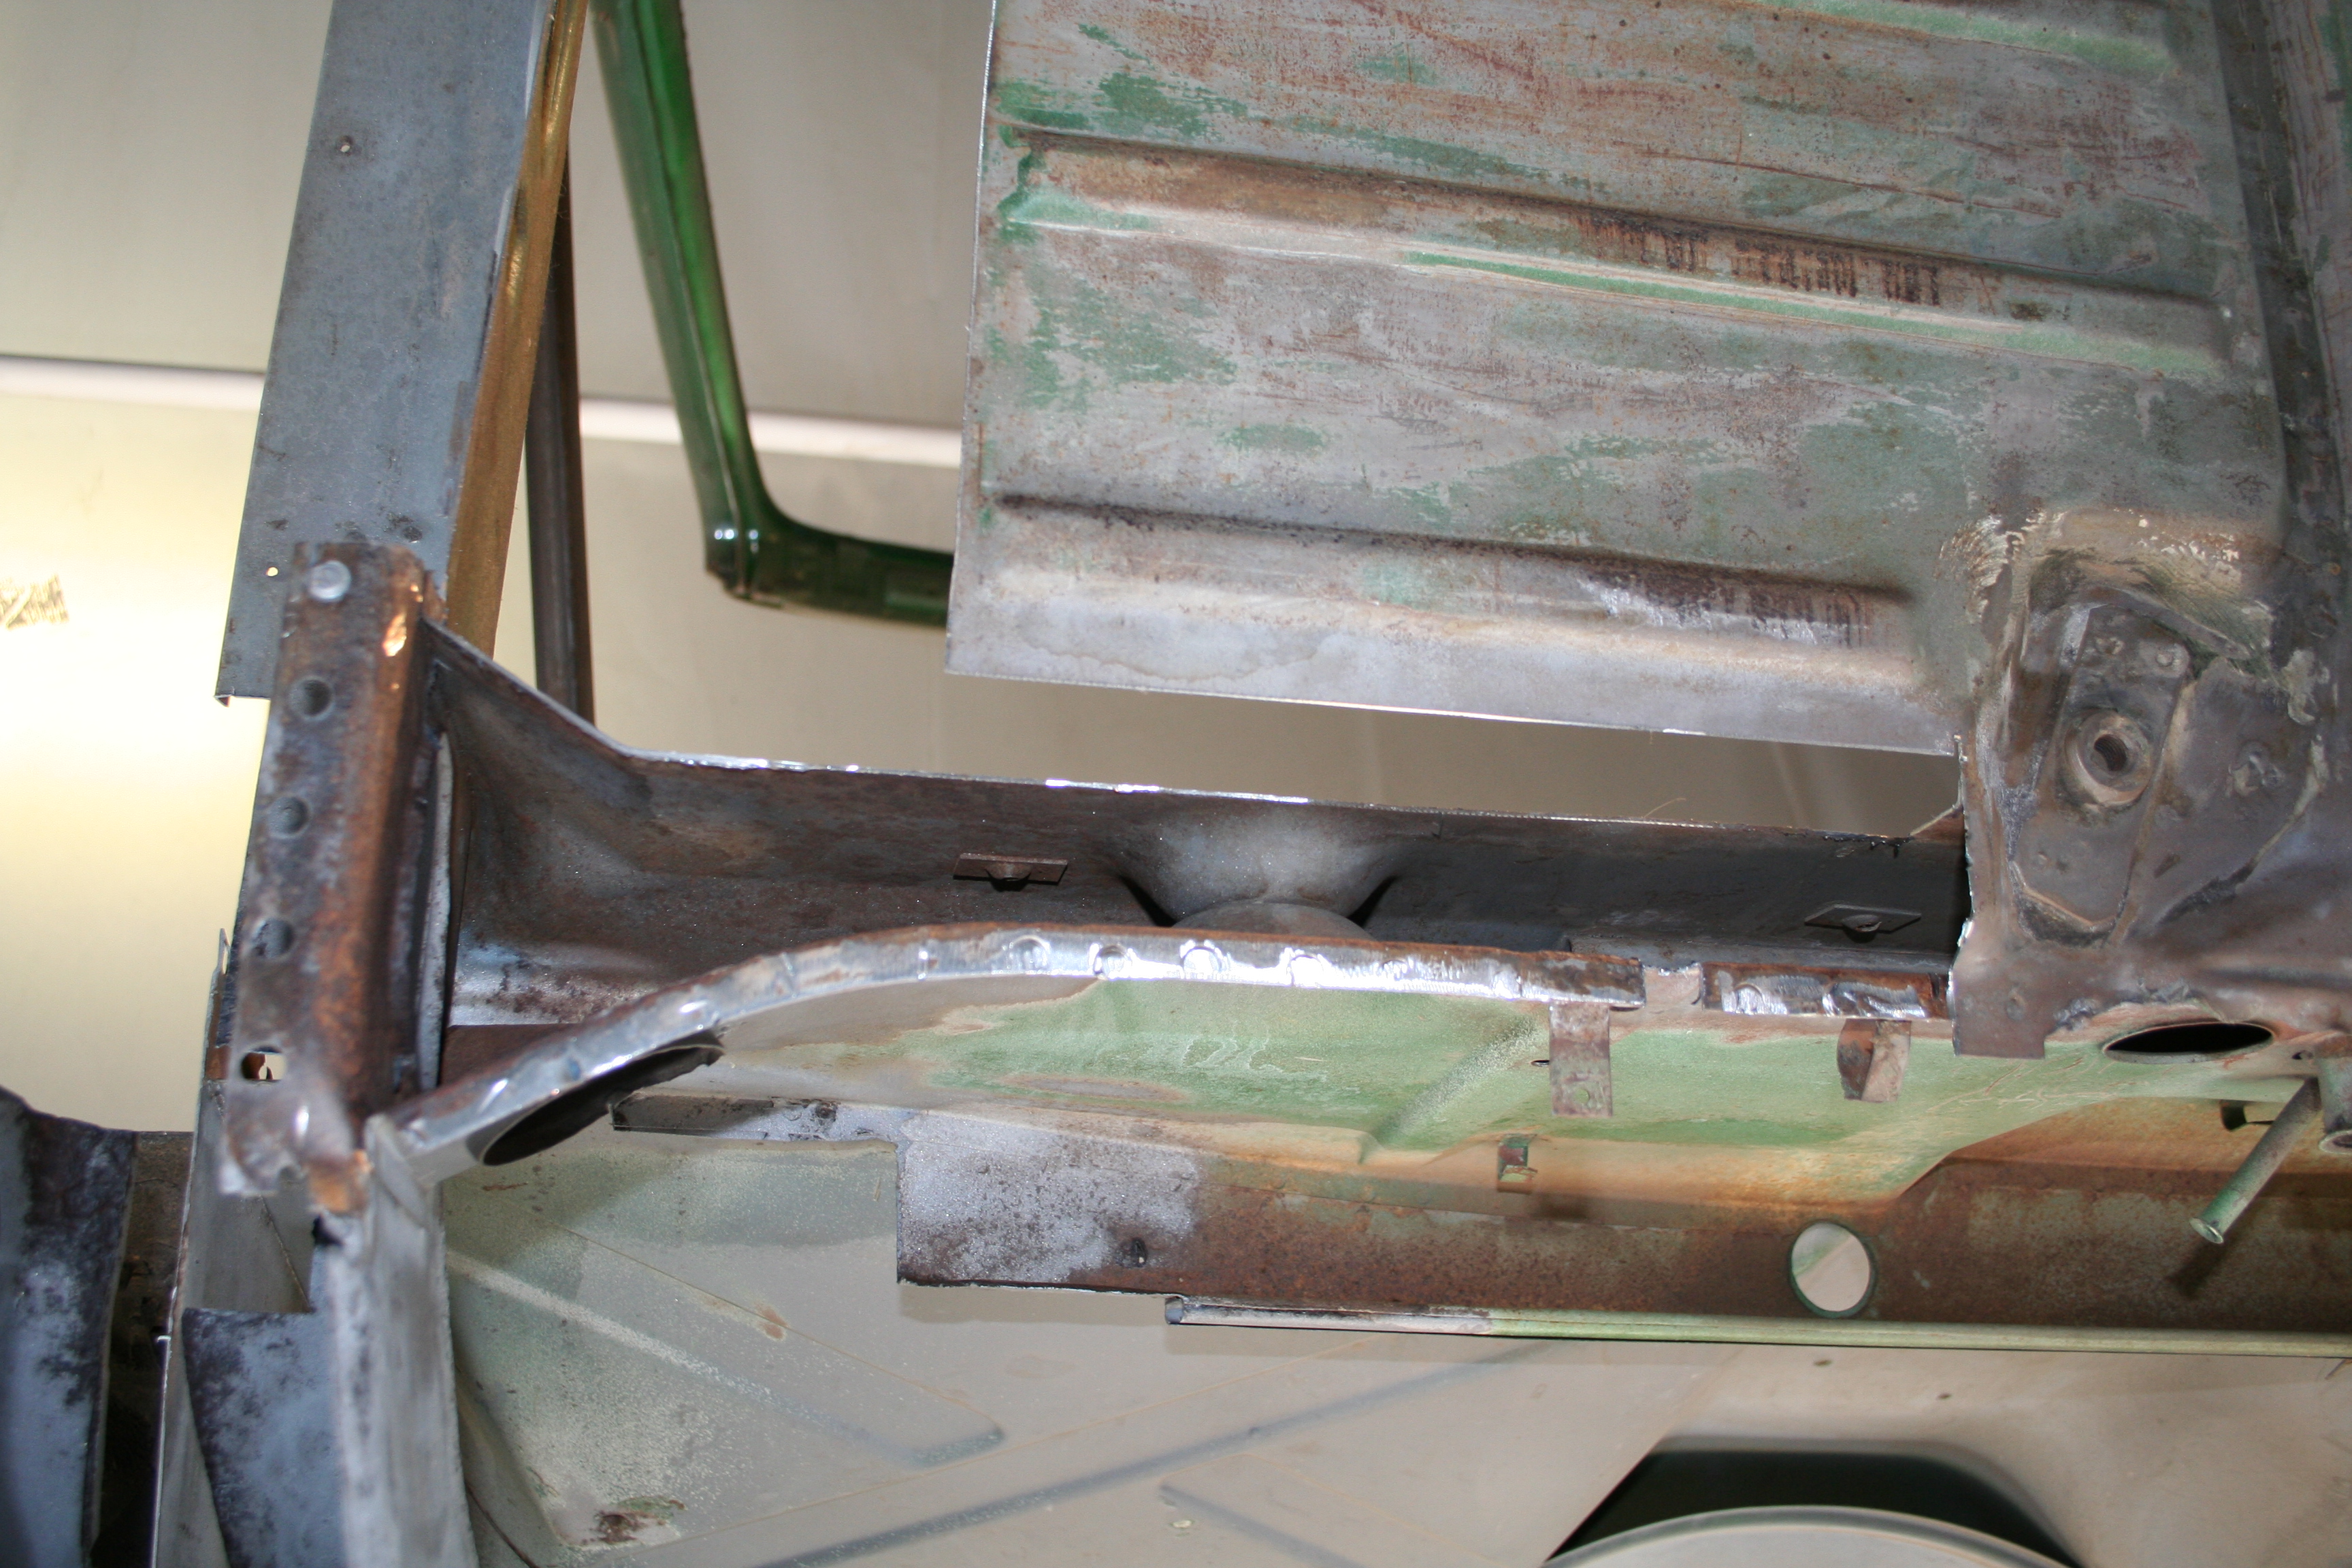
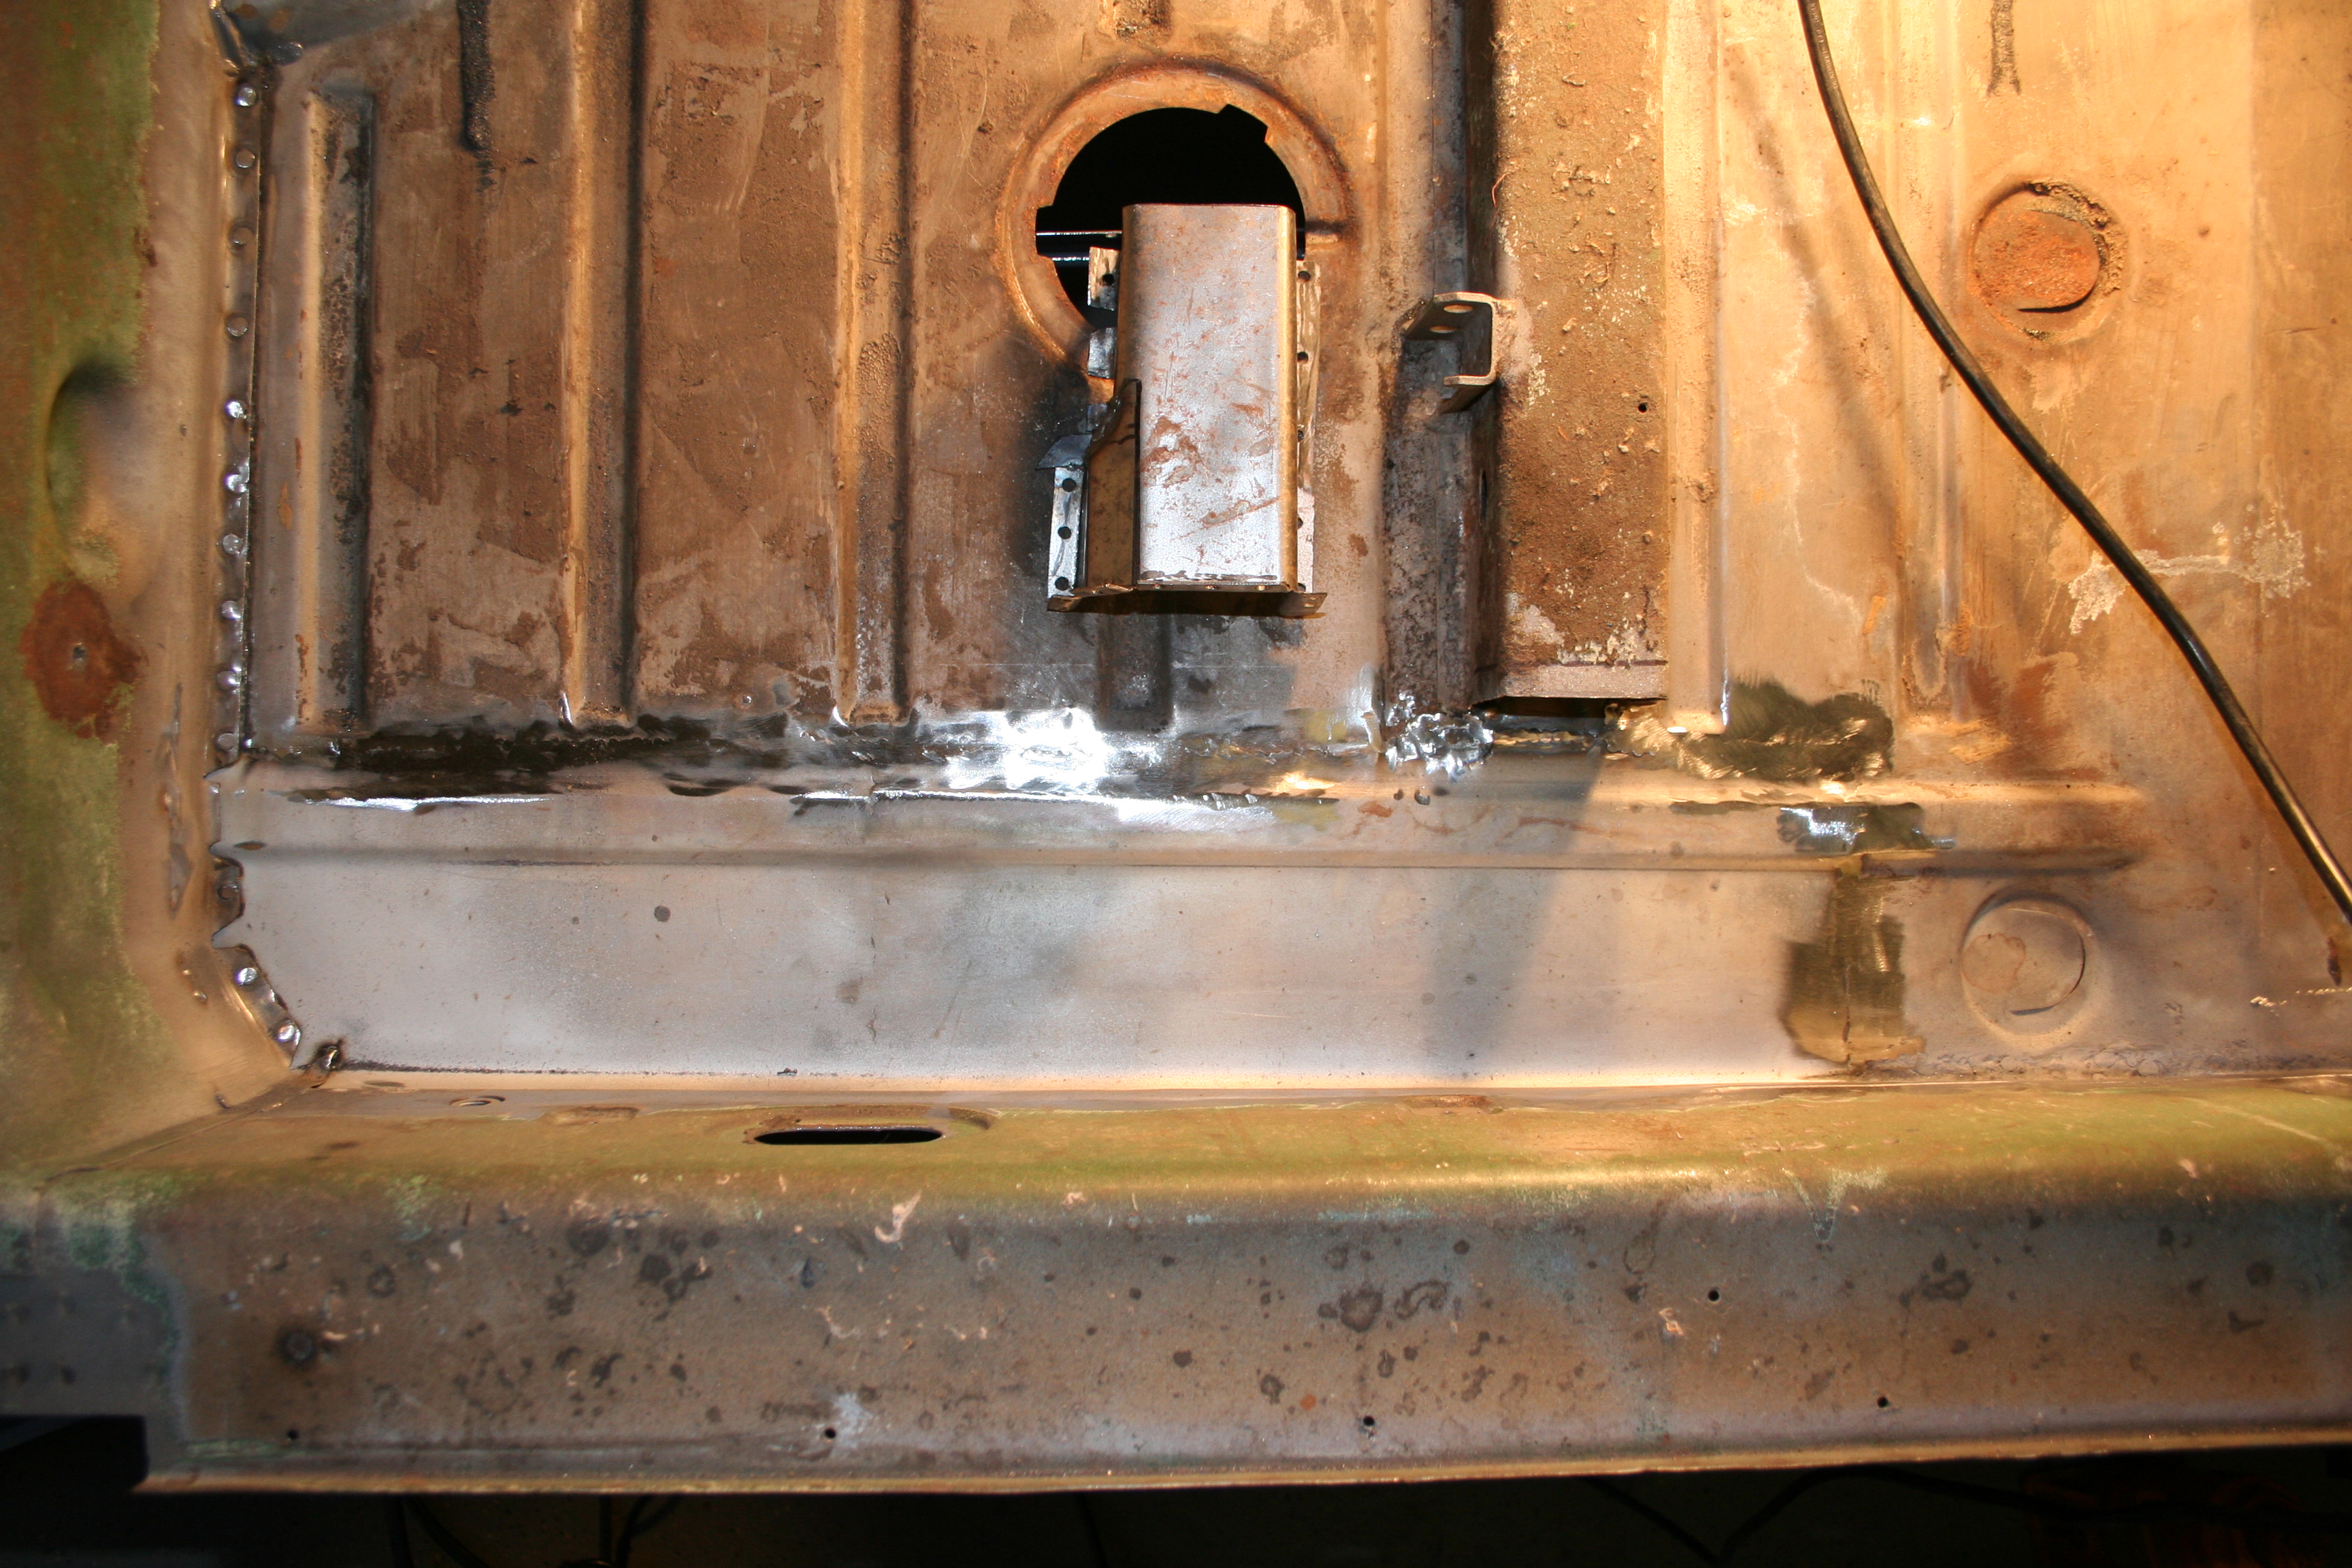
1/11/2009Now I need to put the factory "U channel" reinforcement onto the bottom of the car. This reinforcement is right below the seat hinges. The floor has a "U channel" pointing up that is part of the floor and the weld on reinforcement points down. It makes a small box section. I have always wondered if this is a place that rust starts. I drilled out the spot welds on the old floor section and removed the factory U channel and other than some surface rust it doesn't look too bad.
It's hard to tell in this photo, but this is the U channel laying on the old floor section after the spot welds have been drilled out and it was popped loose.
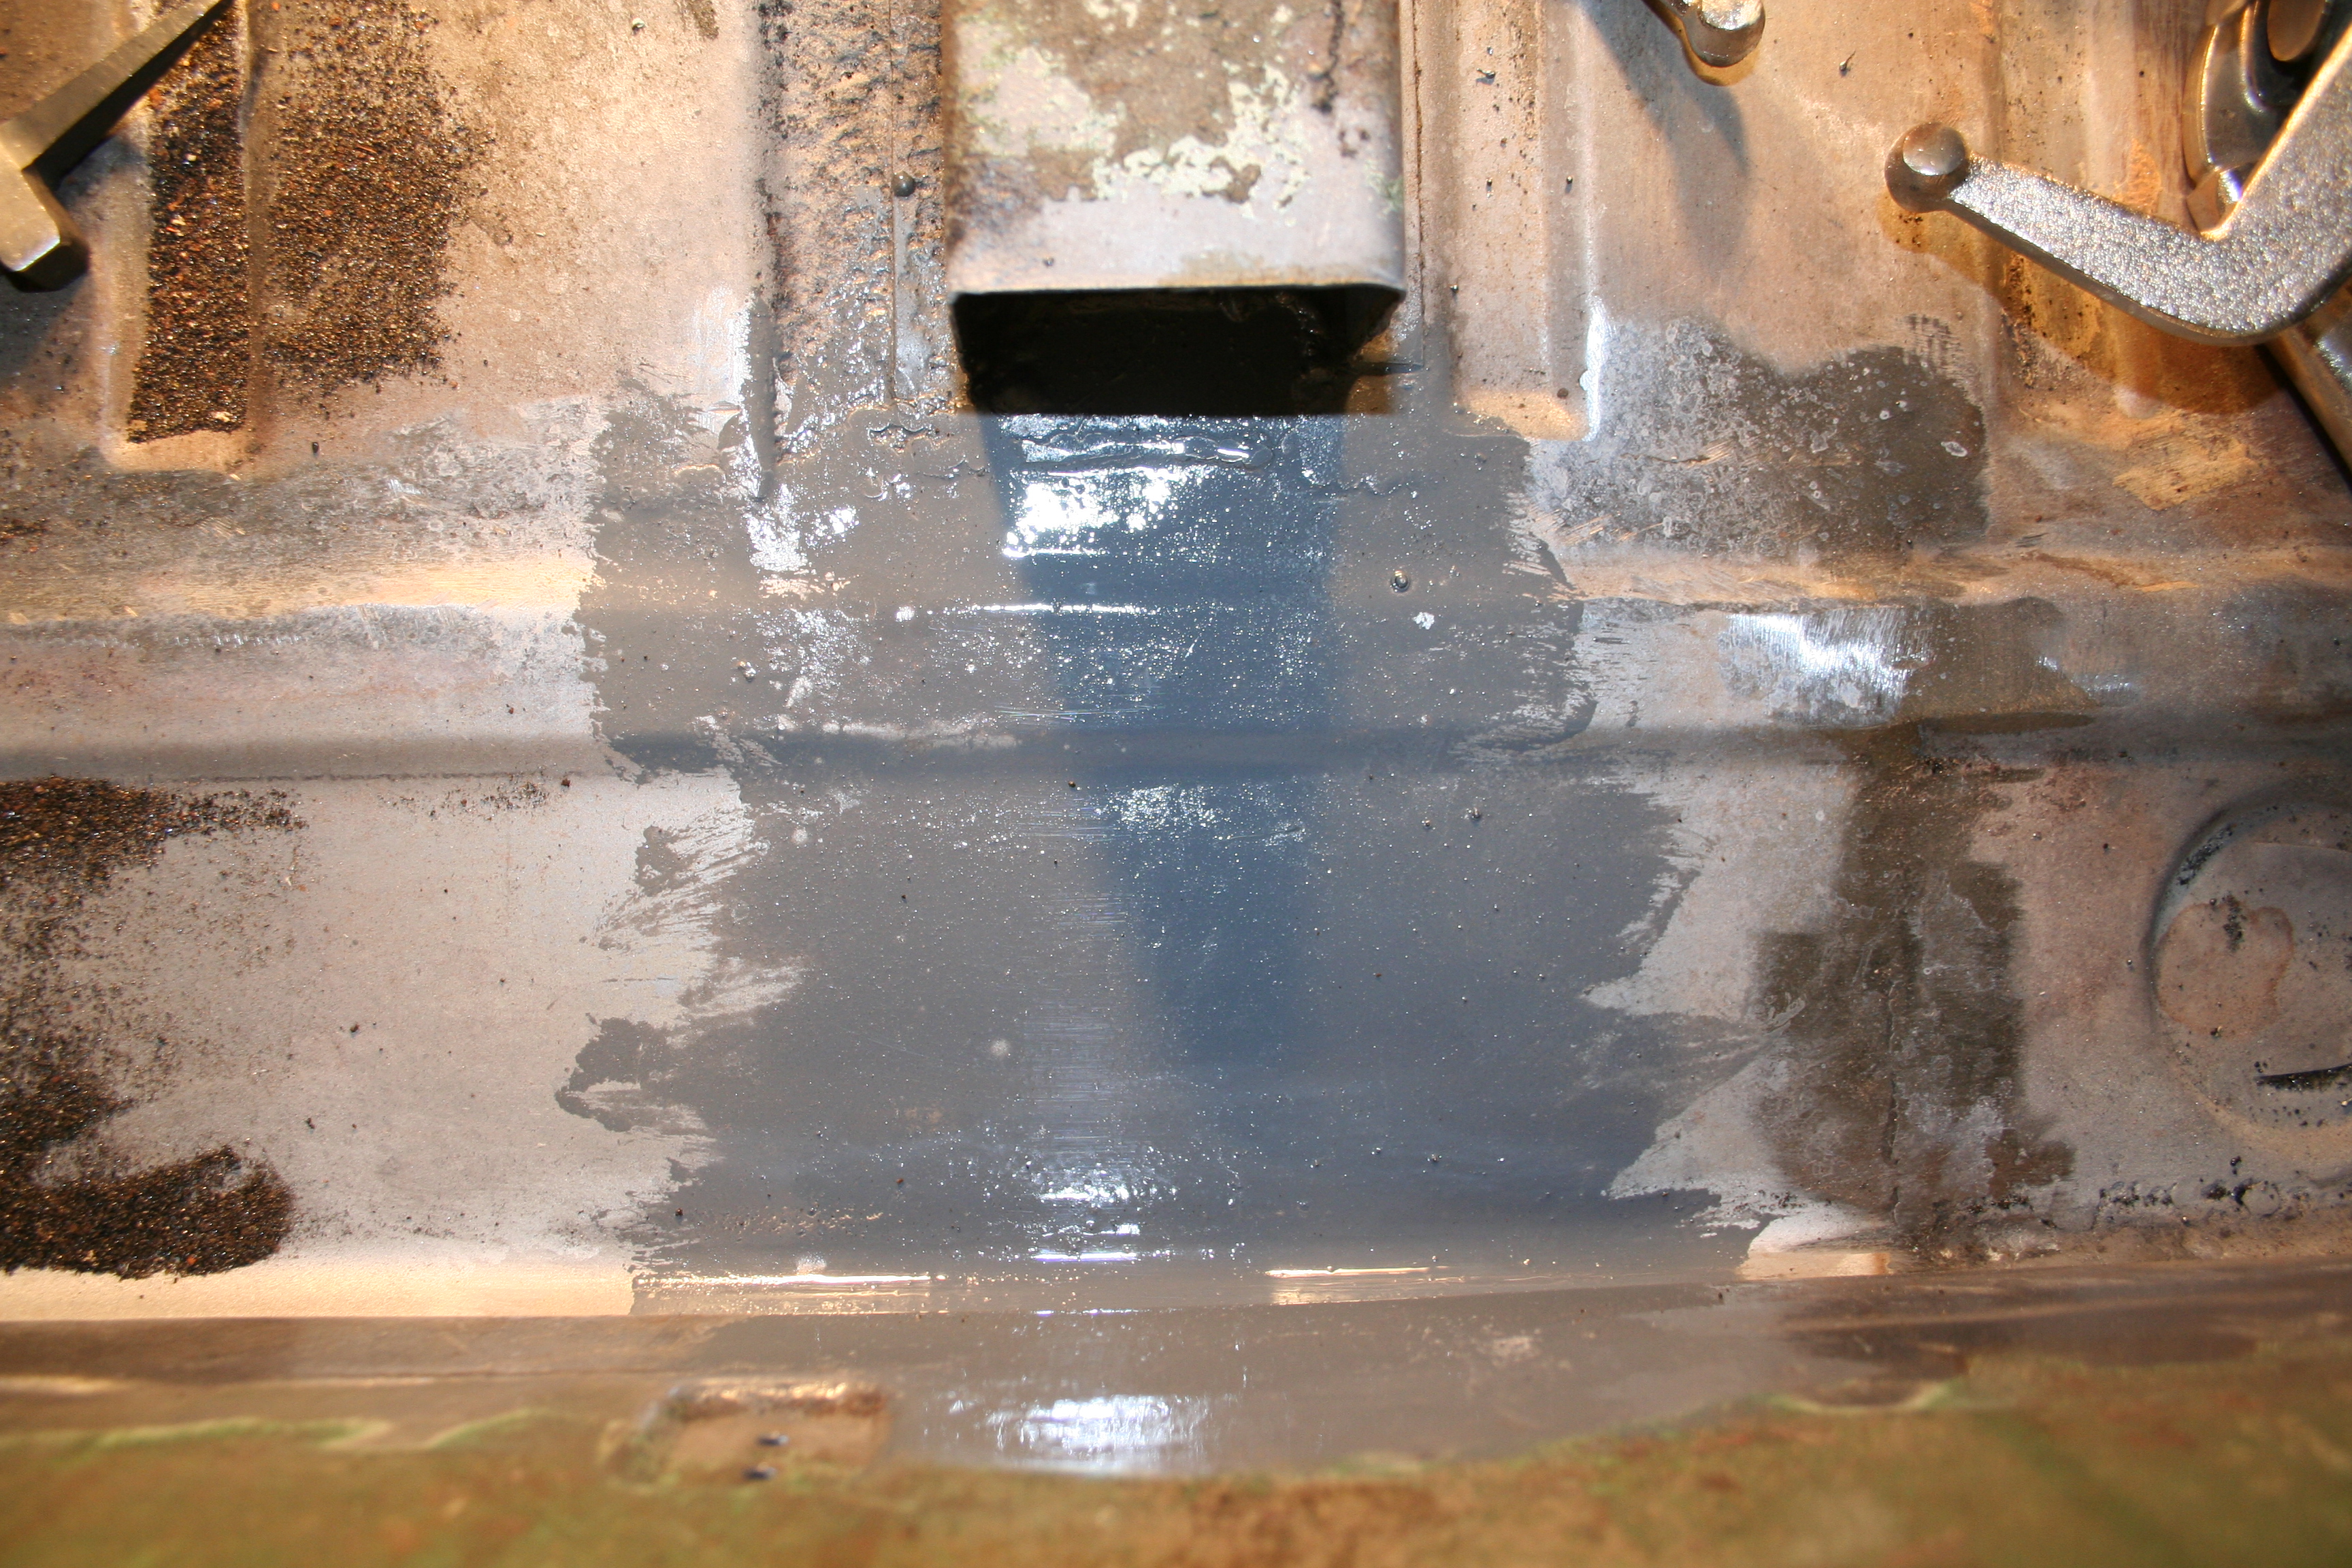
After some time in the blast cabinet, some metal ready and some POR-15, it's all ready to be welded back together. Before I weld, I will grind off small spots in the POR-15 as you can't weld through it. 1/19/2009Now, I need to focus on replacing the last section of the crossmember. I have the original (rusted beyond repair) so I measured it and am fabricating a replacement.
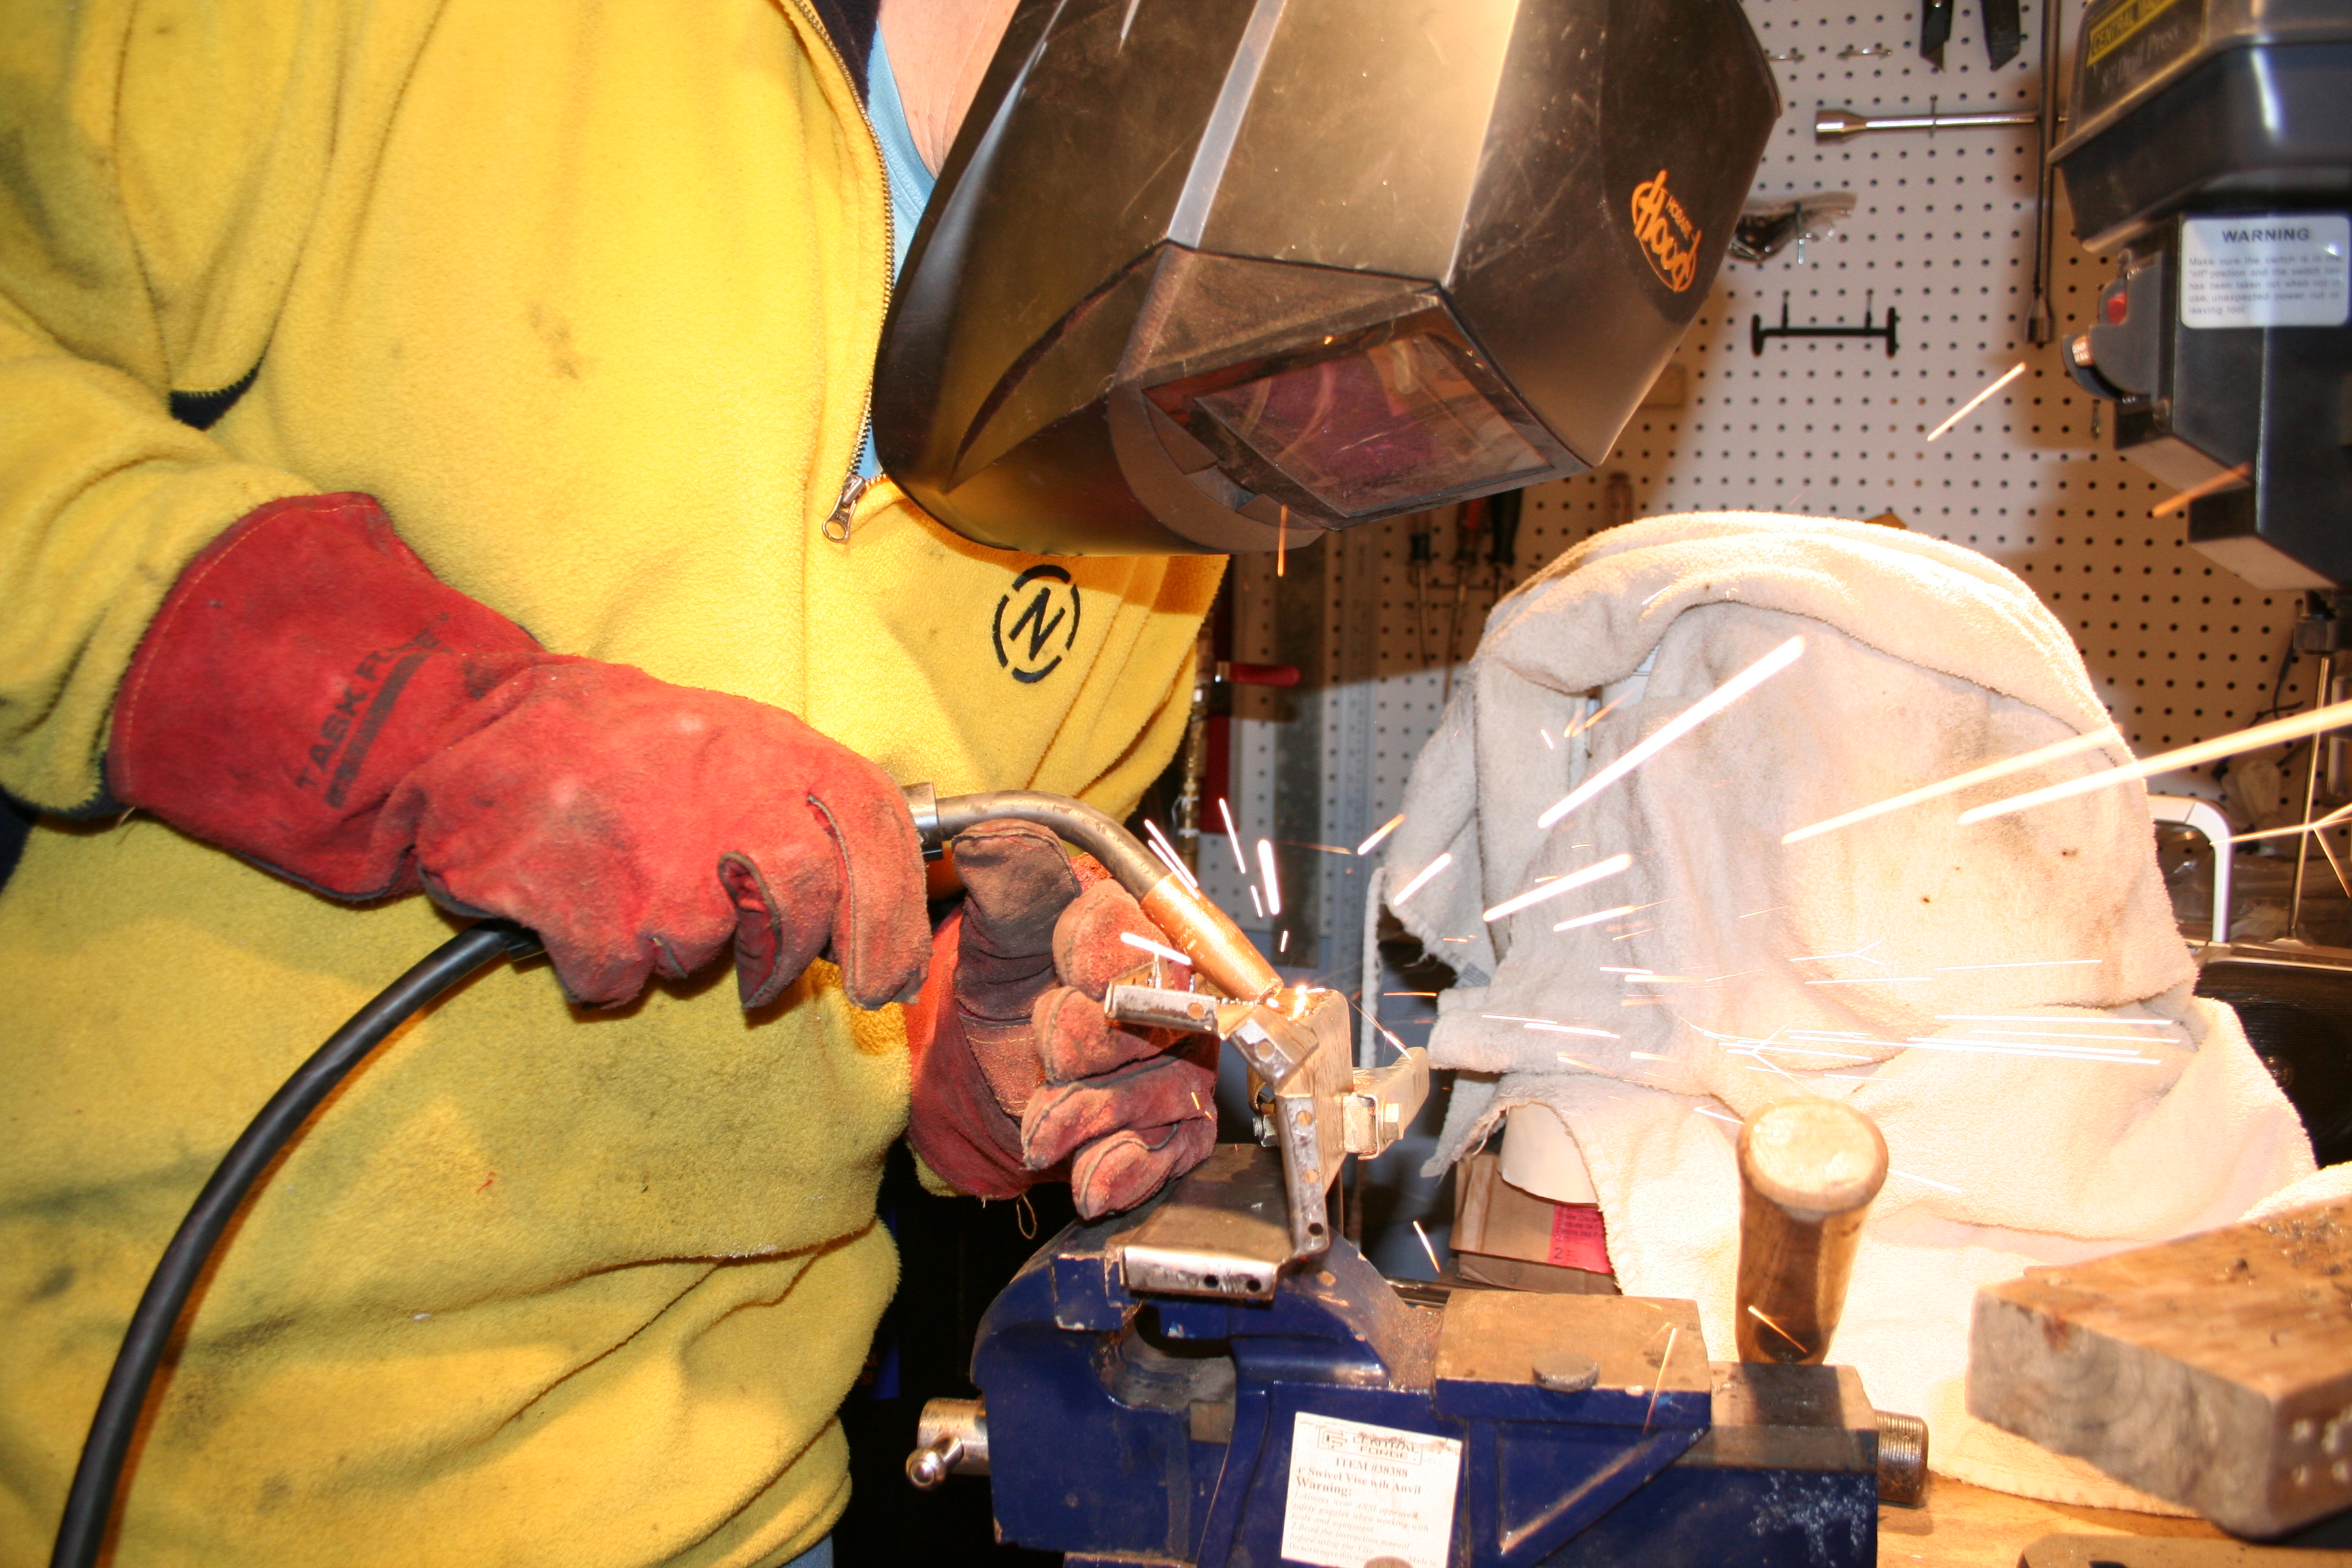
Another action shot. Here I am welding up the replacement section. So... what is wrong with this photo? I am wearing welding mask, and gloves, so what is wrong with my welding protection? I am wearing a synthetic fleece jacket. Hot molten balls will burn right through it. I need to buy me a leather welding apron.
Here is the replacement sitting as well as the spot it will slot into. I still have some more work to do fabricating the replacement. Once it's done, I will weld it and the U channel reinforcement mentioned above in at the same time. 2/13/2009Cross member is just about ready to weld in. Here is the nearly final prep. I have painted POR-15 on the floor in this area.
|
|