![]()
![]()
|
|
|
|
RotisserieThis documents the creation of an automobile rotisserie. This type of rotisserie is commonly used to aid in performing bodywork repairs, painting and other tasks. The concept (at least for my project) is to allow me to strip all of the components (suspension, engine, transmission, wiring, etc.) from my Porsche 914 and then allow me to rotate it along an axis that runs from the front to the rear of the car. Rotating the car allows me to easily access parts of the car that otherwise would be awkward to reach. I plan to expand this article to include instructions but for now here are some photos...
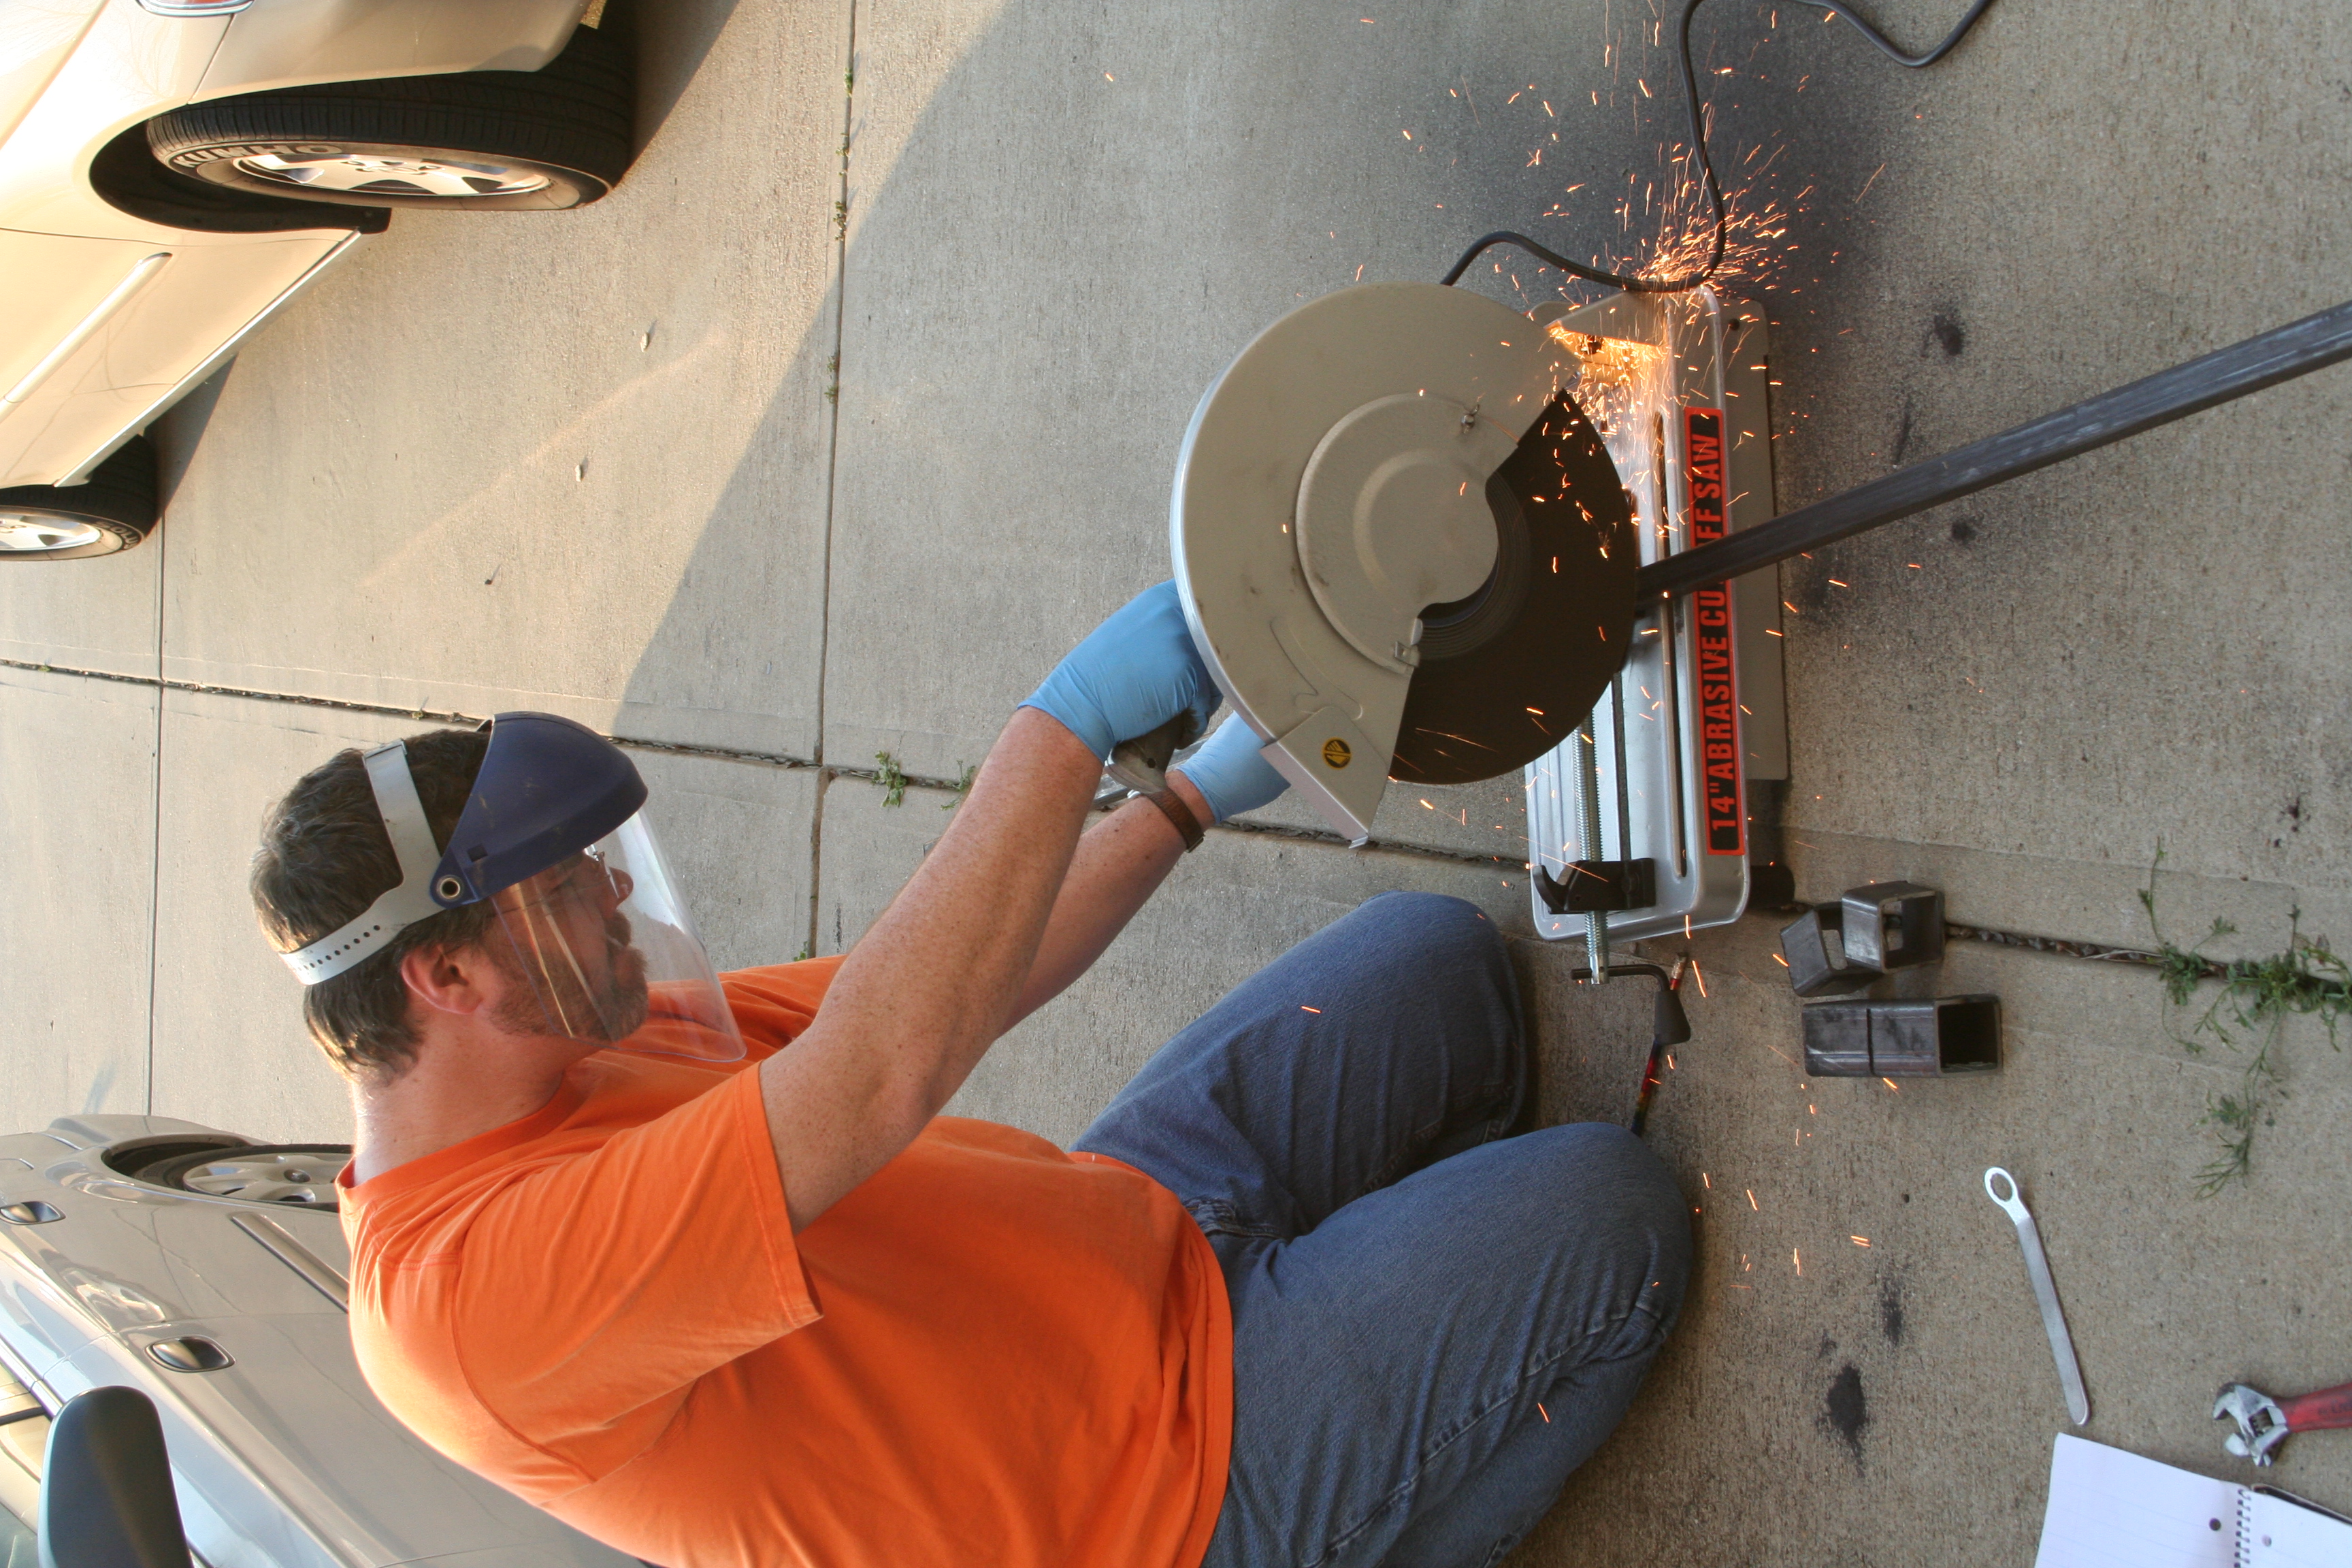
Me using my abrasive chop saw to cut some of the material. I love angle grinders and abrasive saws! Sparks are fun!
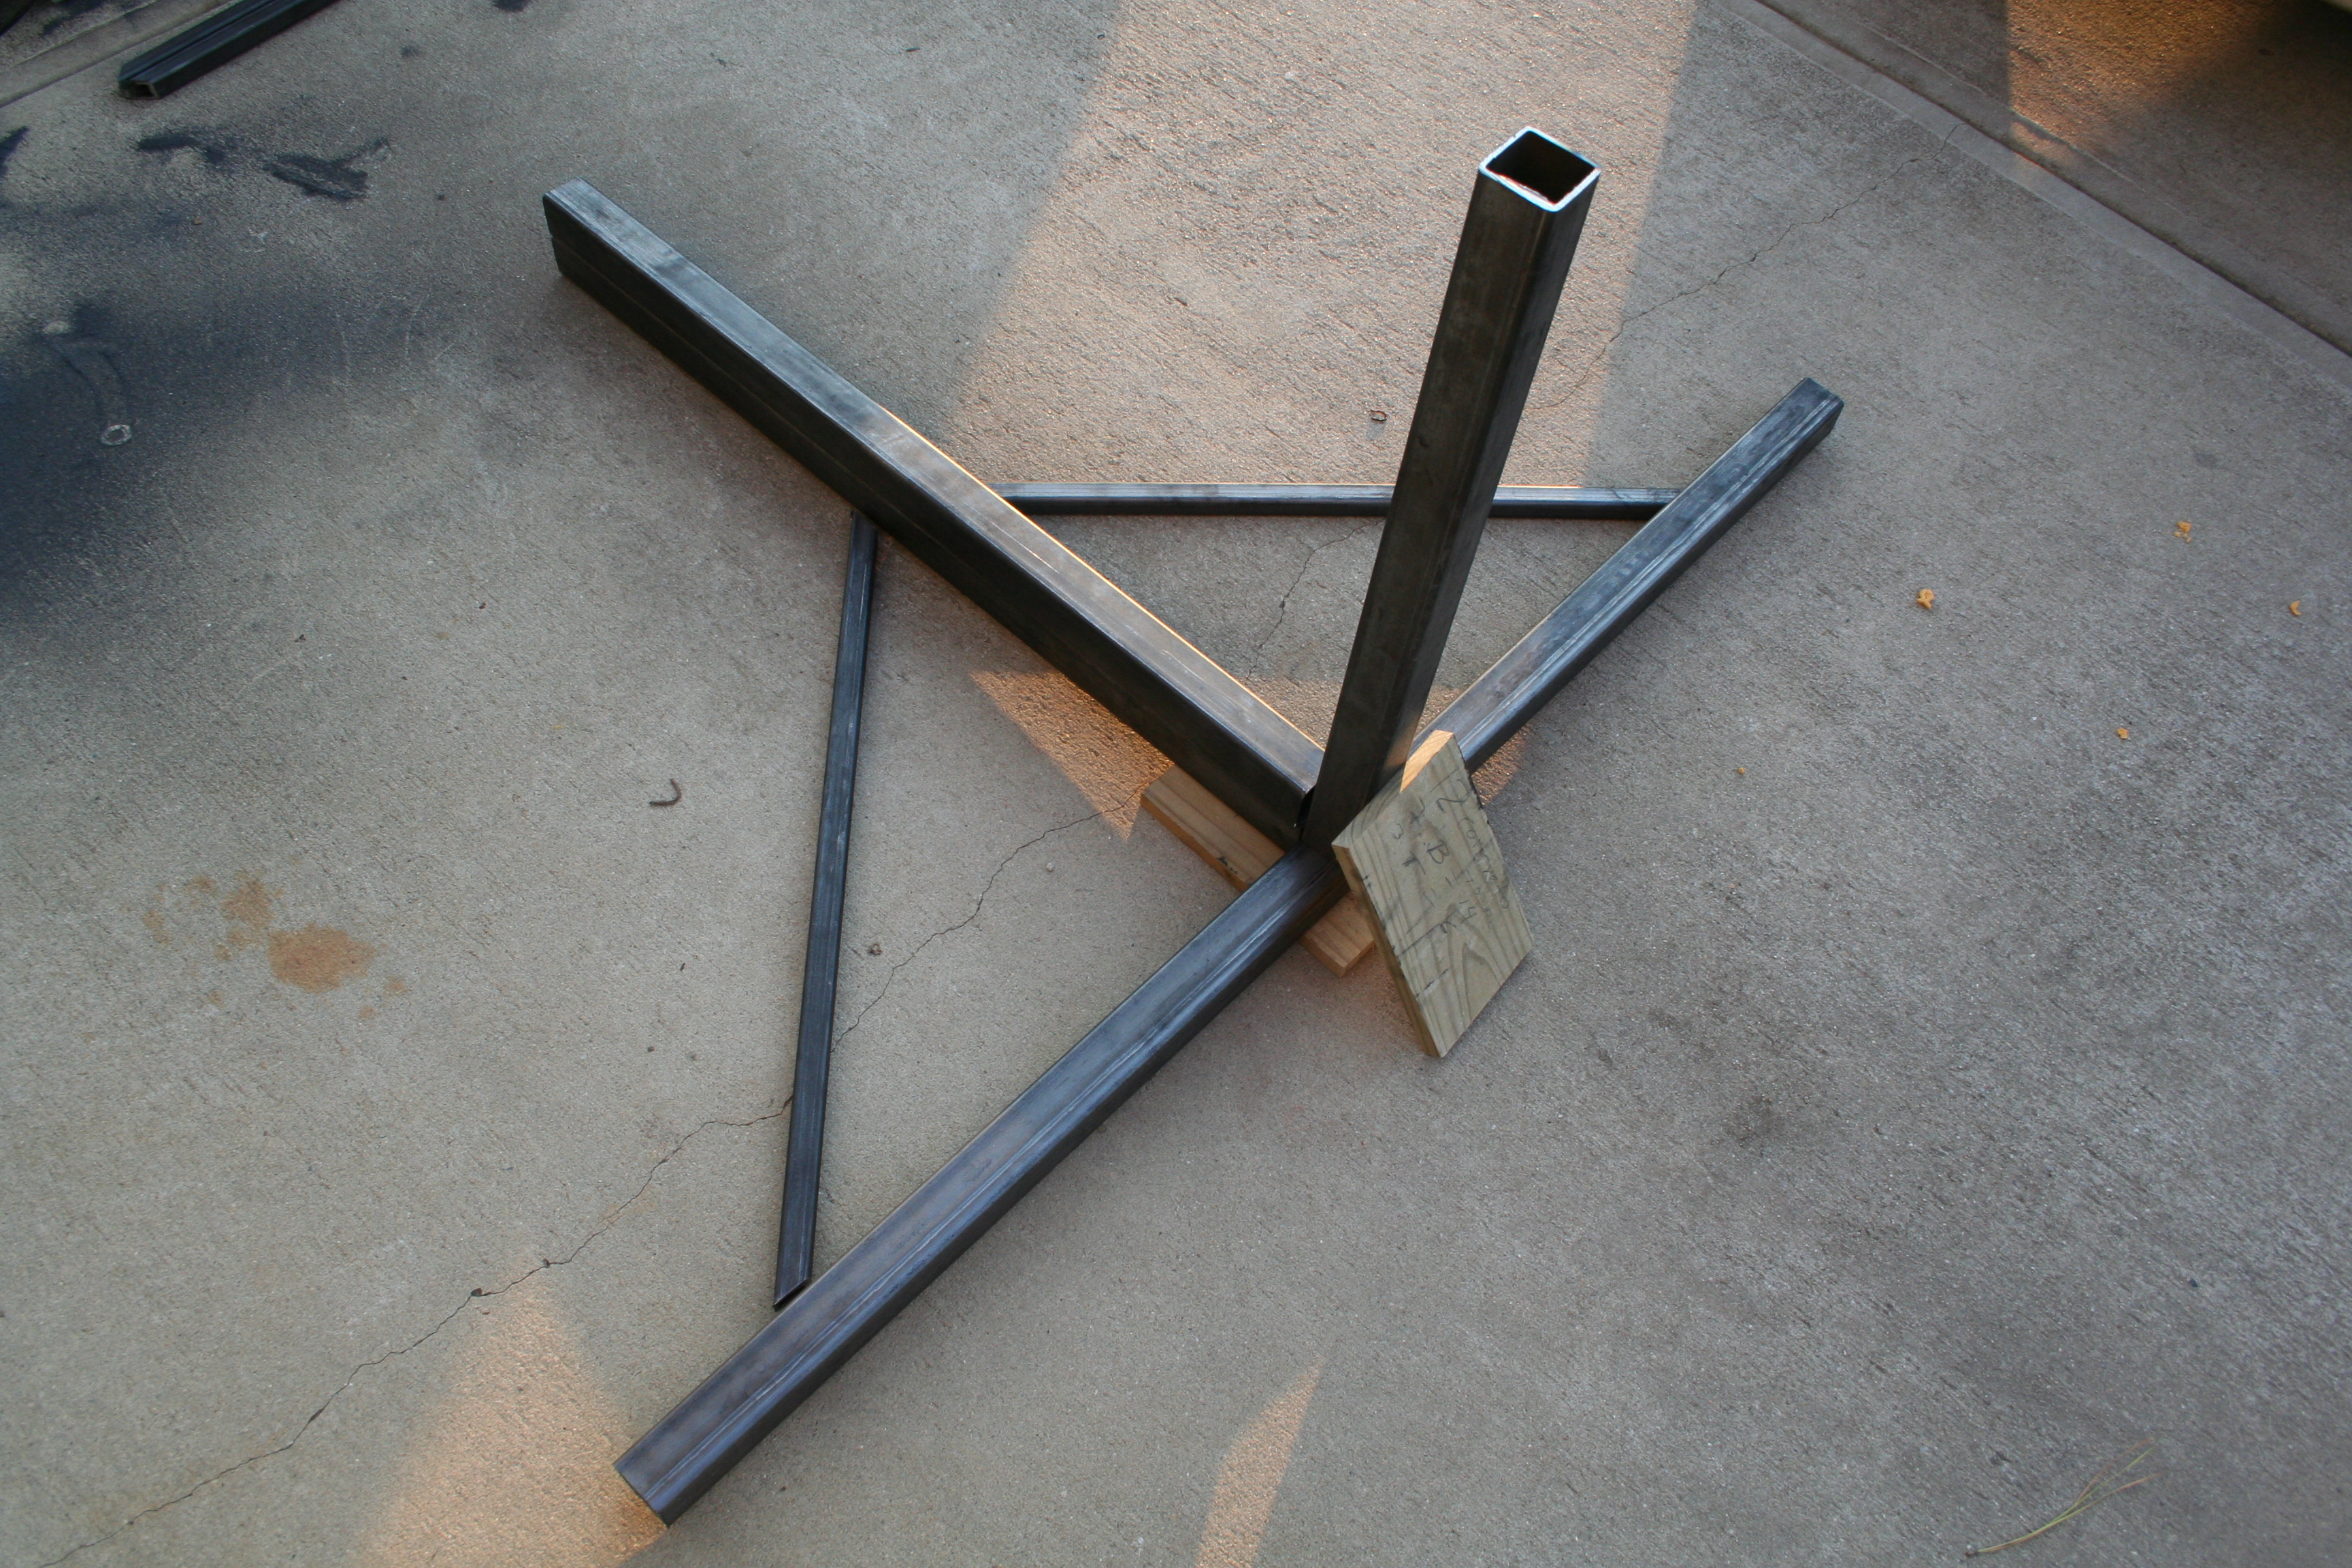
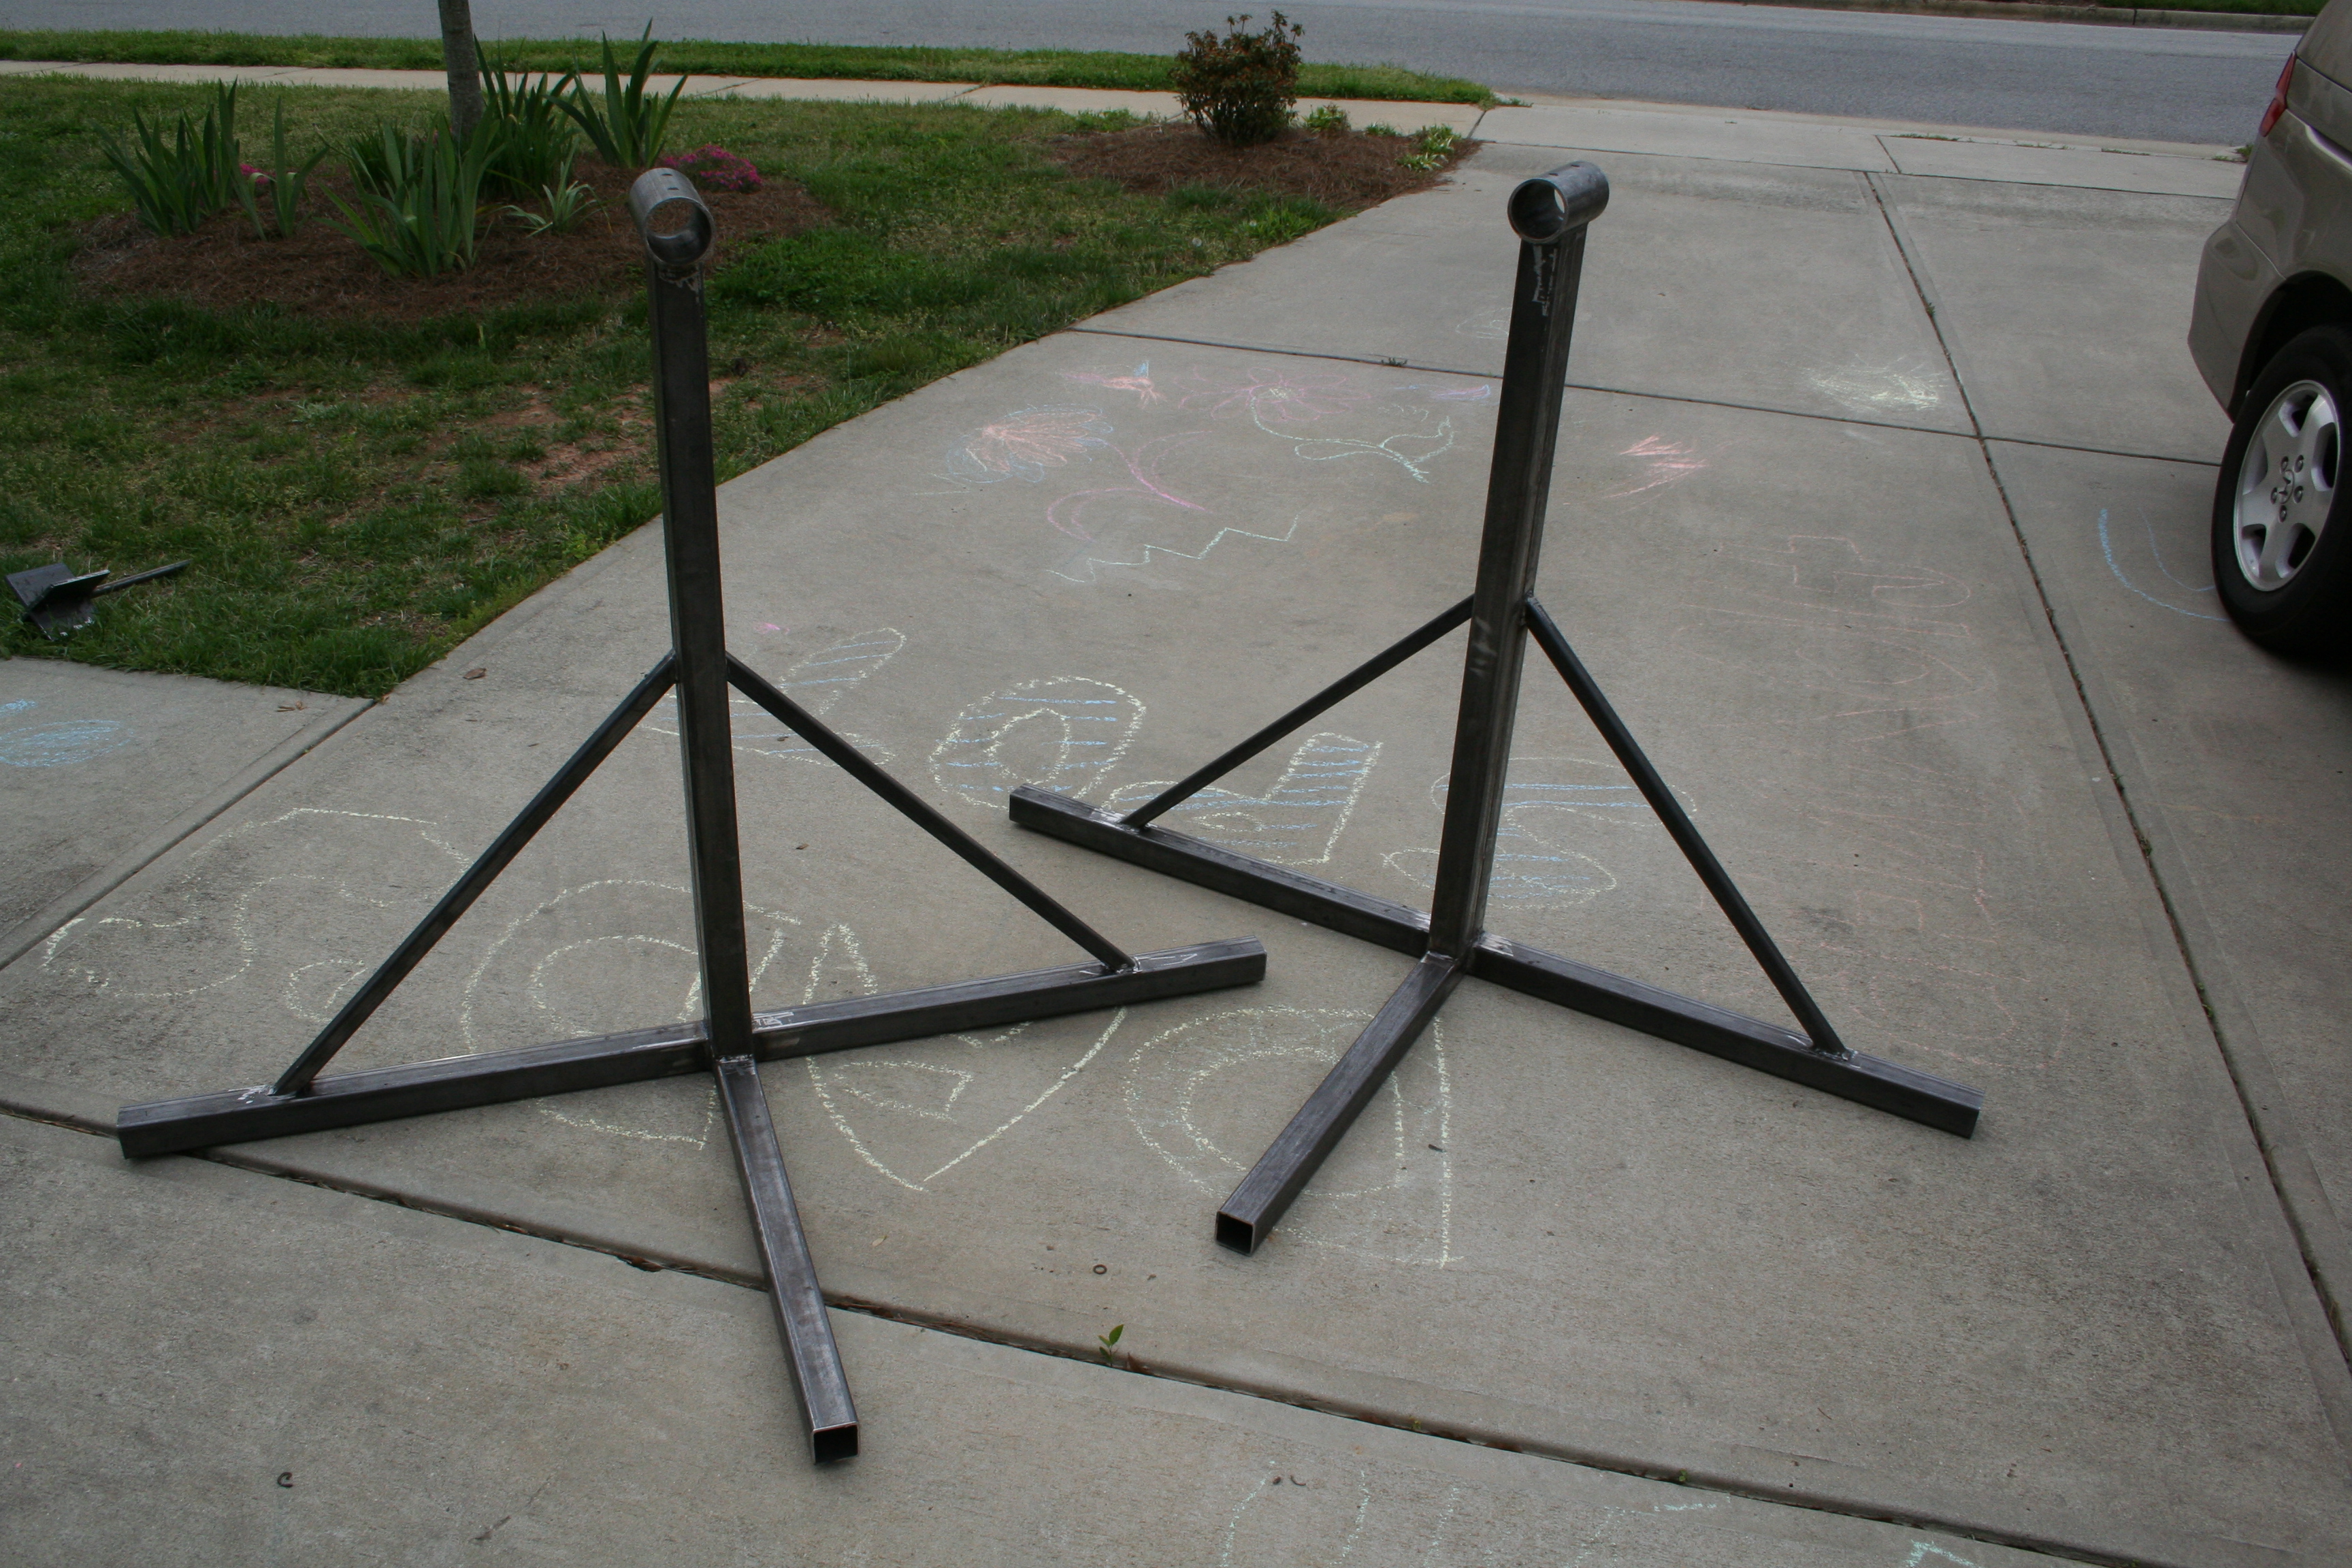
The main parts have been cut and this shows them in position. Next step is to weld.
Here I show how I grinded down the upright part to allow for the tubular pipe to be welded on. I only show two of the four with the semi-circle shape, but all four need it.
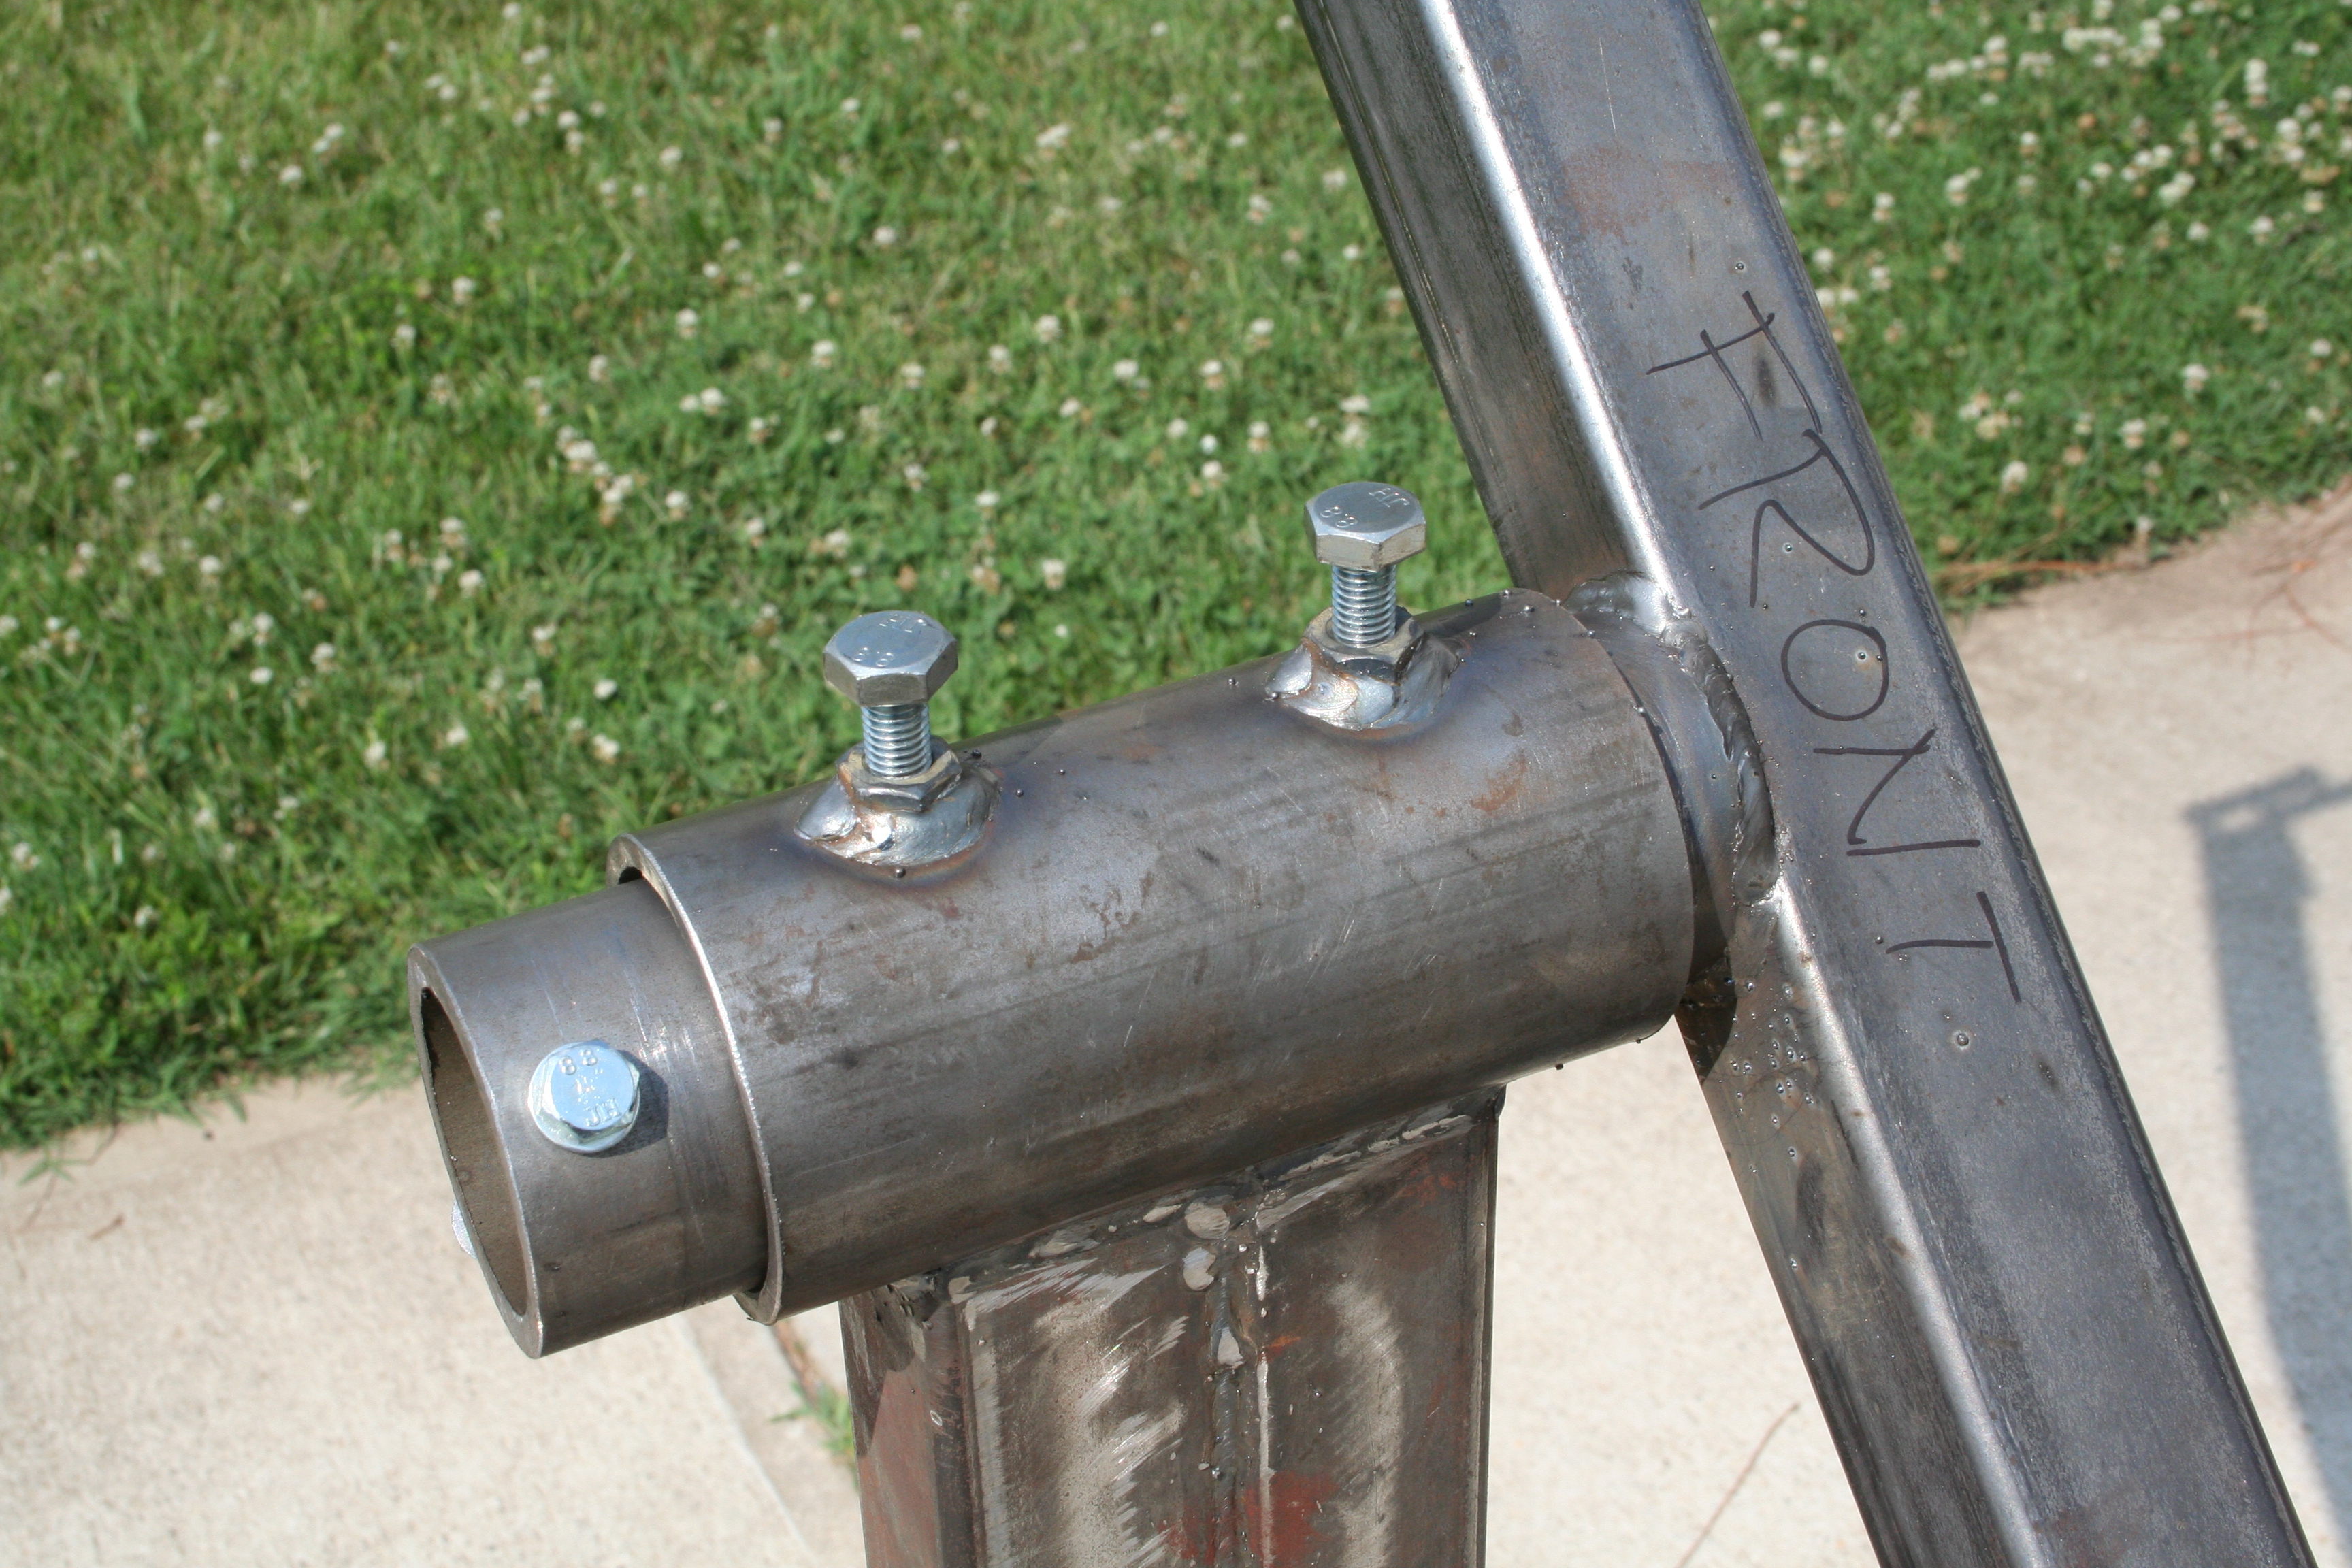
This is the pipe that will fit on the uprights shown above. The holes are for the locking mechanism. The pipe as shown will be trimmed to length and then cut in half (one for each end of the car).
I am mostly finished with each end at this point. I probably should have been more patient with my welding on these (it looks a bit sloppy) but they should be strong welds.
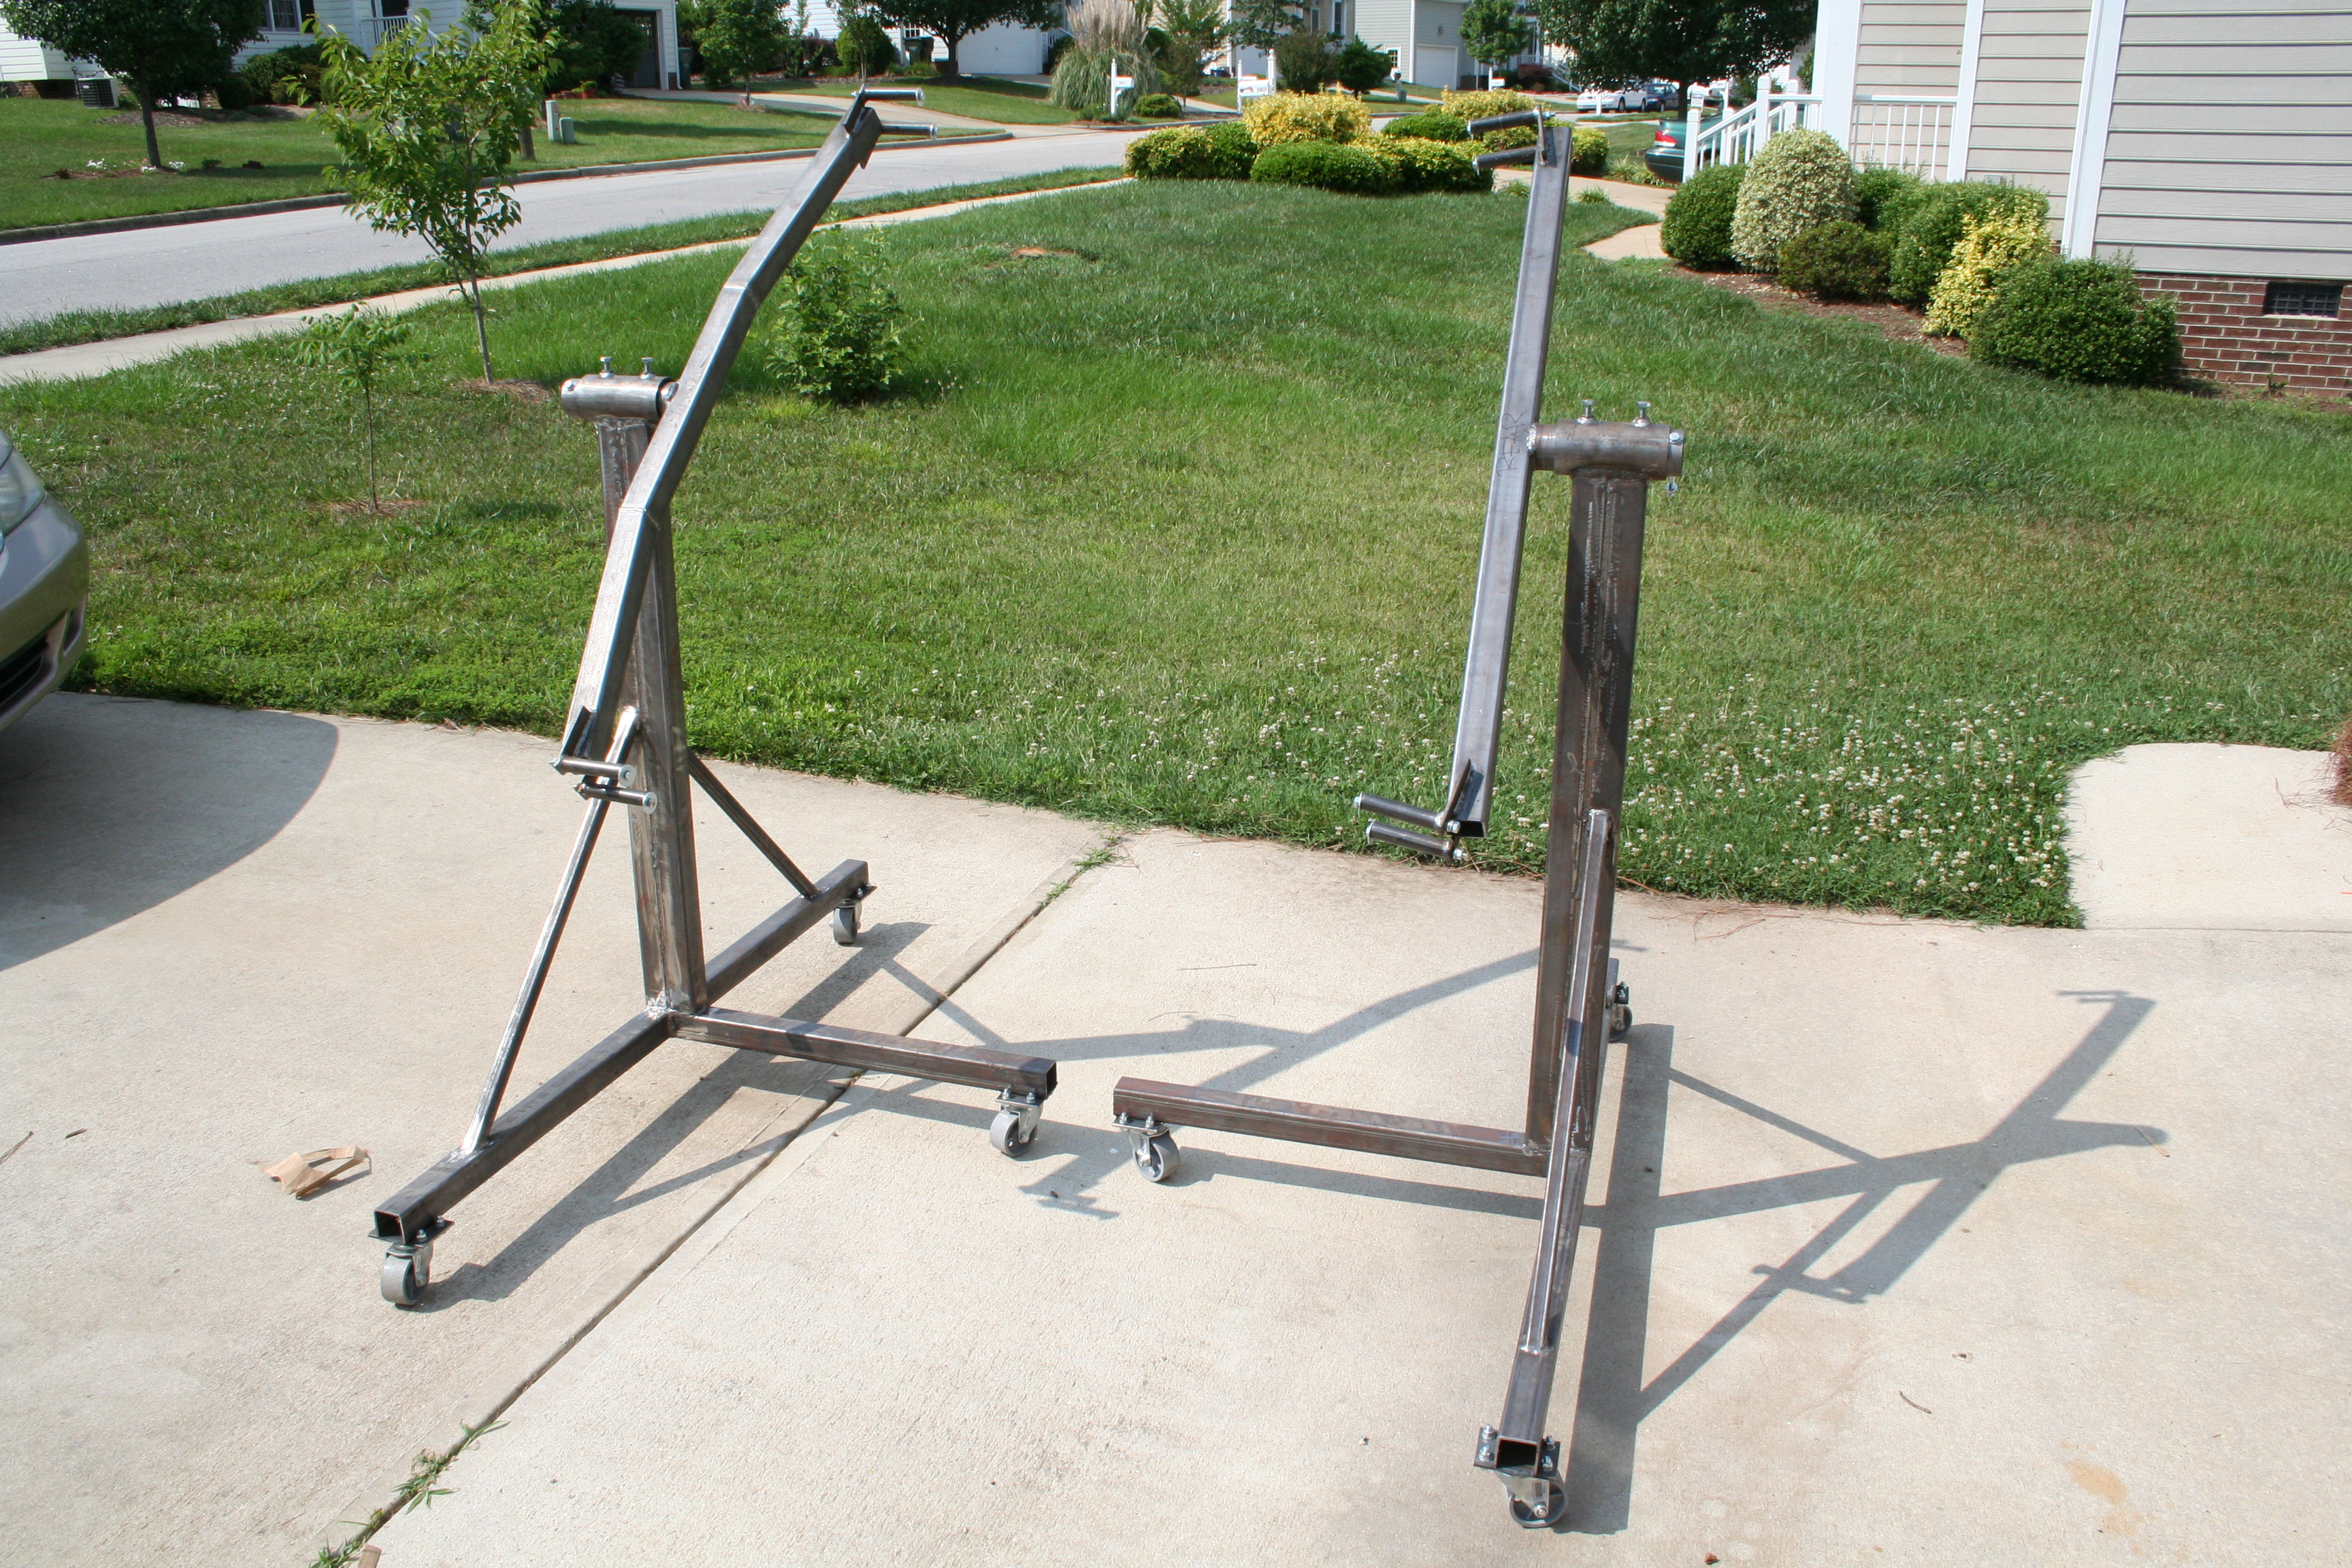
Ok, here is the finished product. I wish I had taken more photos of the construction of the arms, but I just was too busy actually welding them up. In this photo the one on the left is for the front and the right for the rear. The front of the car has more of a curve to it, so I had to cut two bird mouth notches into the arm, bend and then weld. The rear is more flat, but you do have the rear tow mount that sticks out about three inches that you have to clear.
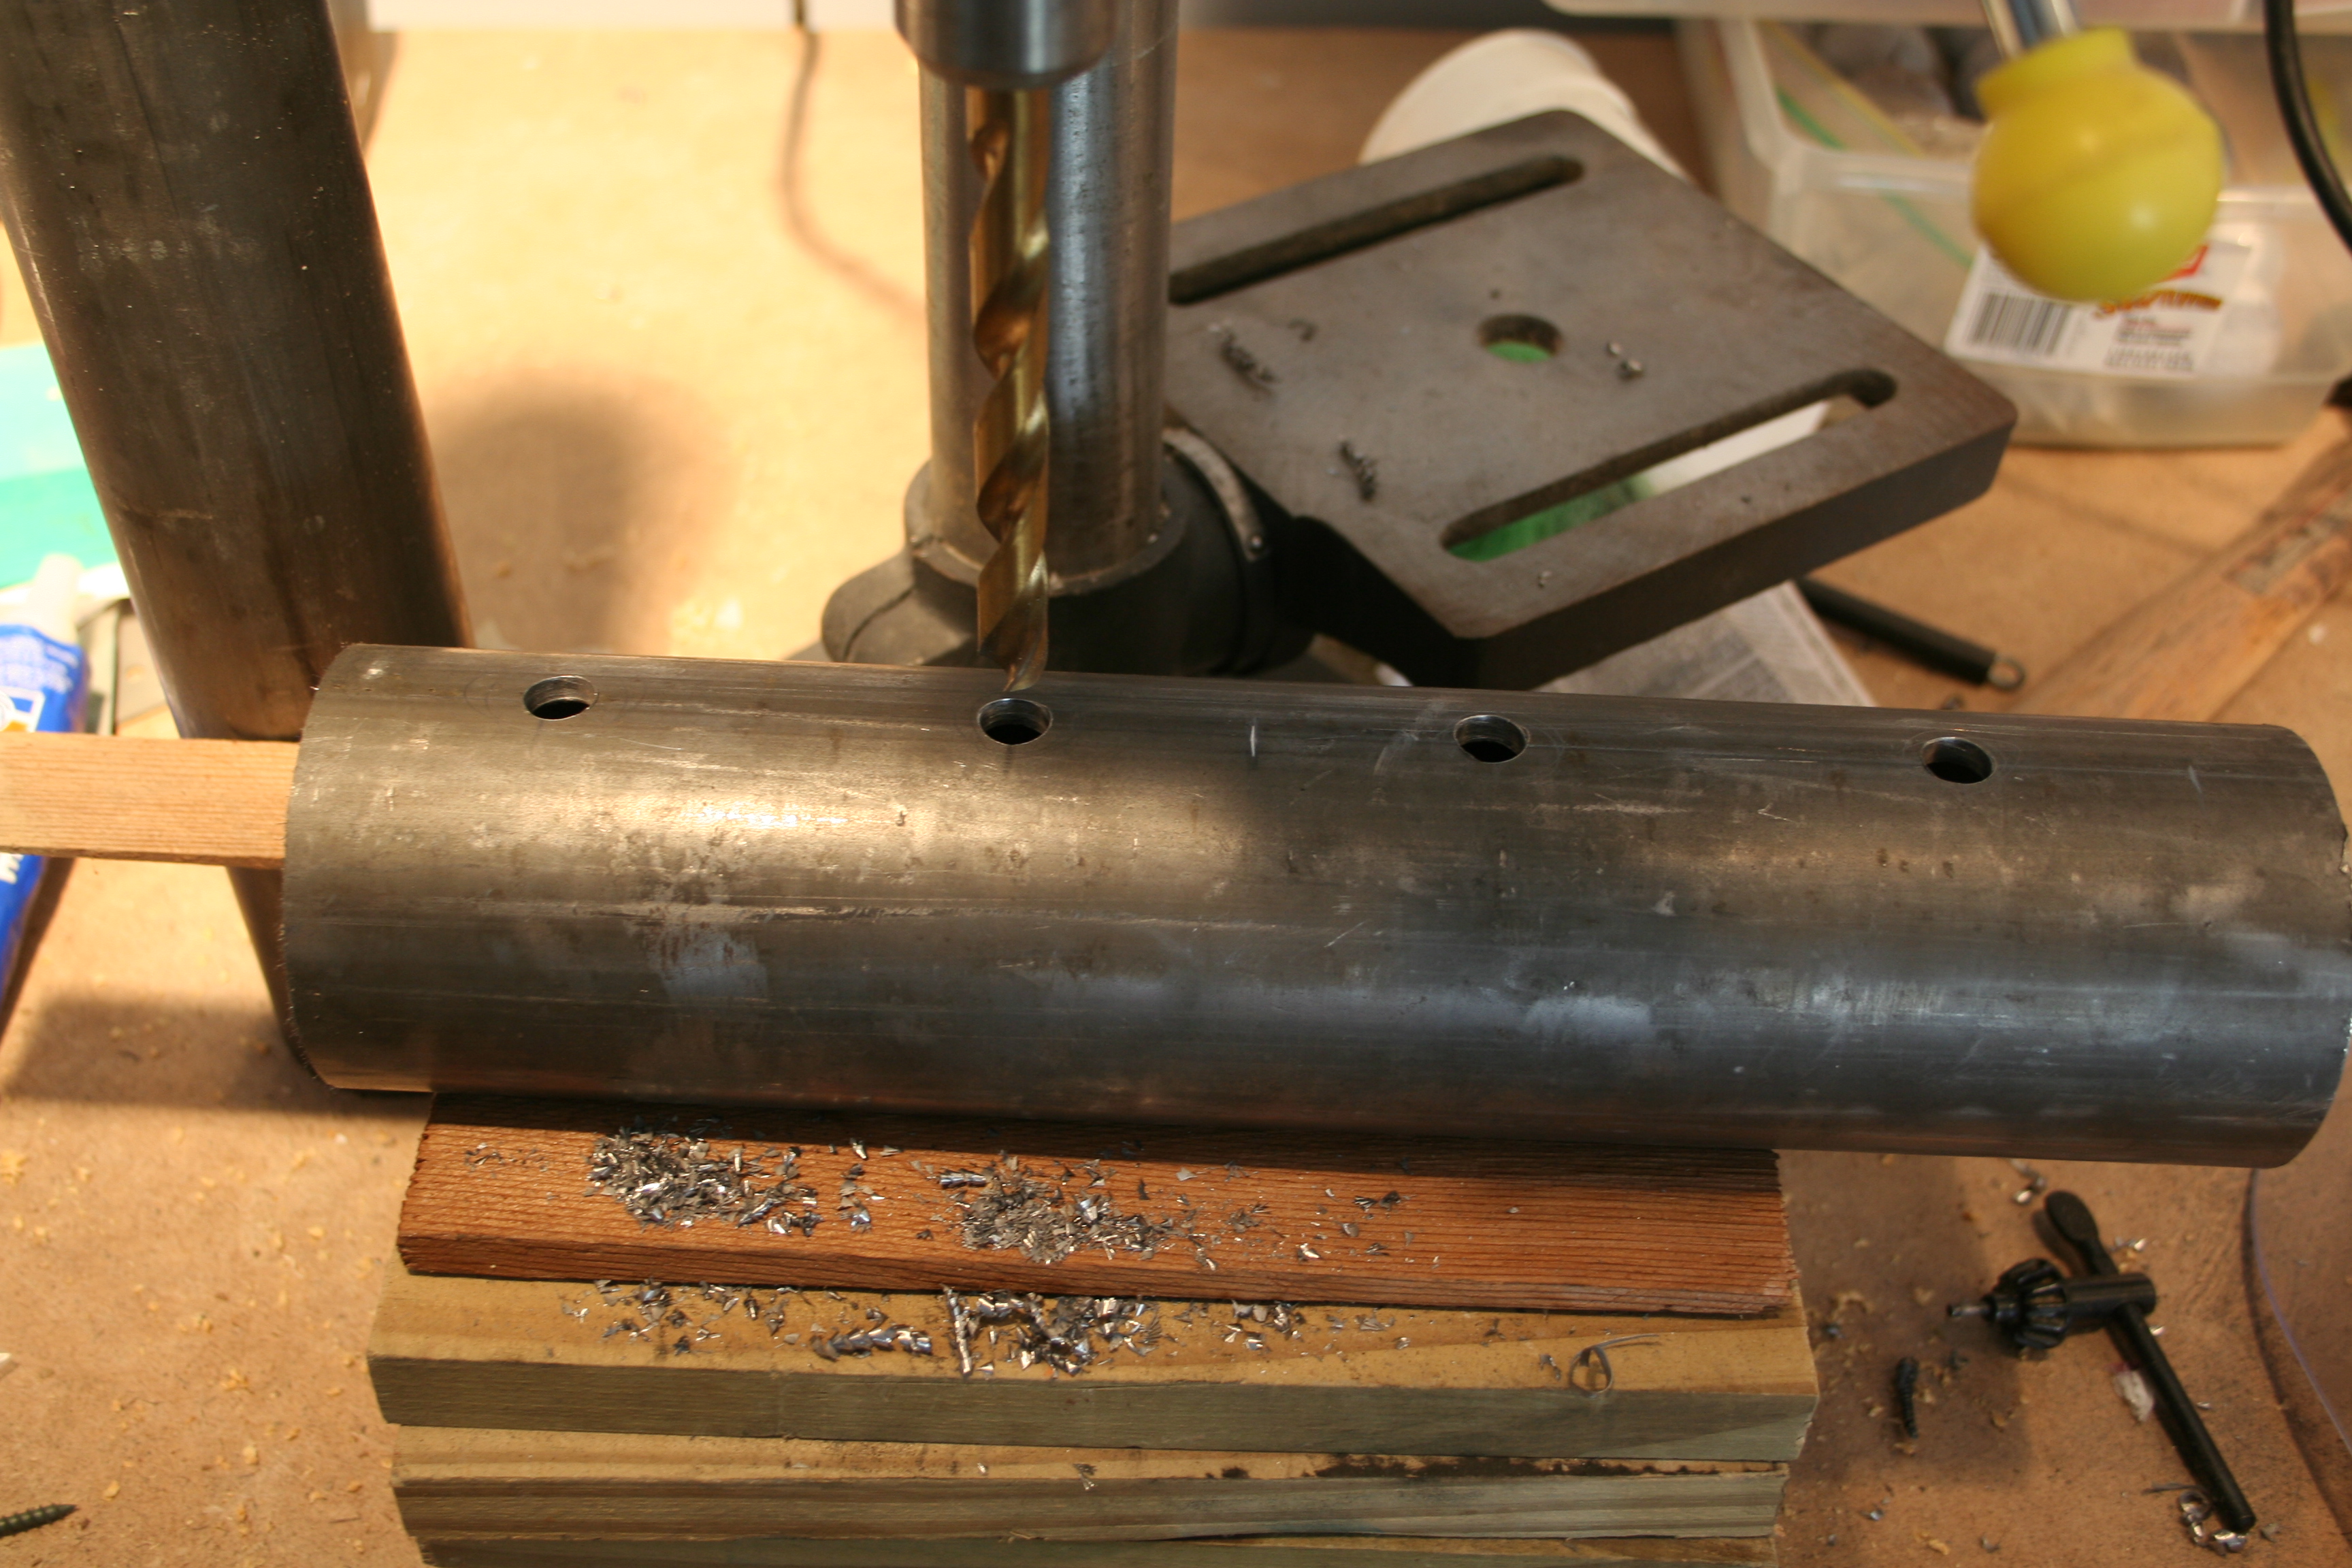
Here is the axel for each arm. The tubing for each is heaver (thicker) than the rest of the rotisserie. The inner pipe (axel) also has a slightly smaller outside diameter than the inside diameter of the outside pipe (bearing). This is to allow for a bit of play to prevent binding as the car rotates. The holes from previous photos now have nuts welded over them. This allows me to screw down those two bolts on each end to lock the arms and car in position.
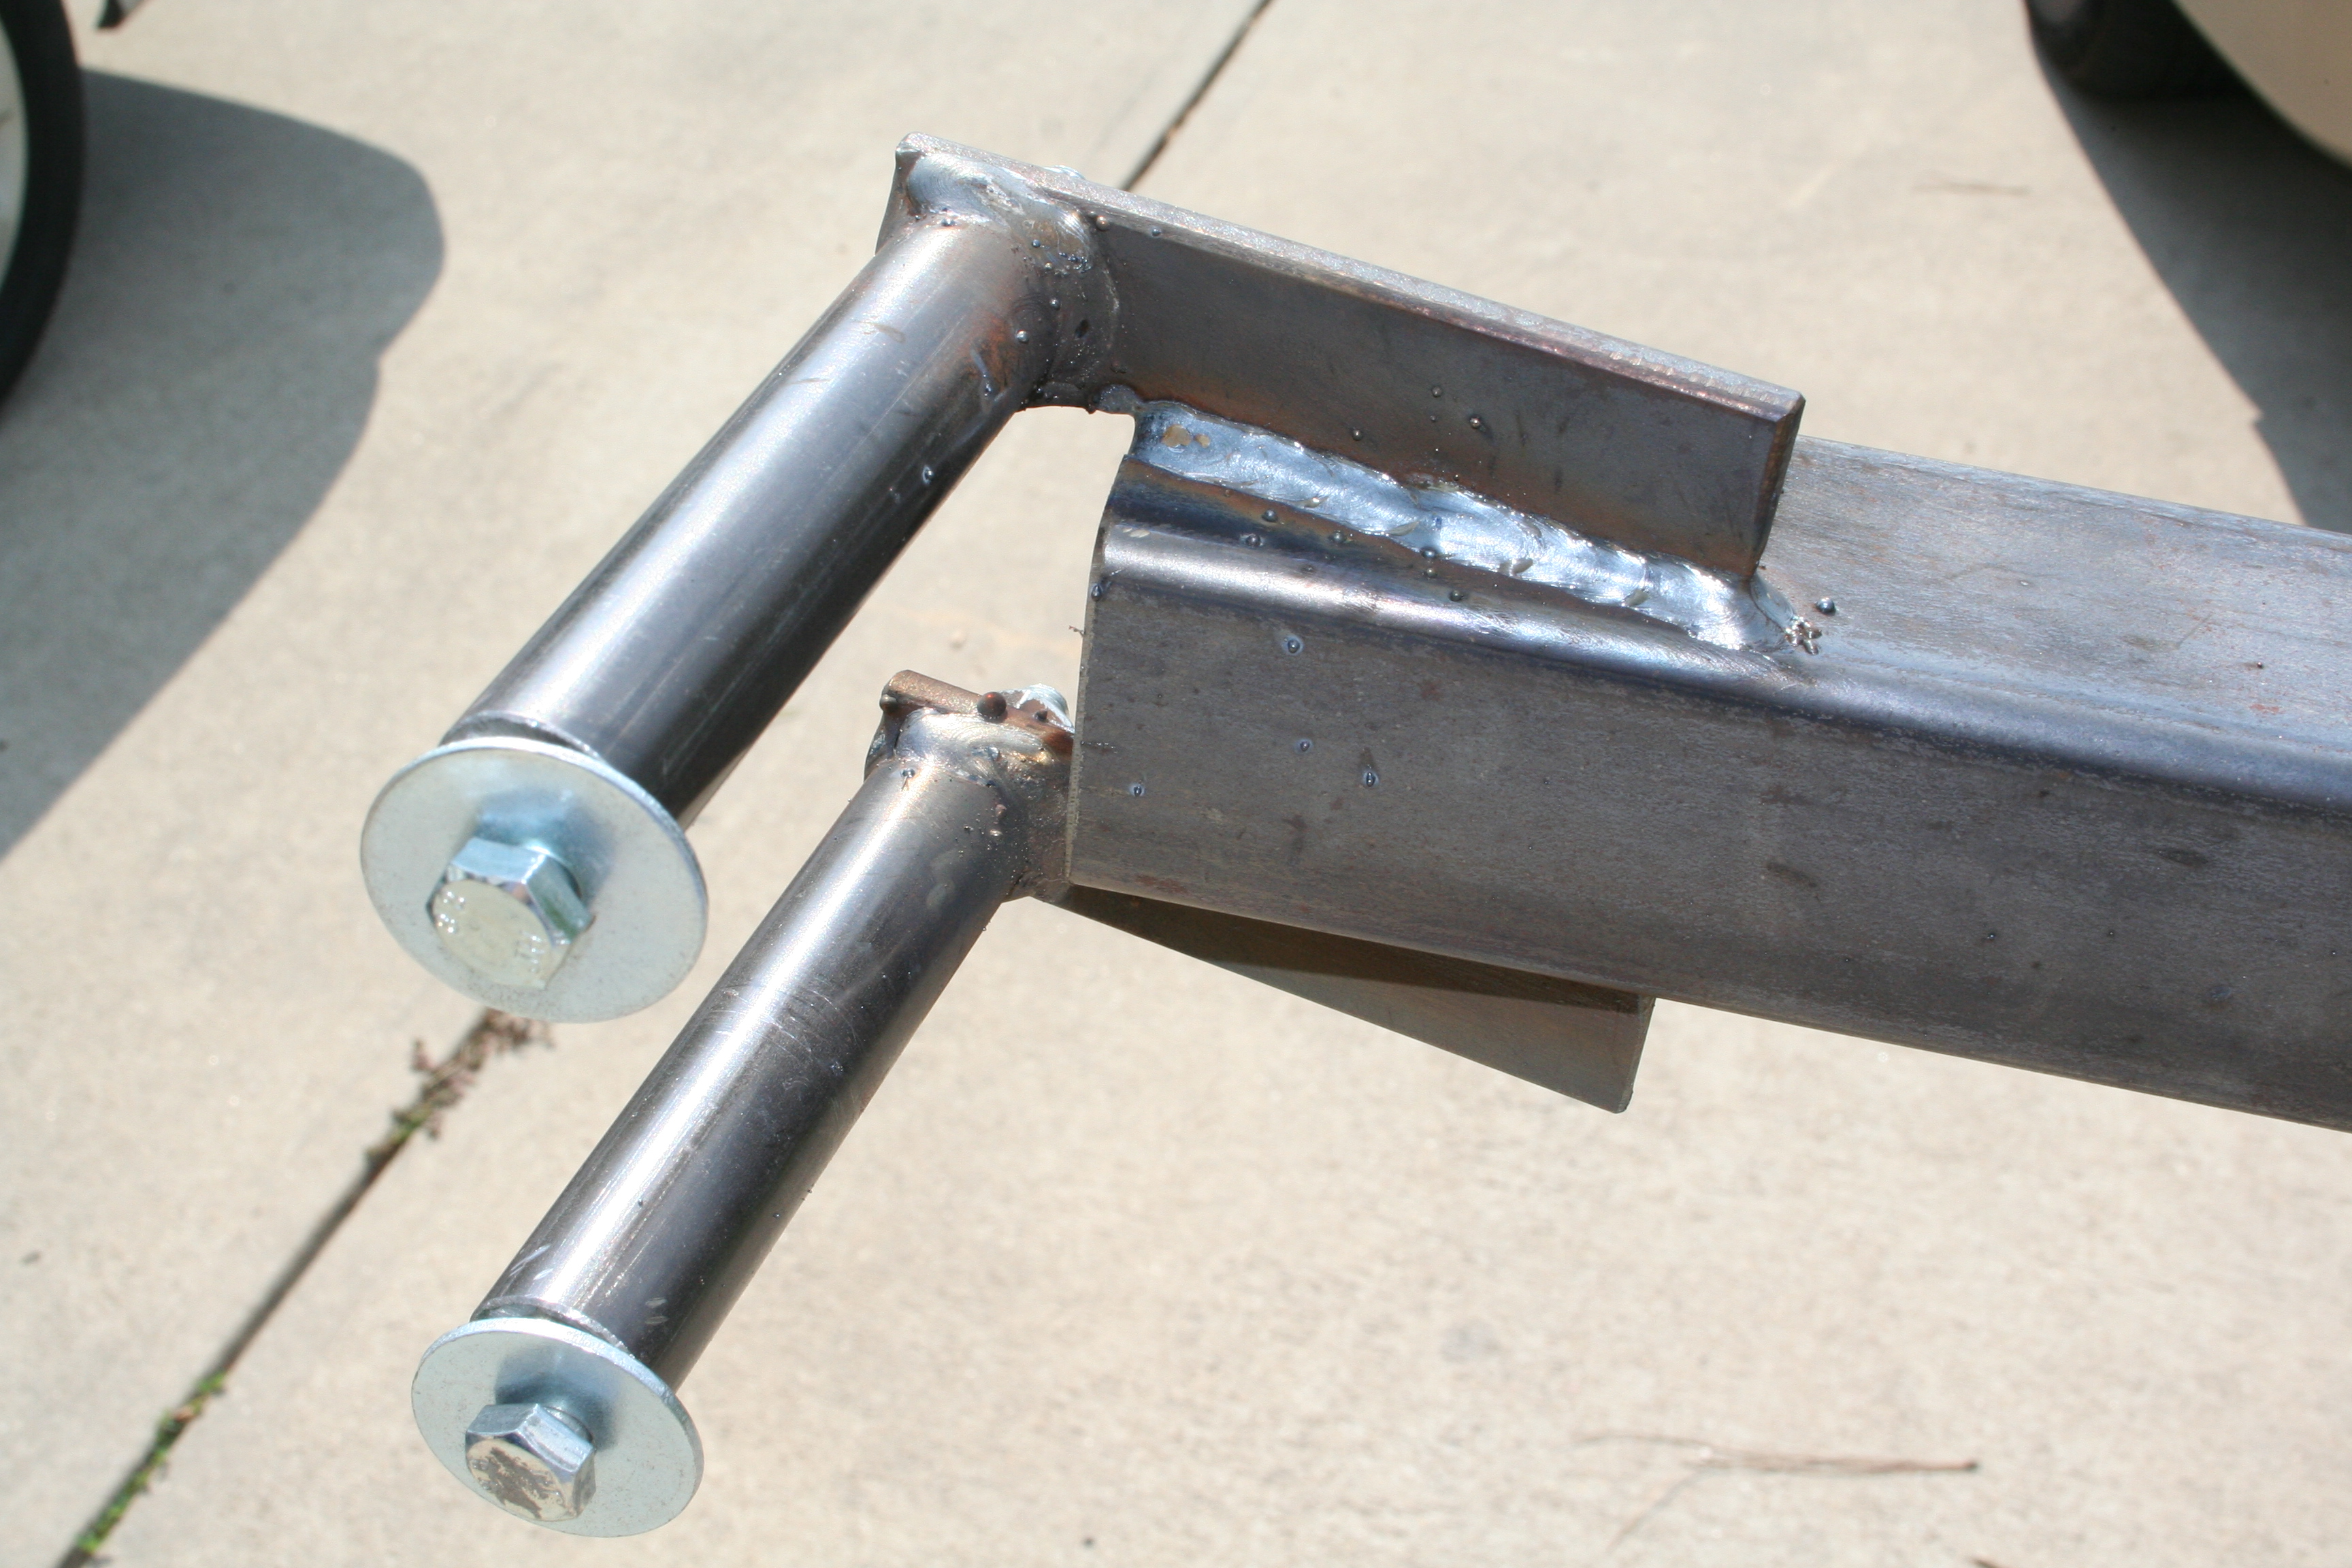
Here is a detail of how the arms mount to the car. For those who don't know the Porsche 914, the bumper are bolted to the body by four bolts on each end of the car. The idea is to bolt the arms on pretty much just like the bumpers mount. But at the same time, stand off from the car enough that you can work behind the arms. The stand offs are thick wall tubing that are about four inches long. These are welded to 1/4" x 1" bars. You can't see it, but the back of the bars have a hole drilled in them and then long M6 bolts run through the entire stand off. Then you have fender washers that would go on the inside of the car. I bolted the standoffs to the car, then positioned the arm in place, and then welded it up. I was a bit more patient with this welding and it shows!
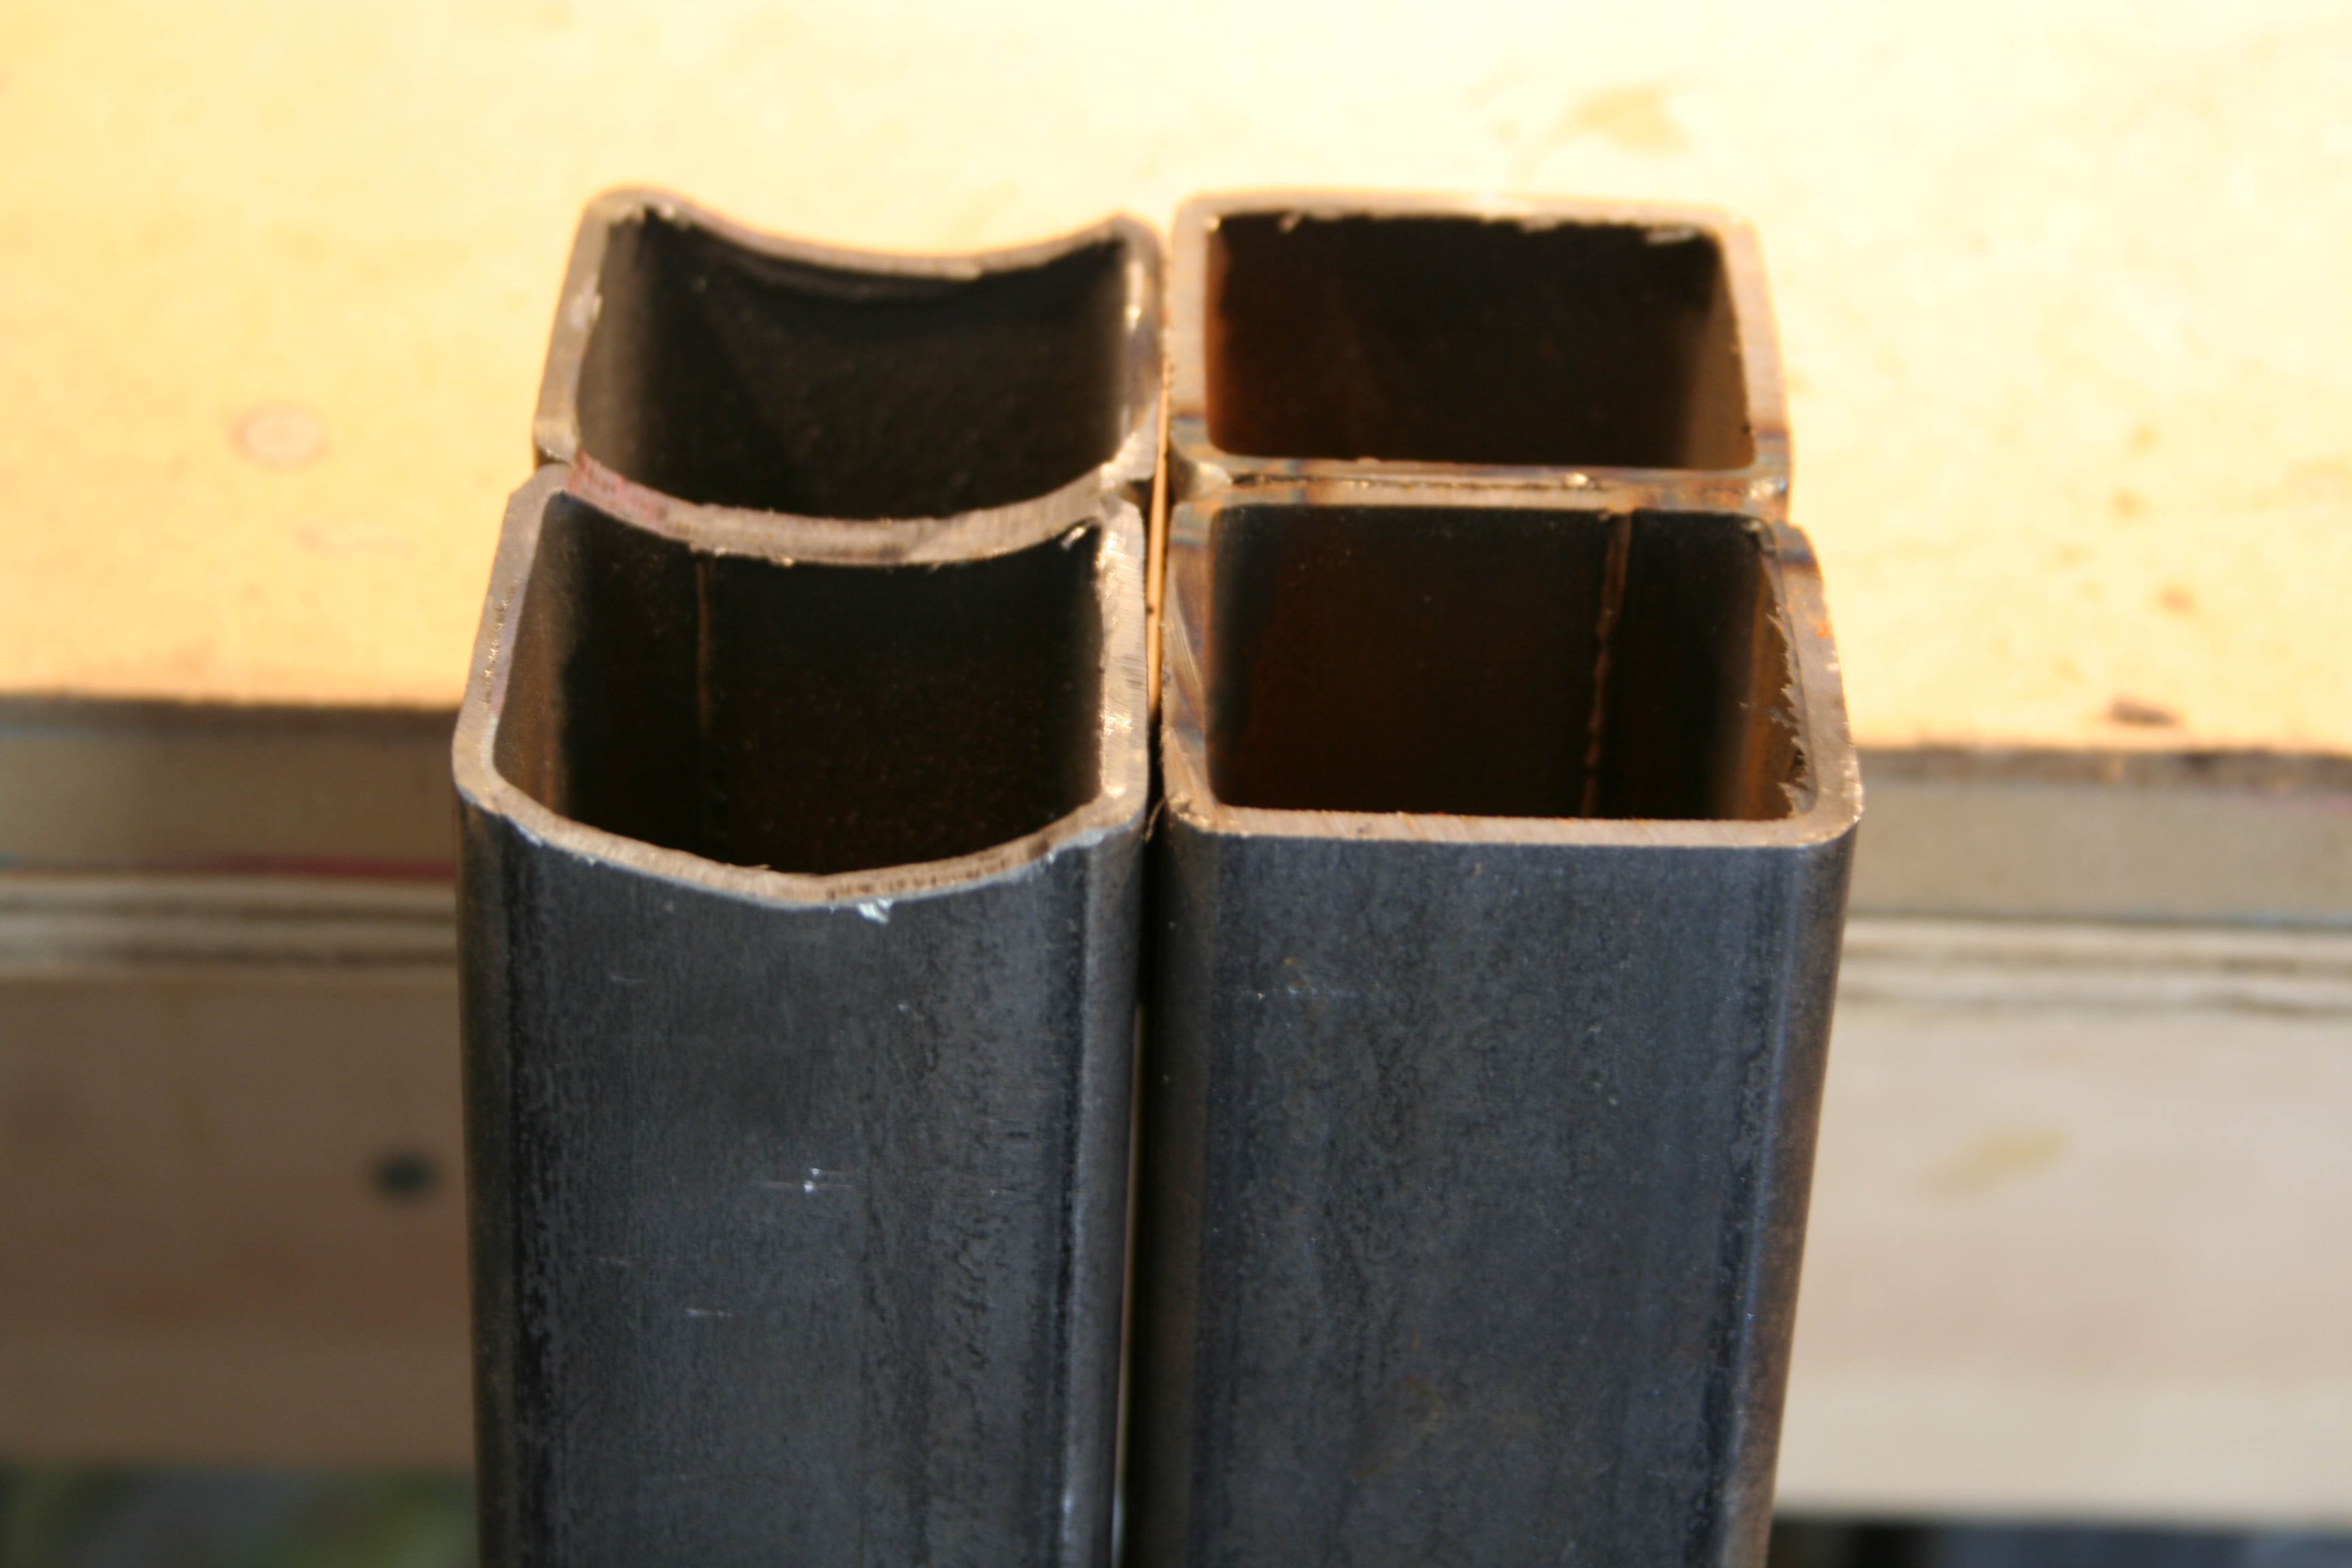
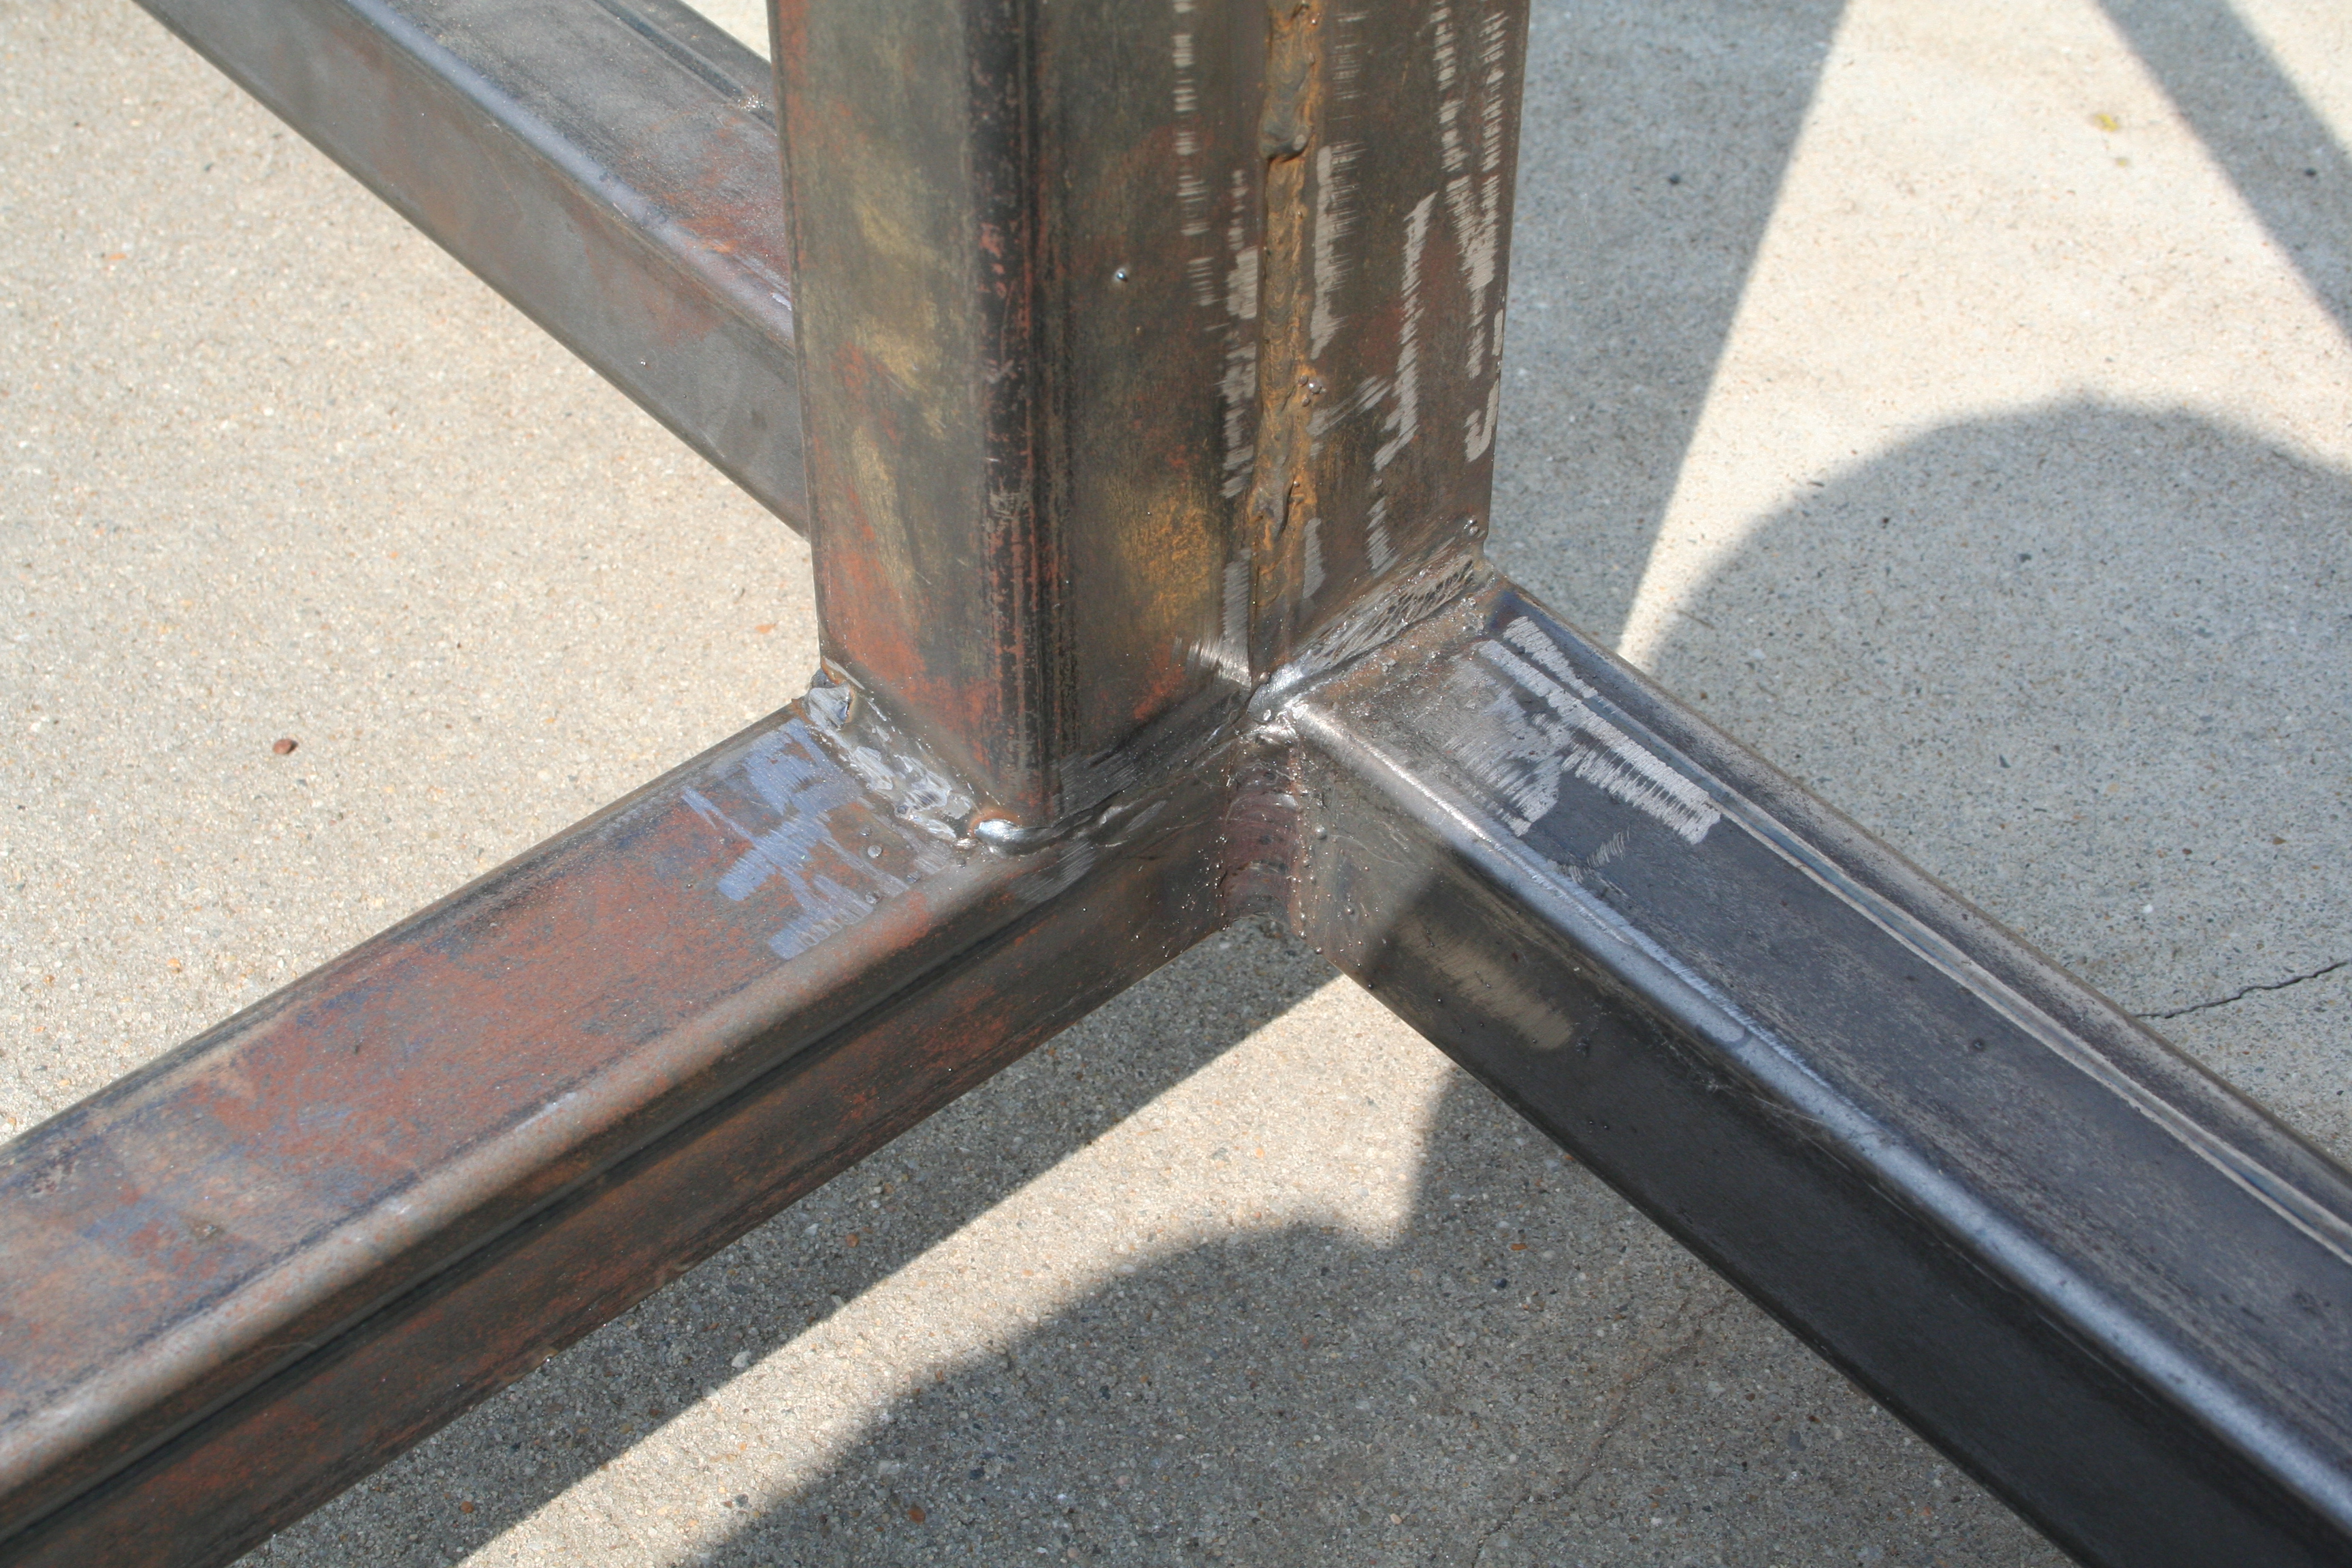
Just a quick shot of the intersection of some of the square tubing. The uprights it two 2" x 2" square tubes. That is a bit of overkill as I had initially thought I might just use a single 3" x 2" square tube. But because my local steel supplier would only sell the tubing in 20 ft lengths, it actually worked out cheaper to double up some of the 2" x 2" vs. buying a complete section of 3" x 2" and not using it all.
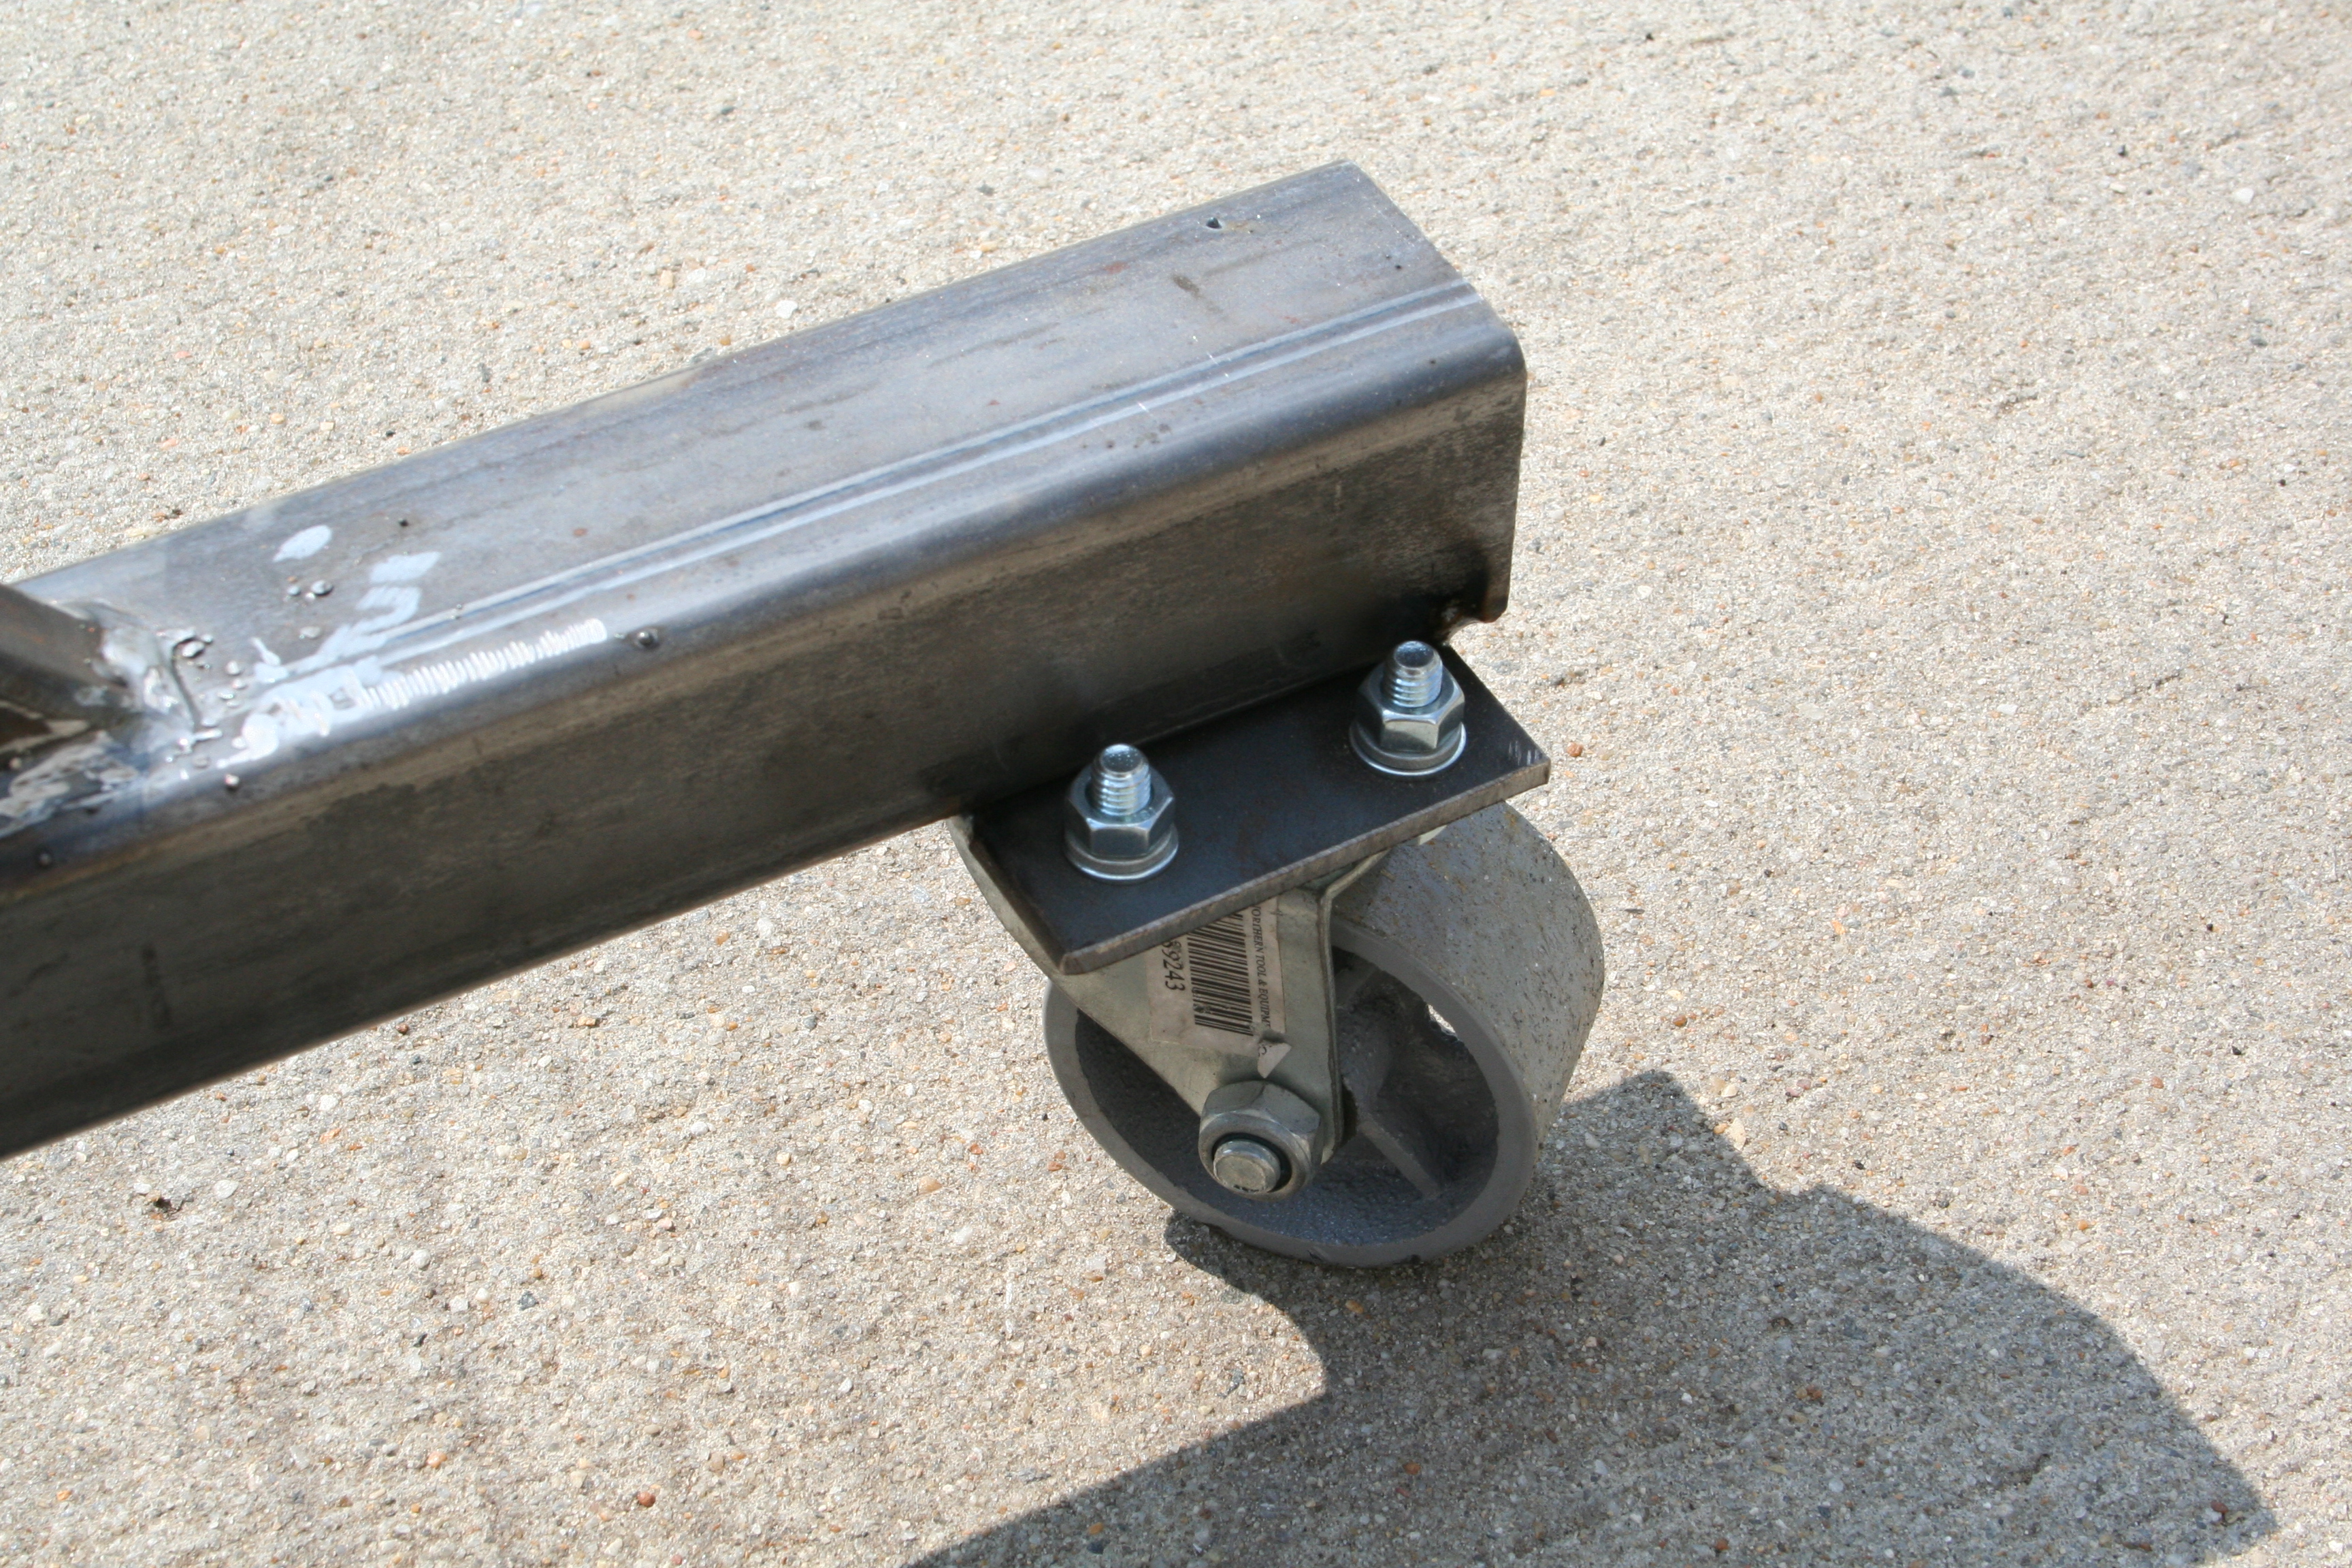
Casters were attached via some plate cut, drilled and then welded. Welds are on the bottom and you can't see them. Casters are rated at 500 lbs each. That should be plenty enough as the Porsche 914 body when stripped down is pretty light weight. |
|