![]()
![]()
|
|
|
|
1972 Porsche 914Repair and Restoration - Part 26 - Front Brakes5/31/2009Ok, first let me tell you what my plan is with regards to the front brakes. Since I am using a 911 front suspension with the 3.5" caliper spacing mounts, and assuming I want to use bolt on Porsche calipers, that leaves me with the all Aluminum "S-Caliper" or the later Steel "A-Caliper". While I would love to use the S-Caliper for both lower weight and coolness factor, they are expensive to buy and expensive to refurbish. I think a used core set is around $400+ and then it's likely that the pistons are rusted and need to be replaced. That is another $160 or so. You would then need to replace the outside hard lines (not sure of the price but it's not cheap). Then you have the normal costs of cleaning and replating plus seals, etc. So for right now I am not going to go that route. Maybe someday in the future. So I am going to go with the A-Caliper. It is about the same size as the S-Caliper, maybe even a bit stiffer, but heavier. It basically was the caliper used up through and including the 911 Carrera. The Carrera did actually use a slightly different version of the A-Caliper (wider and with brake wear sensor). I purchased my calipers from a local guy who parts out 911s. They were in really great shape and frankly I could probably just cleaned them up and used them. But I want to do a full rebuild. Here is the point at which most people would say to let someone else do this. And mostly they are right. Not from the perspective that it can't be done, but that it can be a pain in the ass and those who do it professionally do a great job. In my opinion the number one person to do this would be Eric Shea at PMB Performance... I have a need and desire to do as much of my own work on this car, so I am not going to ship the calipers off to someone else. But if I was, it would be Eric who would do the work. The nice thing about Eric is that he is very willing to help others do the work themselves. He also sells rebuilt kits and other rebuild supplies. So since Eric is helping me out, I am trying to buy as much of my rebuilt items from him. He offers a great service to the community. Anyhow, onto the rebuild...
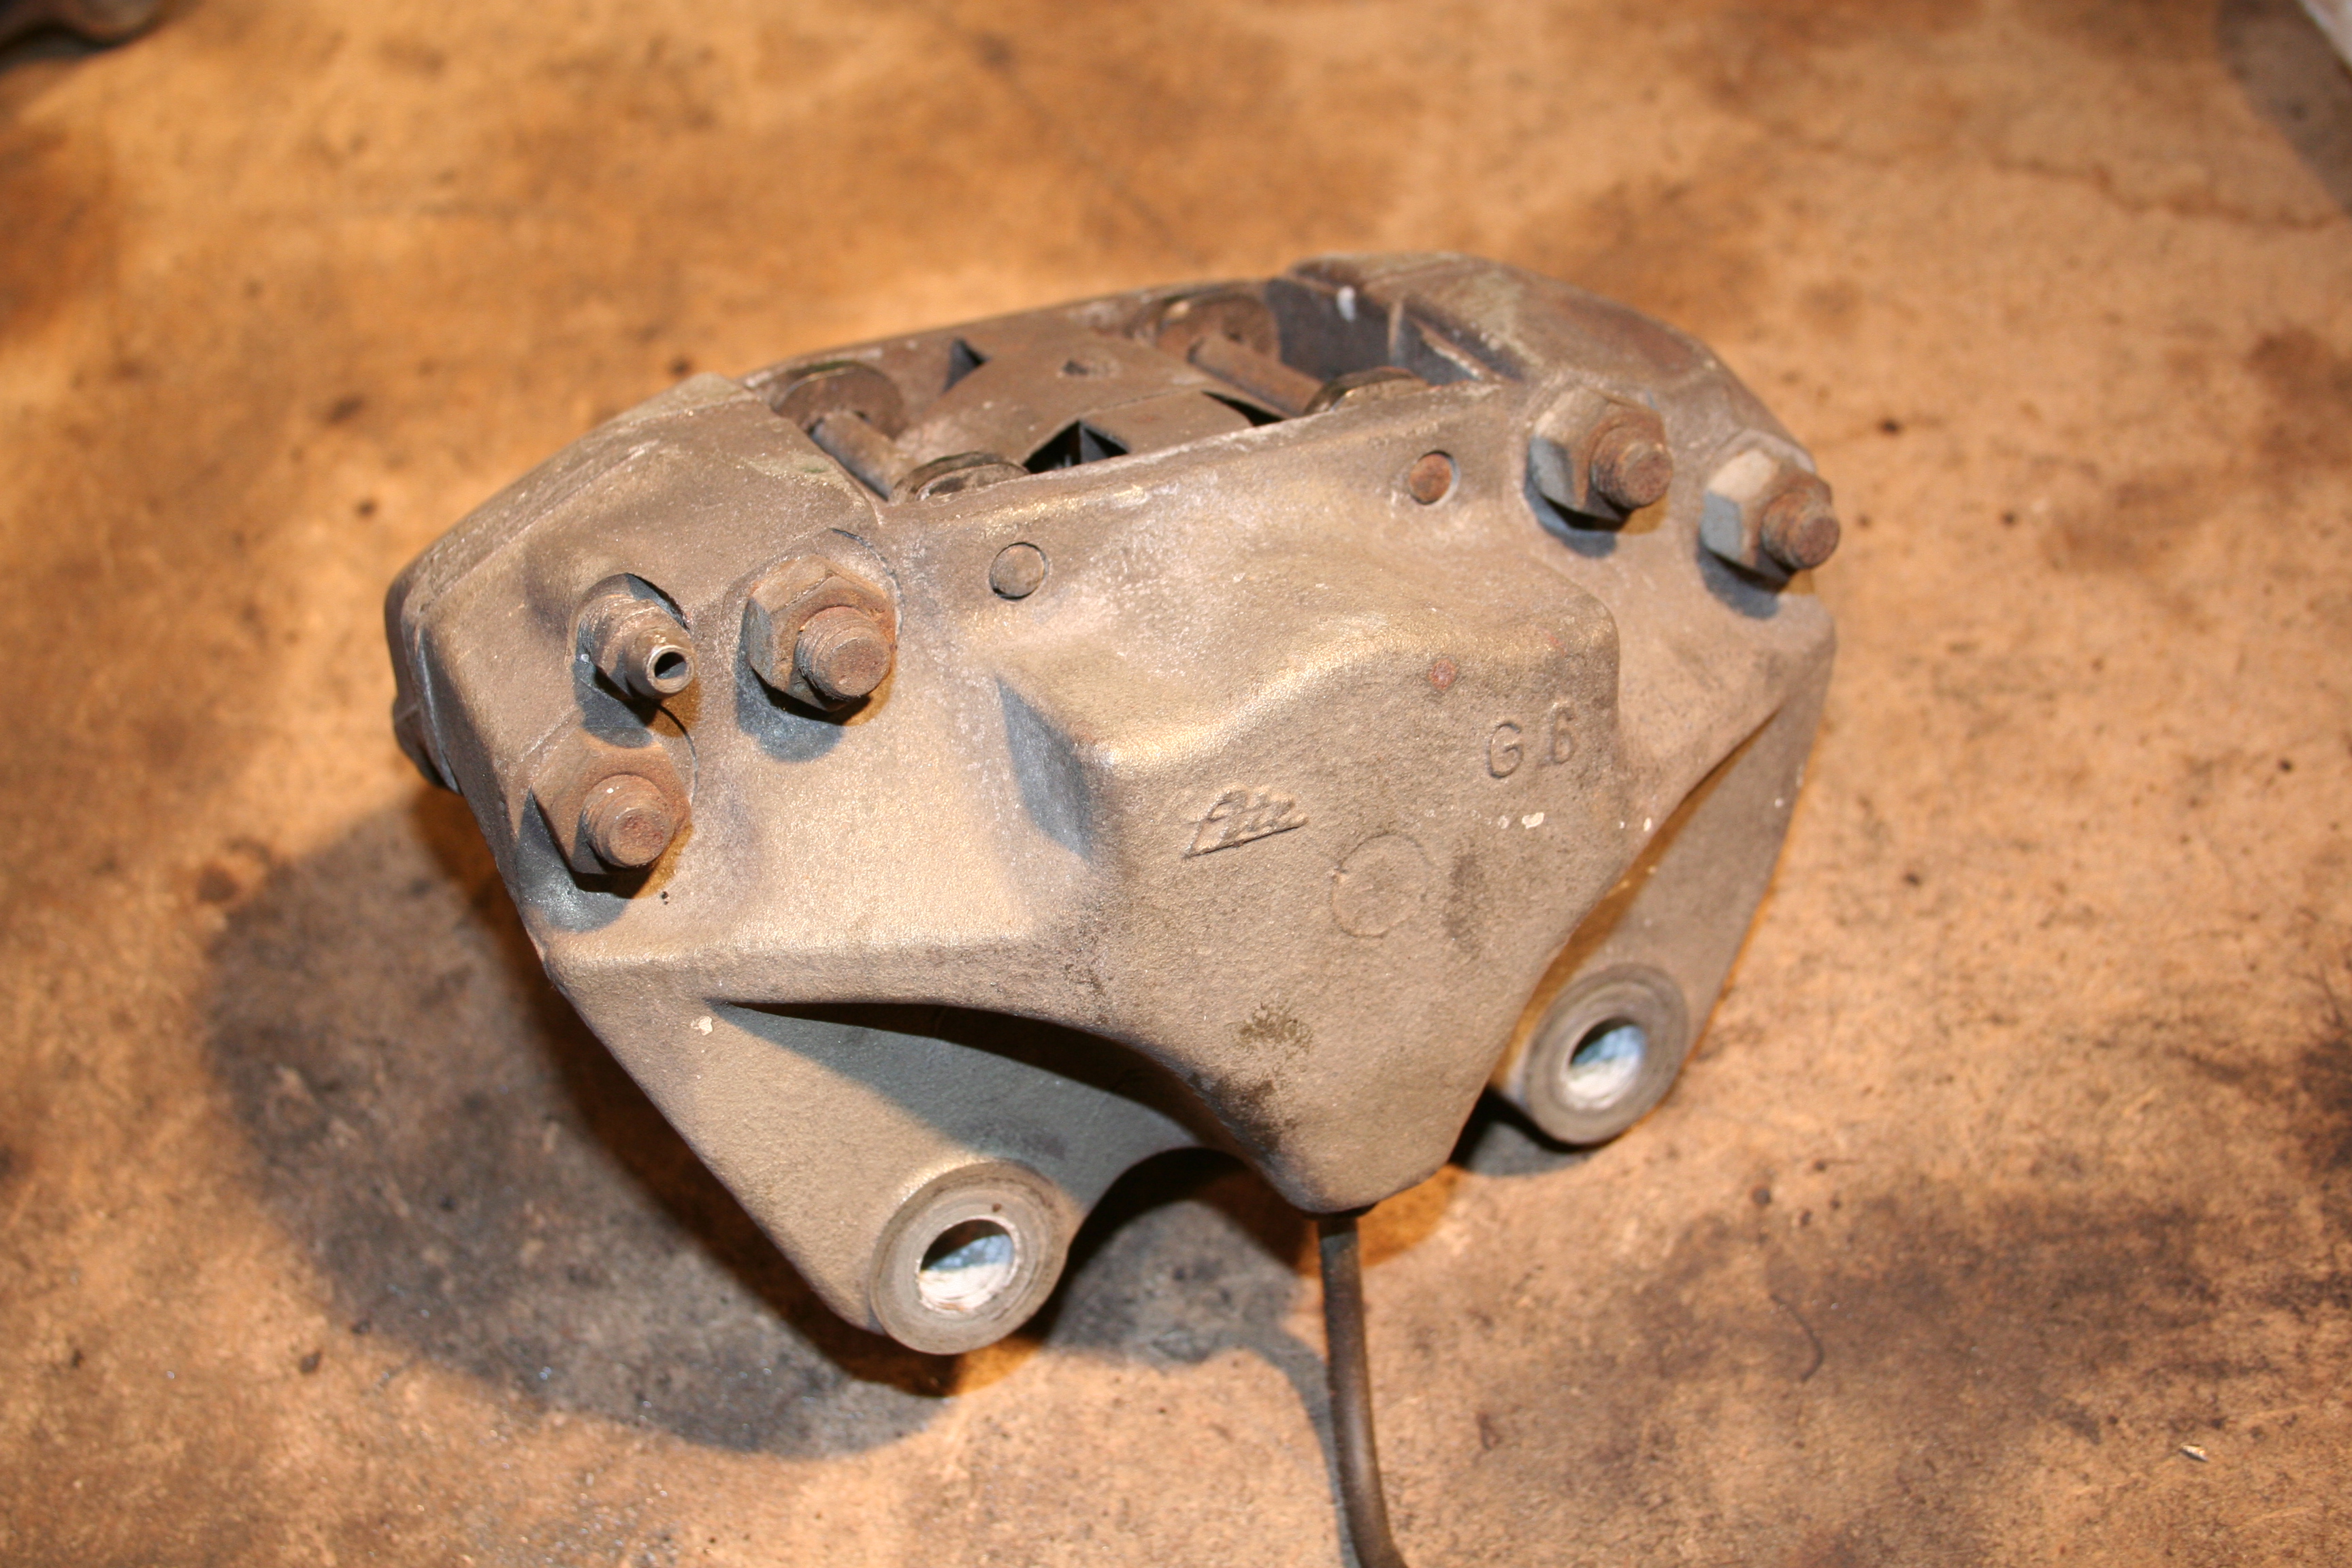
Basic ATE early A-Caliper with 3.5" mount spacing.
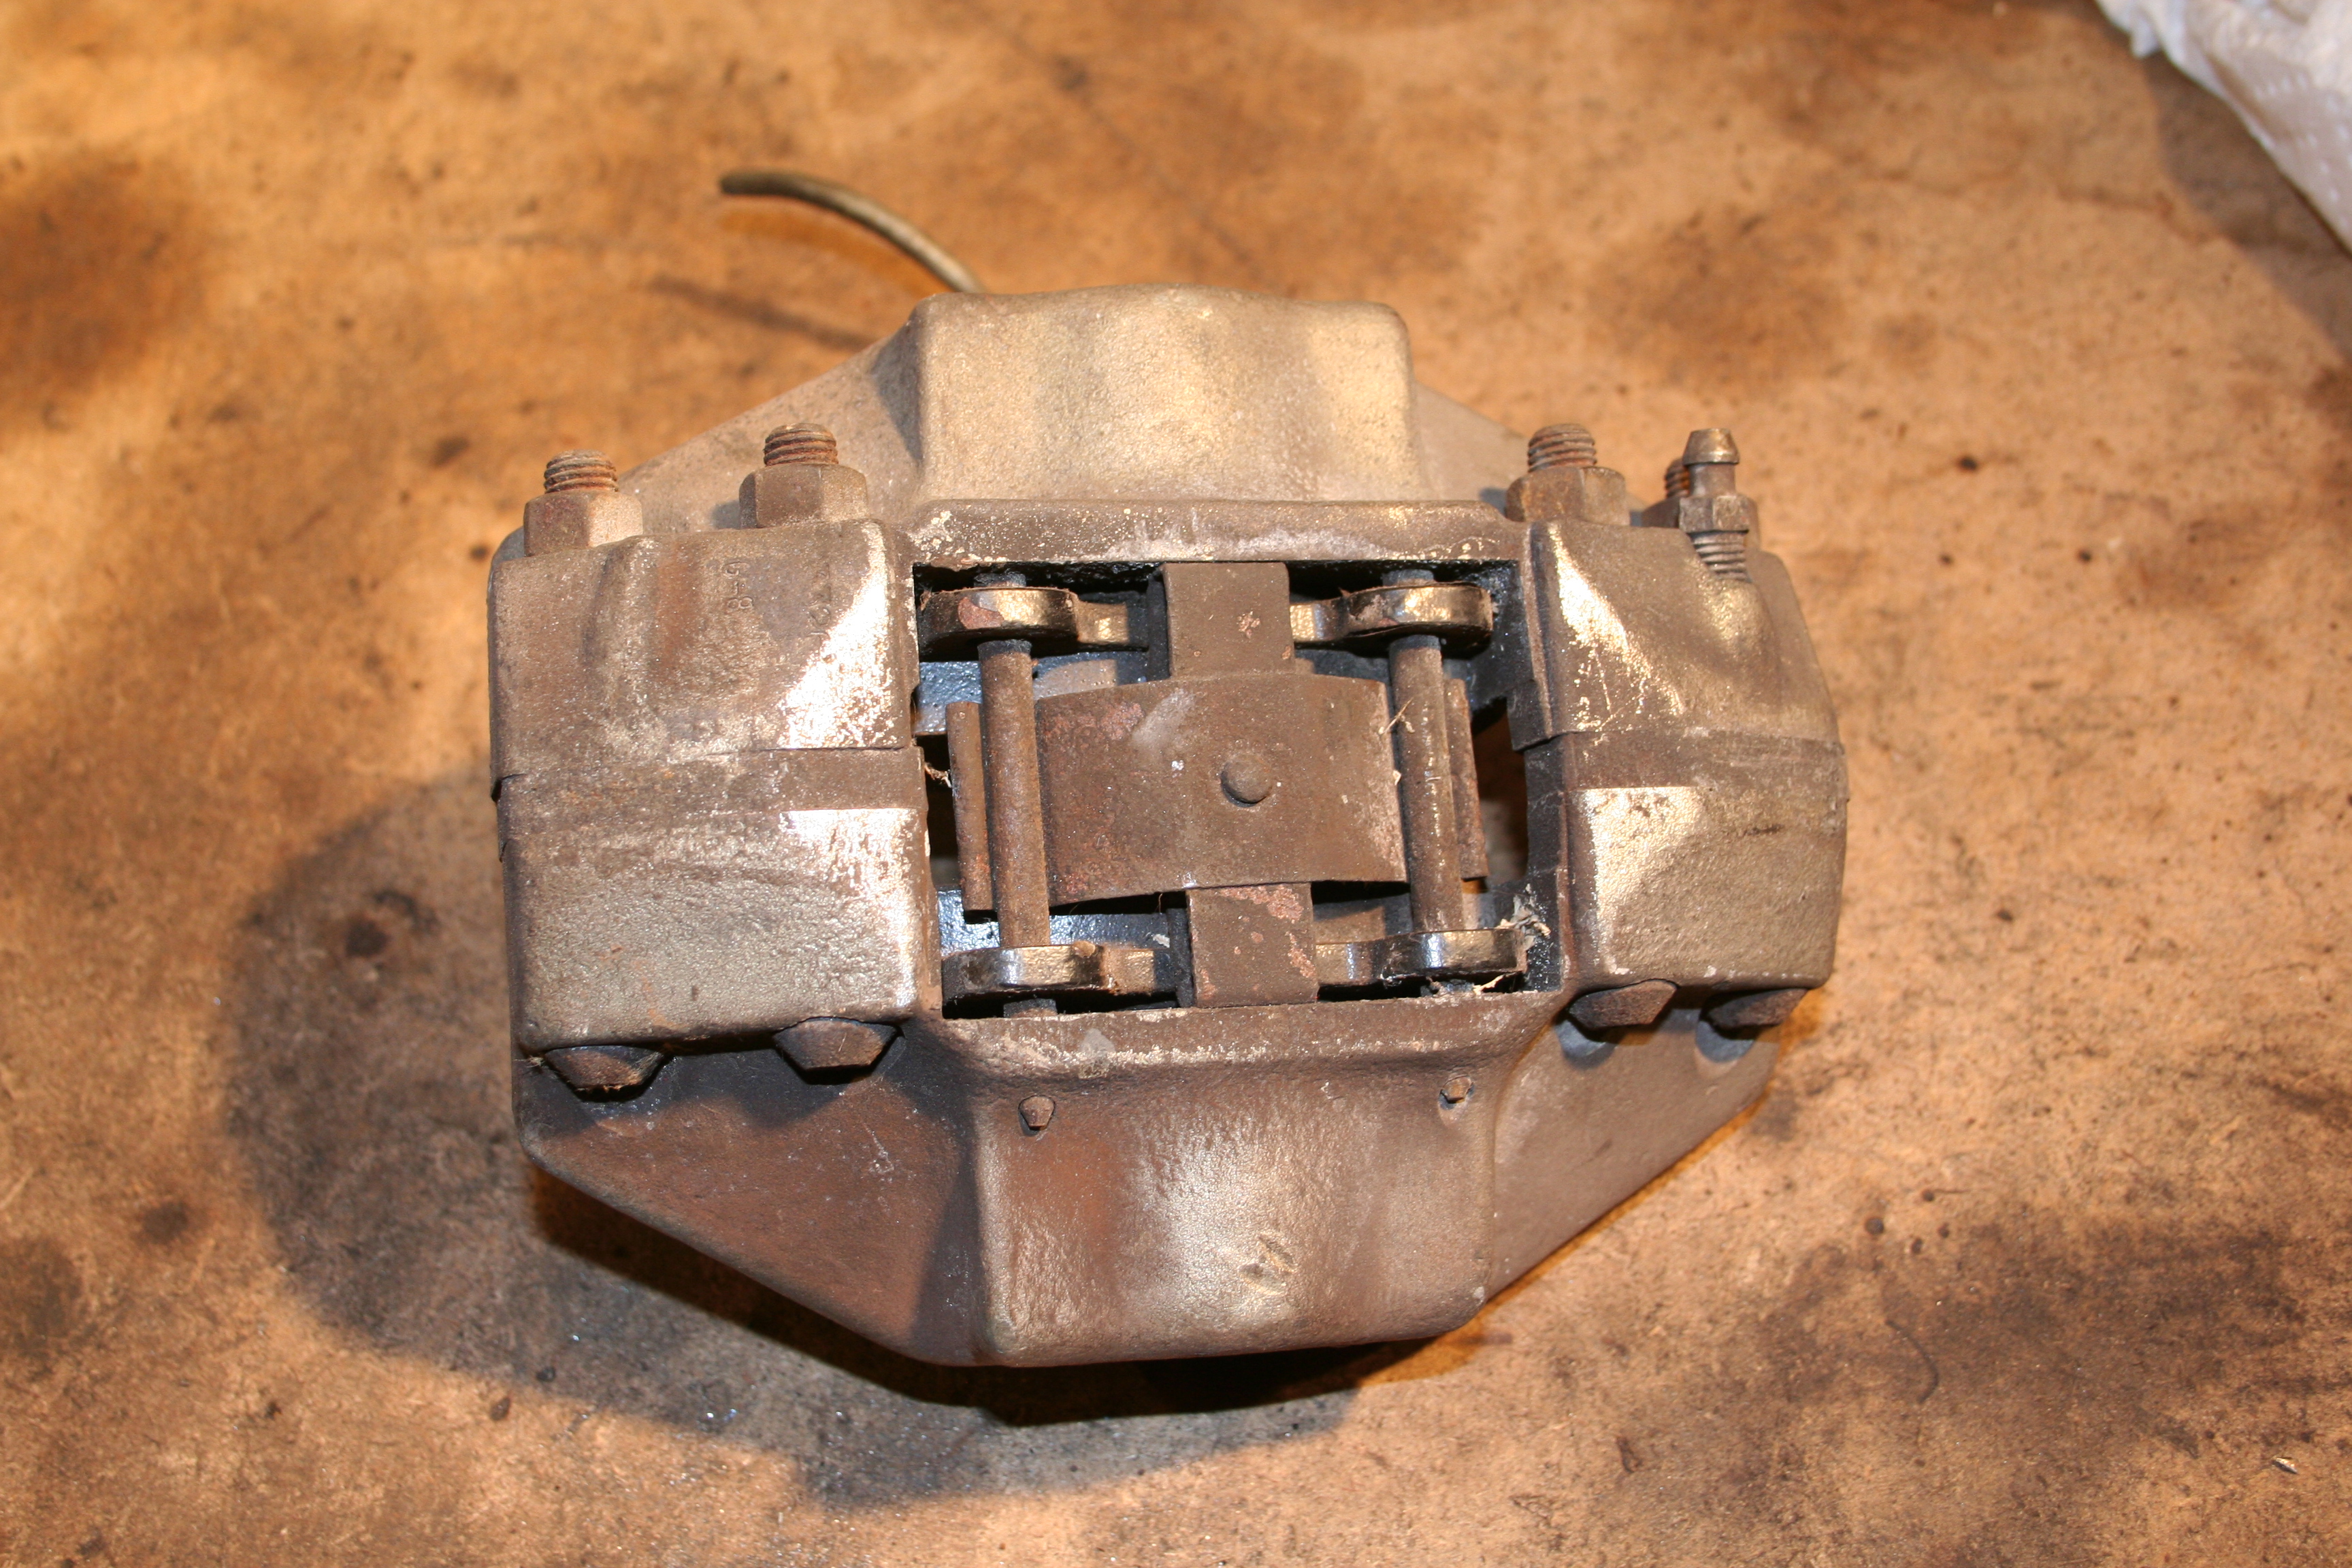
Notice the pins and related hardware that hold the pads in place. You can also see the four bolts that hold the caliper halves together as well as the spacers between the caliper halves.
Another view with the bleeder valve.
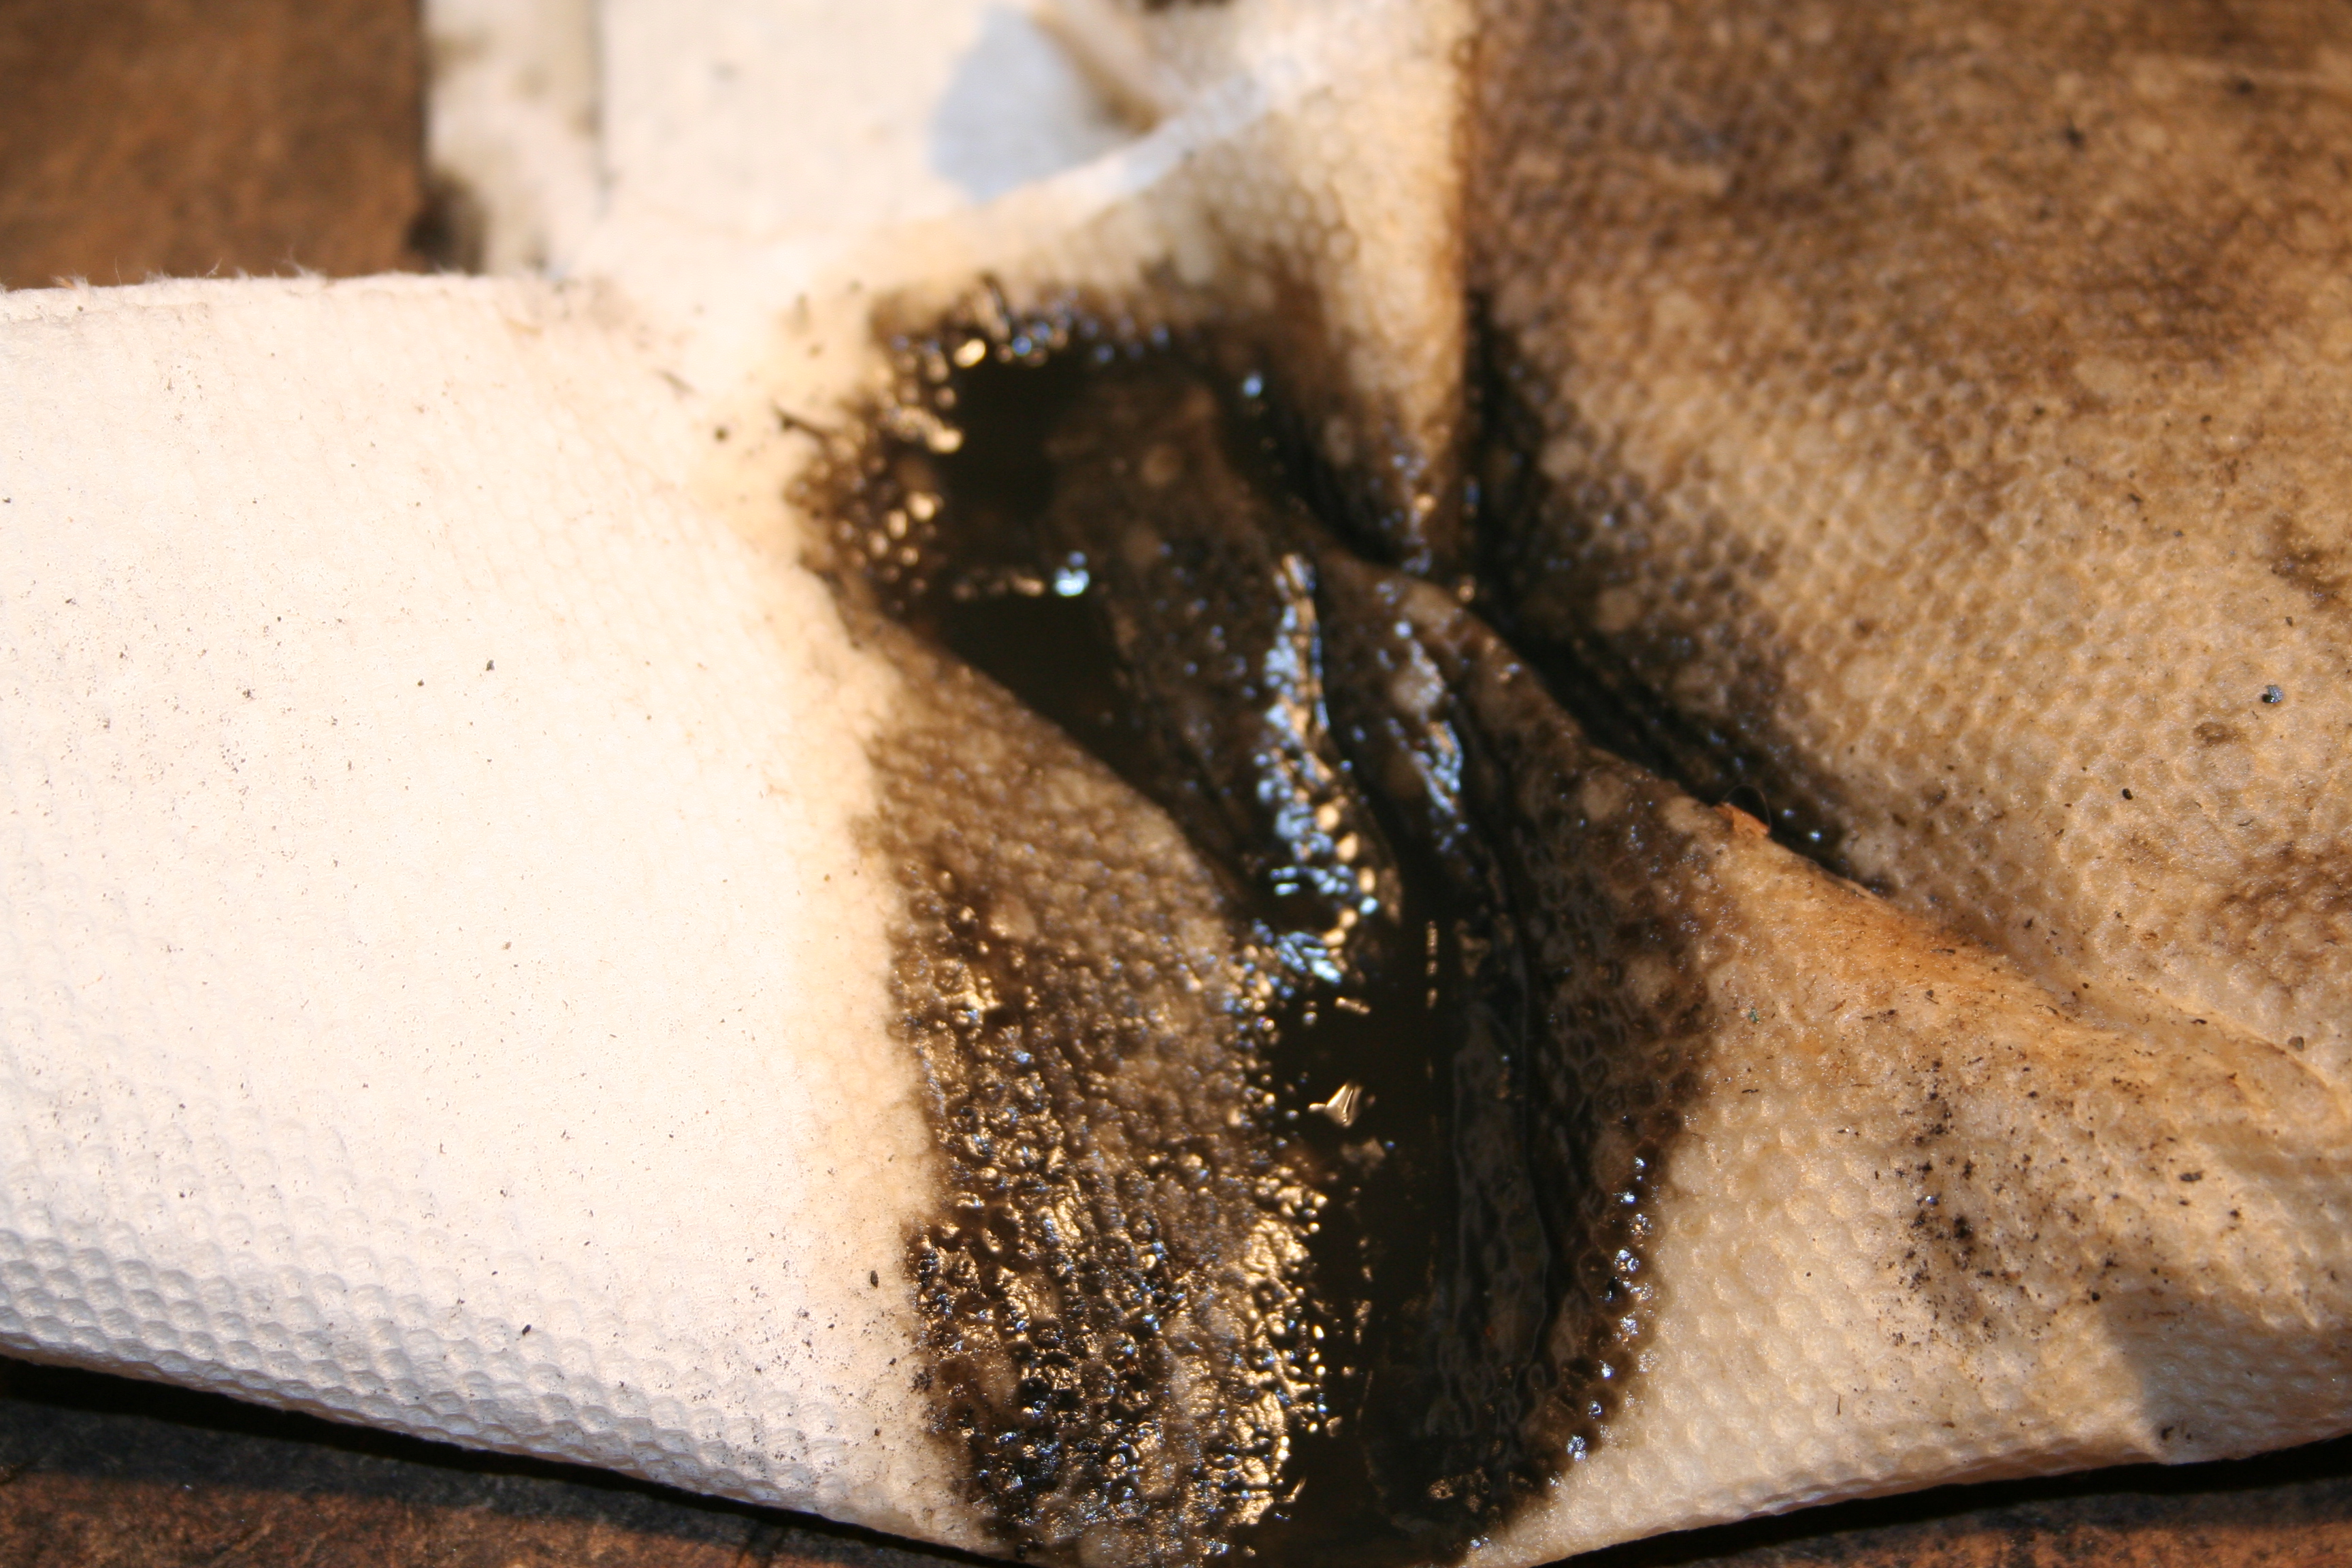
Example of the kind of crap you will find in a caliper that has not had new fluid in years.
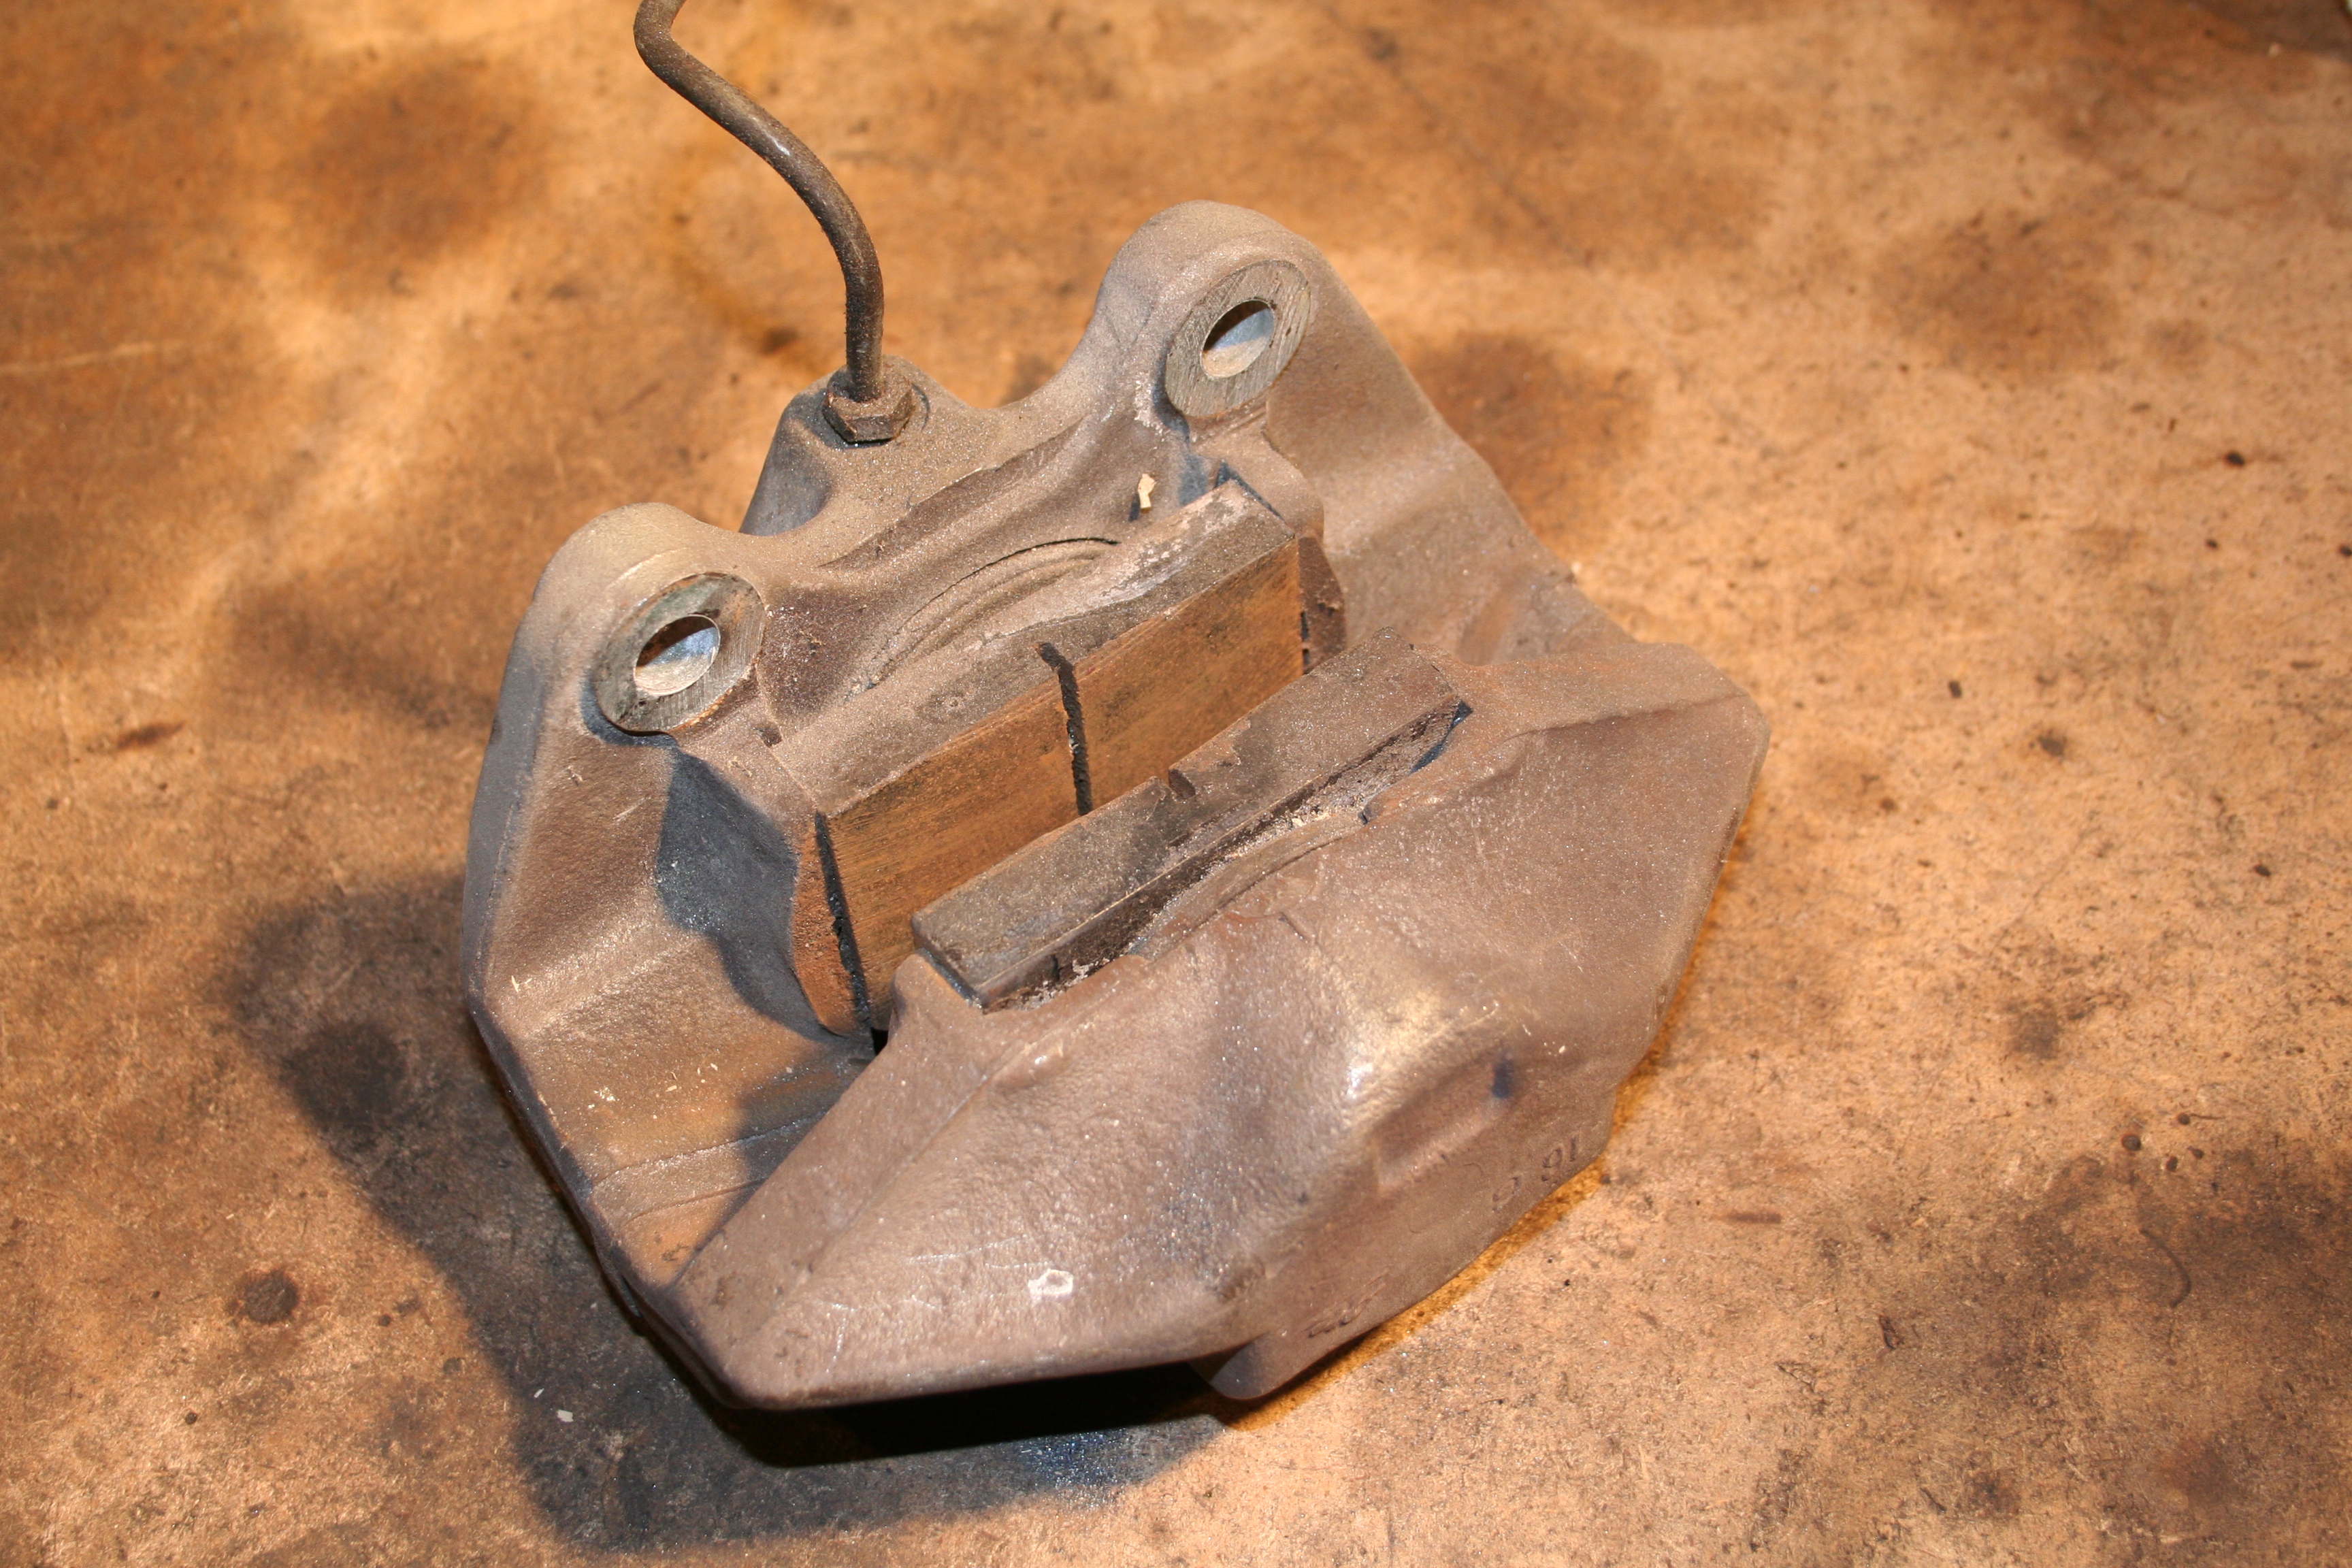
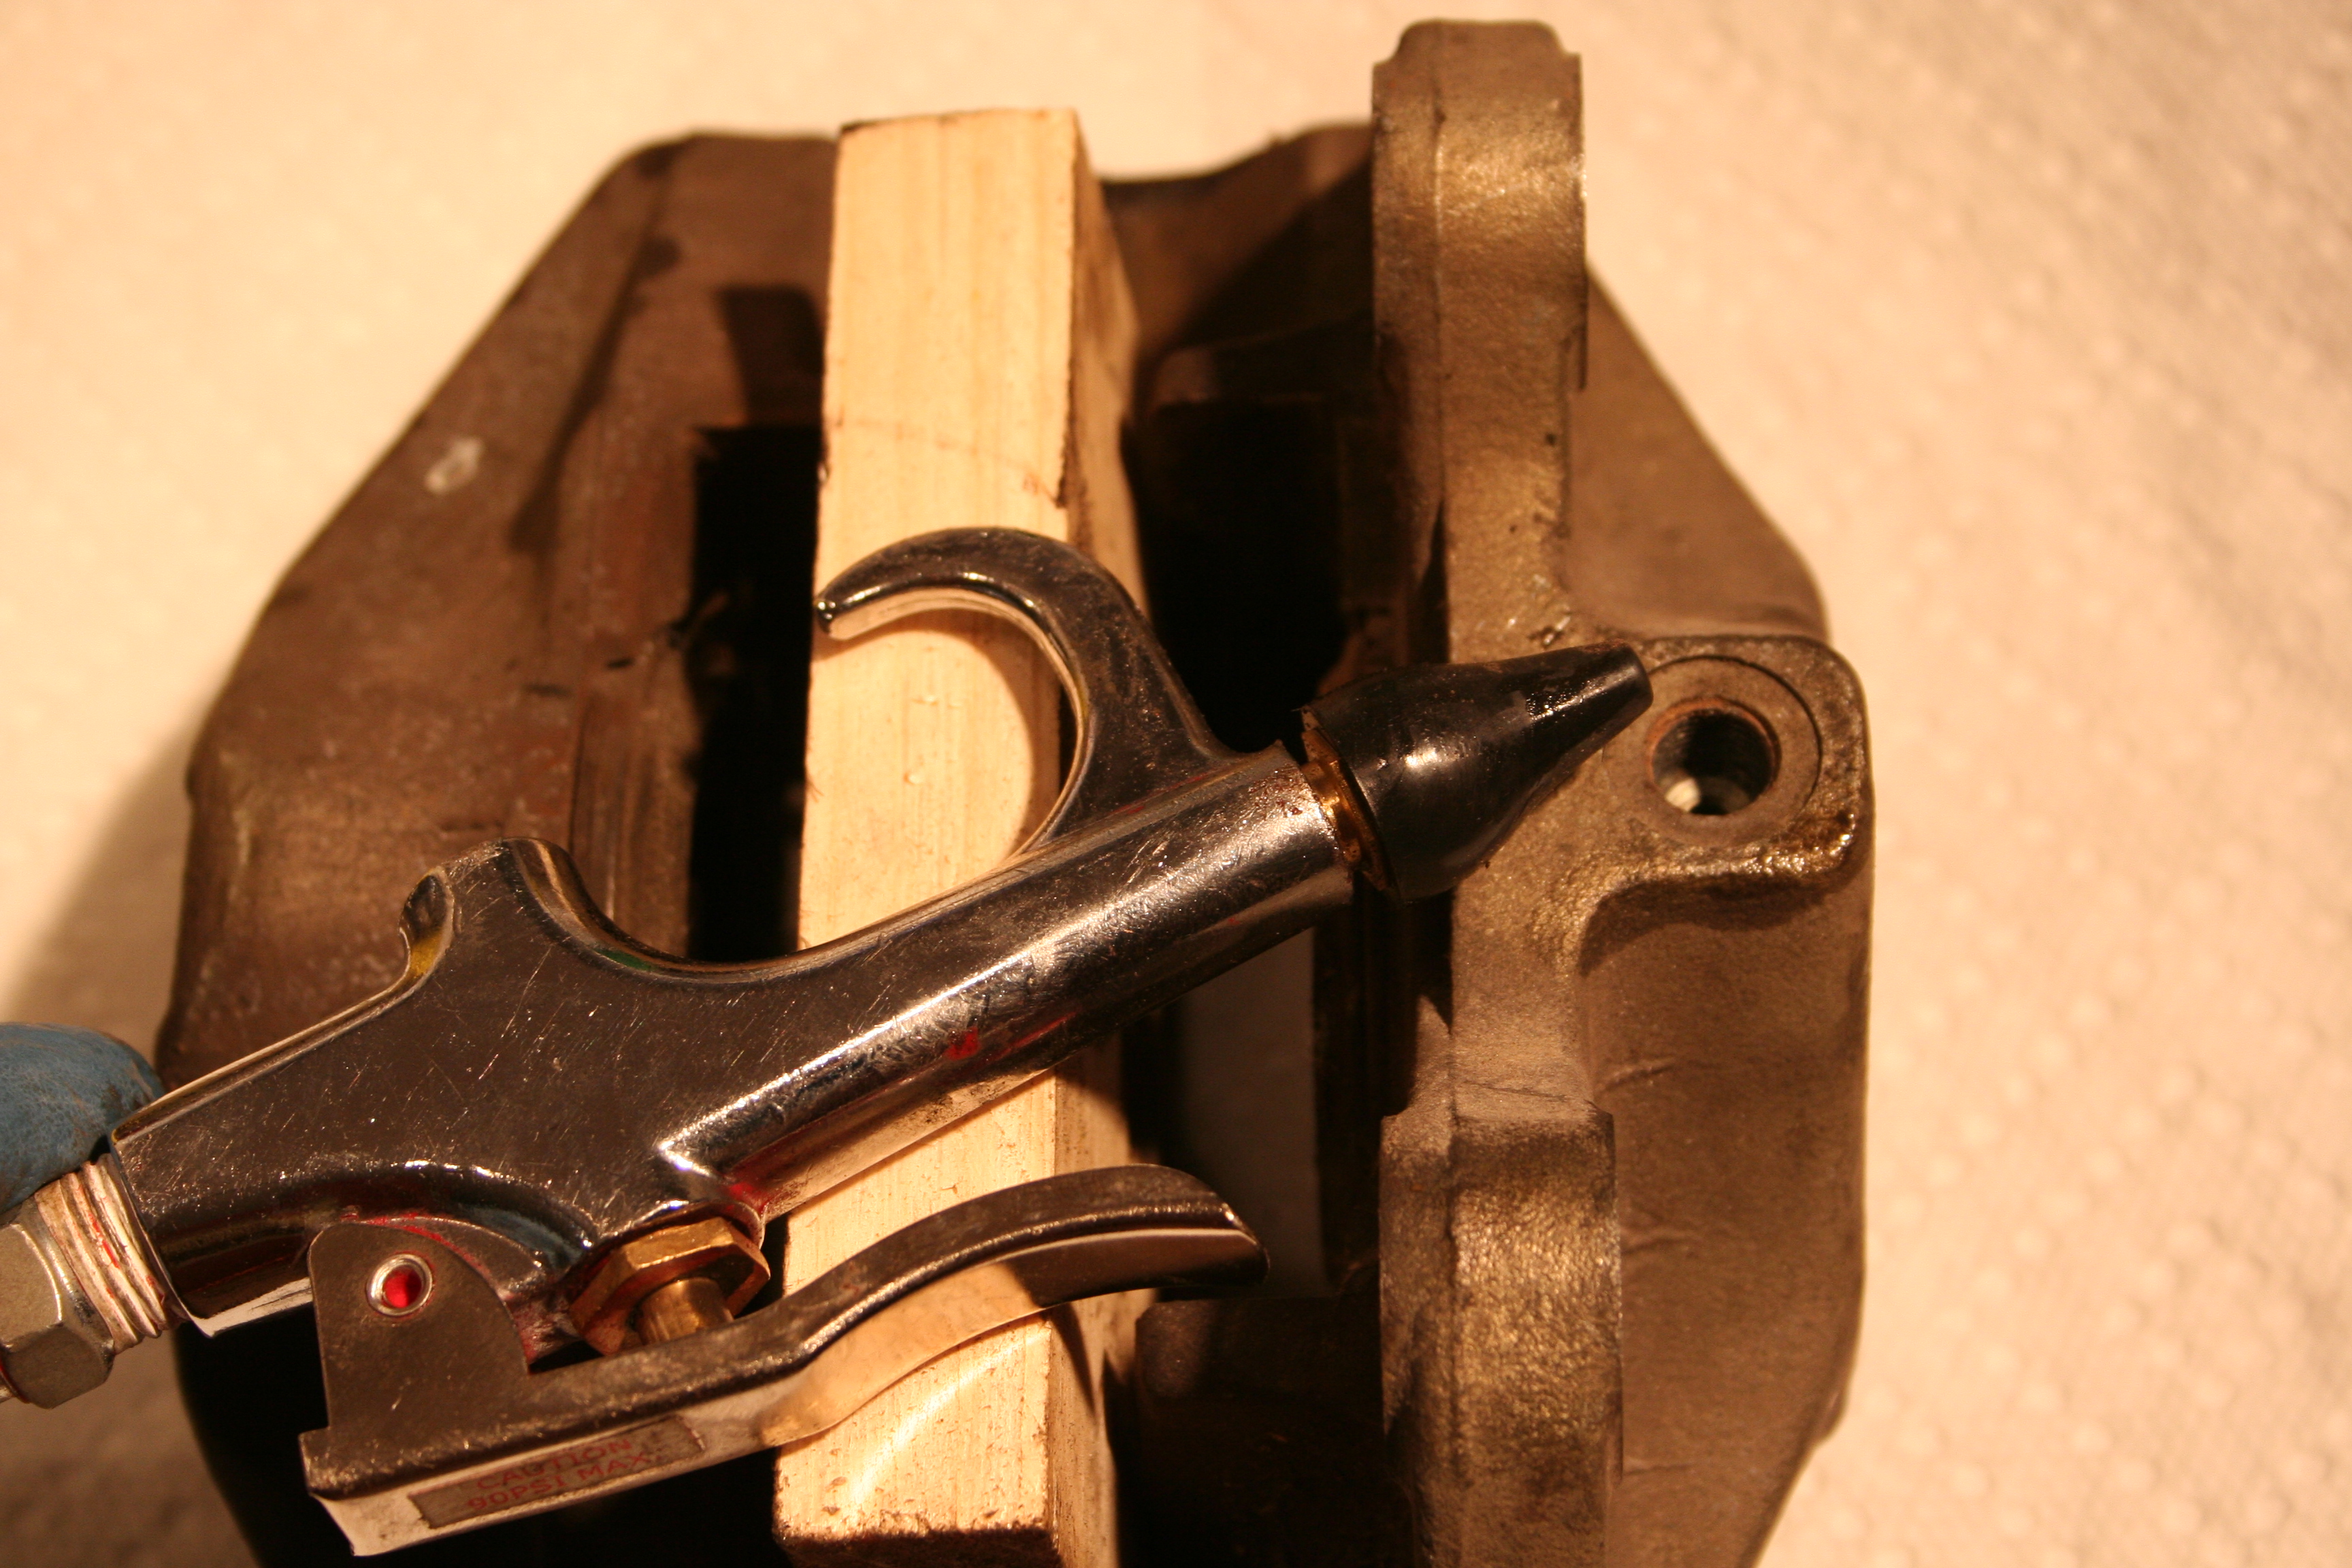
Ok, I am a fan of the compressed air method of removing pistons. The basic idea is that you need to put something in front of the pistons to keep them from rocketing across the room. I am using a wooden block. Then using an air gun (mine is using a rubber nozzle) you slowly pressurize the area behind the pistons. If all goes well and you have a smooth control of the pressure you can ease the pistons out. If you are ham fisted you can pop them out in a very forceful way. With this being a multi piston caliper, the trick is to not pop just one out, but to ease both out to the point they are about to fall out. That way most of the work is done for both pistons. But sometimes the pistons will not budge even if using over 120 psi or air. In that case...
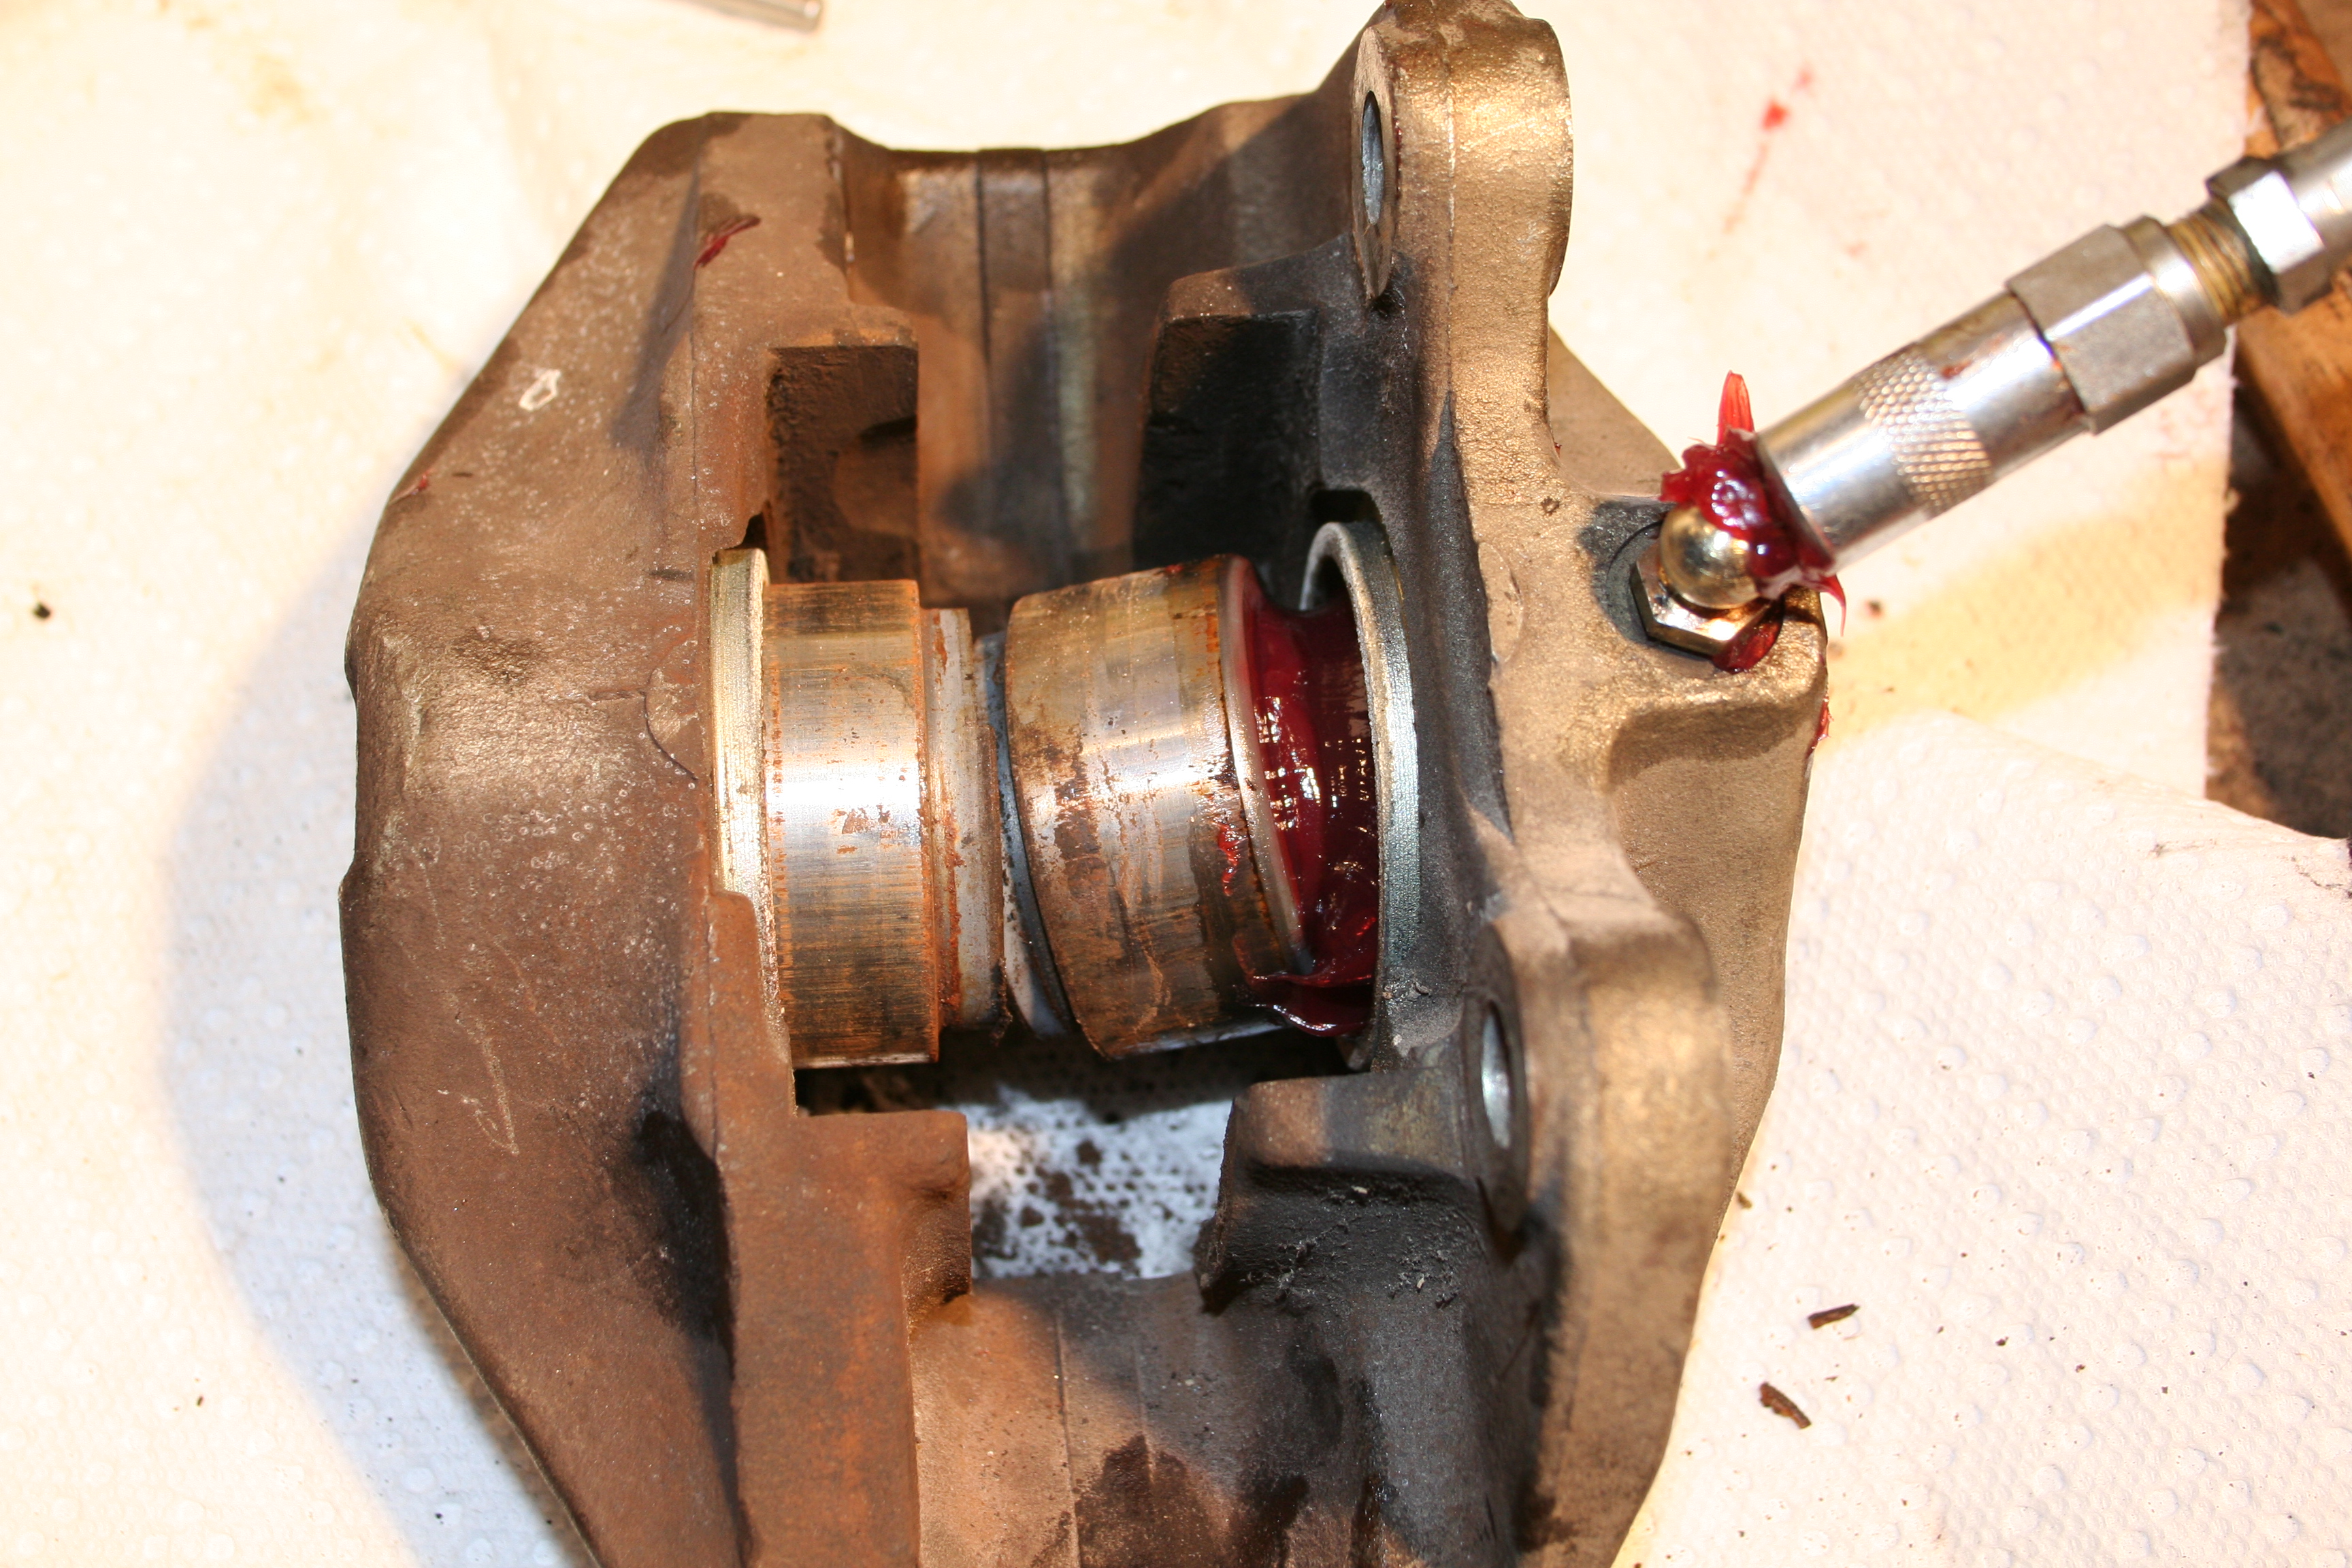
You move onto option two. That is to use a grease gun to push the pistons out. With the grease gun you are able to put much more pressure on the pistons than you can with compressed air. You need a way to get the grease into the calipers. These ATE calipers use an M10 thread (I think the thread pitch is 1.0), so my solution is an M10 Zirk fitting. Then I just hook up a regular grease gun and start pumping.
Here I have moved one piston out some, but I am clamping it in place, so I can move the other.
I move the clamp back and forth and hopefully move them both out a bit at a time. Eventually one is going to pop out. You can put it back into the caliper just enough to match up with the seal, clamp in place and pop the other piston out. You may need to take a channel lock wrench to pull out a piston. DO NOT clamp anything on the piston outer surface. If you must clamp onto the piston try to protect it with a rag and clamp around the dust seal area. If you can't rotate it out relatively easily then you haven't pushed it out far enough. At this point if you are not going to split the caliper, you can clean stuff up and using a standard rebuild kit, install new seals, etc. But I wan to split the caliper as I am going to replate everything.
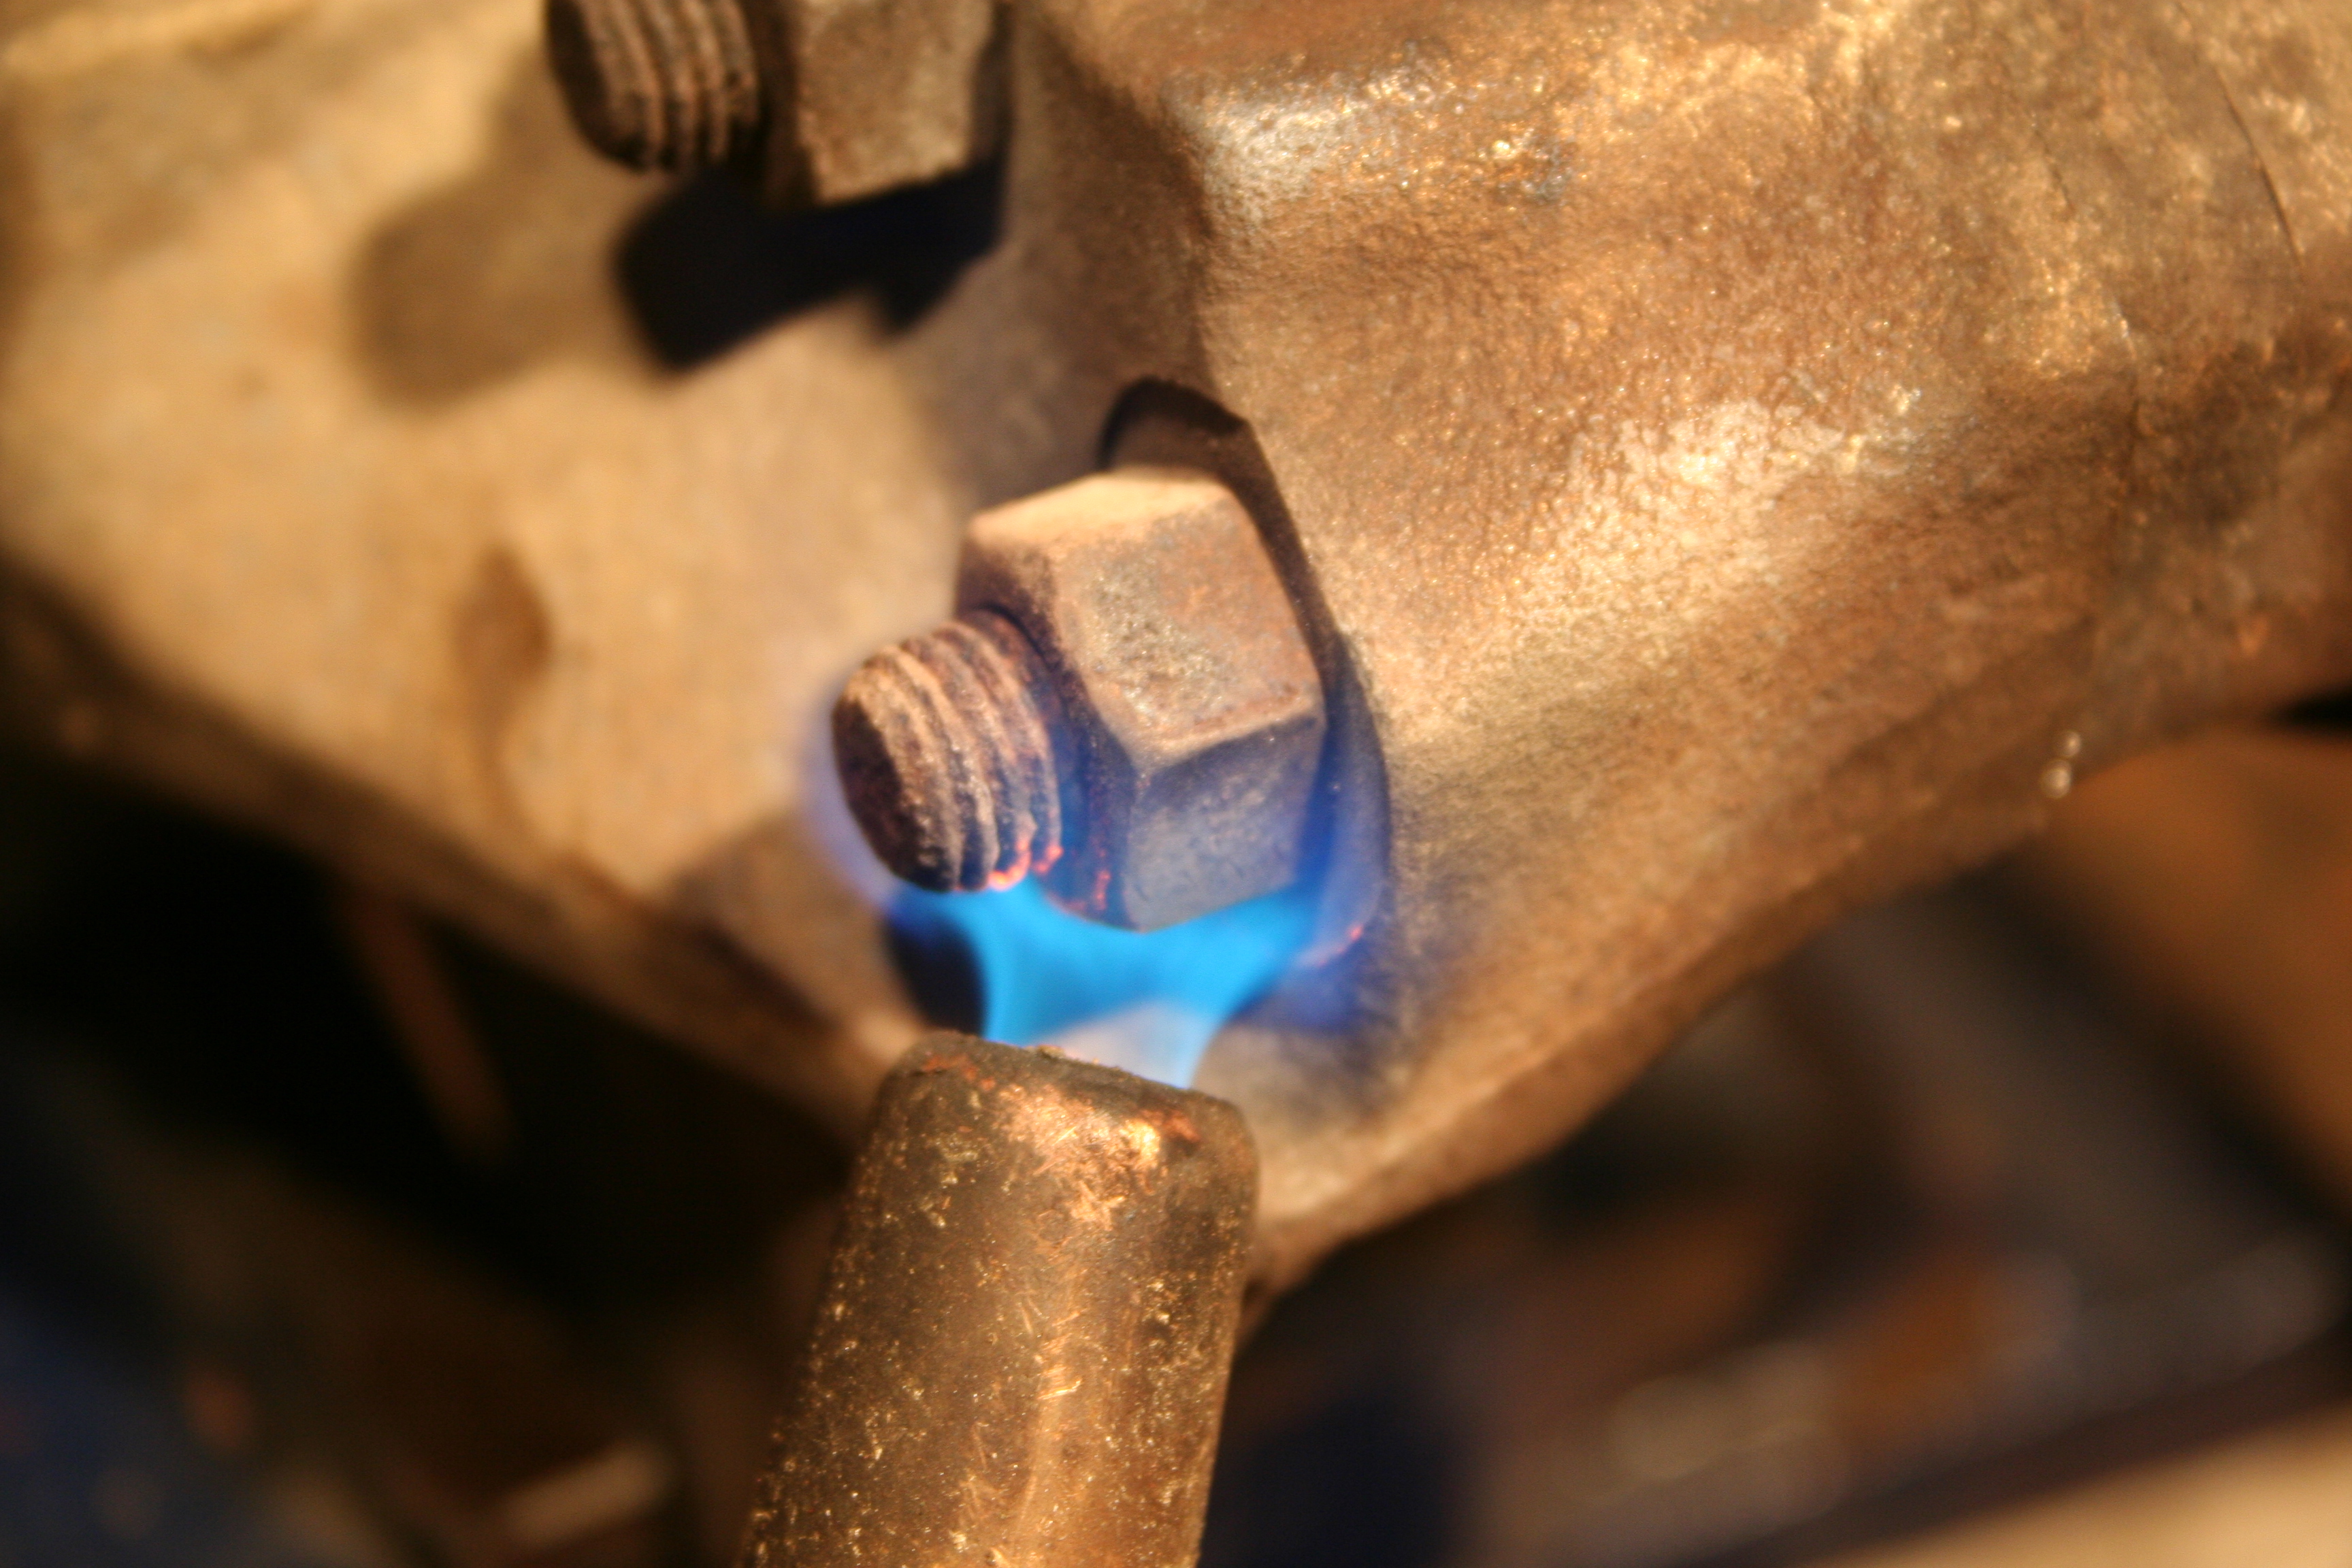
The four cap head bolts and associated nuts are of an odd design. First they are M9 hardware. New M9 hardware is pretty much unobtainable. You may find an odd bit here and there, but so far I have not been able to find replacement M9 hardware. So you need to keep the existing hardware. The other odd thing is that the cap head uses a Ribe style head. This is sort of like a Torx head, but it has square edges. Ribe bits are available and you should NOT try to use Torx bits on a Ribe head. You may think it will work, but you will strip out the head. On top of all of this, the cap head bolt uses a relatively small Ribe size. It is a 6m Ribe head. This is small for a M9 bolt. The bottom line is that it's very easy to tear up the head of this bolt if you are not careful. The way to do this is to heat up the nut to help loosen it. I used a MAPP gas torch and applied heat to each nut for about 5 minutes. It will heat up the entire caliper and the nut really is not going to get red hot as the entire caliper acts as a huge heat sink. Once you have heated them up, let them cool down before you try to remove the nut.
I noticed an interesting thing as I heated the nuts. I heated the caliper enough that it started to sweat out small bead of what I think is lead between the caliper halves and the spacer. I suspect that when ATE built the calipers that they may have "tinned" the mating surfaces with a bit of lead for some reason. You can see the small beads in the photos above. 6/1/2009
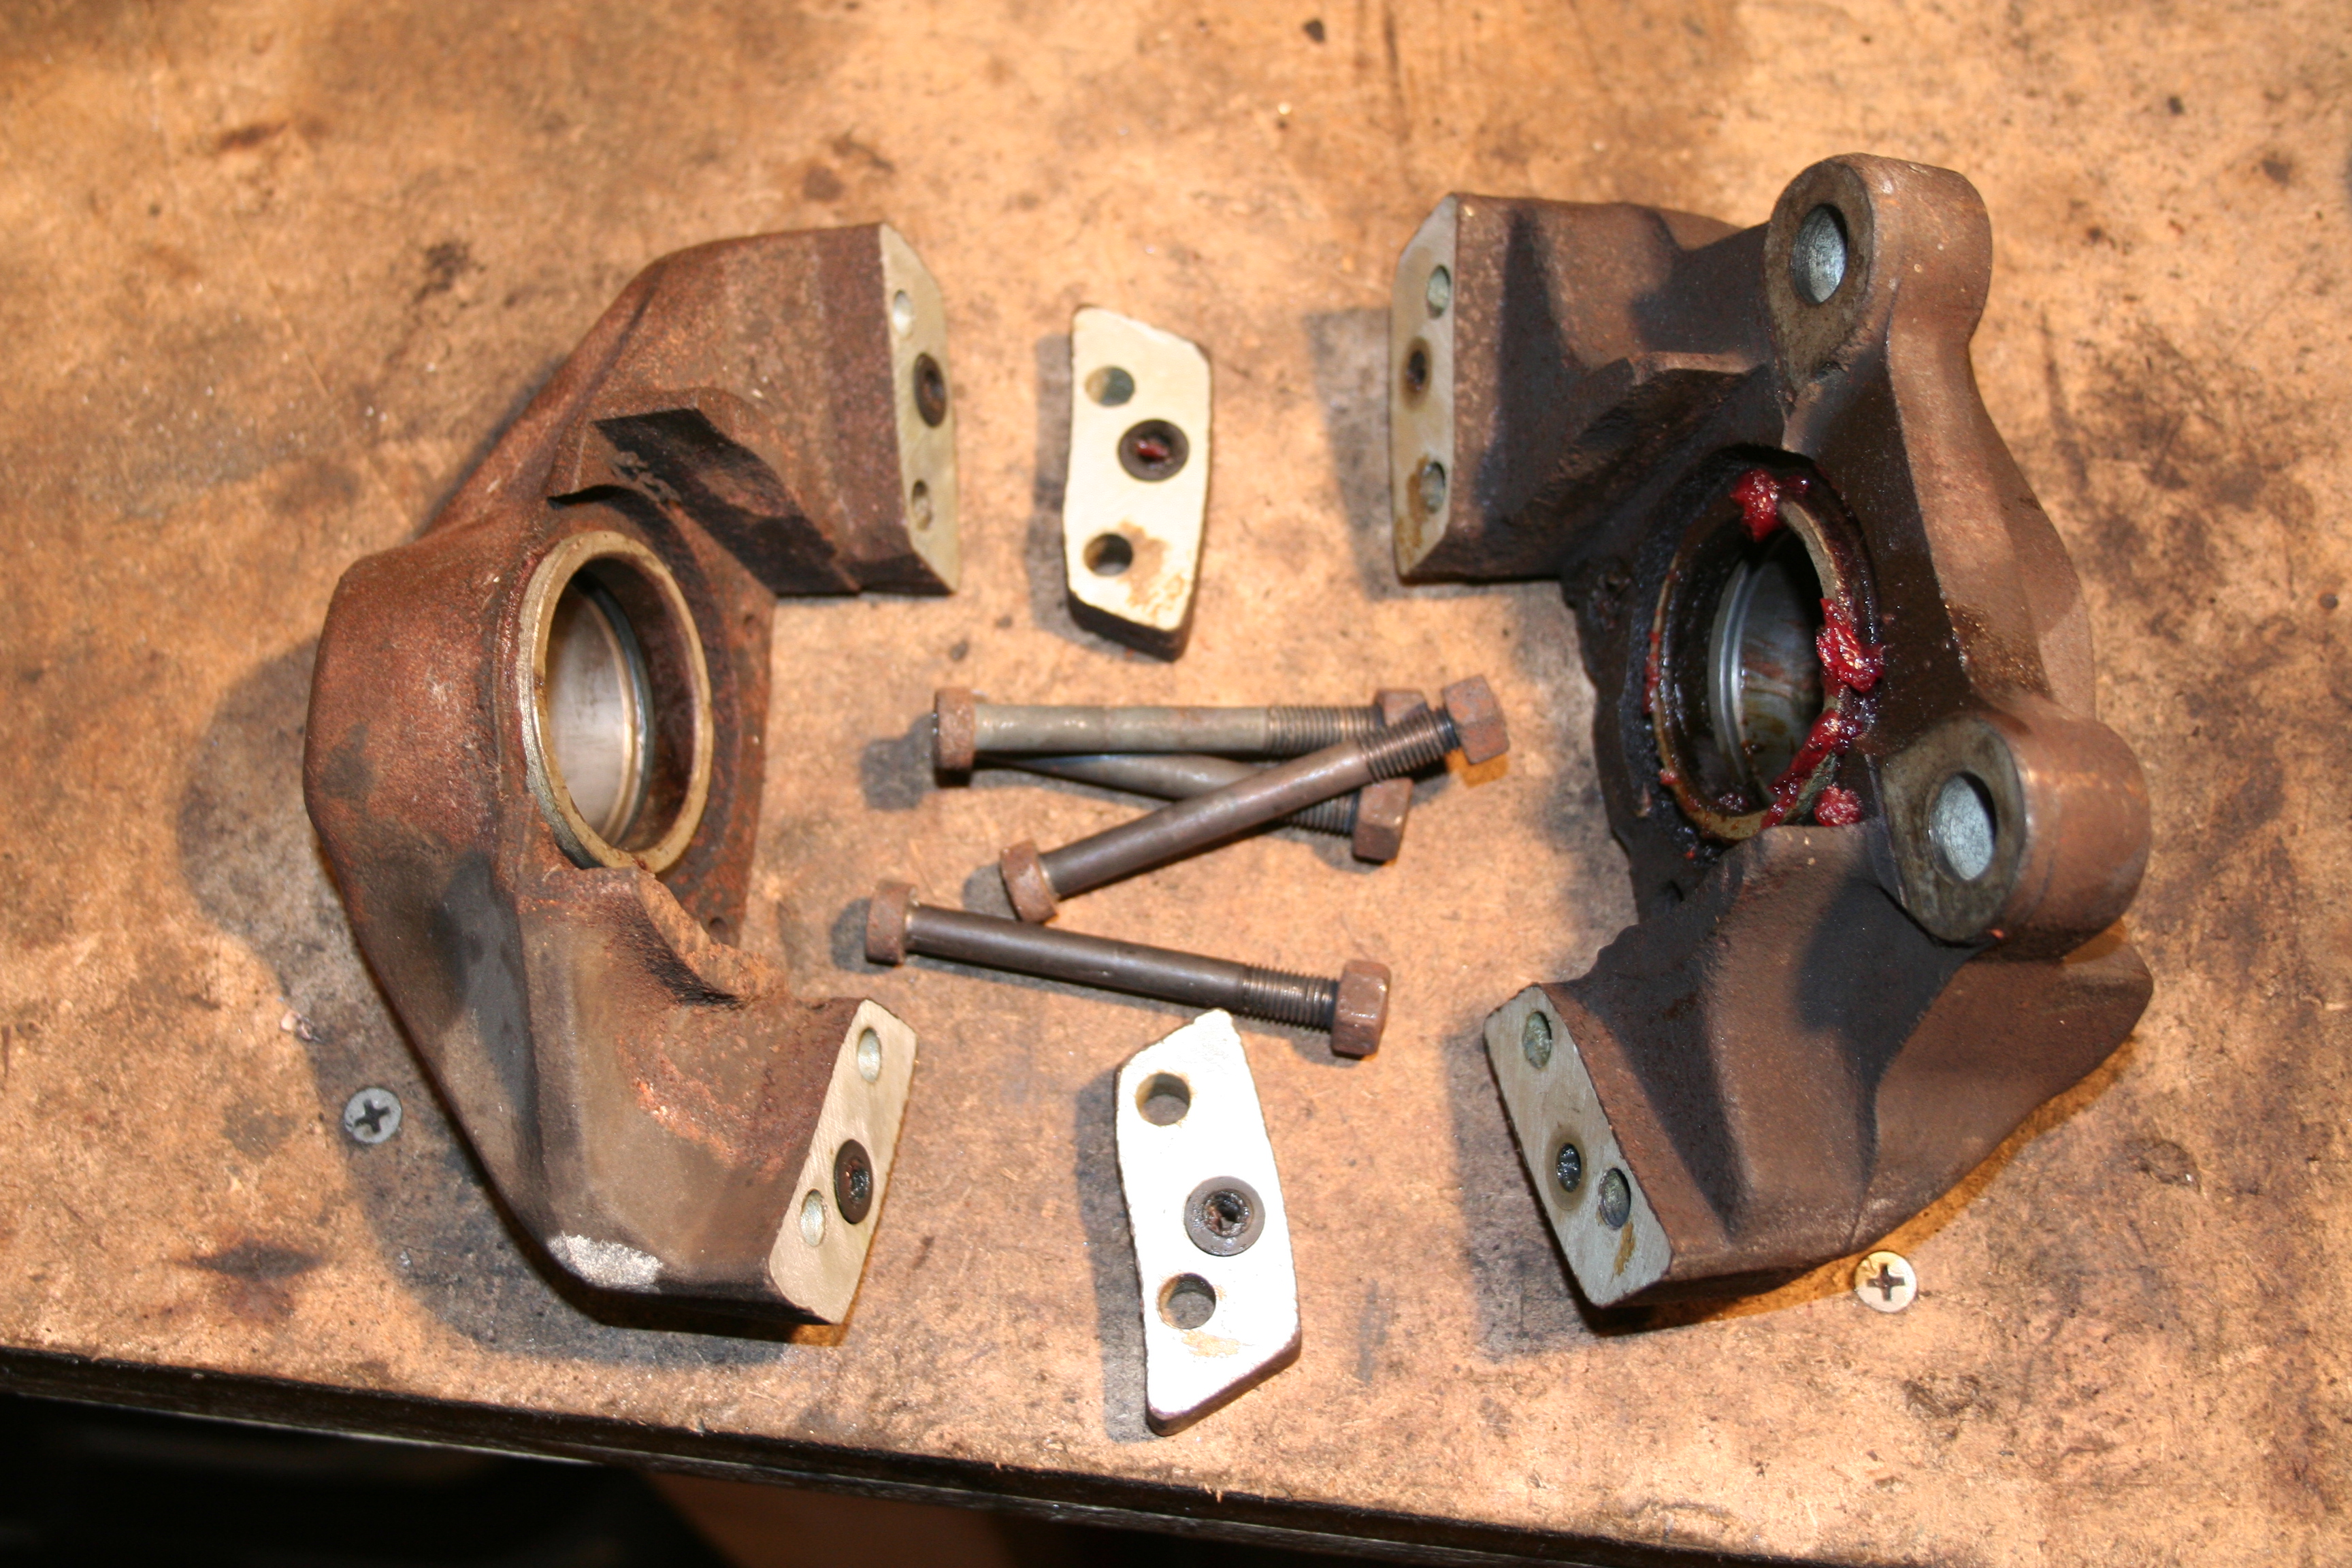
Ok, after the calipers cooled overnight, I sprayed some "PB Blaster" on the nuts to help loosen them. Not sure if that worked or not. Then let that sit all day. Then in the evening I removed the nuts. The trick according to Eric Shea (and I did this) is to put the Ribe bit in a wrench, but hold he bolt still. Then use an impact wrench on the nut end. I learned that the best way to do this is to make 100% sure that the Ribe bit is all the way into the socket head. Make sure it is completely perpendicular in every way and then hit the nut with the impact wrench. You really want to make sure that you don't twist the Ribe bit in the bolt head. If it doesn't break loose after one or two hits with the impact wrench, stop before you screw up the bolt head and do another heat cycle. In the photo above, you can see the bolts and nuts (which apparently are black oxide plated), the split calipers and the spacers.
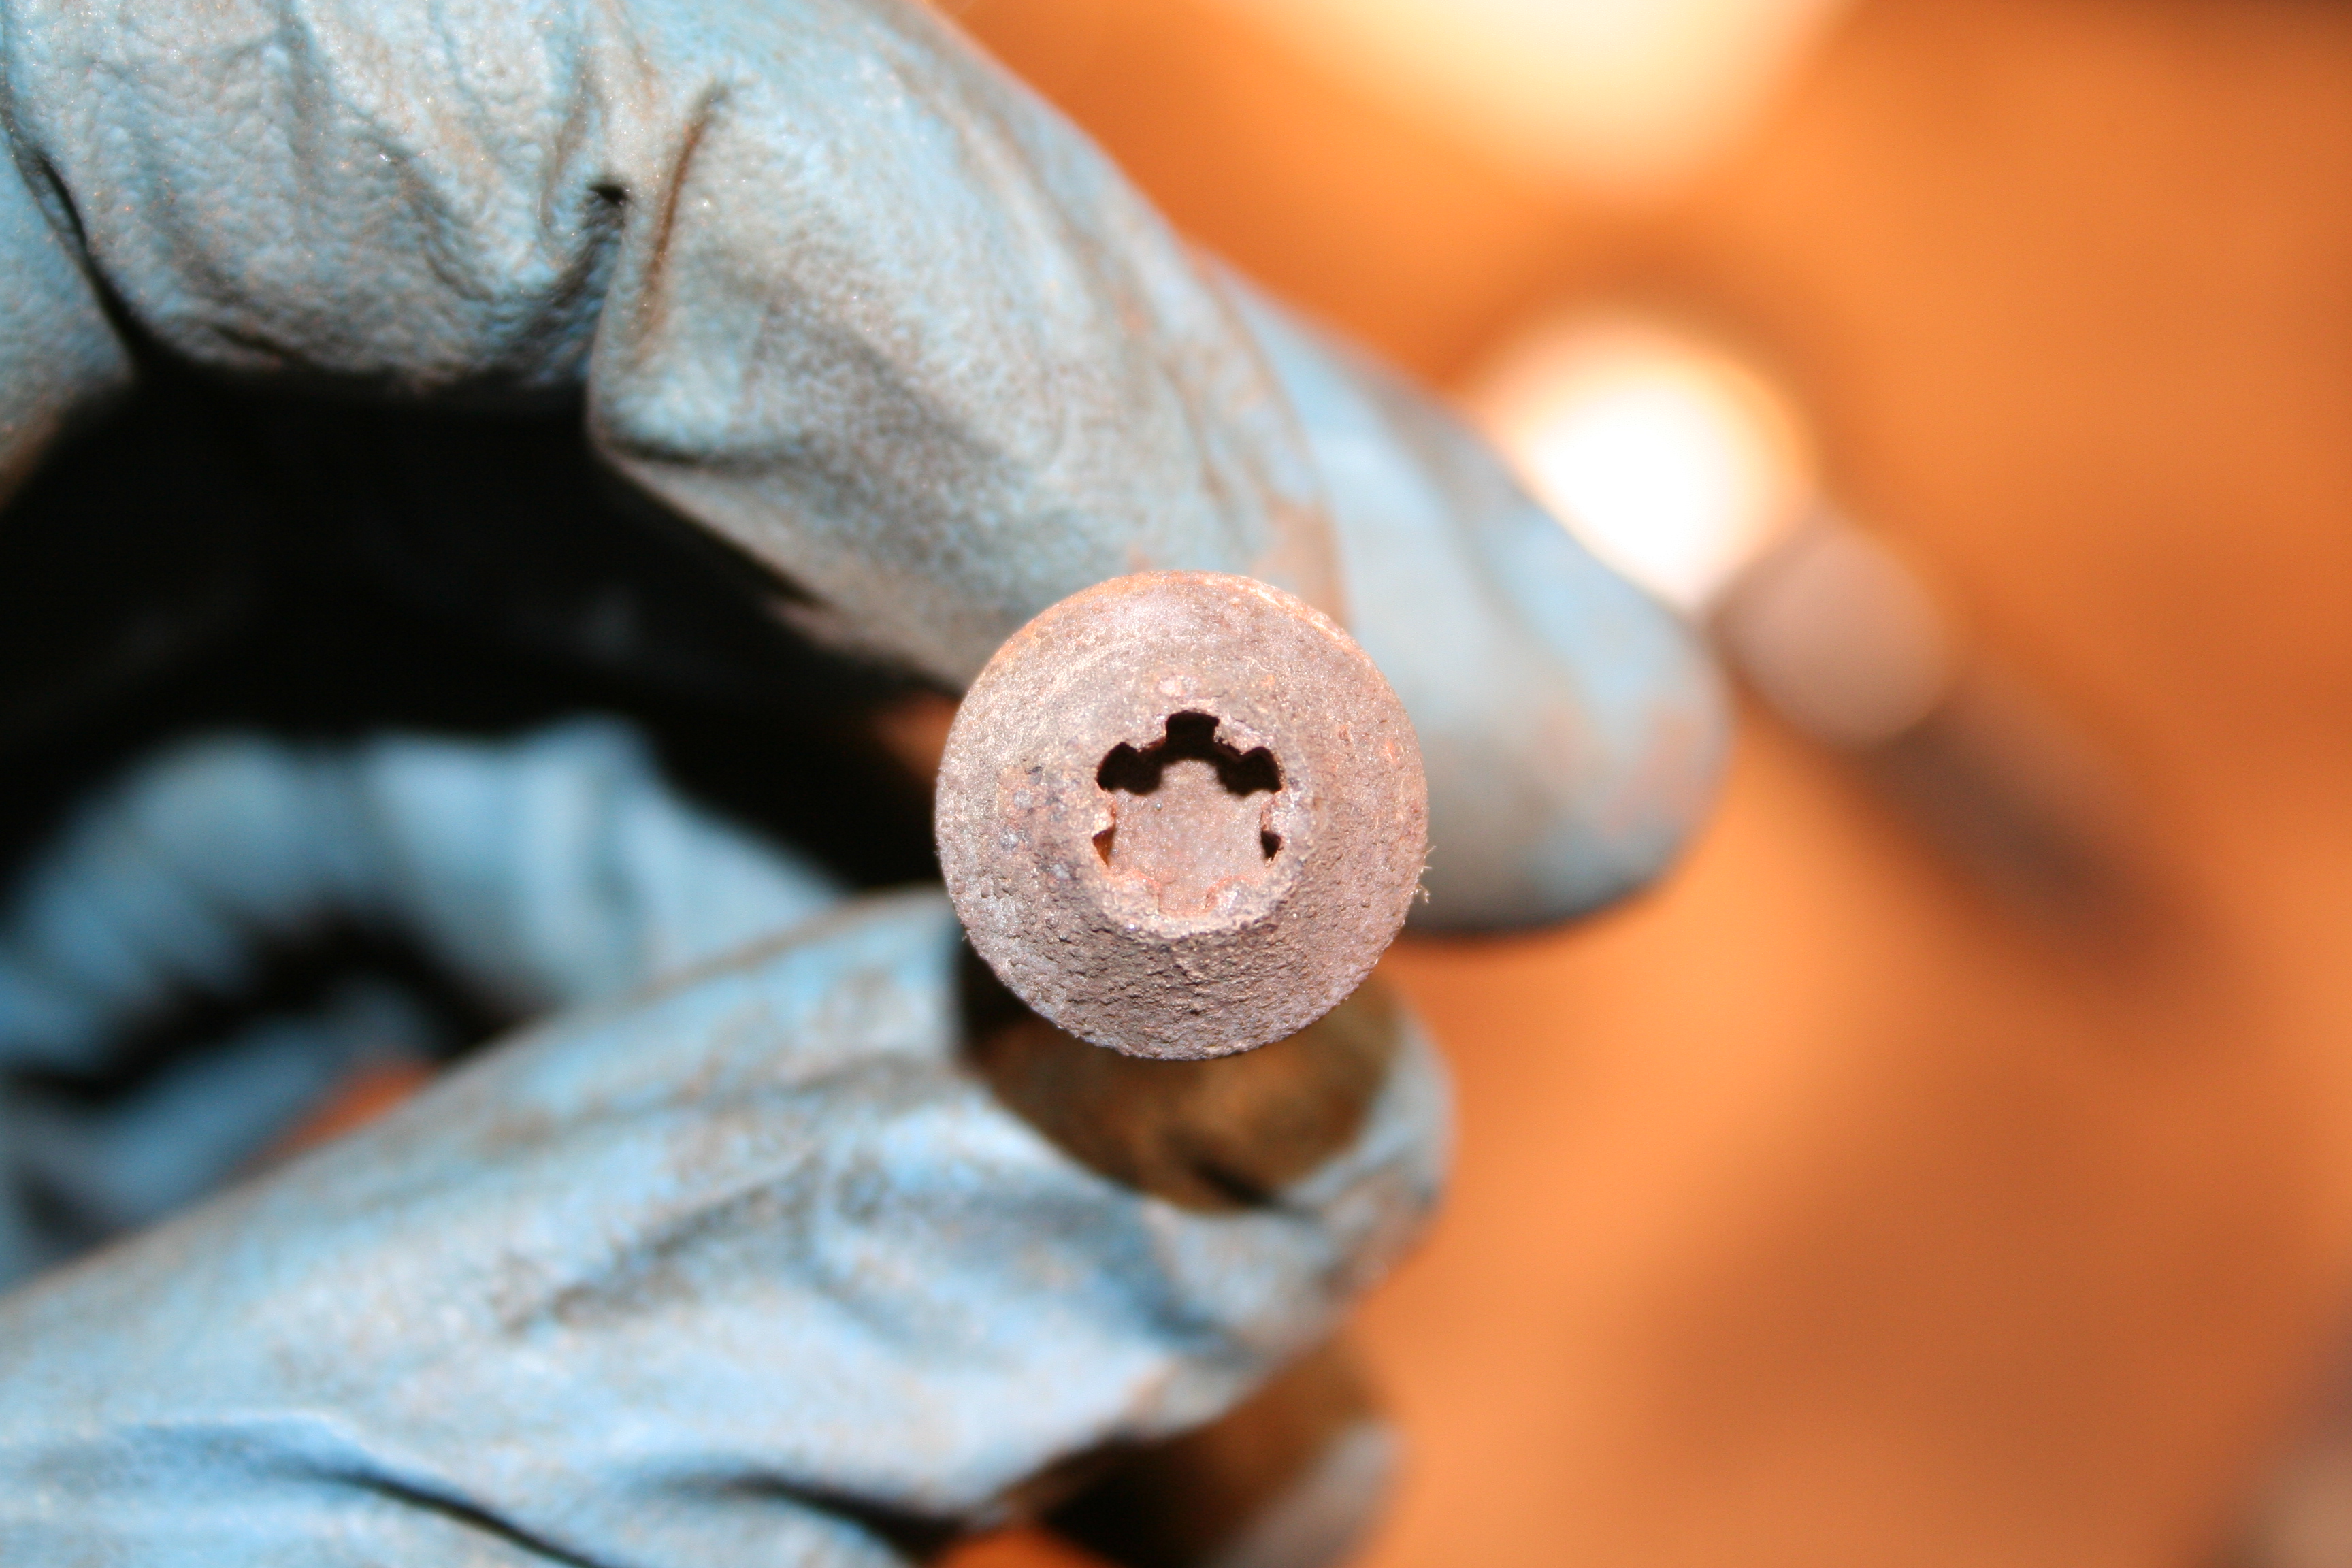
Here is a 6mm Ribe bit.
Here is the M9 bolt with a 6mm Ribe head. Note the square edges which are not like the round edges of a Torx head.
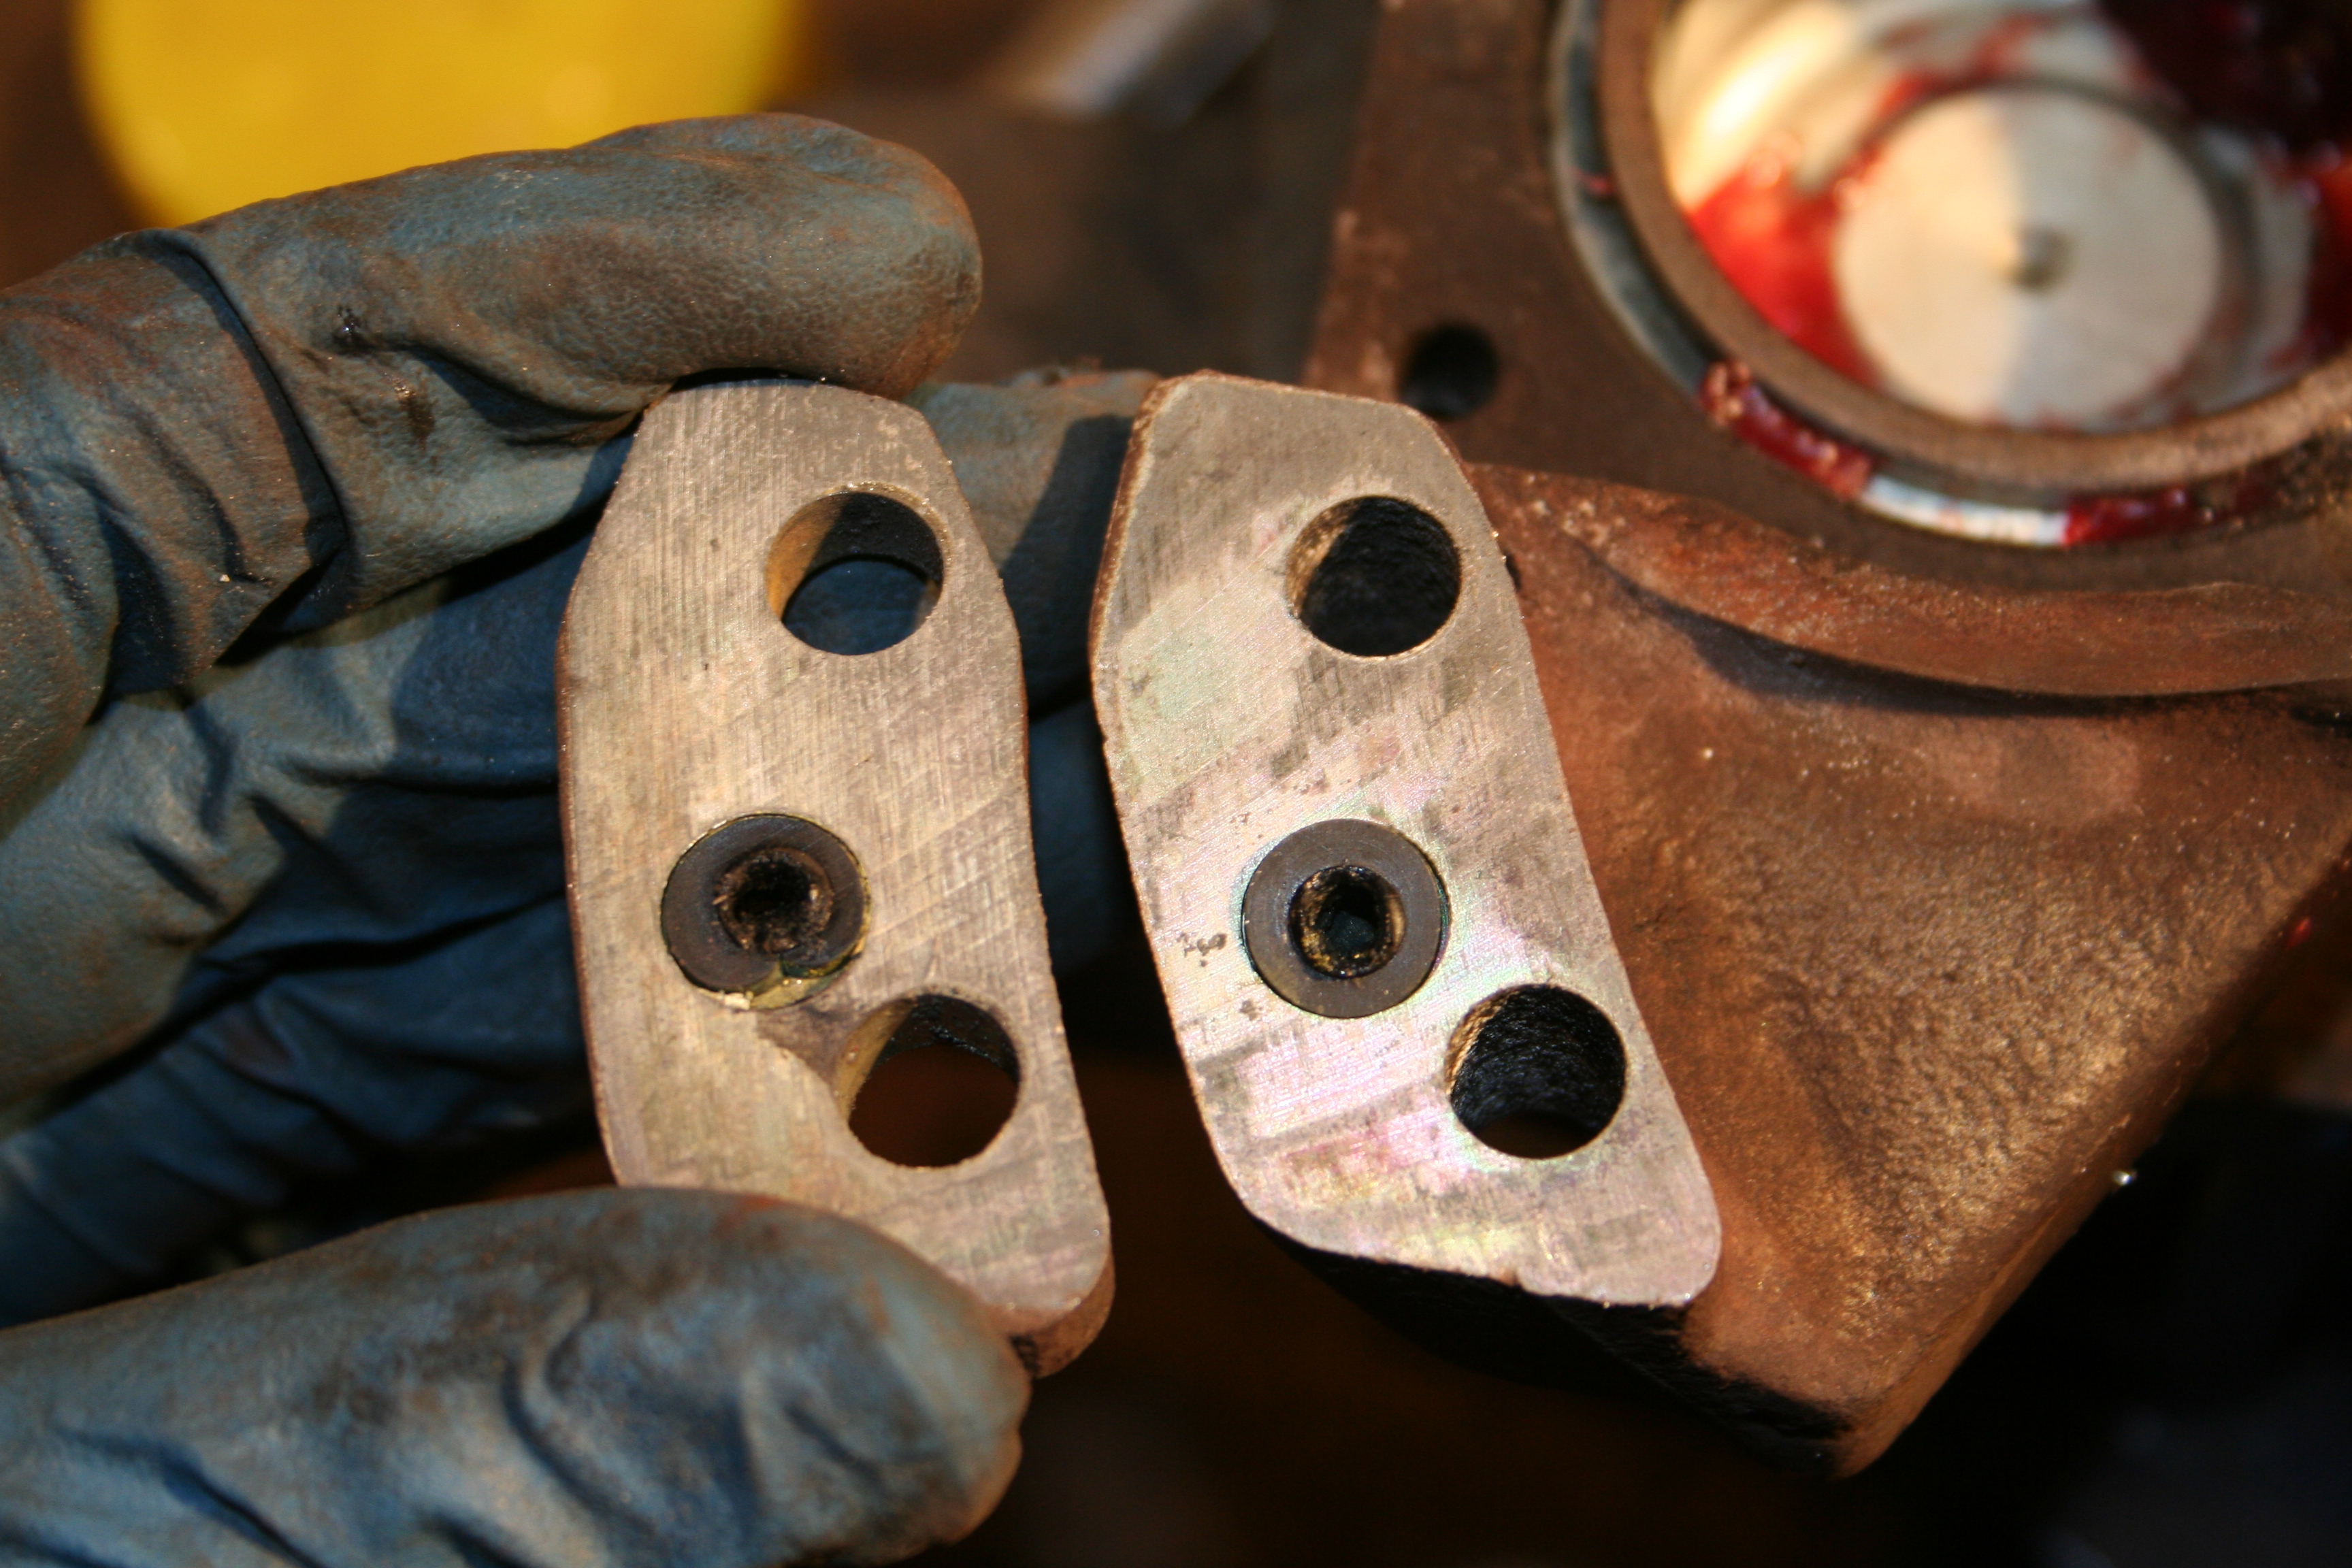
Here is the spacer next to one of the caliper halves. Note that there is a recess in one of the caliper halves as well as the spacer for the small o-rings. Normal caliper rebuild kits DO NOT provide those o-rings as they assume you will not be splitting the caliper. |
|