![]()
![]()
|
|
|
|
1972 Porsche 914Repair and Restoration - Part 25 - Front Suspension8/26/2007I really should be spending time working on the rust repair, but I just wanted to do something different. And I just fixed the Plexiglas window on my blast cabinet, so I figured I would disassemble and start cleaning up the struts I bought.
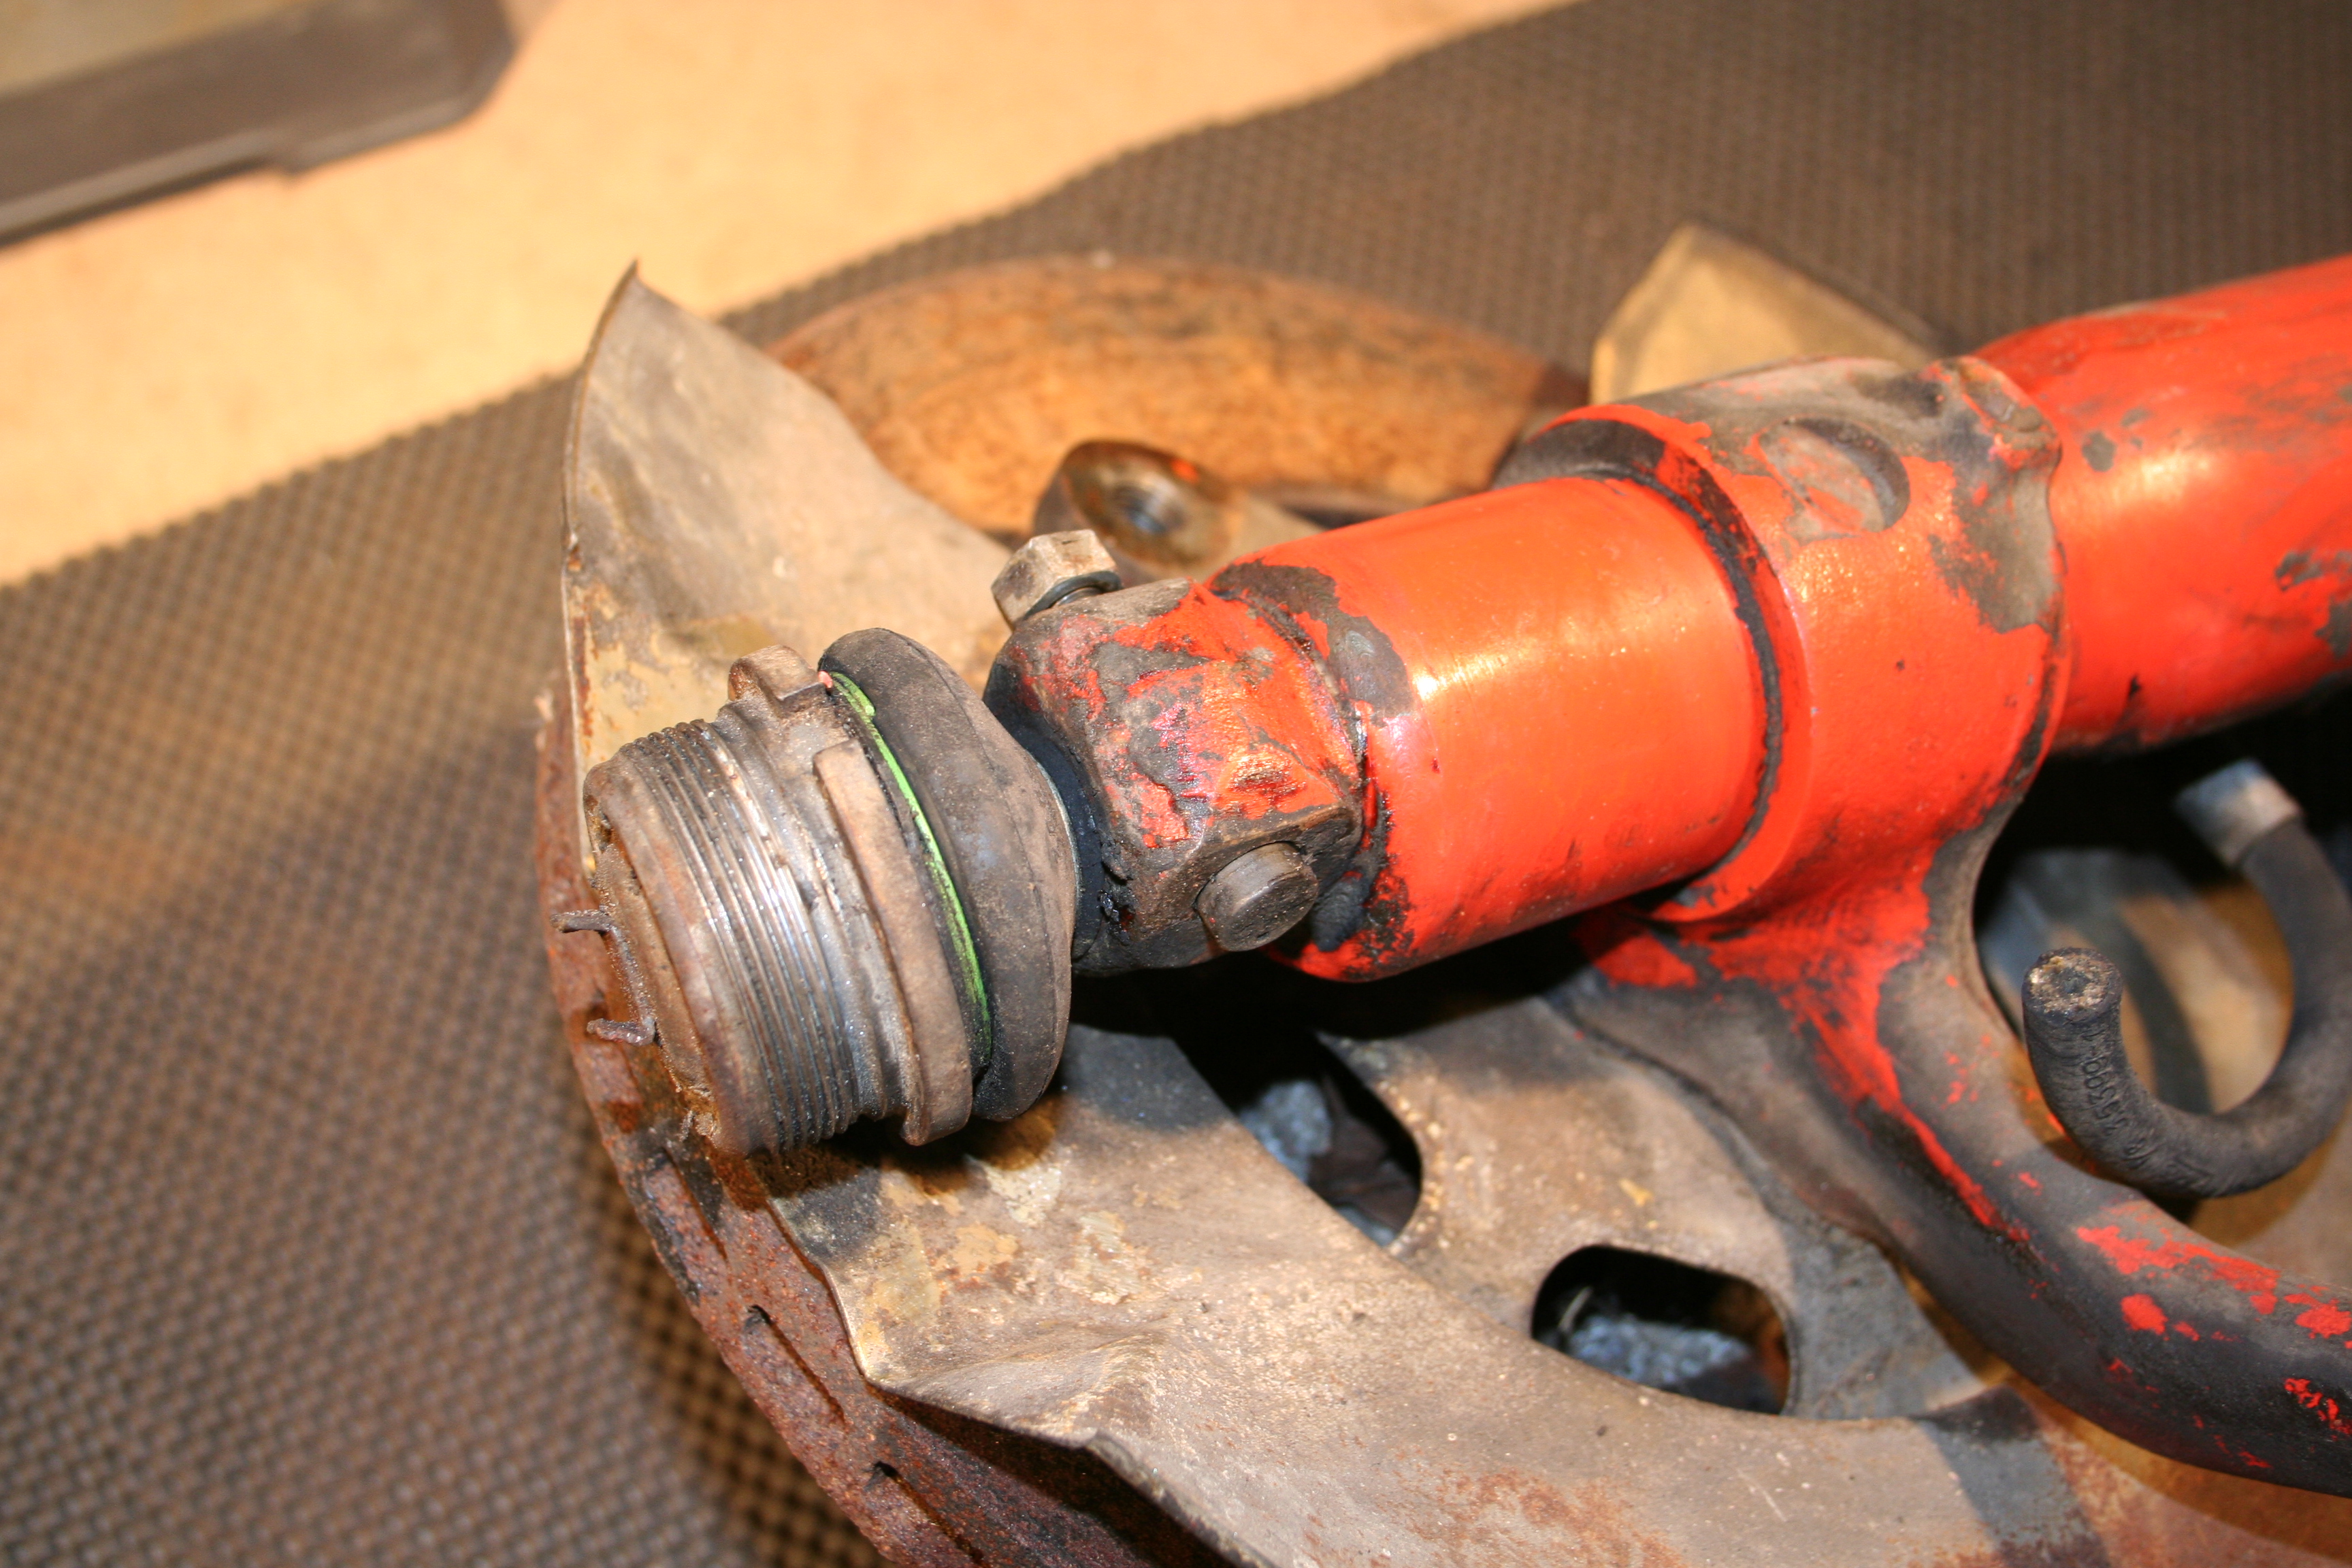
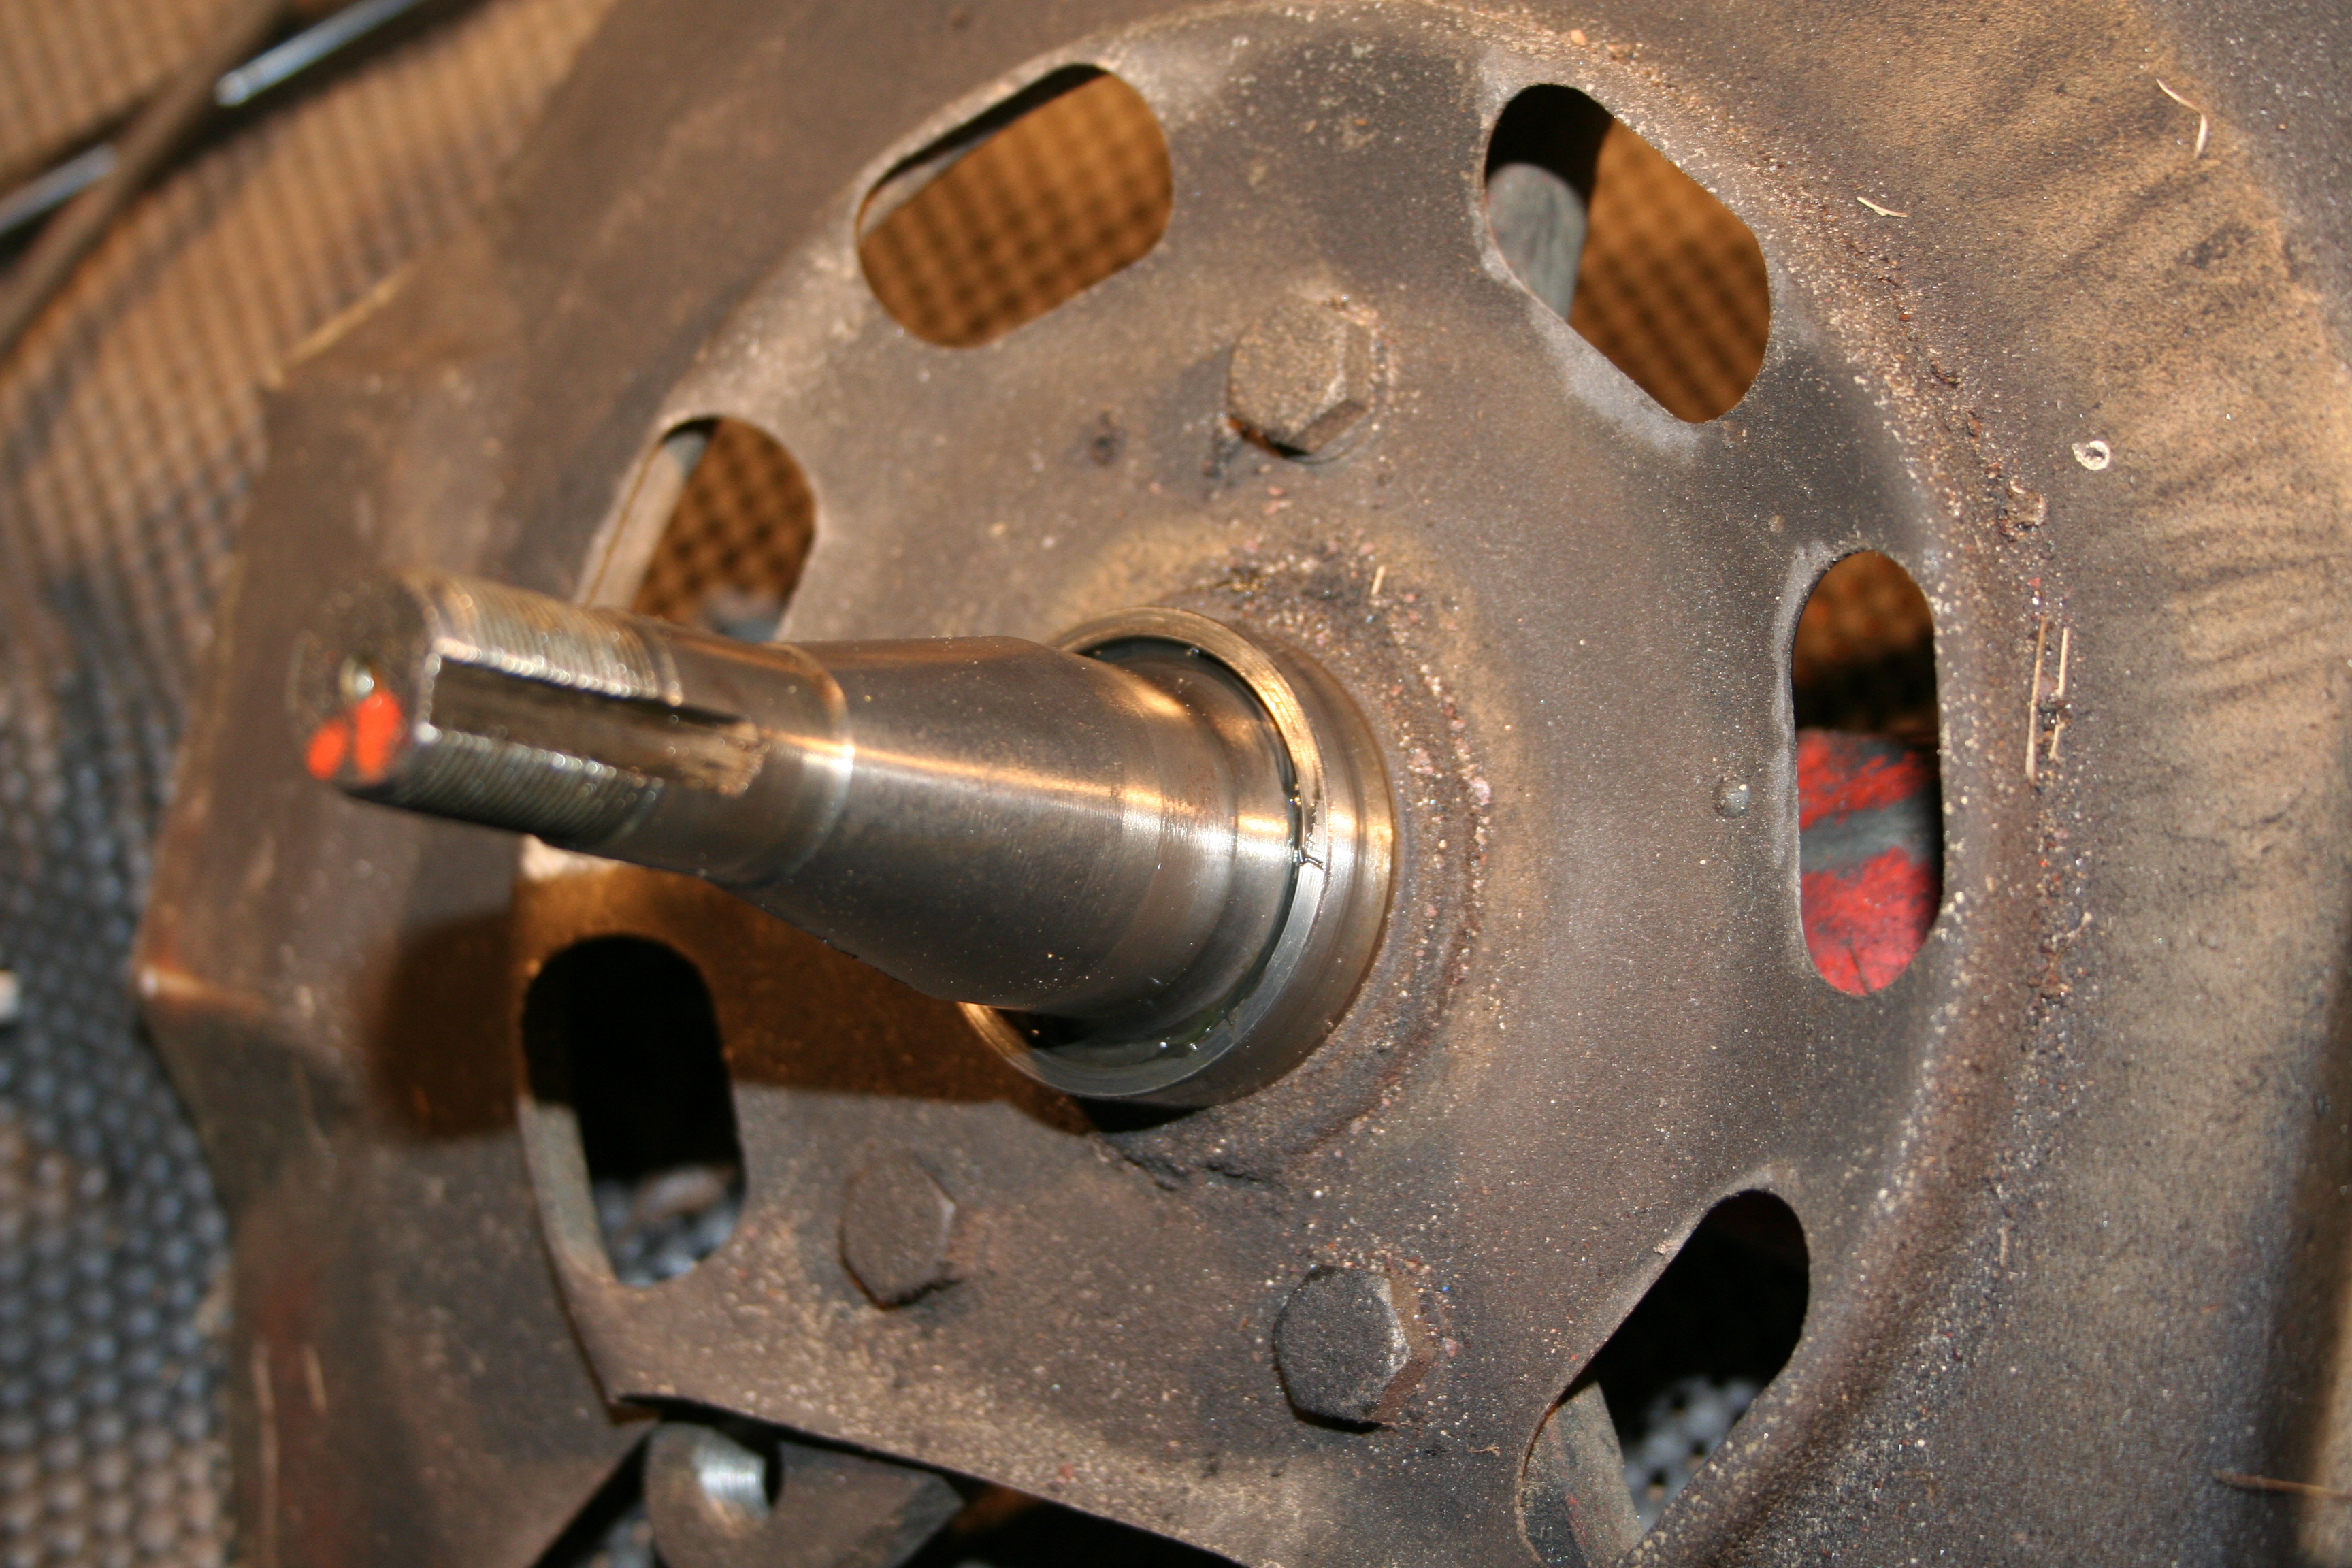
Note the wedge pin and newer style ball joint.
Impact wrench took the nut right off. Obviously had to bend down the spiked washer to remove the rest.
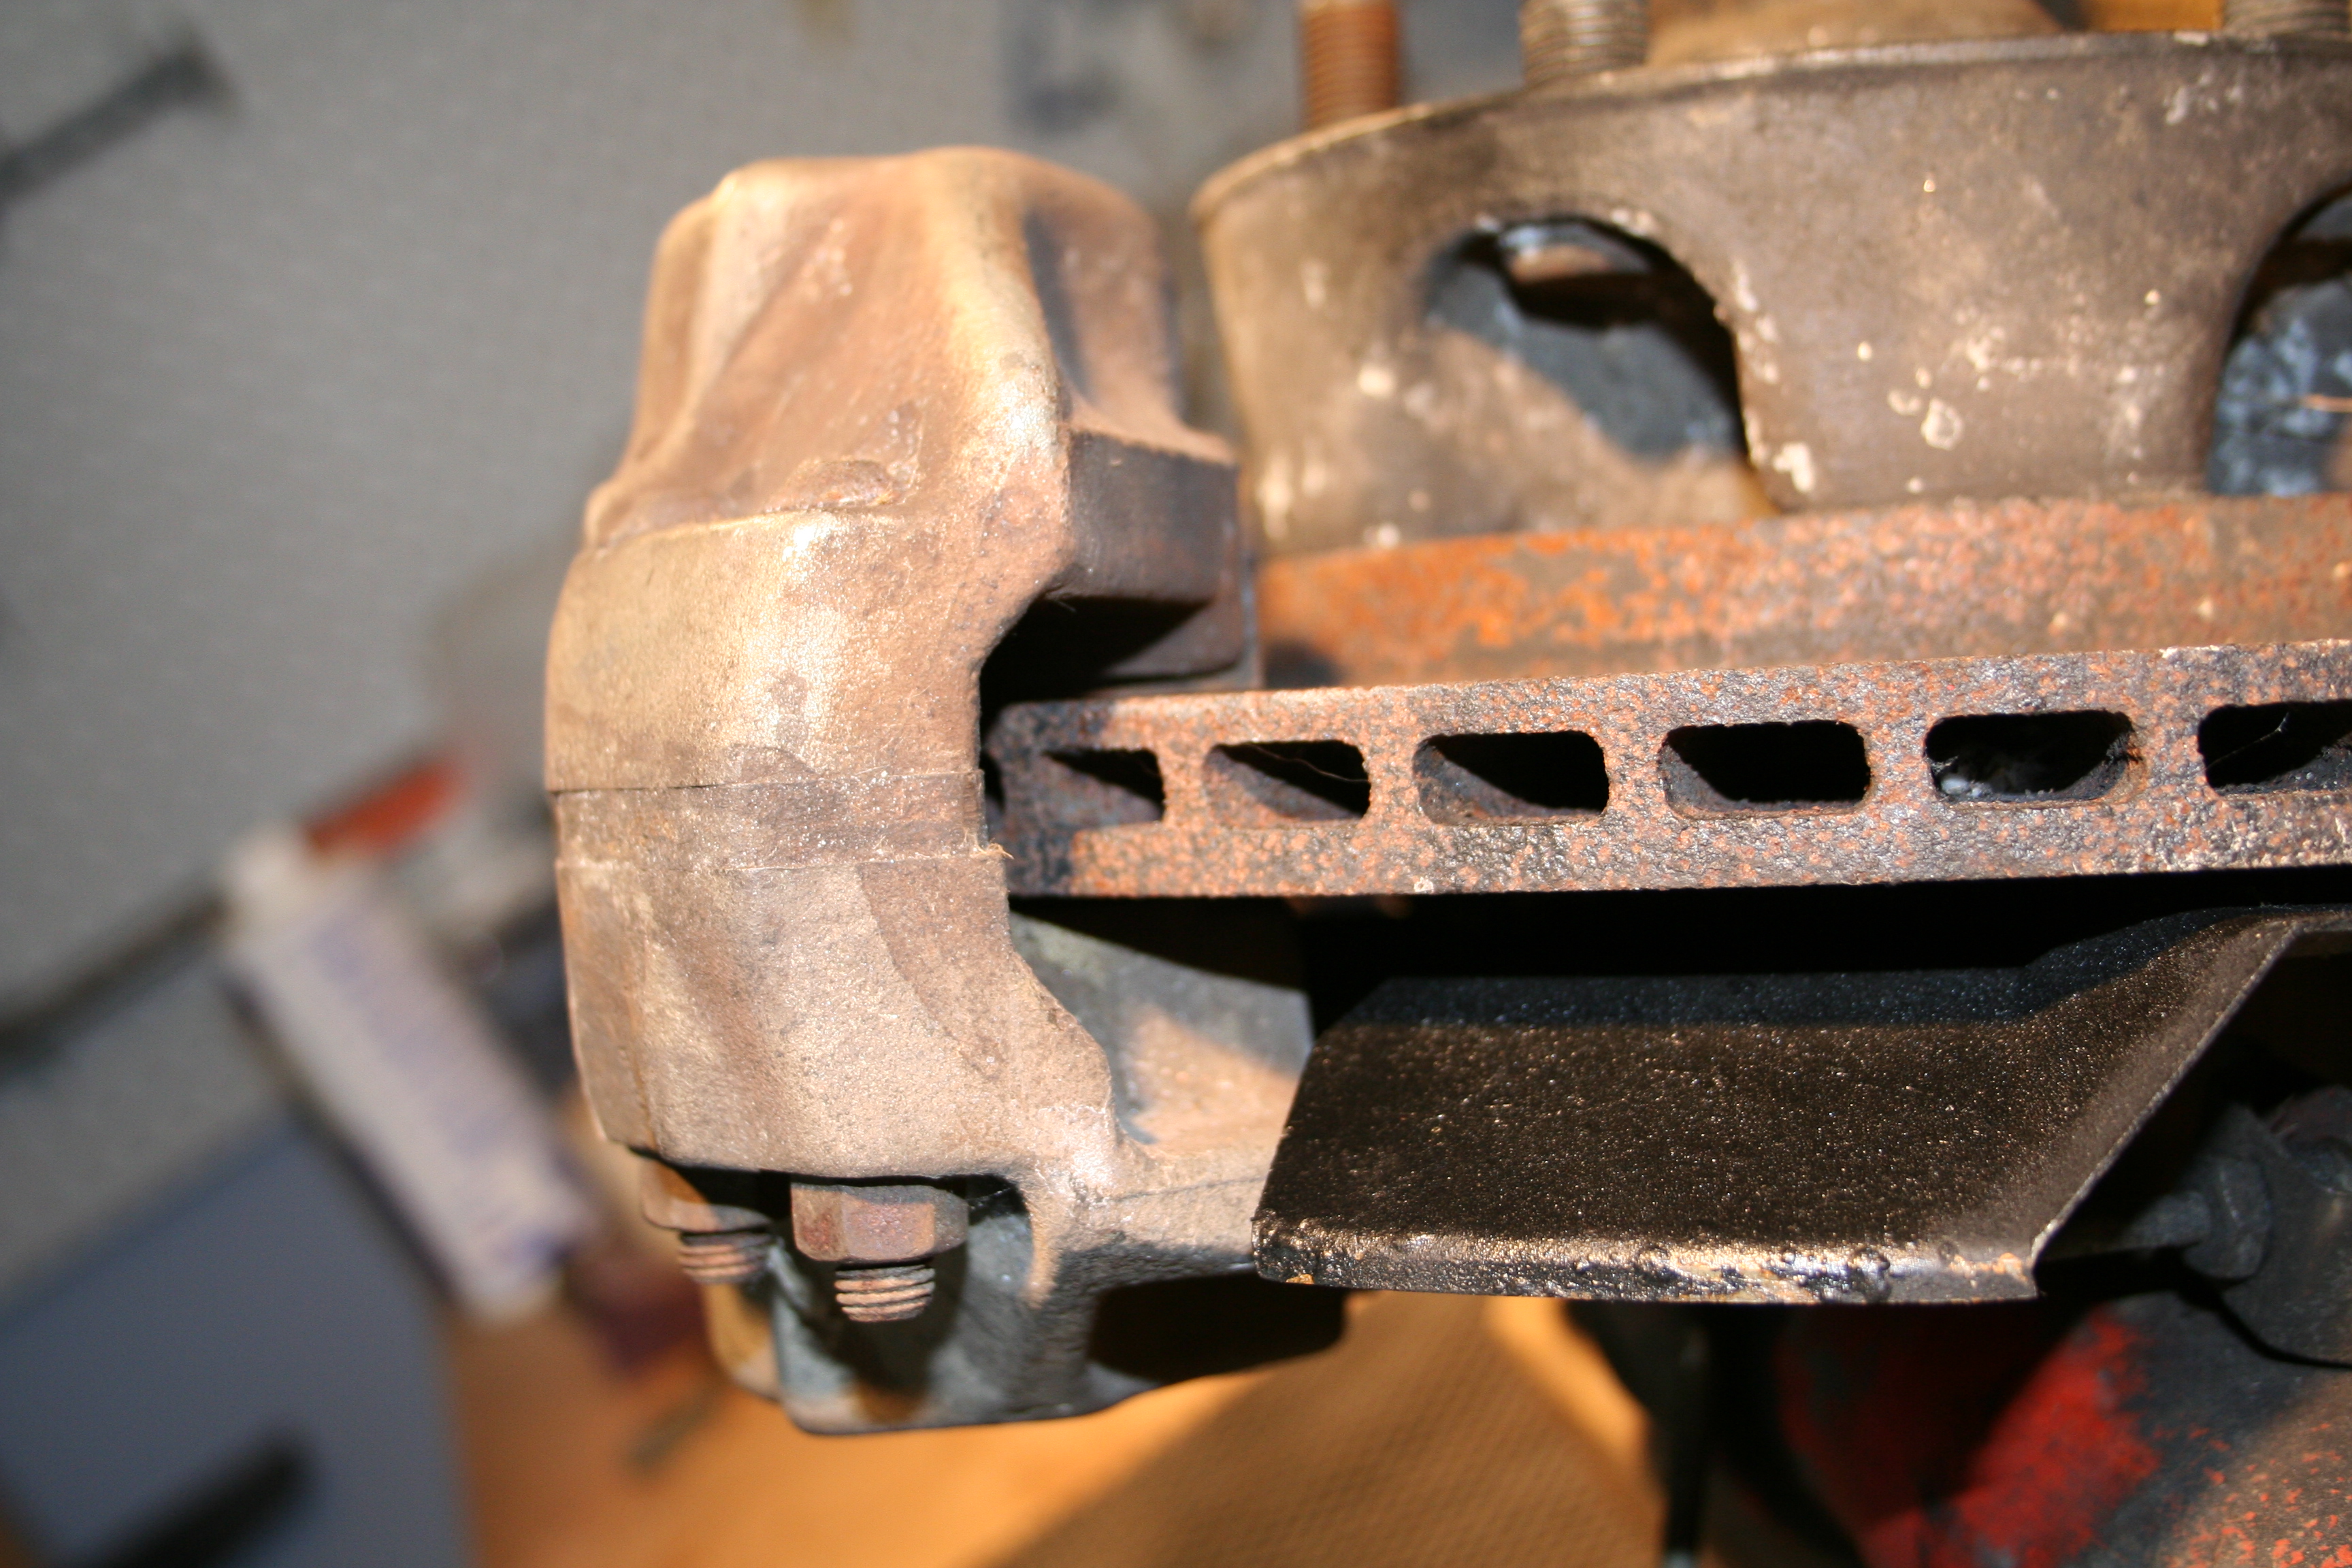
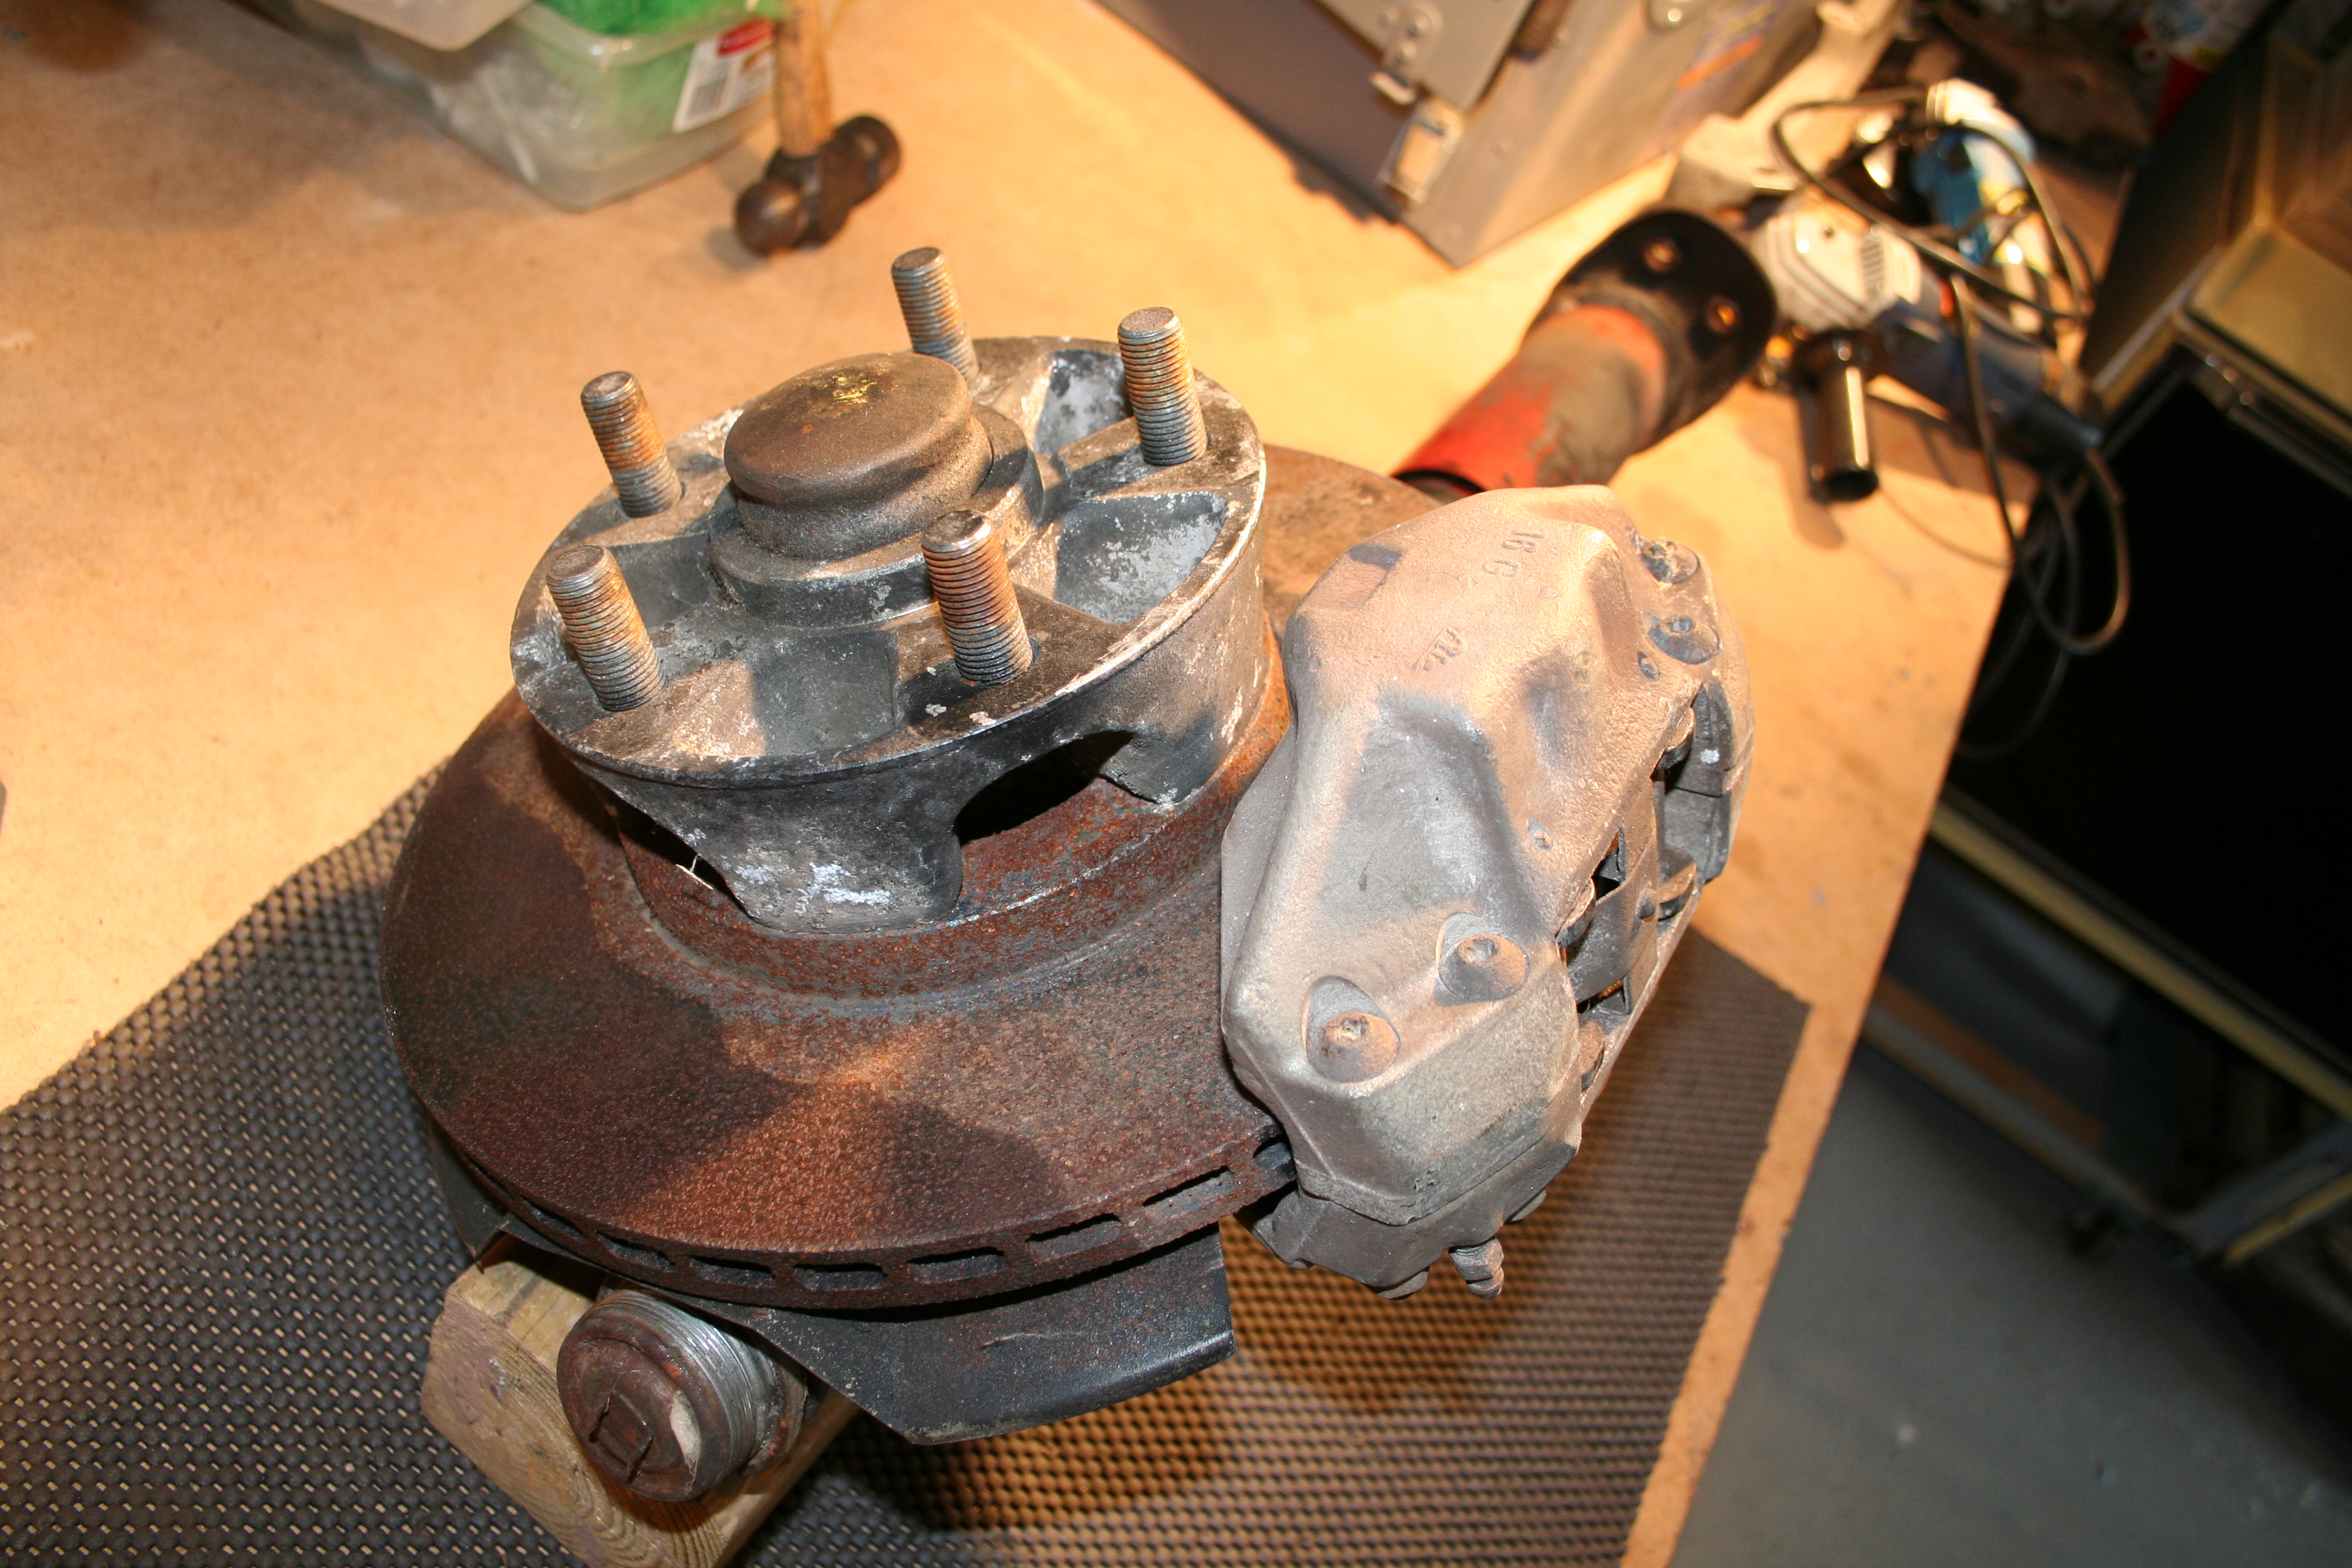
Caliper was not fitted on strut, but rather I was just doing a quick test fit to make sure that my caliper works with this thickness of rotor. I need to measure my calipers spacing as well as the rotor thickness to determine exactly what model number it is.
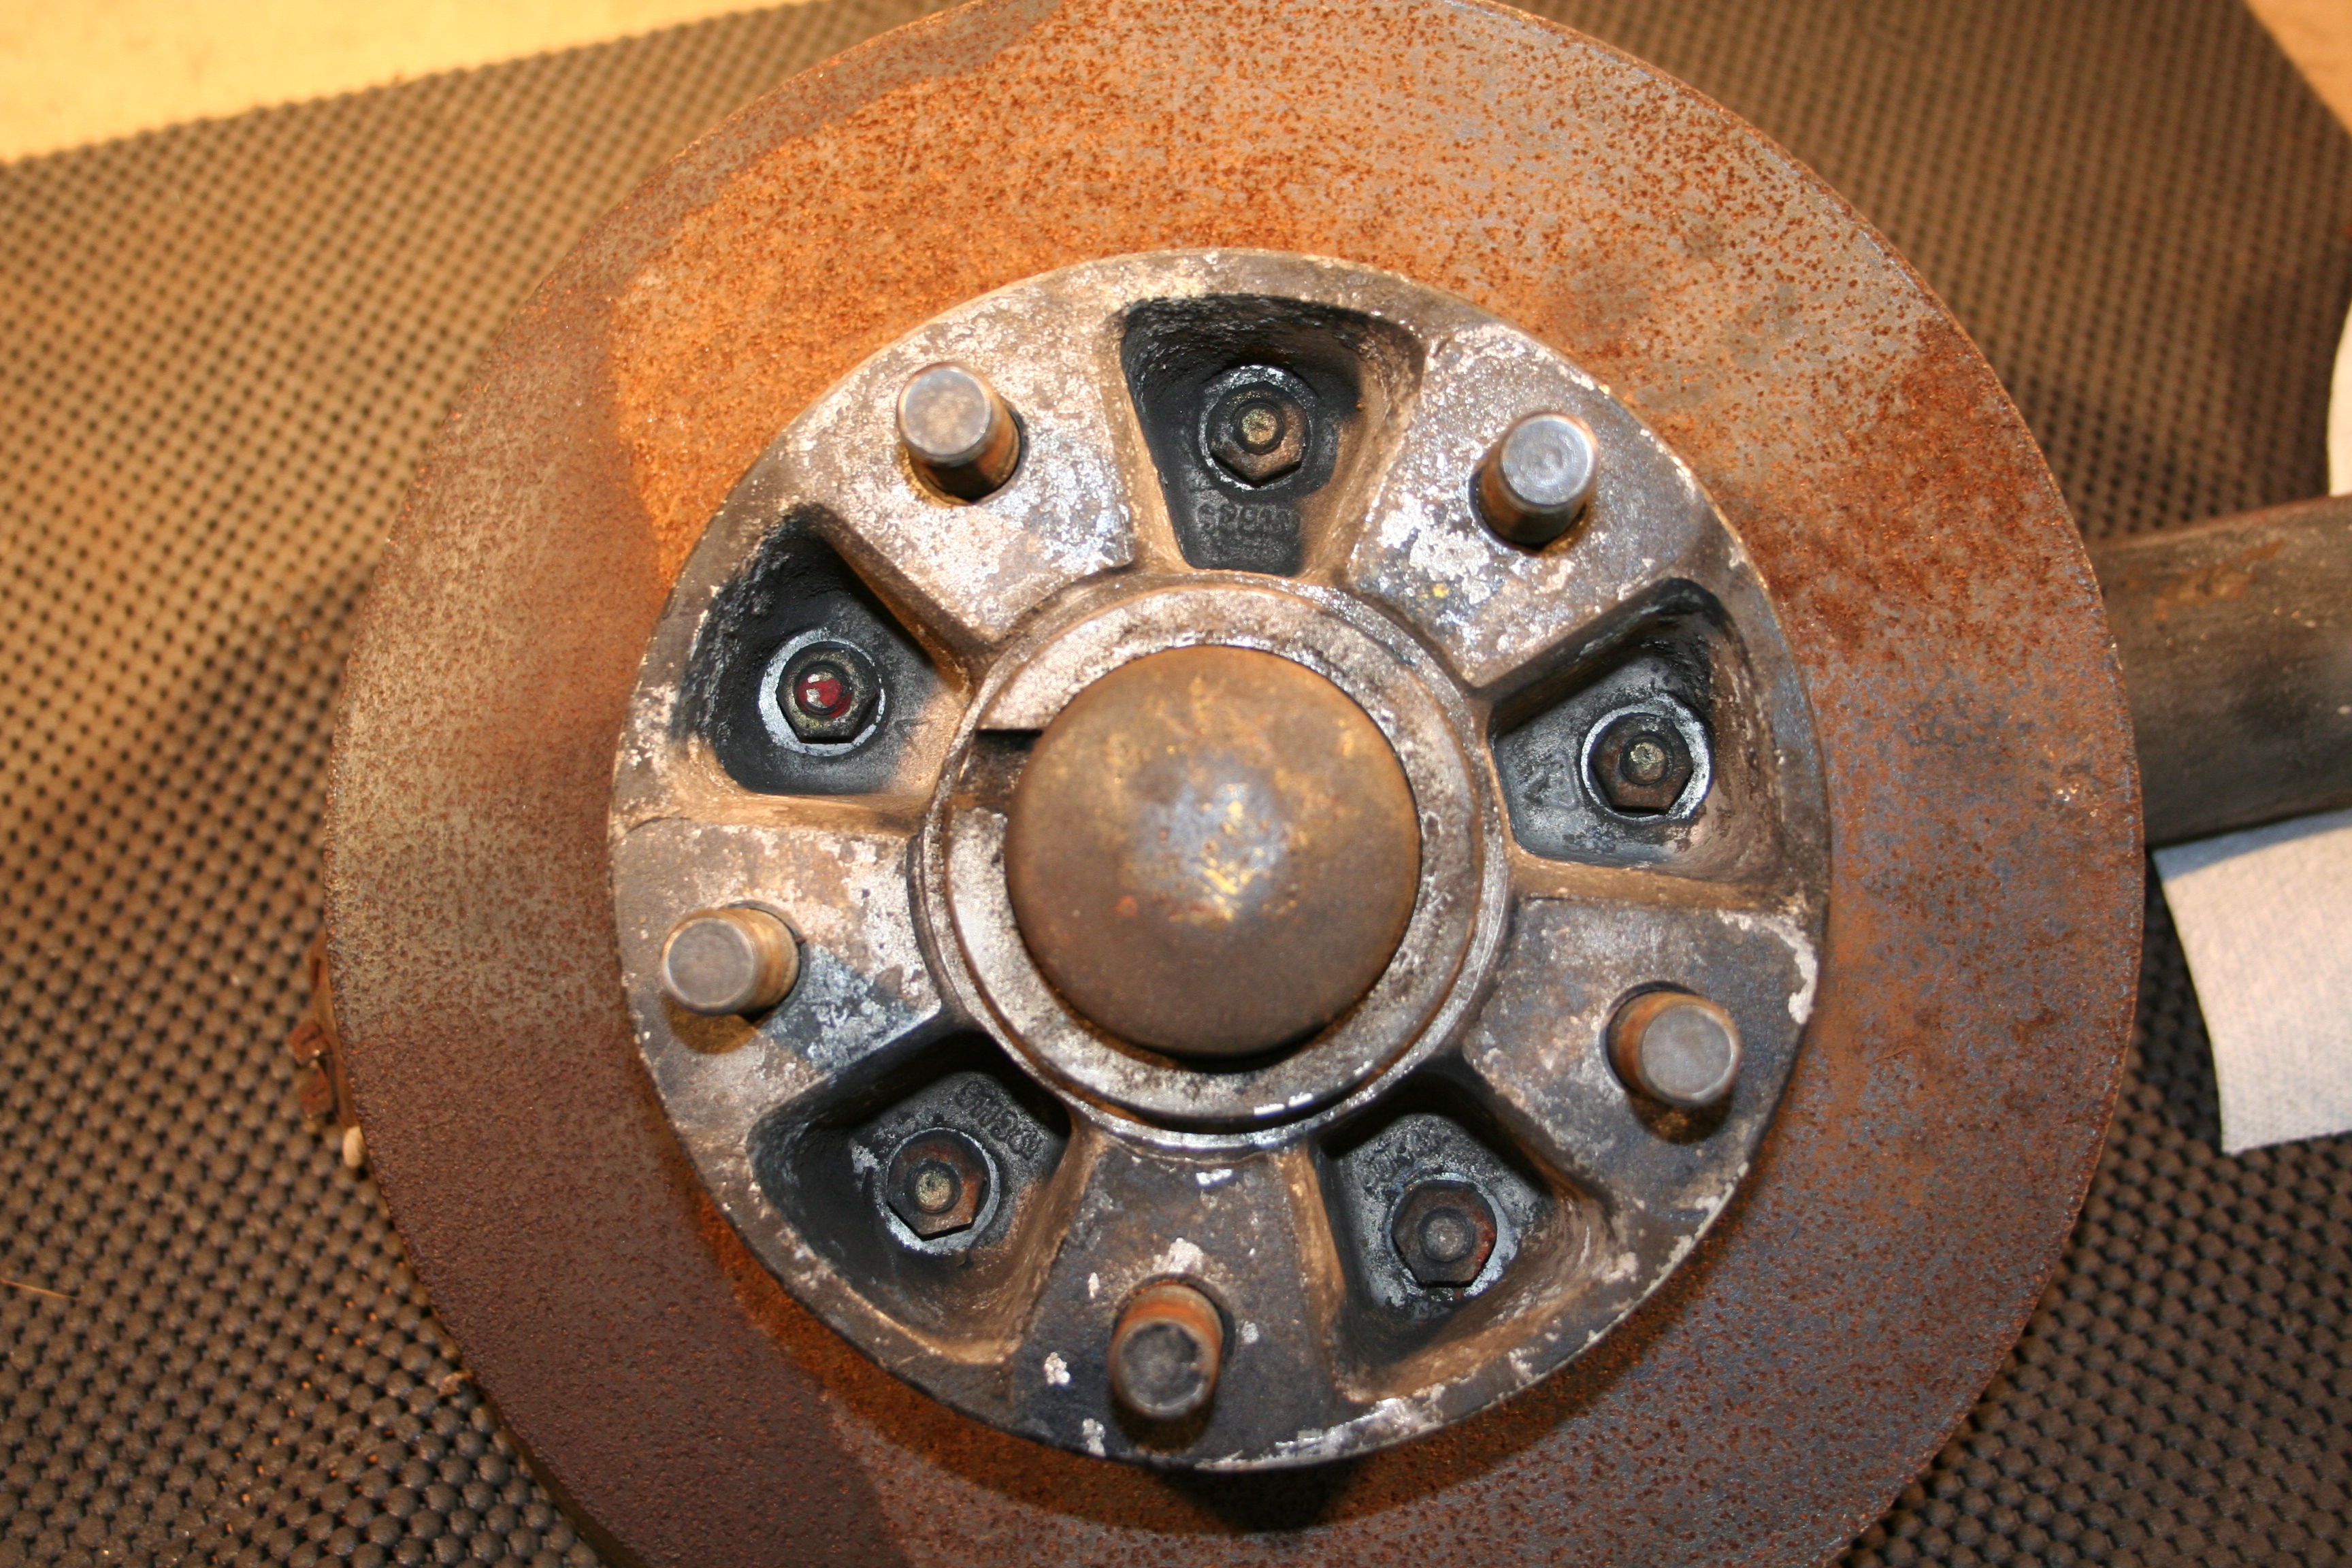
Note how hub seal is installed.
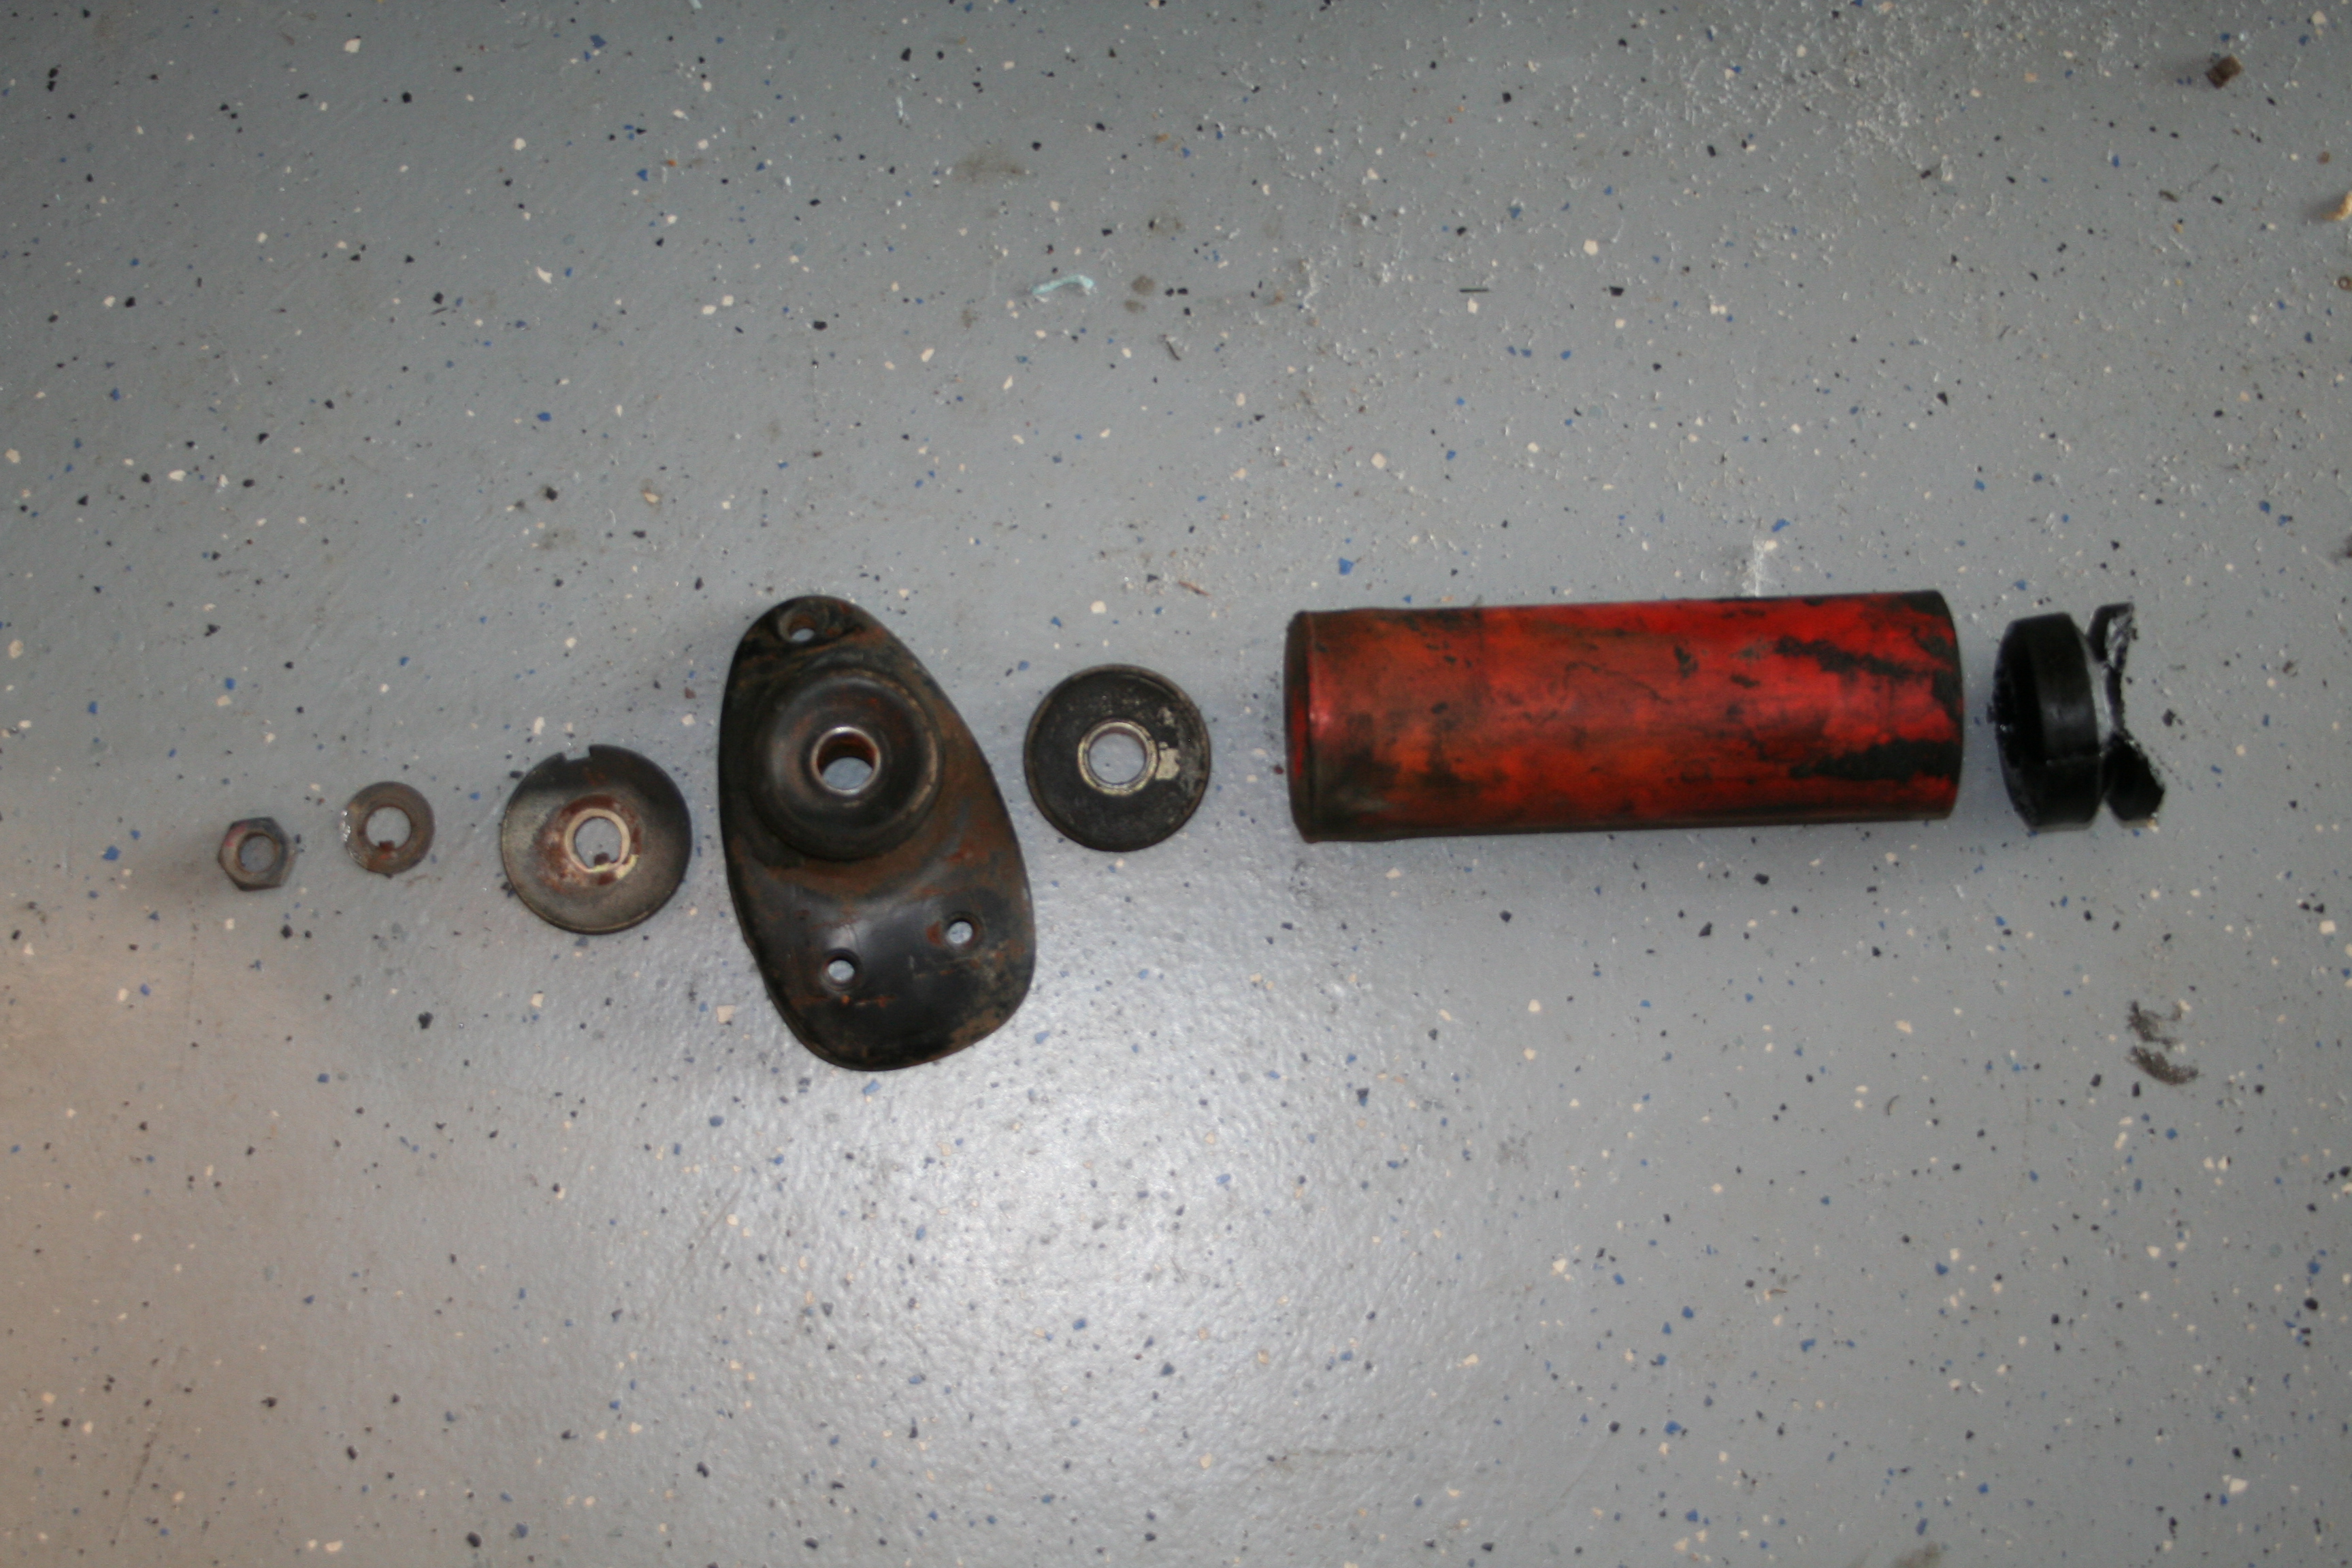
Order of assembly. The bump stop was trashed.
At this point I am not sure what the best way is to remove the gland nut. I think the ideal tool would be a wrench with two pins on it (much like what you use on an angle grinder shaft). But after reading some, it sounds like people just use a pipe wrench. I don't like that idea as it will tear up the nut a bit, but most likely I will not be reusing this nut, but rather a new "special" nut that allows Koni sport inserts to work in the OEM Koni strut. 8/30/2007Have both struts mostly disassembled. Figured I would go ahead and blast the hubs. I put in the paper towels to prevent the media from directly hitting the bearing races. They cleaned up really well. Both hubs look good and I put some grease back on the races to prevent rust and sprayed some WD40 on the studs to keep them from rusting and put them in two ziplock bags.
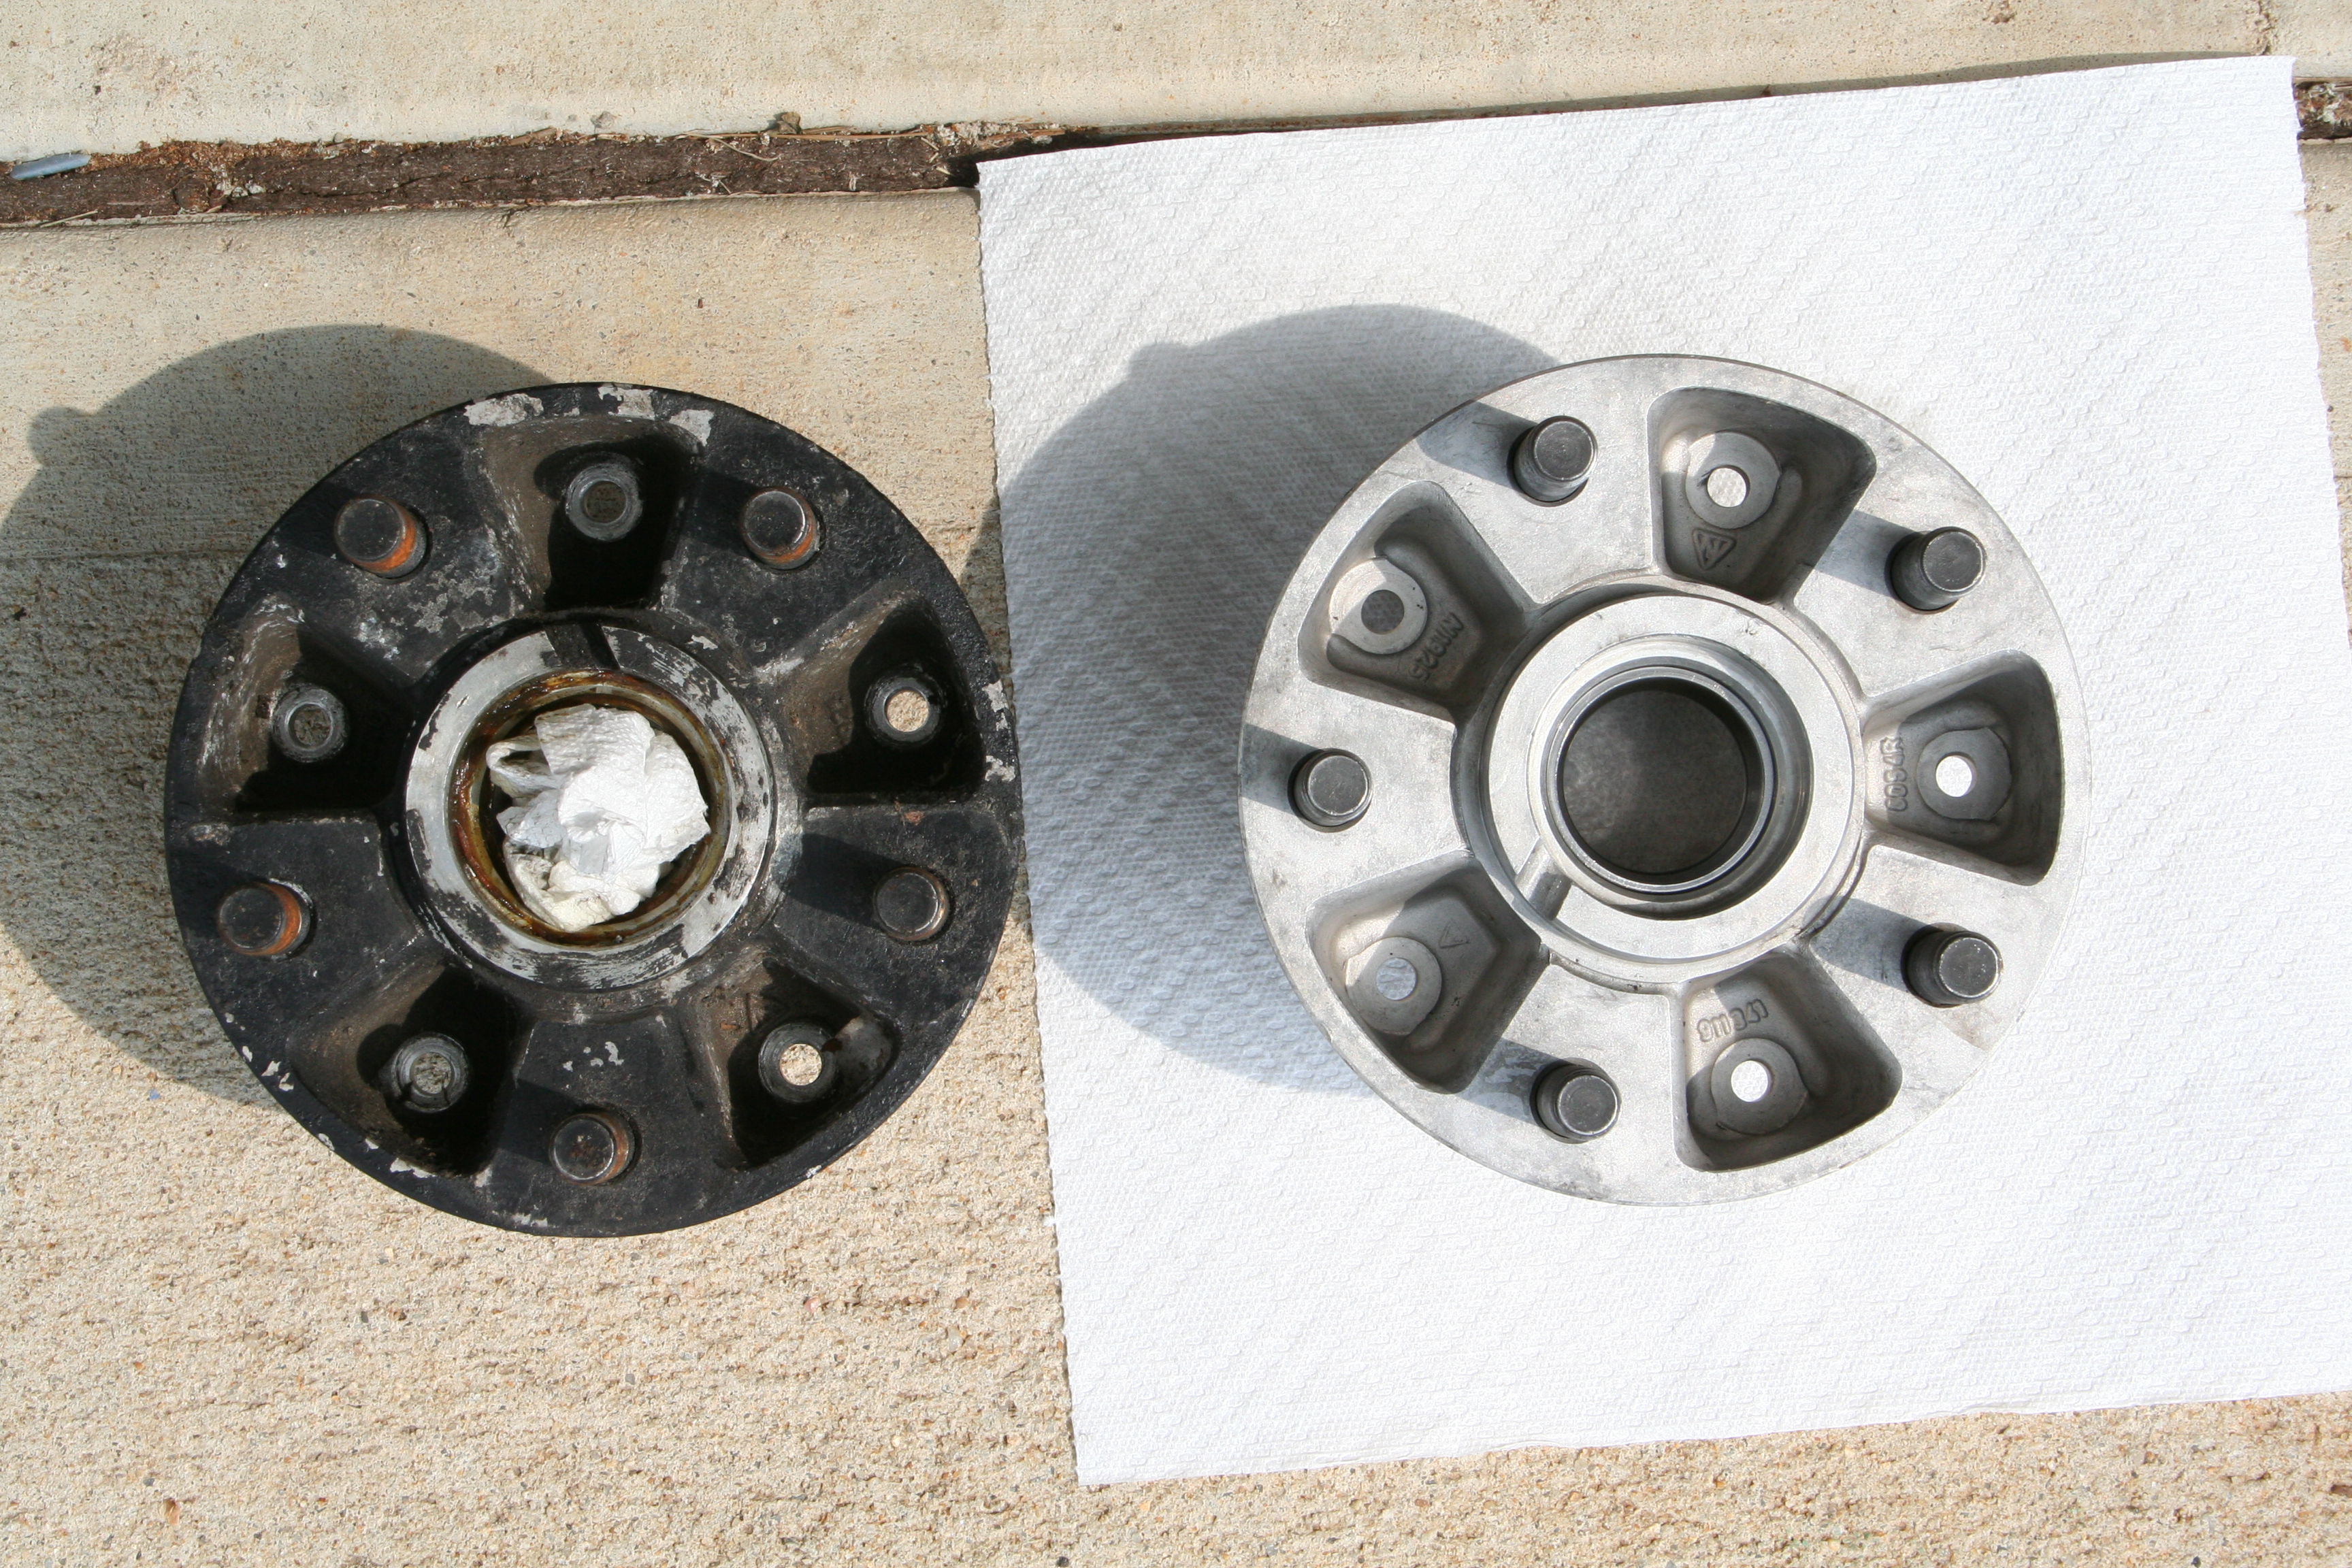
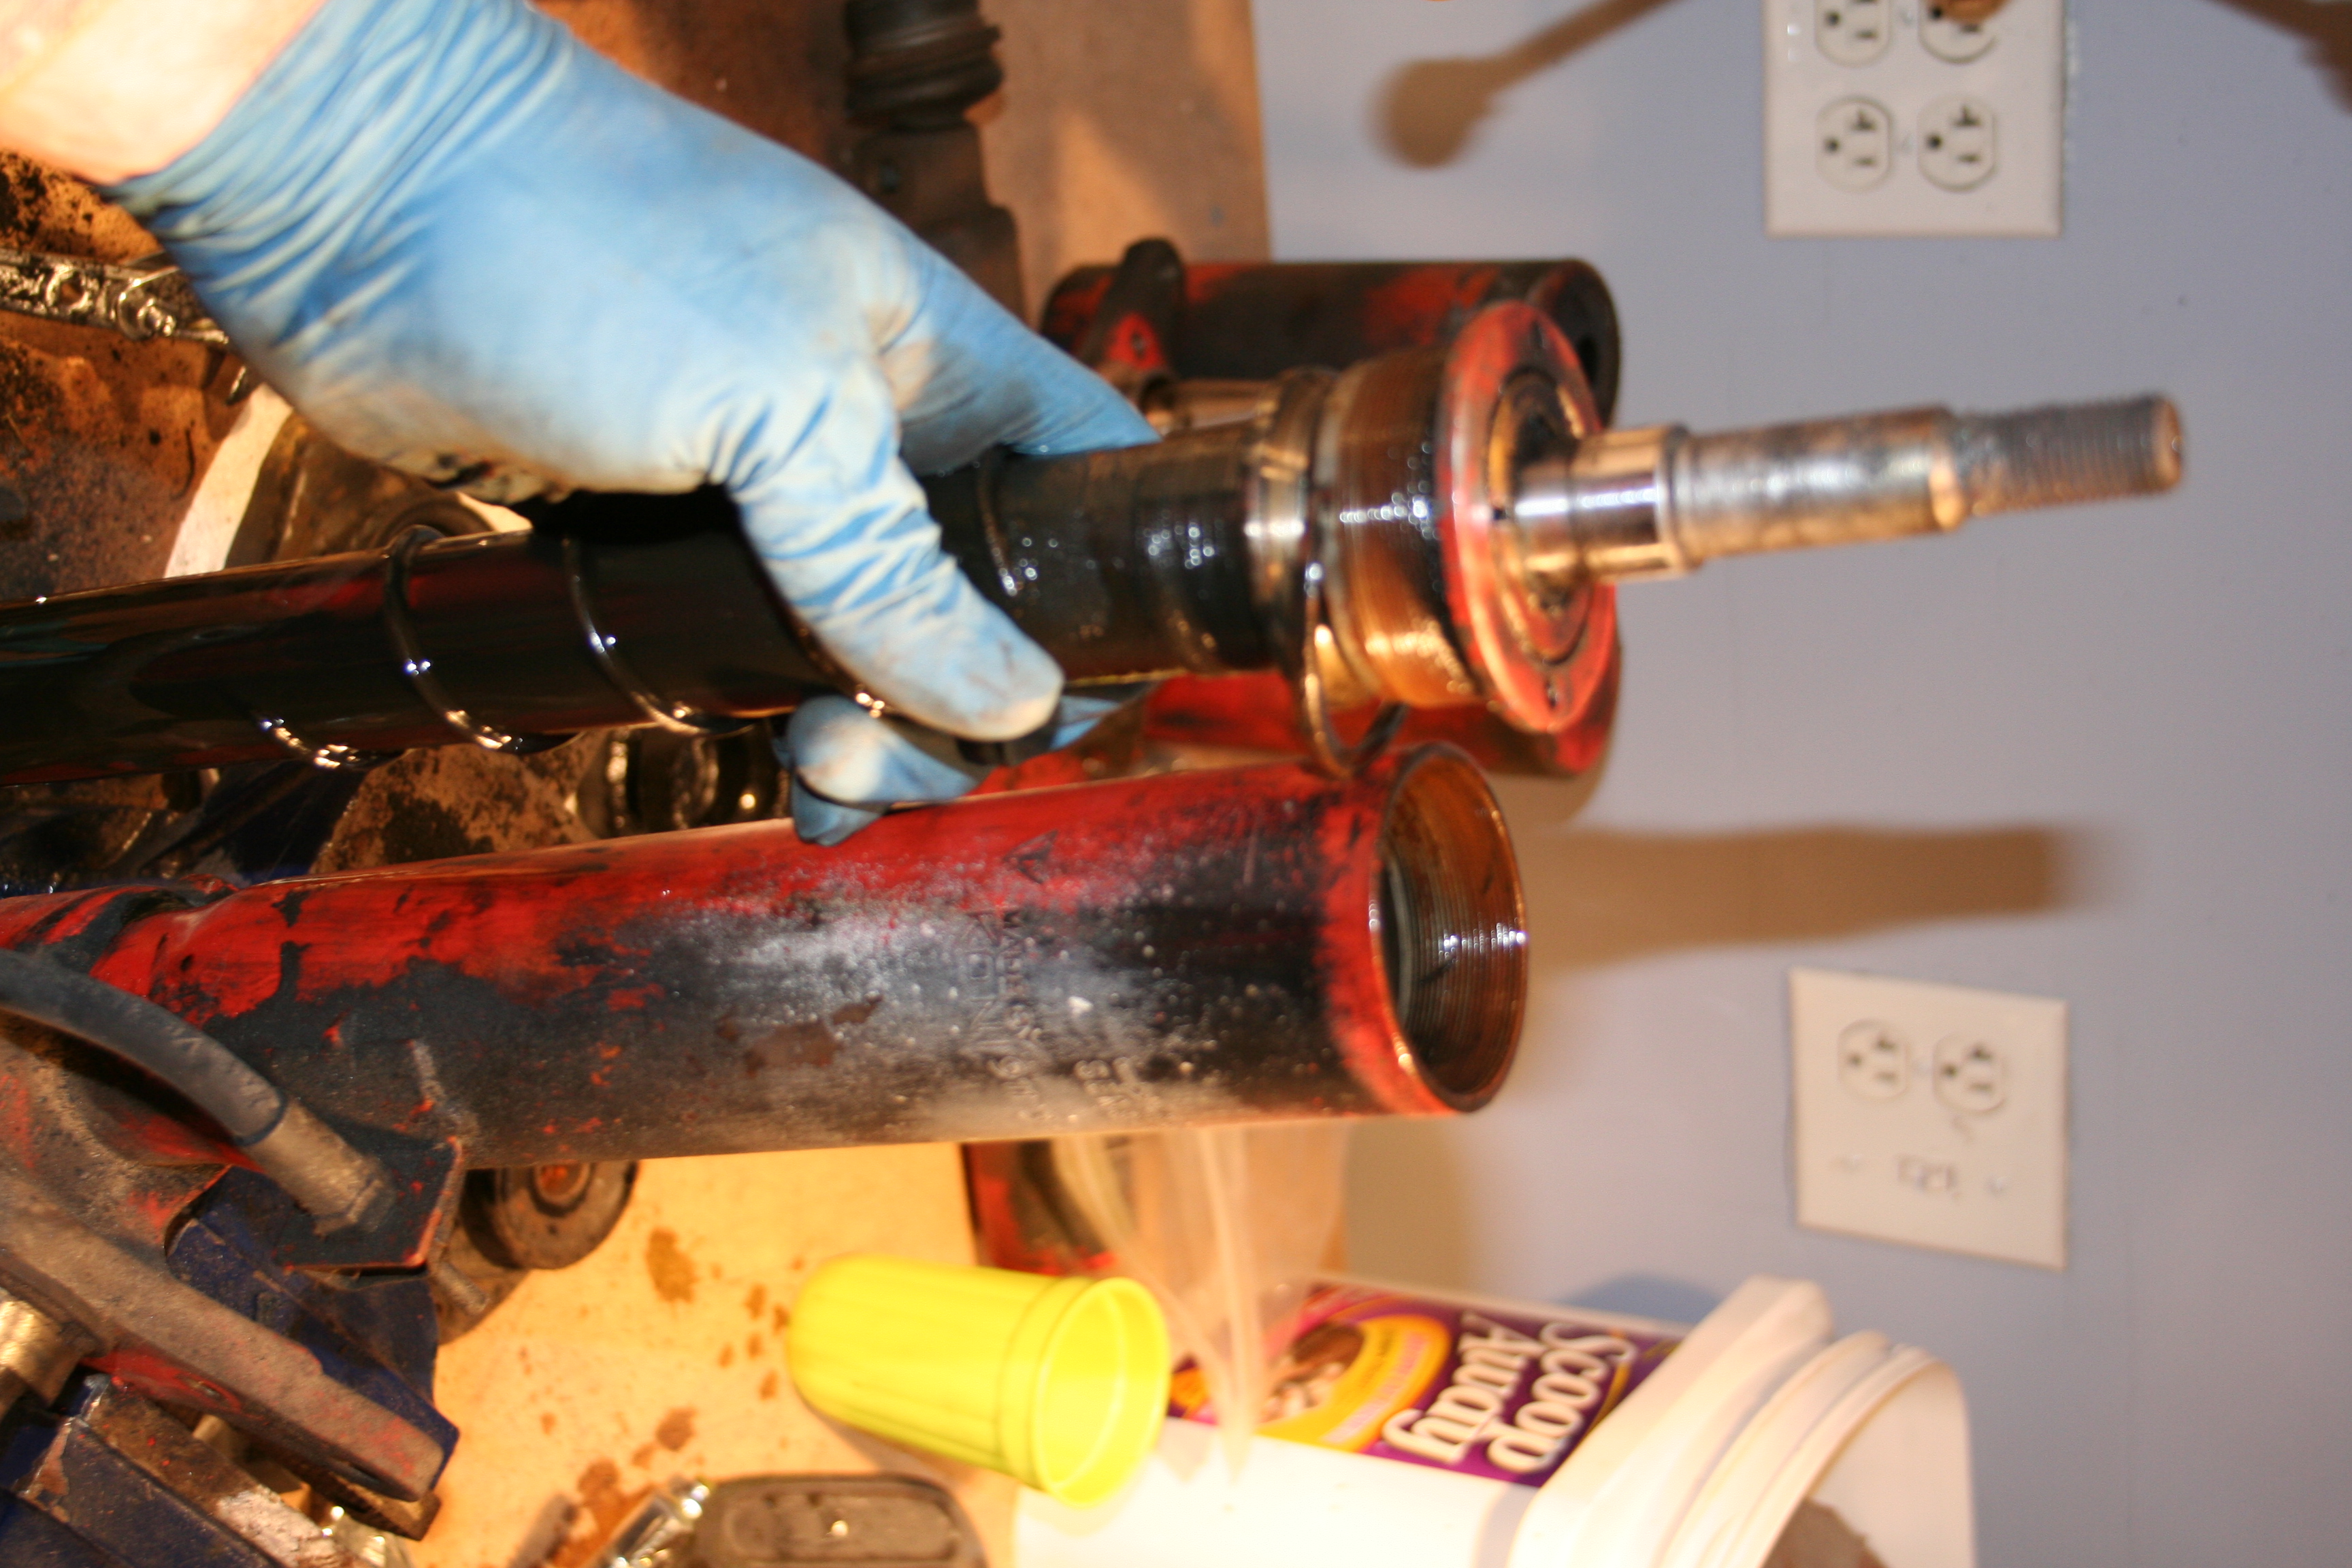
One hub as pulled from the strut, one has been media blasted. 10/19/2008I had initially intended on leaving work on the suspension until after I finished up most if not all of the body work. I generally work one day on the weekends and sometimes in the evenings after everyone else in the family is in bed. But since working on the body is currently noisy (grinding, pounding, etc.) I can't do that in the evenings. So I going to start doing some restoration work on the suspension in the evenings. I have purchased most all of what I need for the front suspension and brakes. My current tasks is to finish dismantling the front struts I need to give a little more info on the front suspension. The struts look to be from a 74-77 911. They are OEM Koni struts (part numbers 911 341 041 10 and 911 341 042 10) which are not extremely common (but not rare at all). Most people prefer to use Boge struts since there are more options regarding what inserts will fit into the struts. Basically since the Boge were standard equipment, most replacement struts (including Koni's) have been engineered to fit into that strut. What can confuse people (and I didn't understand this until I had taken
them apart) is that these struts don't have slide in self contained
inserts, but rather the internals are the working part of the shock.
When you open up the gland nut on the top you find the shock oil, piston,
valves, etc. I don' think this insert is rebuildable (I am sure
someone somewhere has for authenticity purposes), so I am using a Koni
yellow "sport" insert with a special gland nut that is needed. This
is because the thread at the top of this strut is different from the Boge
strut. So you need the Koni 73.25.01.0111.1 I am also going to powder coat the struts and am trying to replicate the original Koni color. I had to pretty much just pick a color. I had searched on the web and found that others had contacted Koni and asked them what color. Koni is apparently using one of two different paints for repainting/touchups... Red High Visibility Safety - 140-0548 sherwin-williams Since I wanted to powder coat vs. rattle can, I just picked a "Safety Red" powder coat color from Caswell. Time will tell if it matches decently or not.
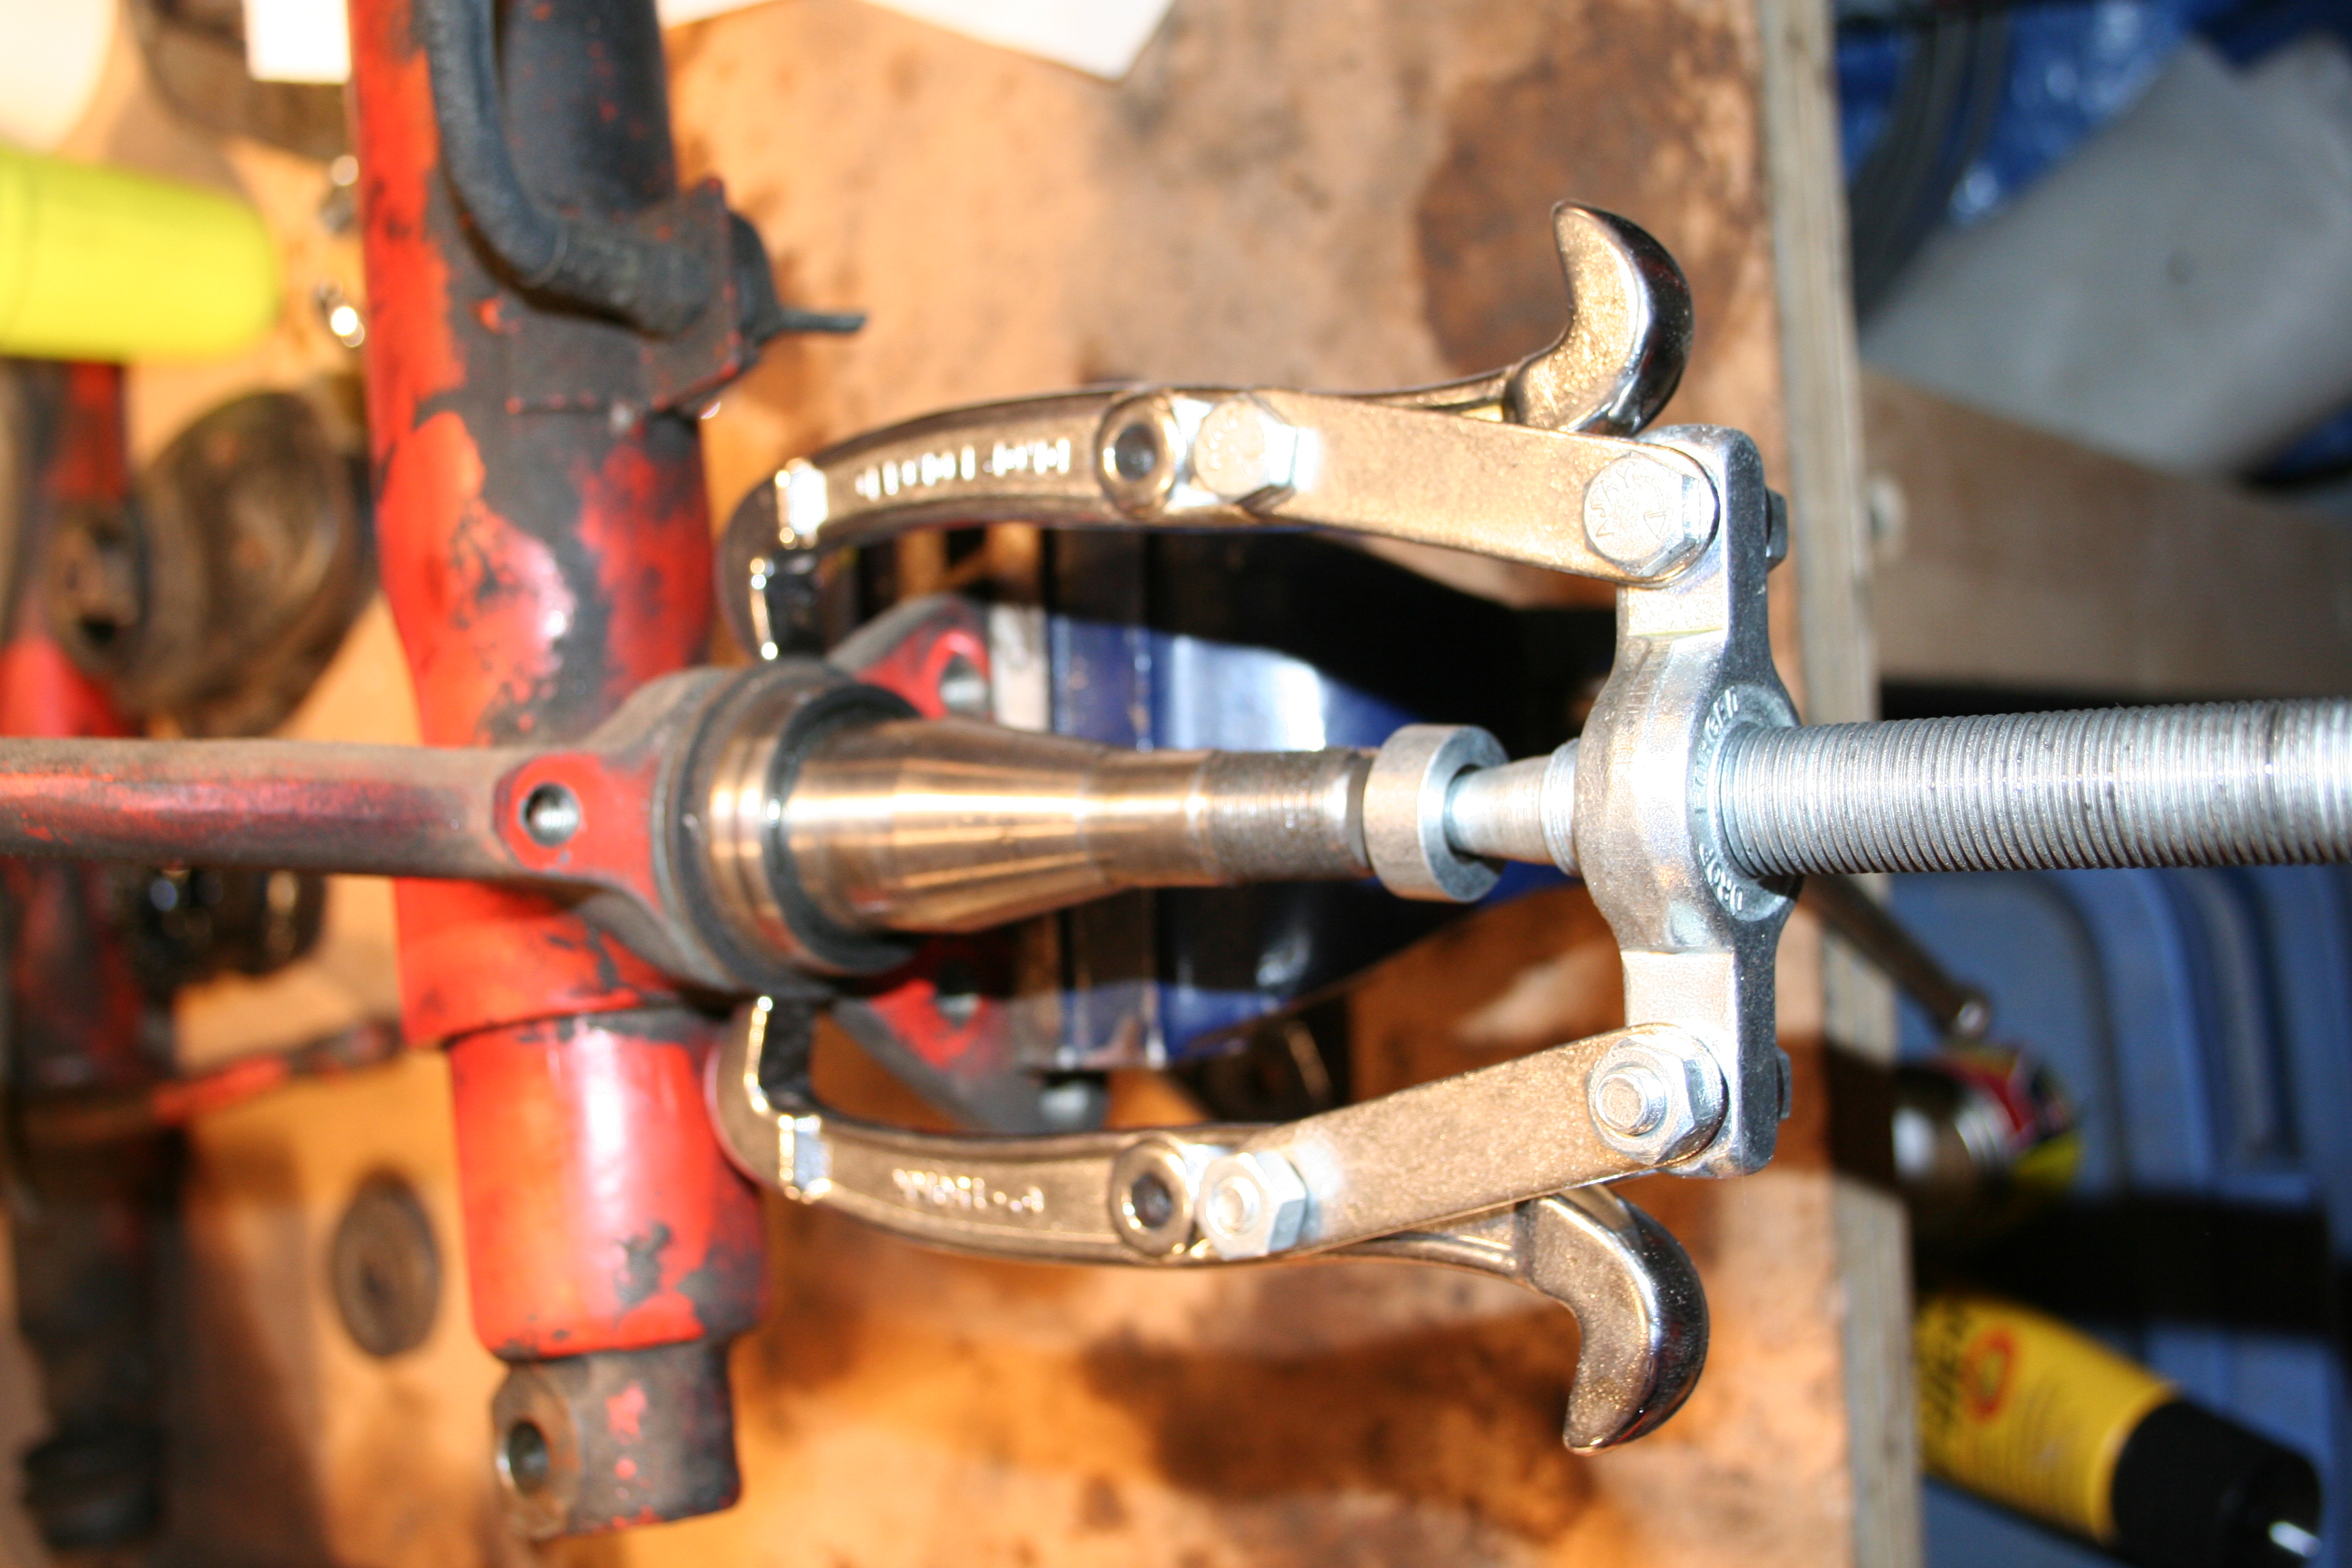
Here you see the insert removed from the strut. Oil has already been drained.
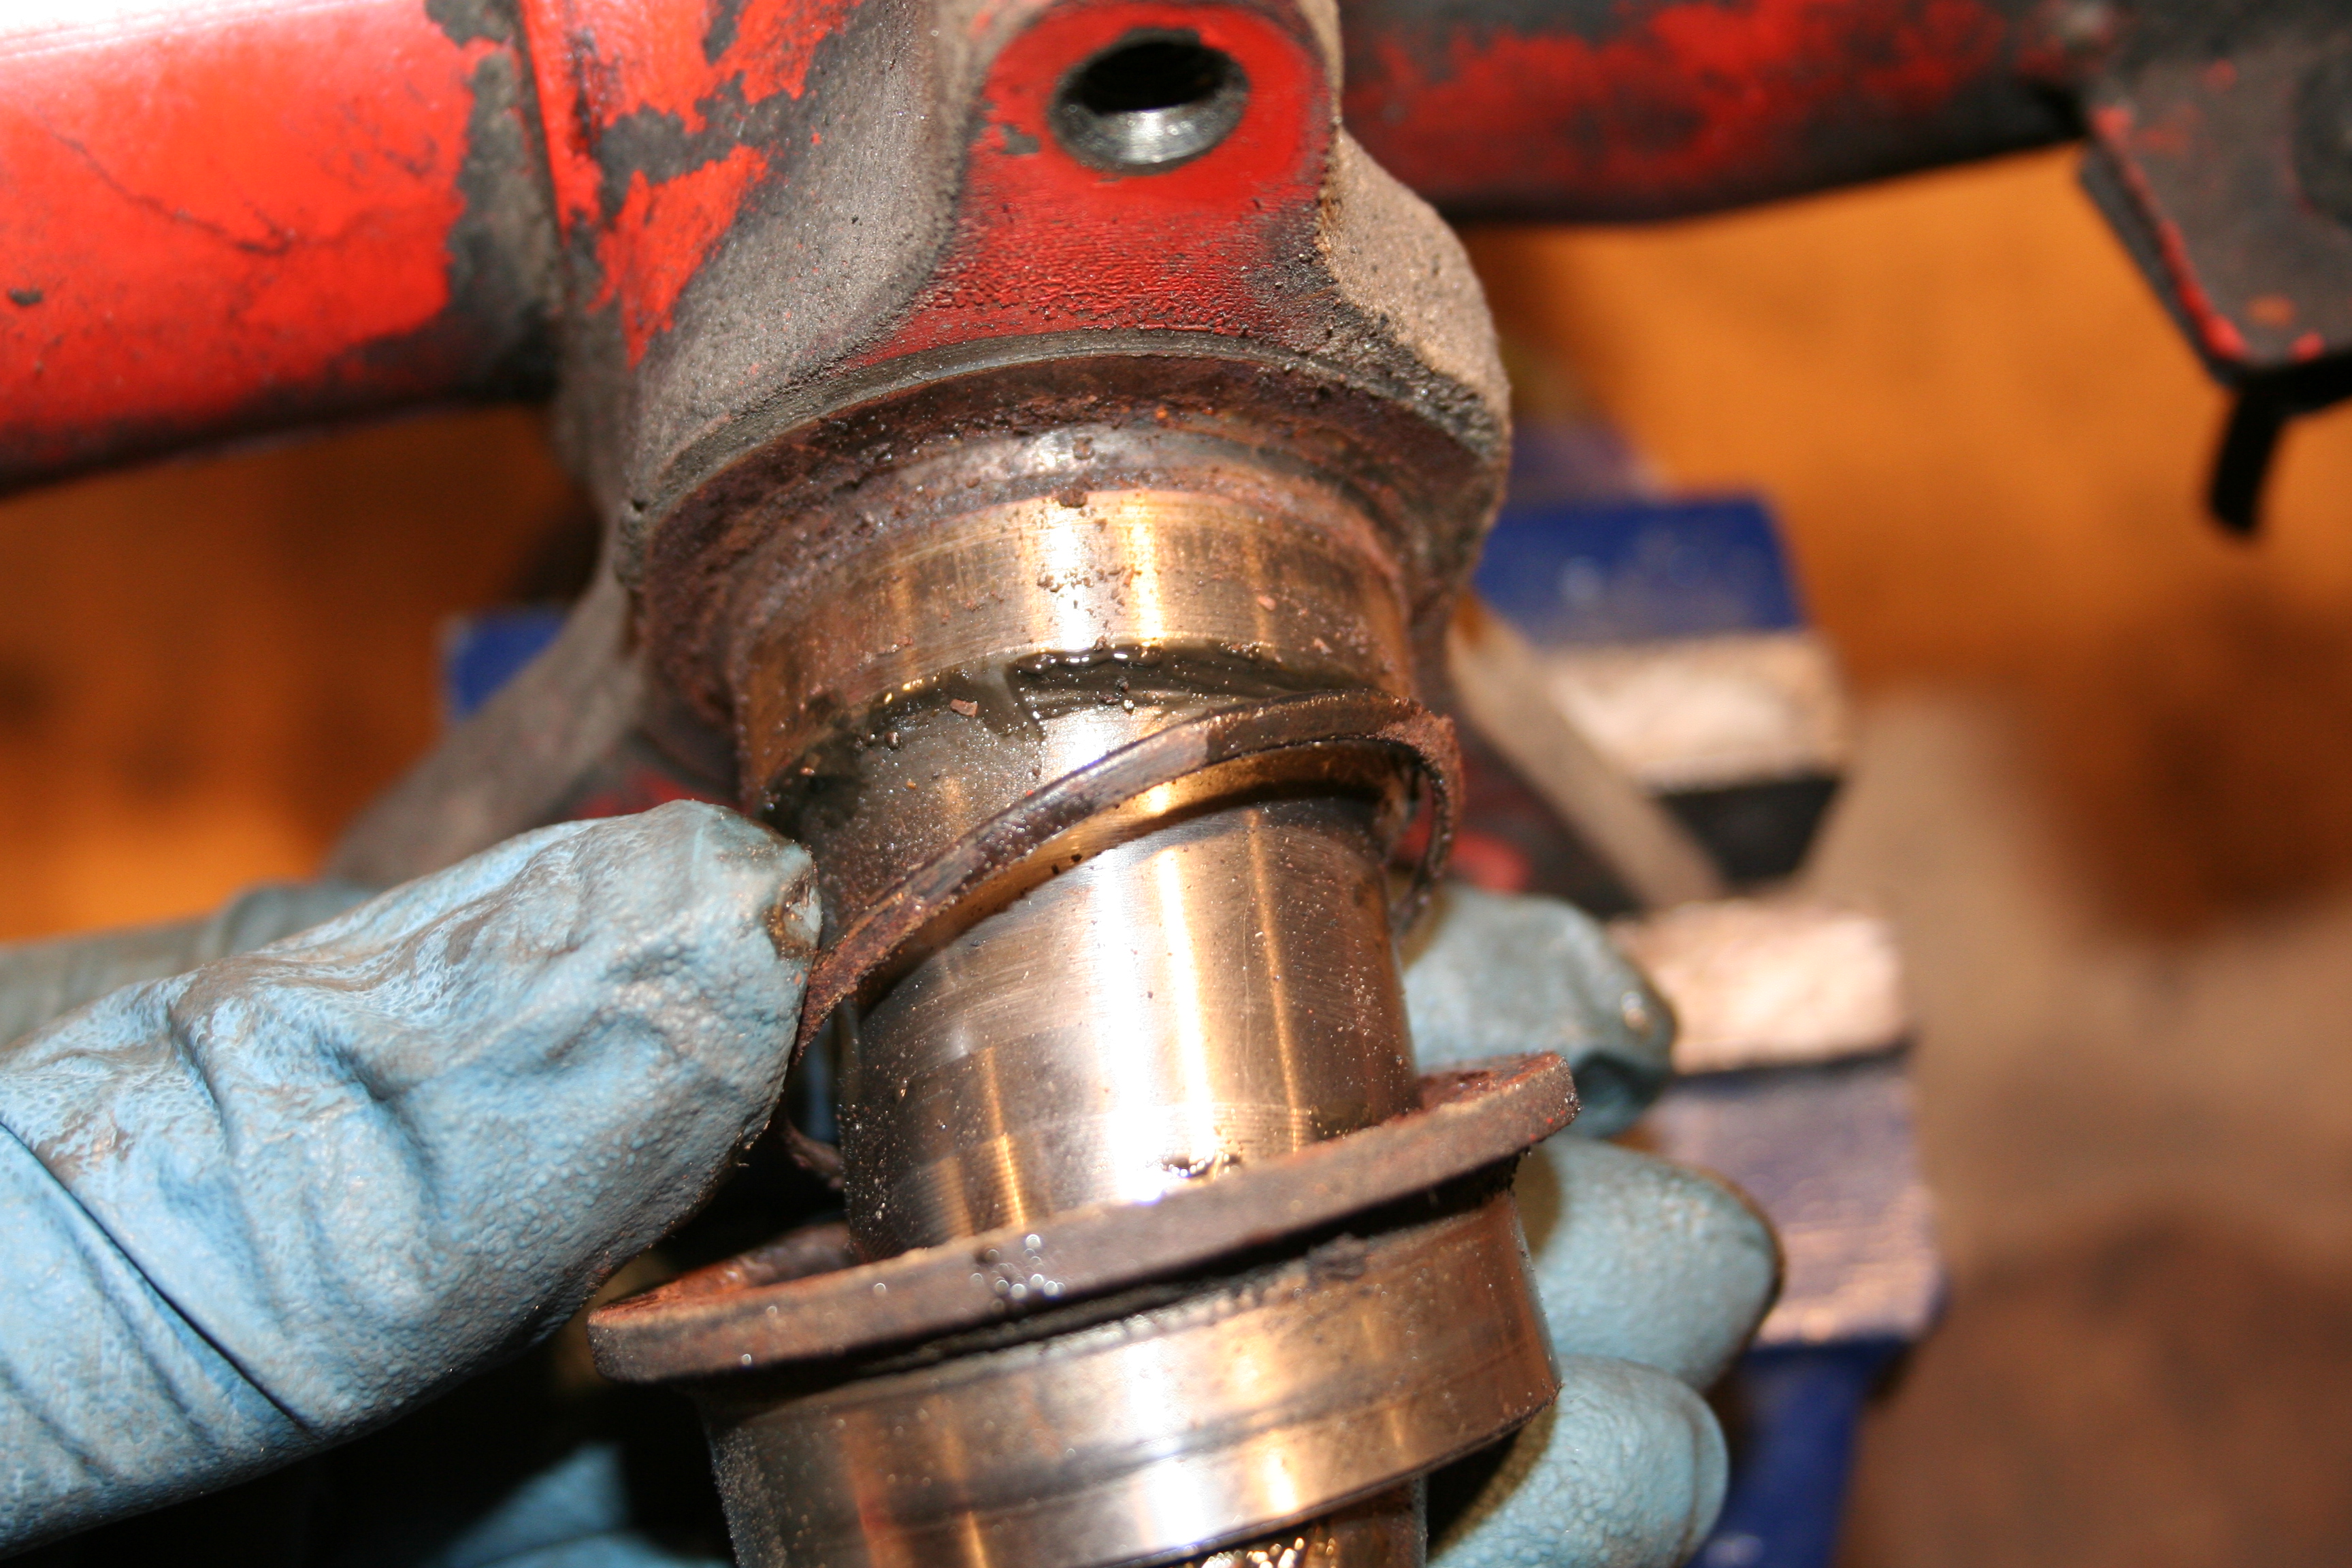
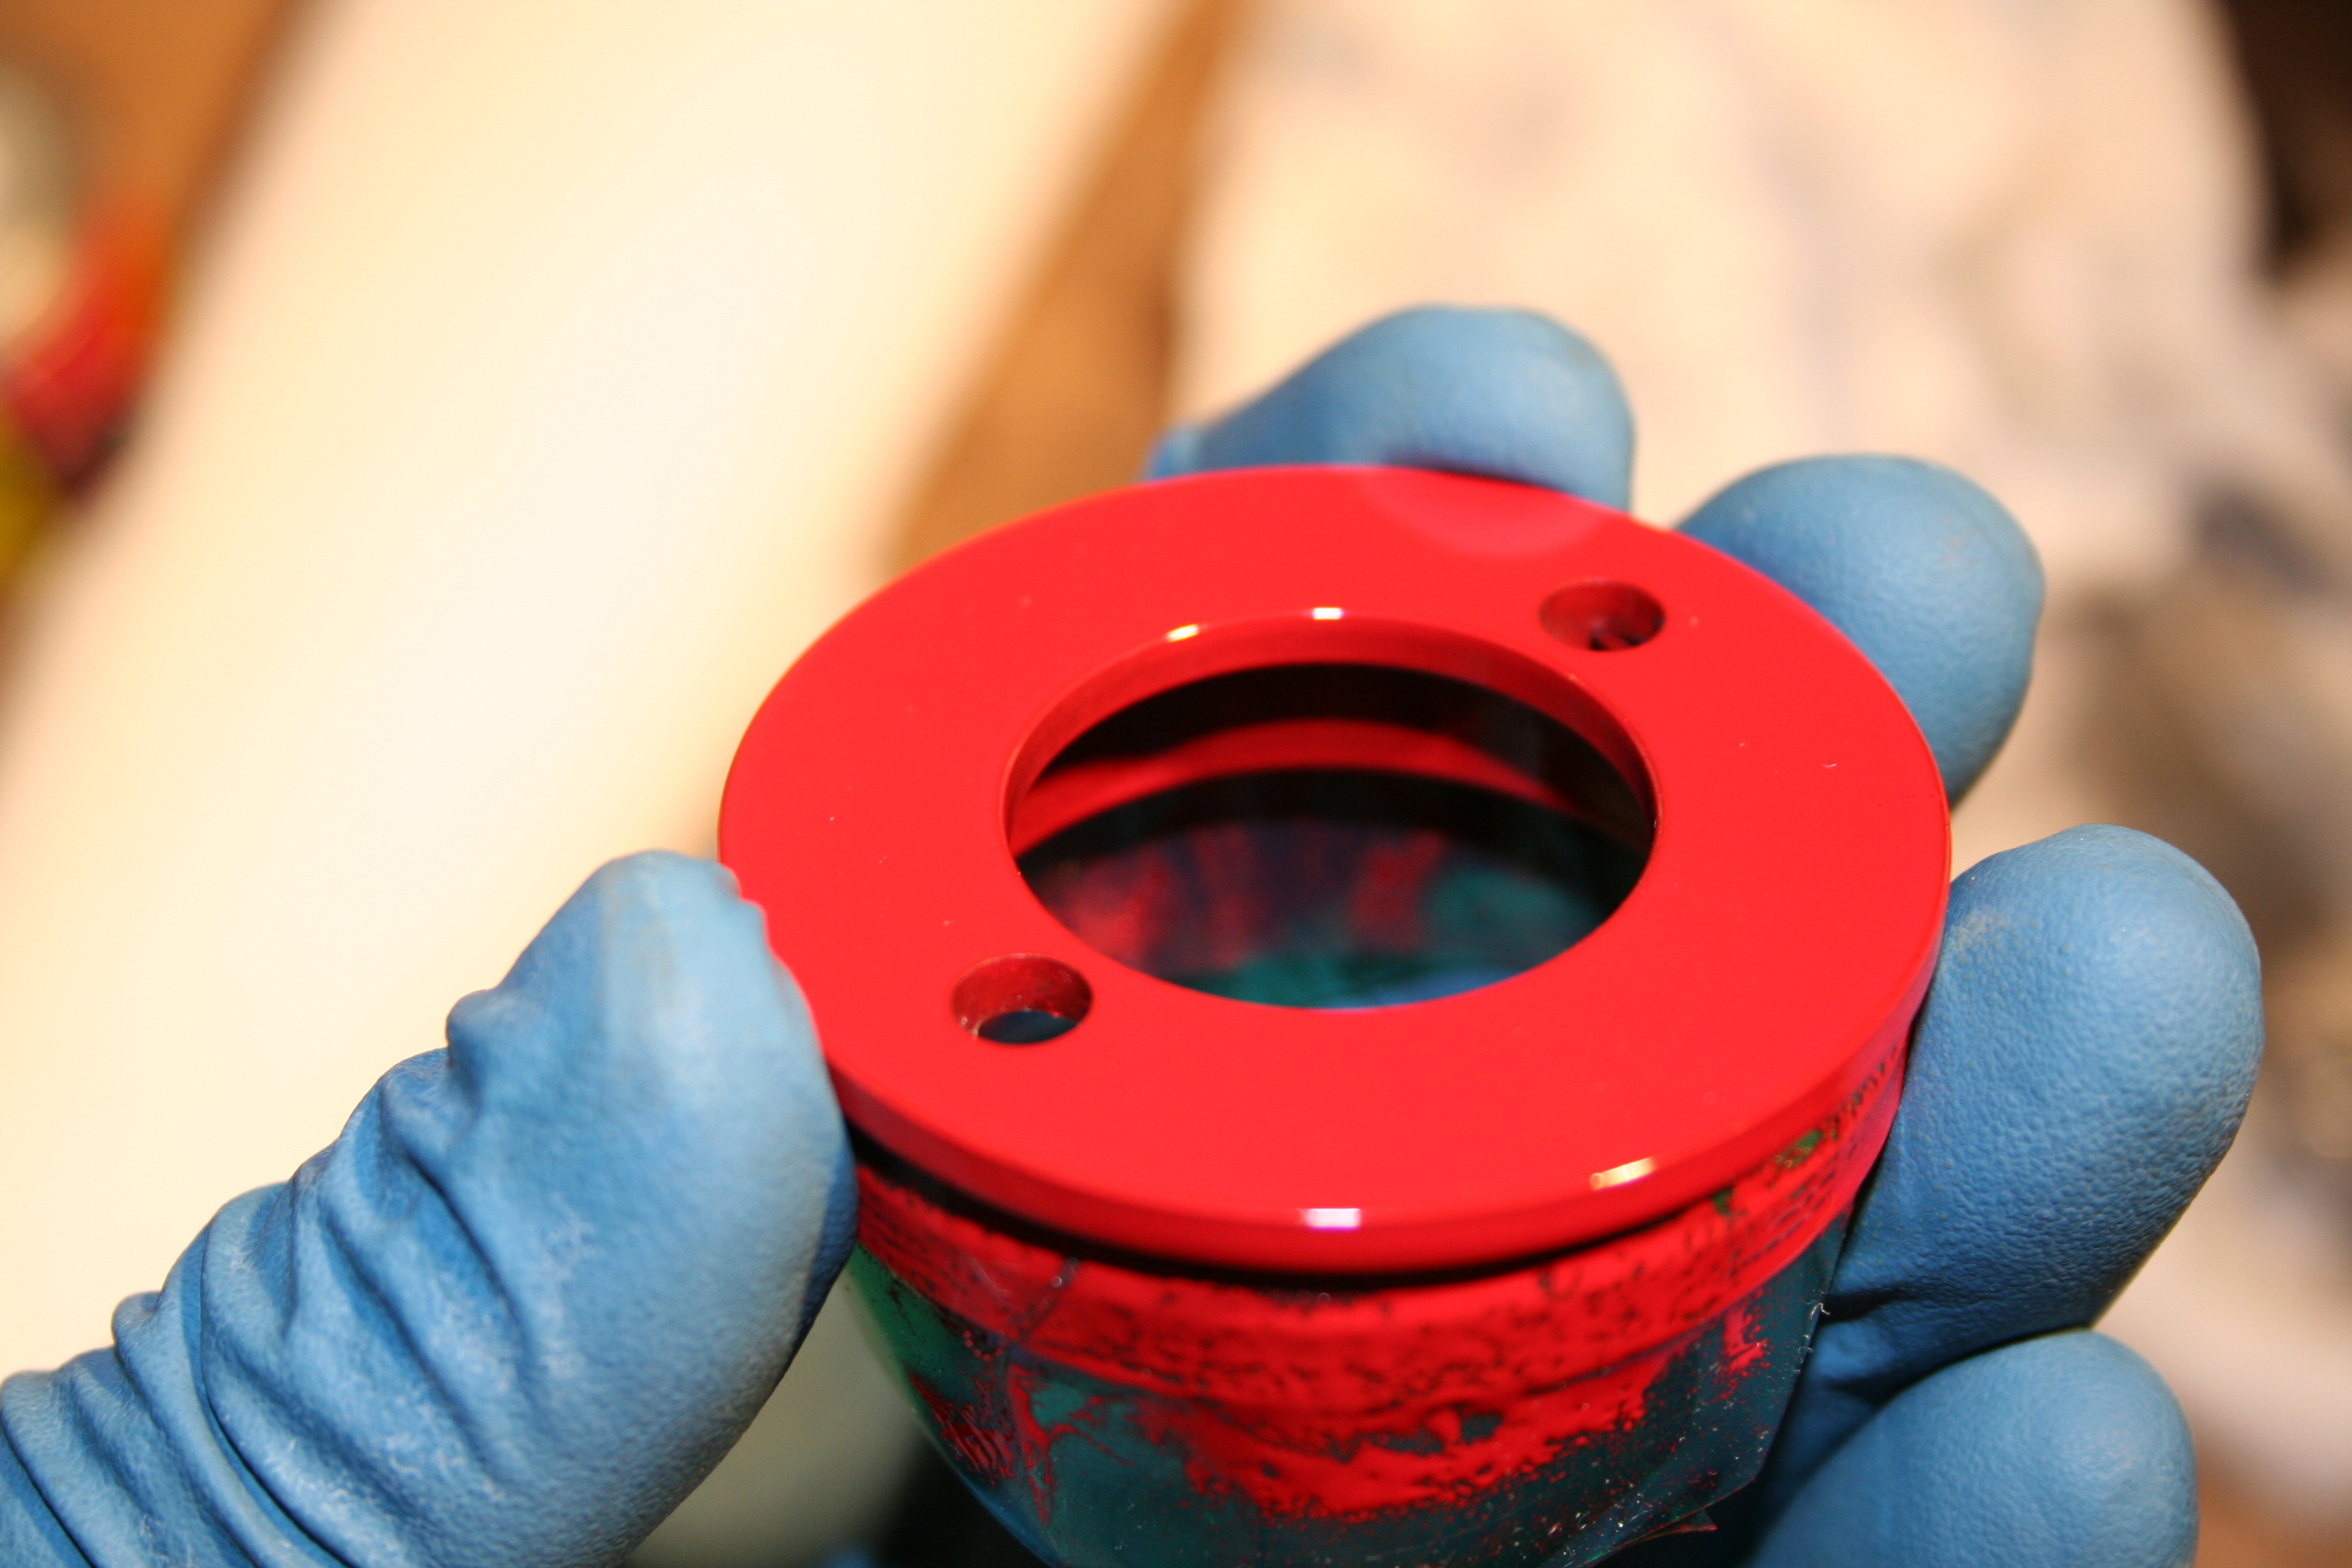
I suspect that many people don't mess with this when rebuilding their struts. This ring is pressed on and easily removed with a two jaw bearing pull. Behind it you will find...
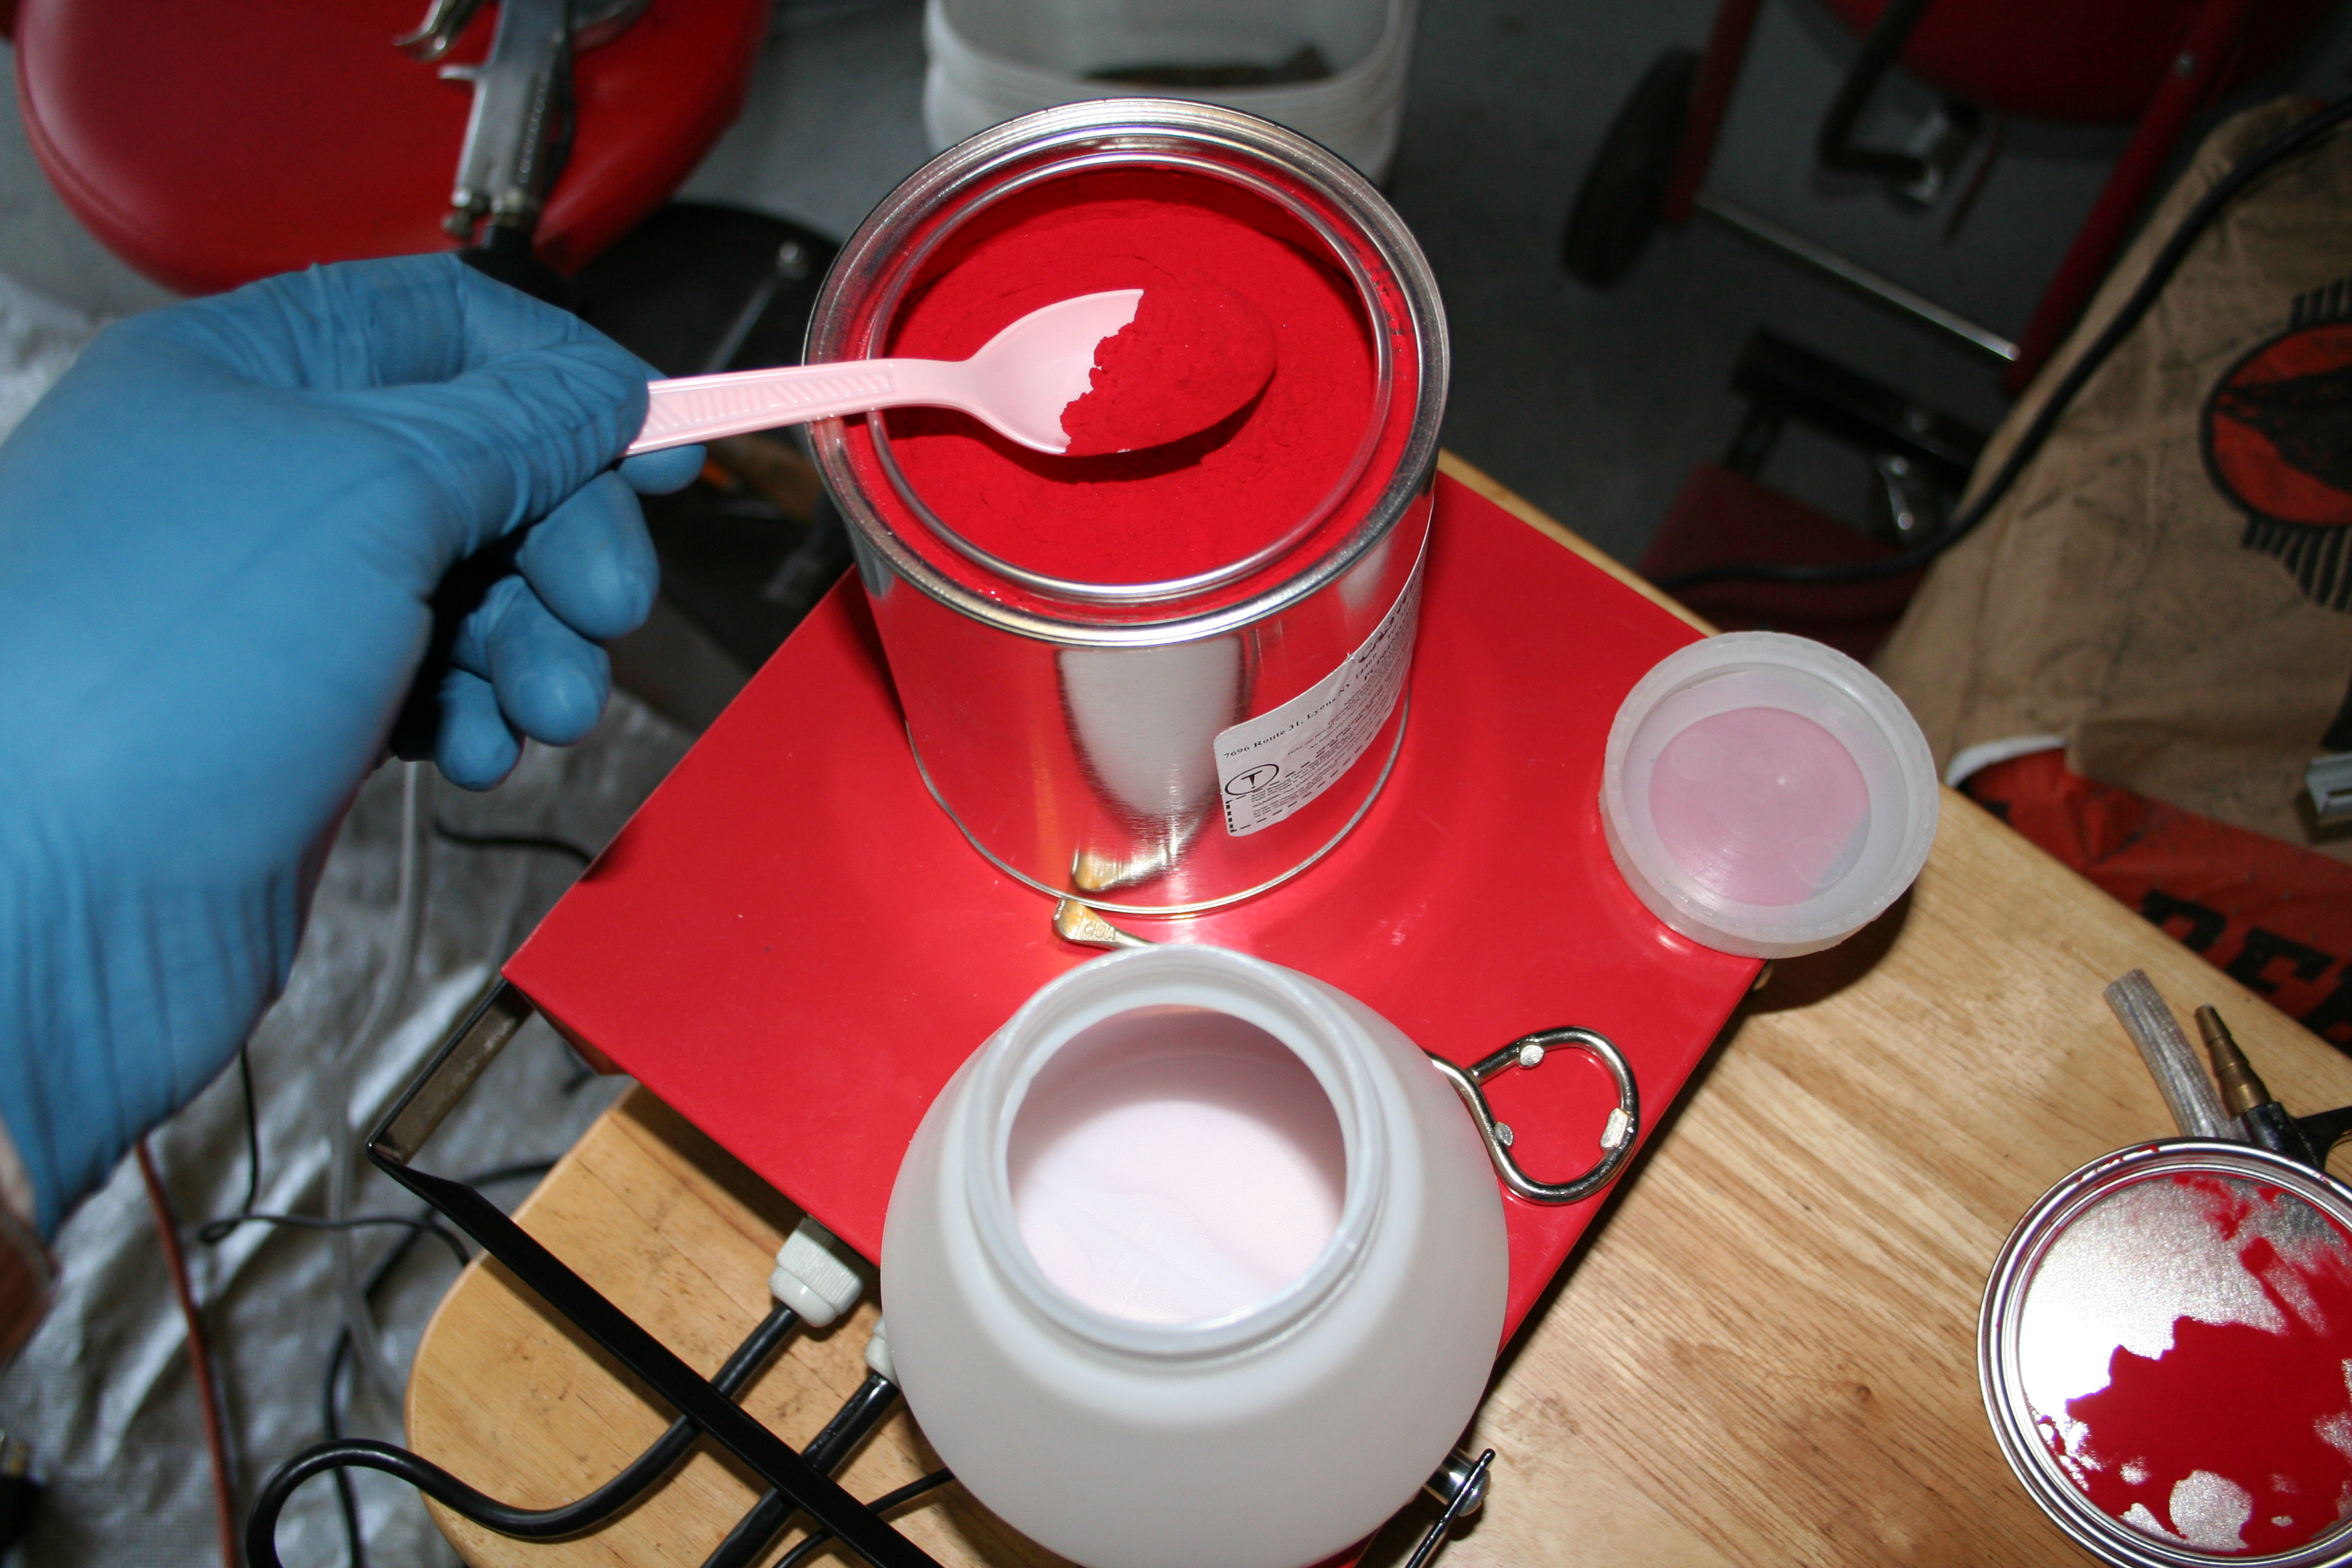
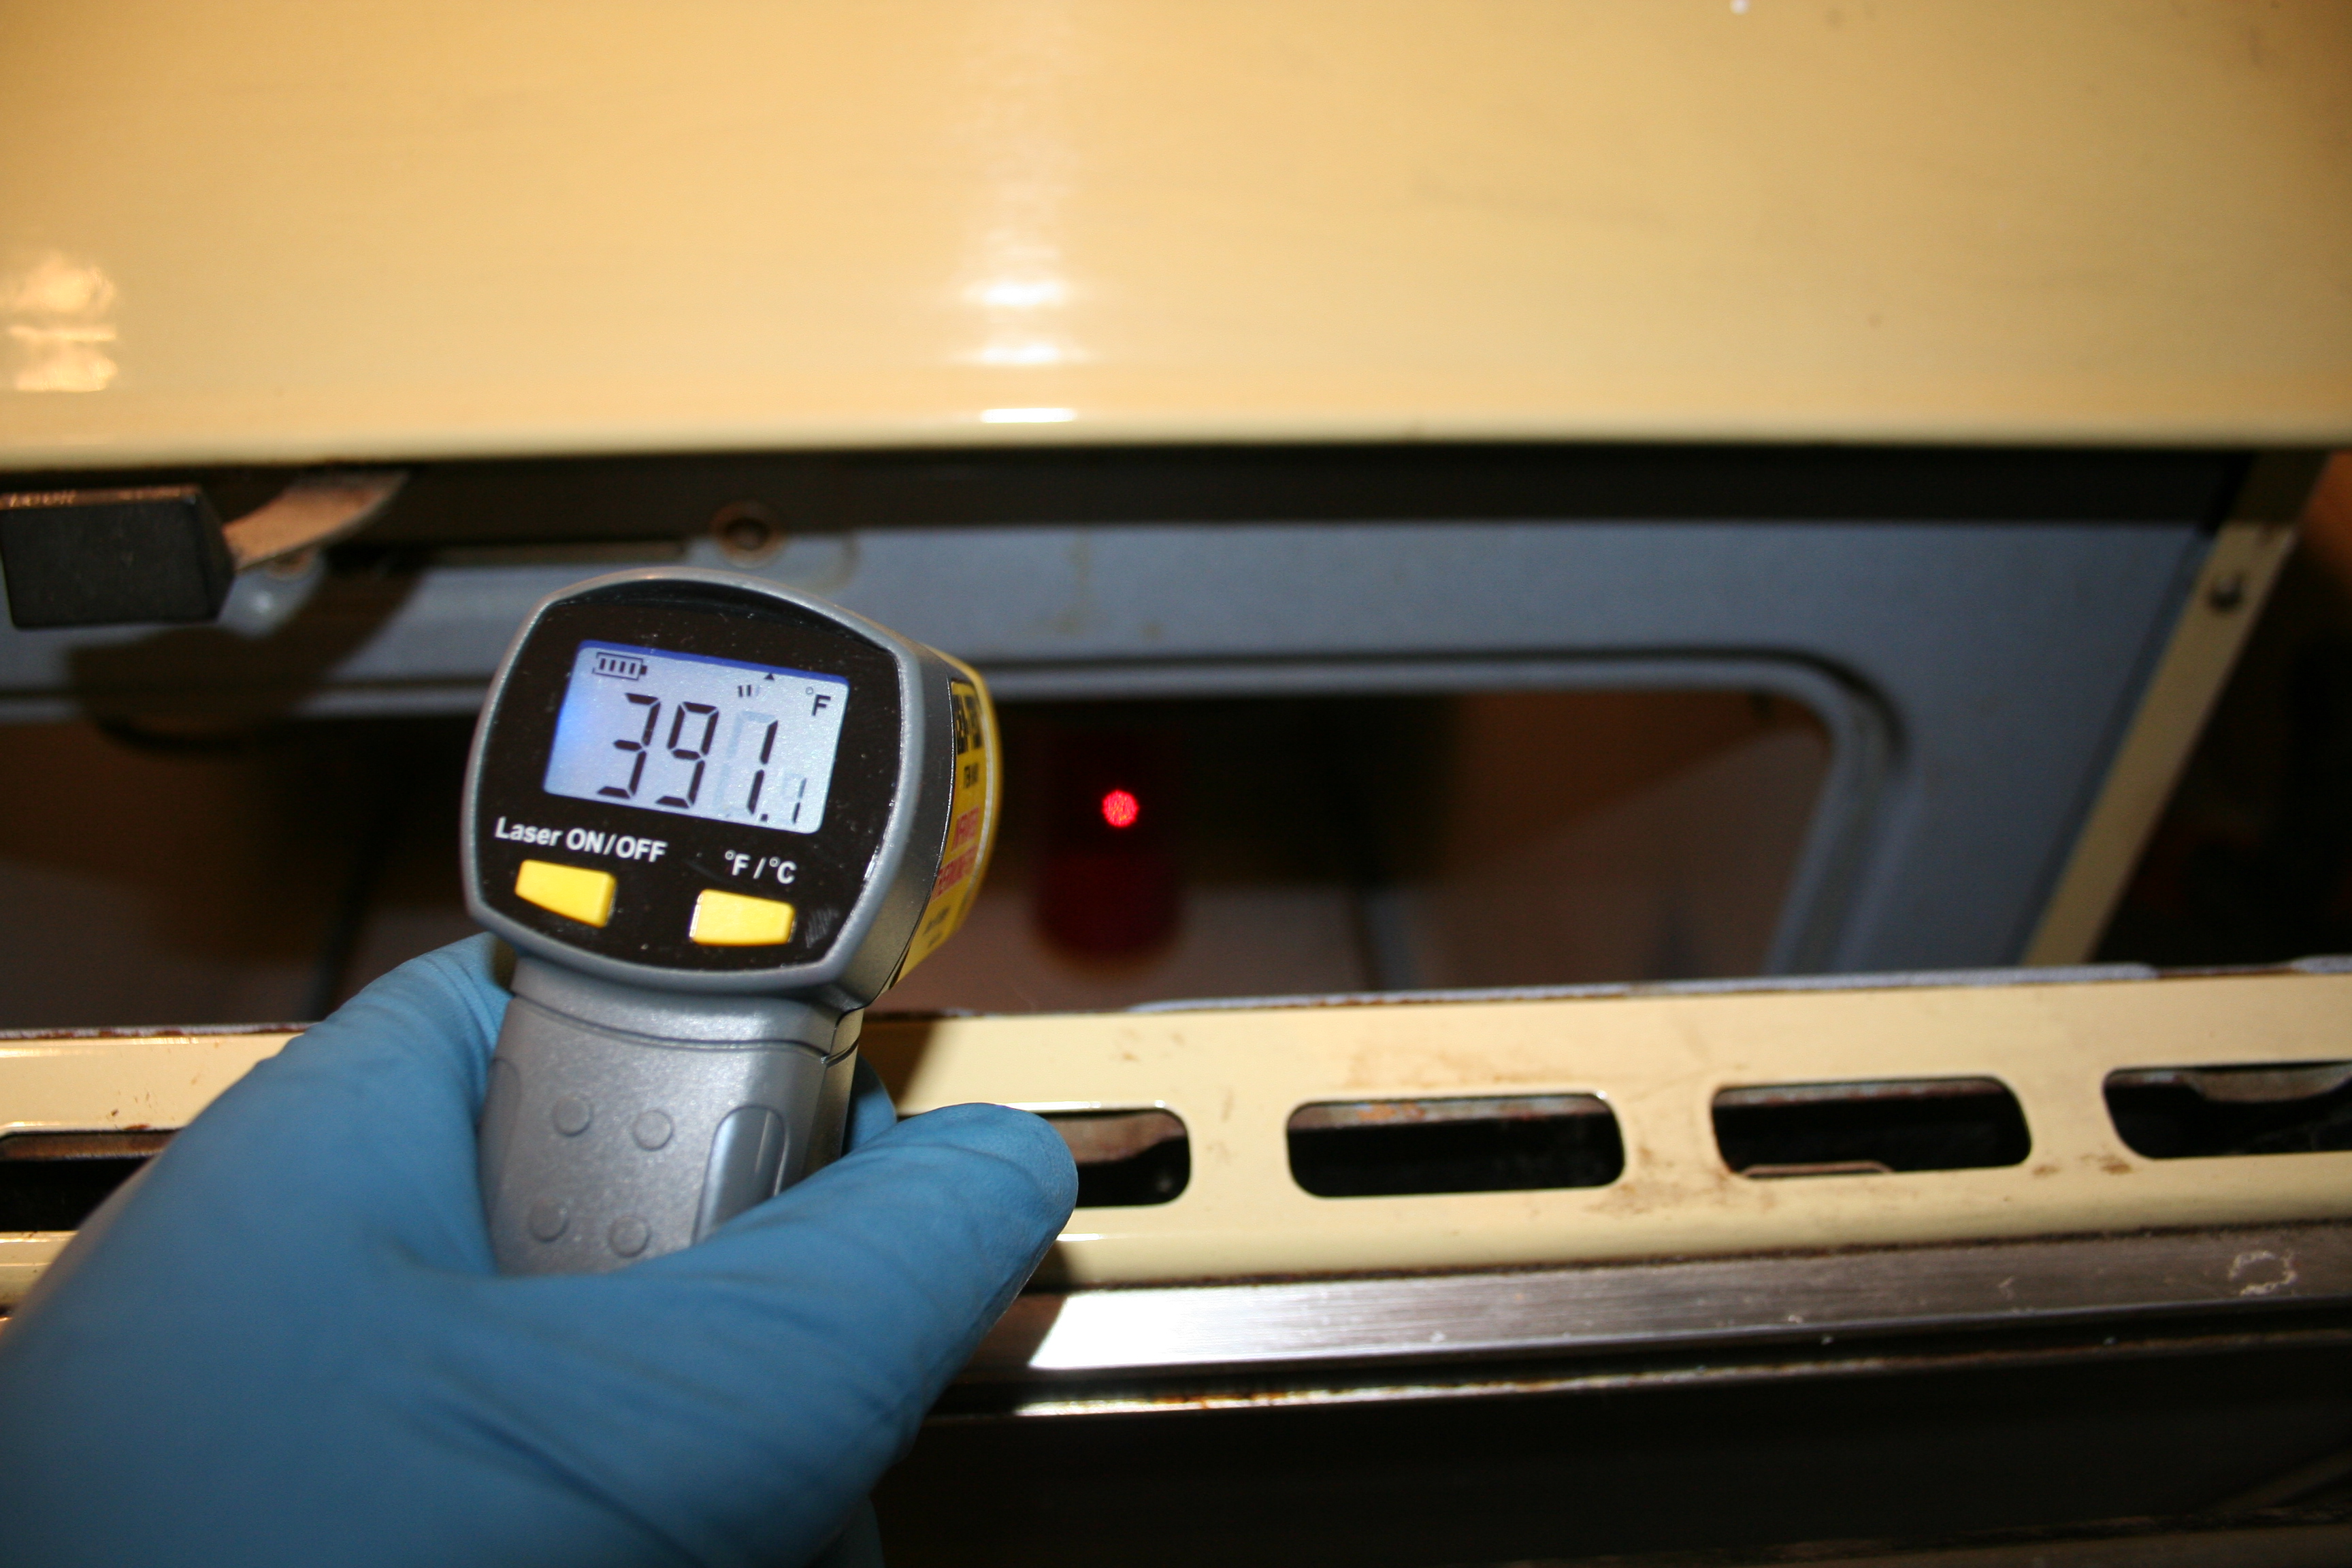
...an o-ring. I suspect this is to prevent grease from migrating out and water from migrating in. This o-ring was brittle and too old to keep. The replacement part is cheap anyhow. 11/08/2008I used some Jasco paint stripper a week or two ago to remove the paint from the front struts and strut dust covers. This was all in prep for powder coating them. So today I finally tried powder coating for the first time. I had been given a kit from Caswell over a year ago, but just have not gotten around to trying it out. I recently purchased some additional powder for the Koni struts. In short it went super well and was quite easy. I had rescued an electric oven about a year ago from the Durham Landfill Transfer station. I was there dropping off some junk when I saw some guys unloading an old stove/oven. I asked if the oven worked and they said they thought it did, so I brought it come. I have removed the burners from the top and it is now my powder coating oven. The Caswell kit included the gun and 12v air pump. I had purchased a battery charger awhile back as my 12v supply. I had lost the directions from Caswell, so after some general reading of "Powder Coating DIY" on various web sites, I figured I had enough info to give it a try. Here was my process... 1. Clean part to remove as much grease and oil as possible. This was done via mechanical scraping and brake cleaner. 2. Media blast part. 3. Wash in soap and water to remove any remaining oils, blasting residue, etc.. 4. Treat with Ospho to convert the top layer into Zinc Phosphate. 5. Rinse with water 6. Pre-heat to dry as needed and let cool. 7. Pre-heat oven to around 400 F. 8. Powder coat part using gun. 9. Put in oven and use IR thermo to measure part temp. 10. Depending upon part size, it took about 2-5 minutes for it to get up to about 350+ F and around this point the powder started to melt, flow and turn glossy. Shortly after this part was 390-400 F. 11. Let cure for 10 minutes at around 400 F (Powder listed 392 F). 12. Turn off oven, crack oven and let it cool slowly down to point that it can be handled and then remove from oven. Photos below...
Filling up the gun cup. I only put about 1" of powder into the cup.
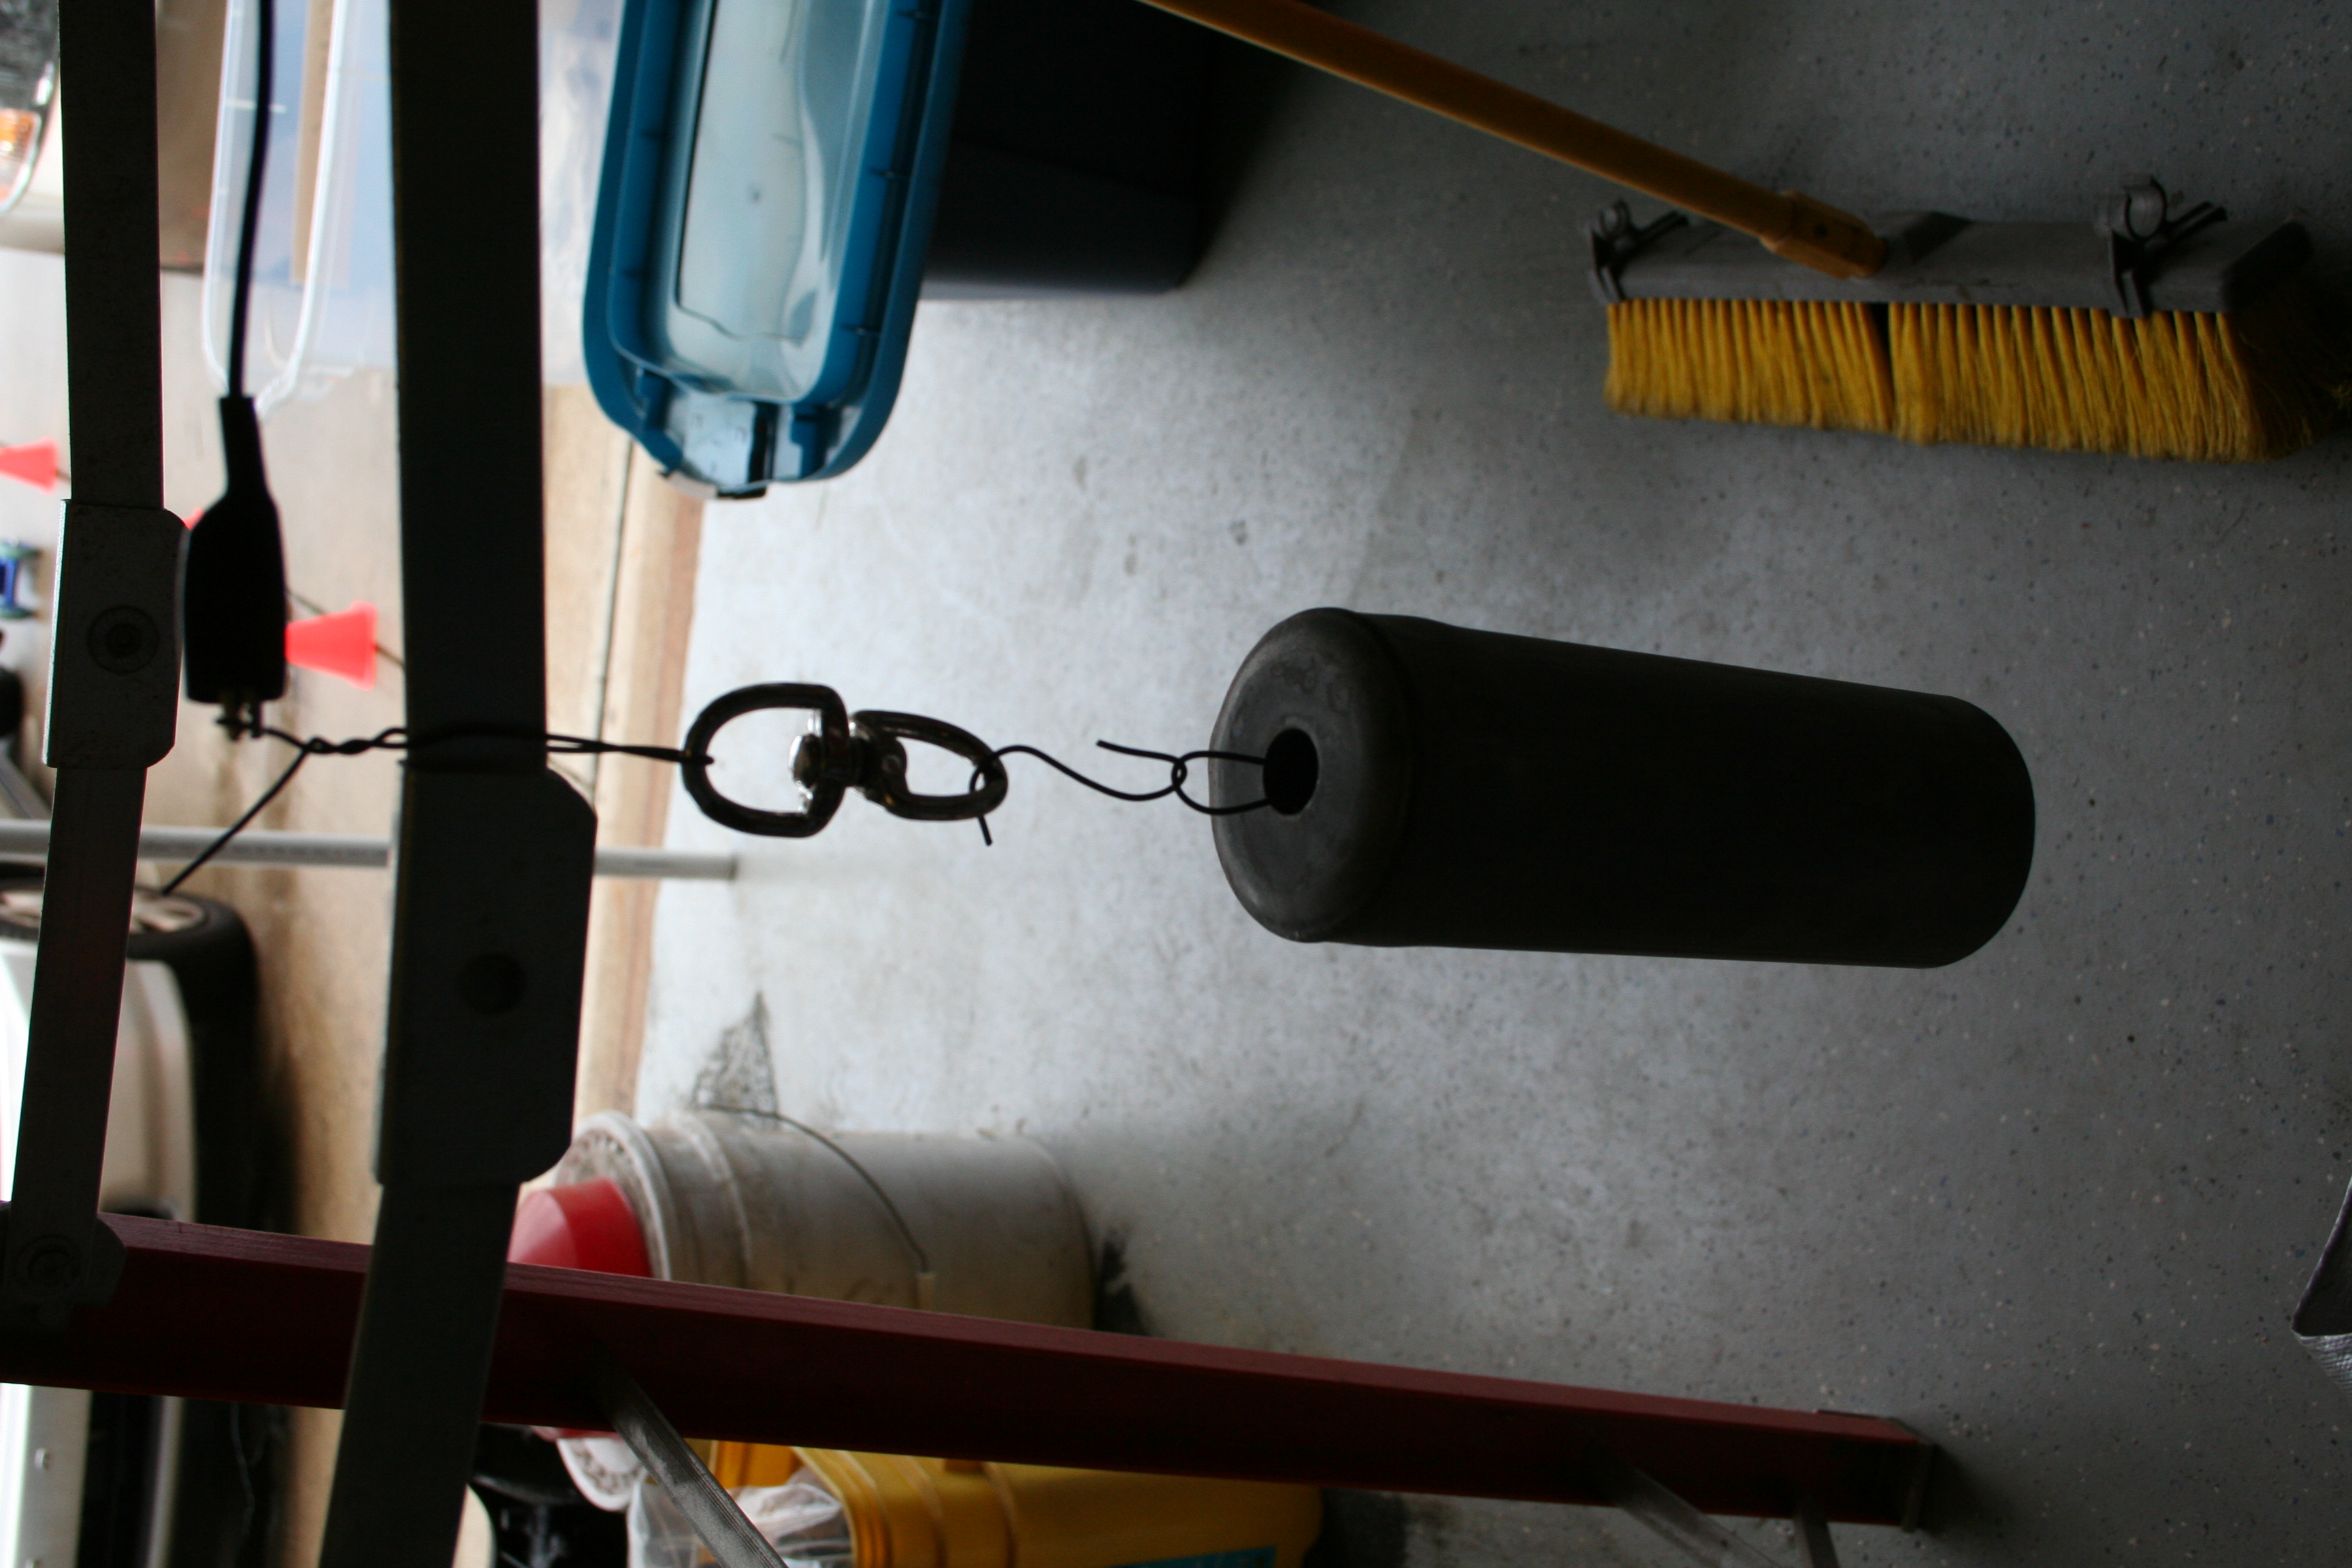
Hard to tell due to backlighting, but this is the strut dust cover. It is hung on a swivel so that I can rotate part as I coat it. Ground clip can be seen at top.
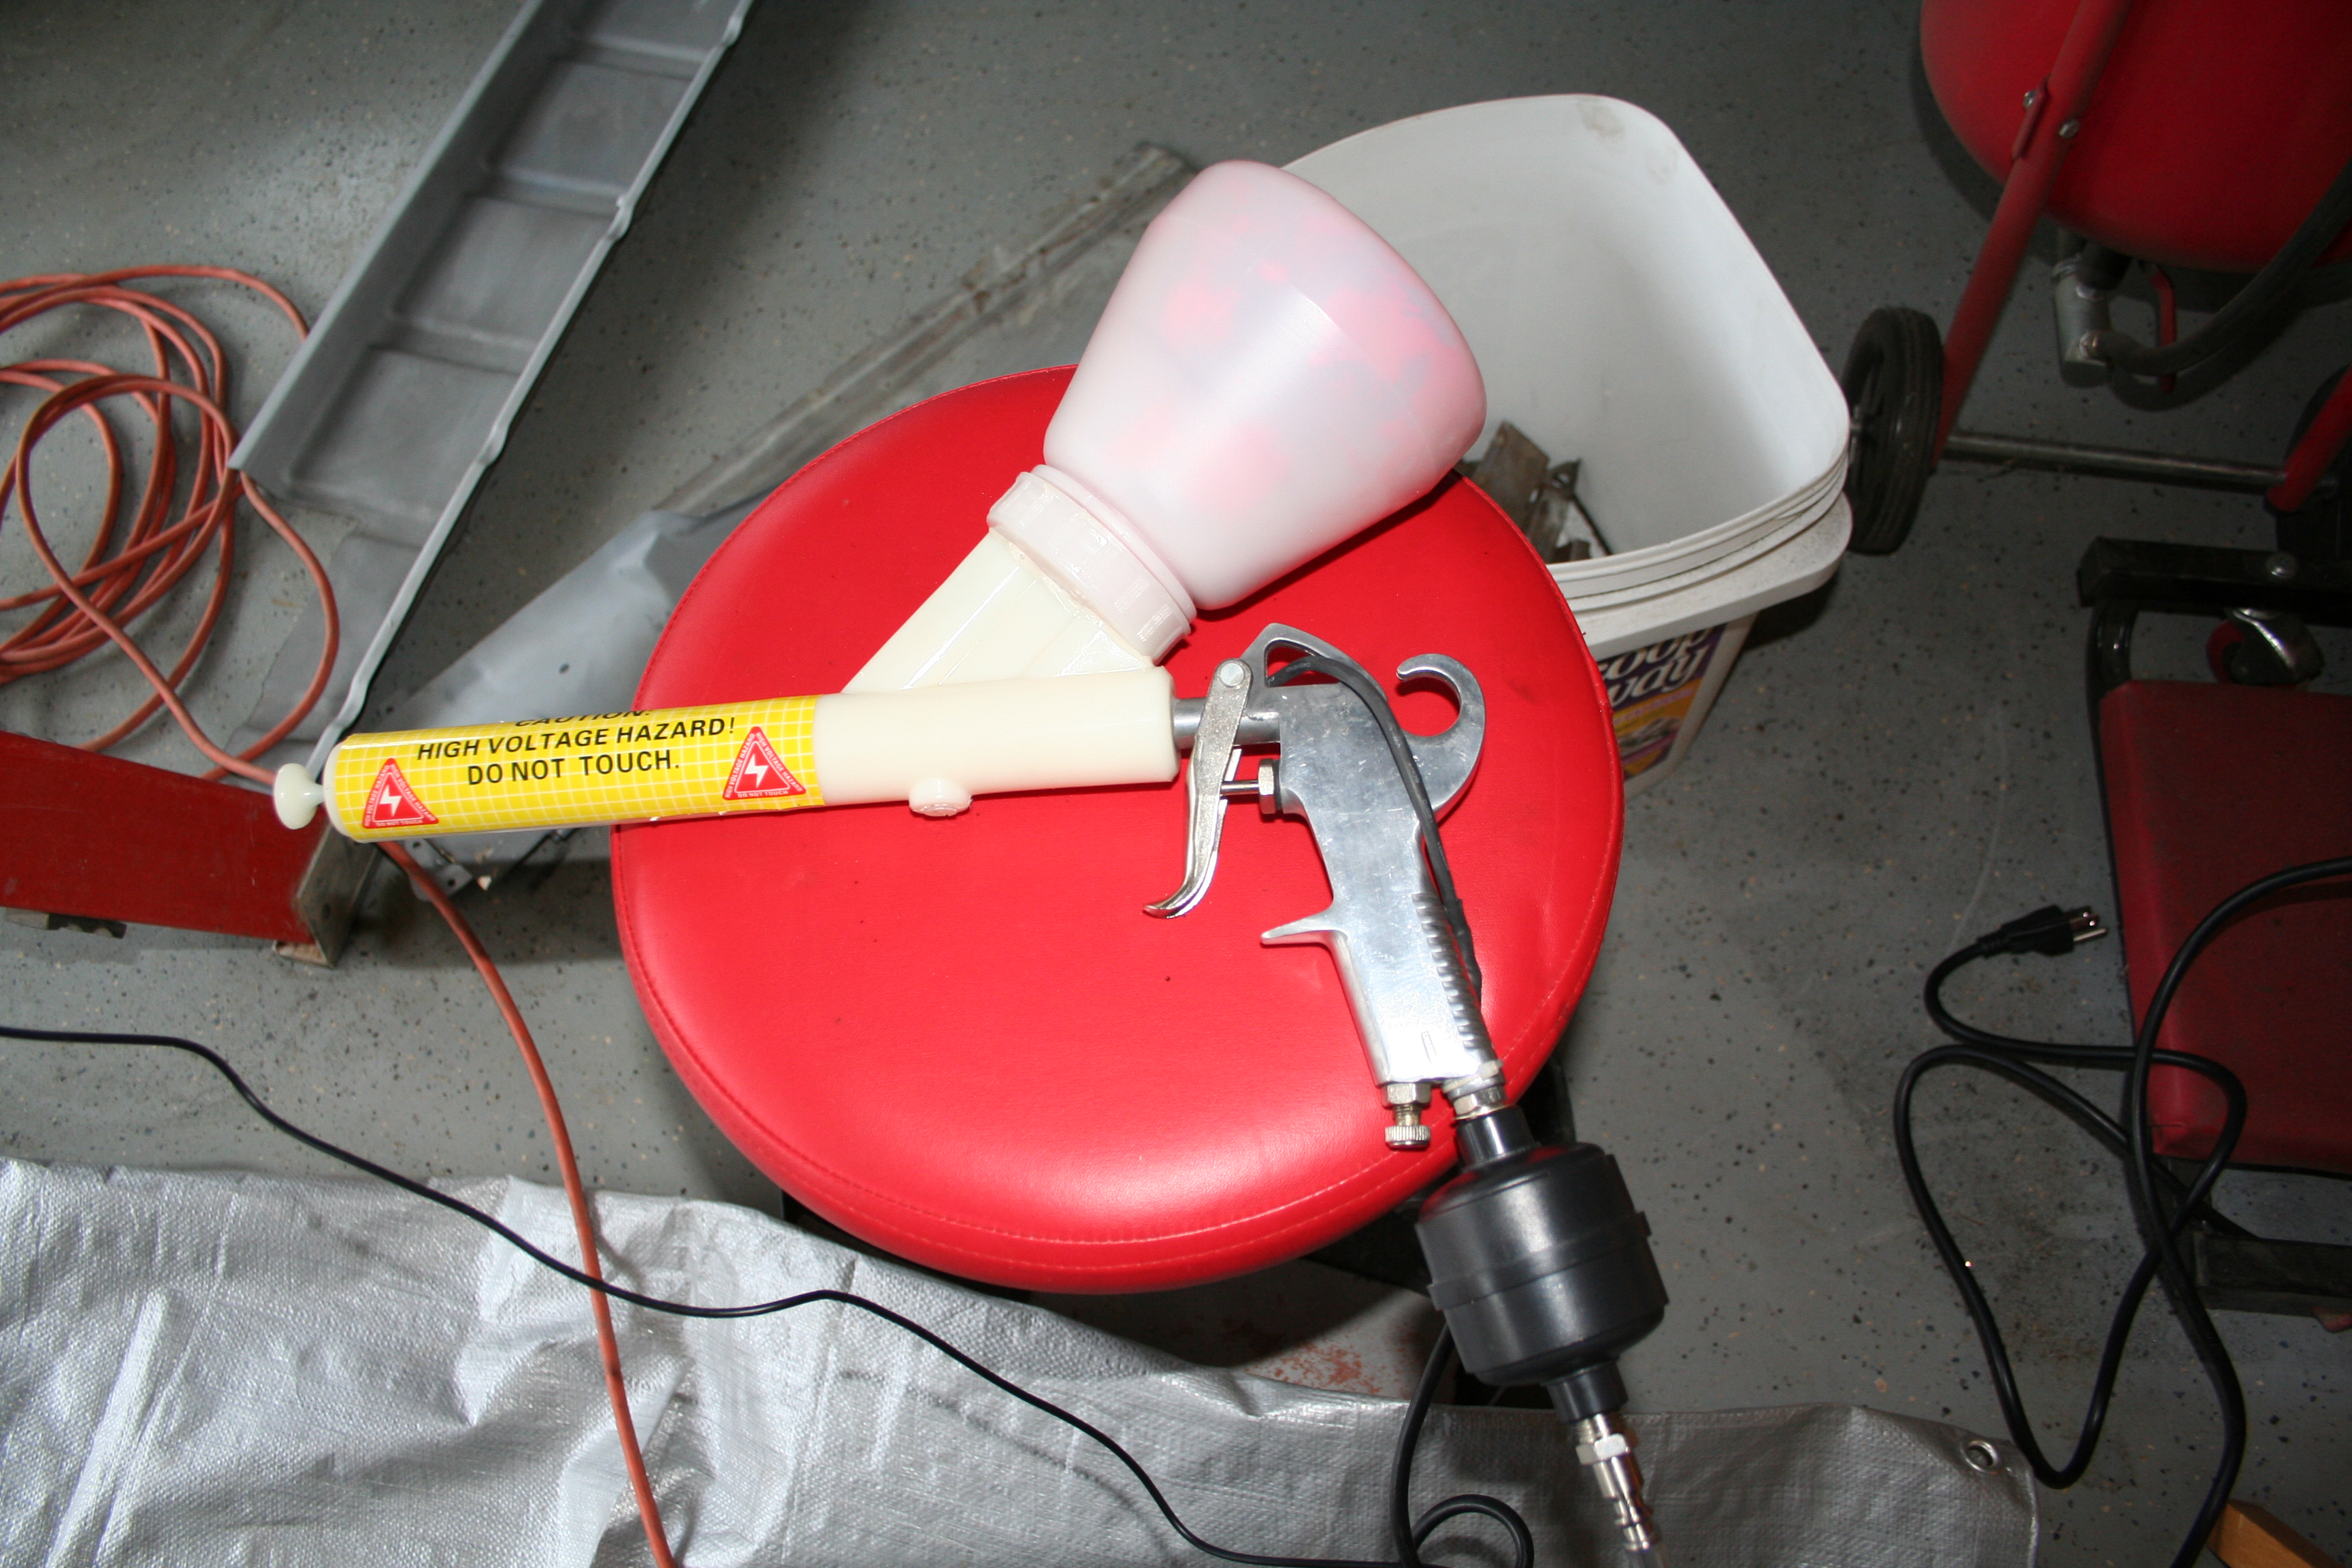
Gun all ready to go.
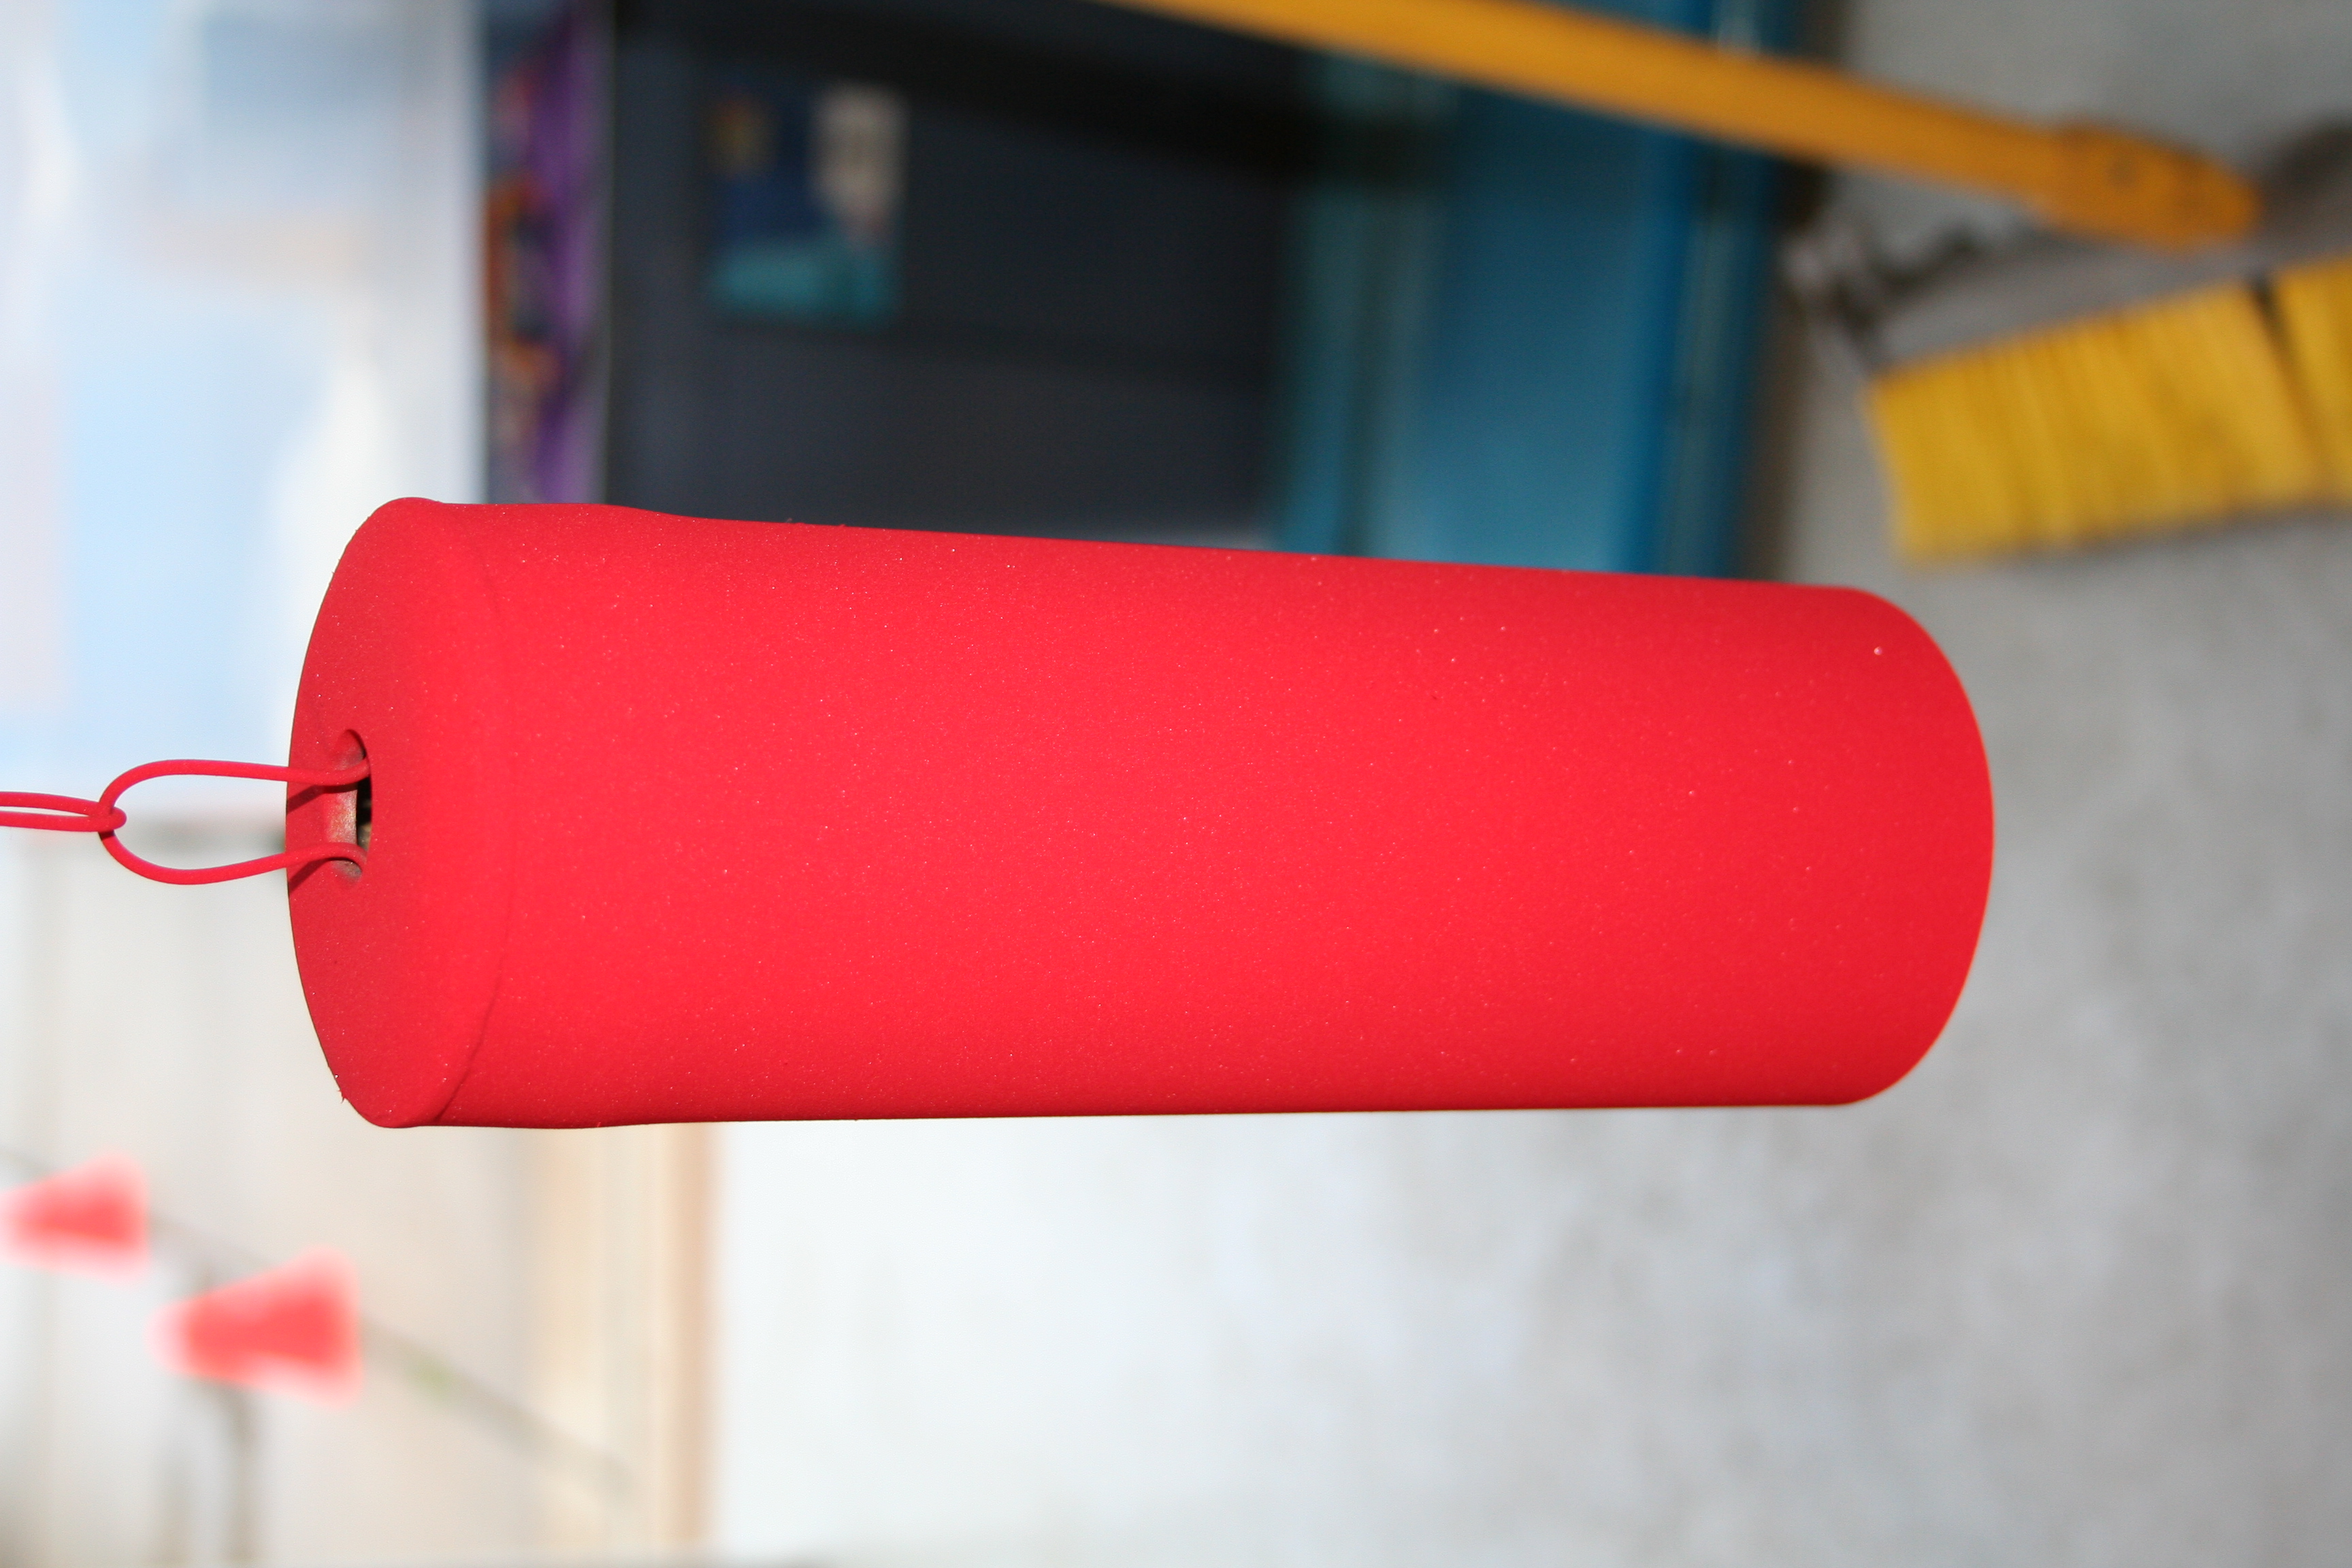
Sorry, no action shots of powder moving from gun to part. Powder has been applied to part. At this point you could just wipe or blow the powder off. It obviously has a "flat" appearance as it is just dusted with powder. I would apply powder until I could not see the base metal.
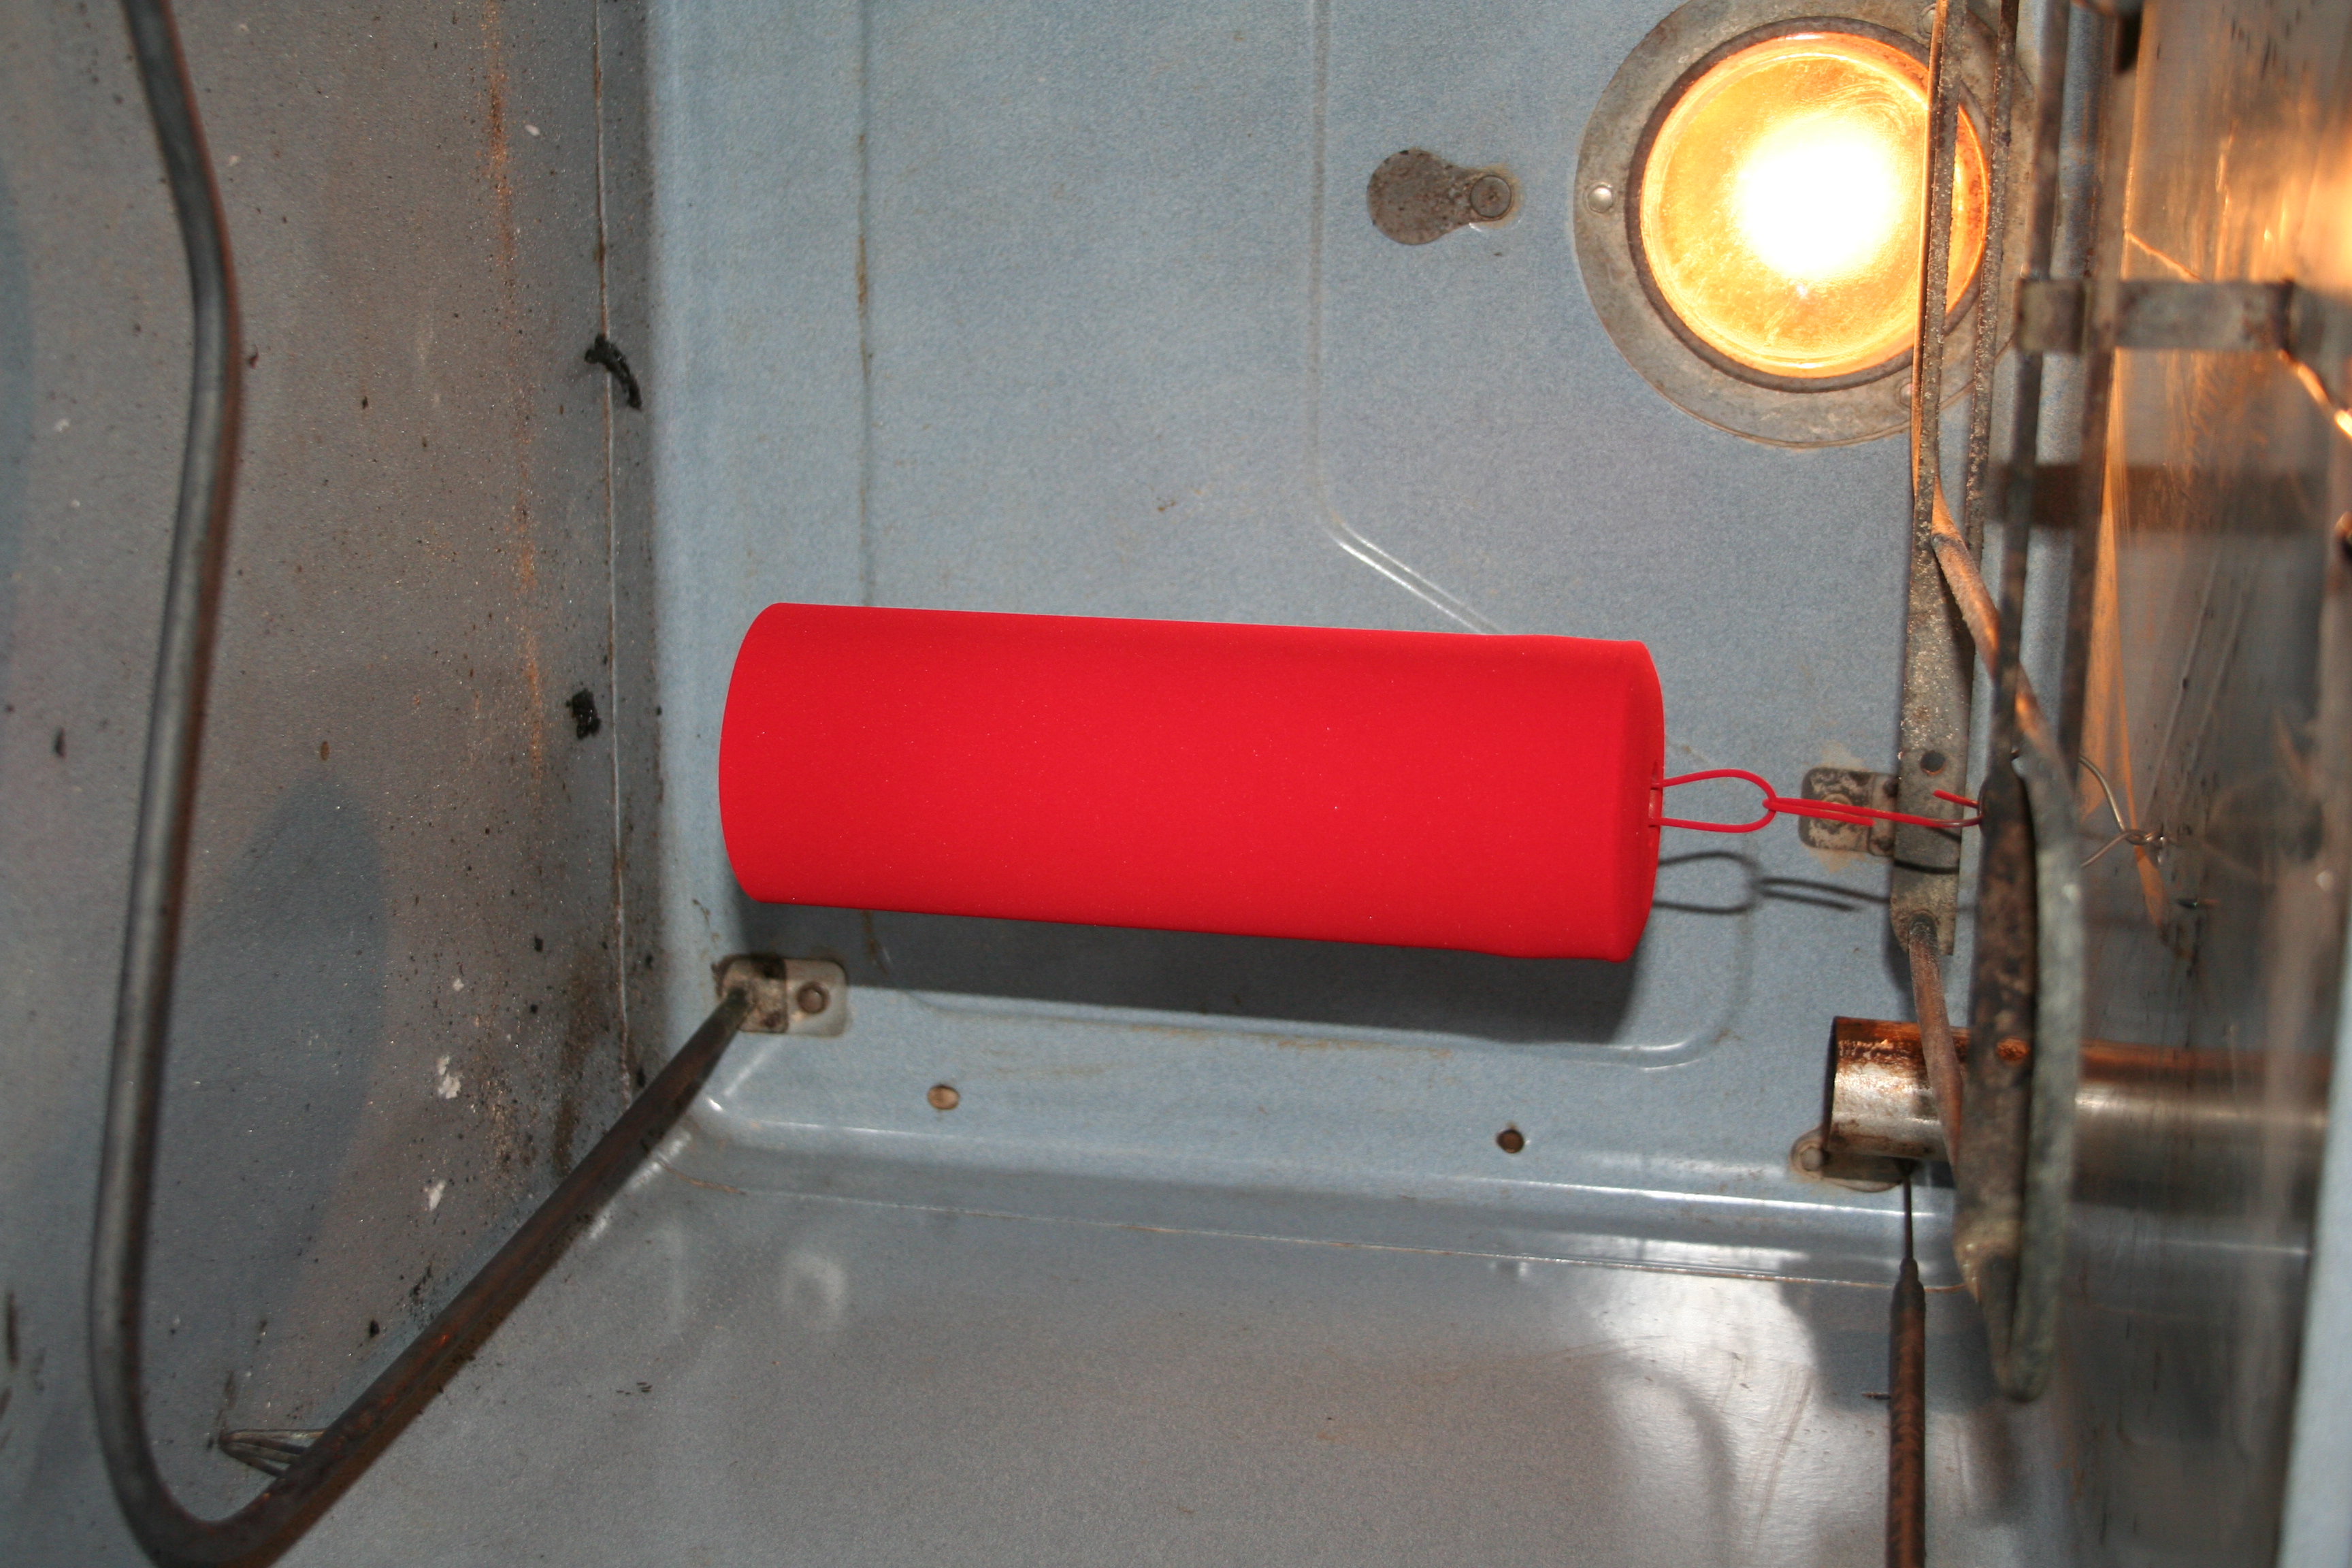
Oven is pre-heated and ready to go. So I carefully transfer into the oven. I drilled two holes in the top of the oven for hangers. Close door and watch through window as paint turns from a flat powder to a matte finish and finally a gloss.
Crack open over just a bit and check temperature using an IR thermometer. Once it's up to the specified cure temp, then time the cure. For this paint, it was 392 F for 10 minutes.
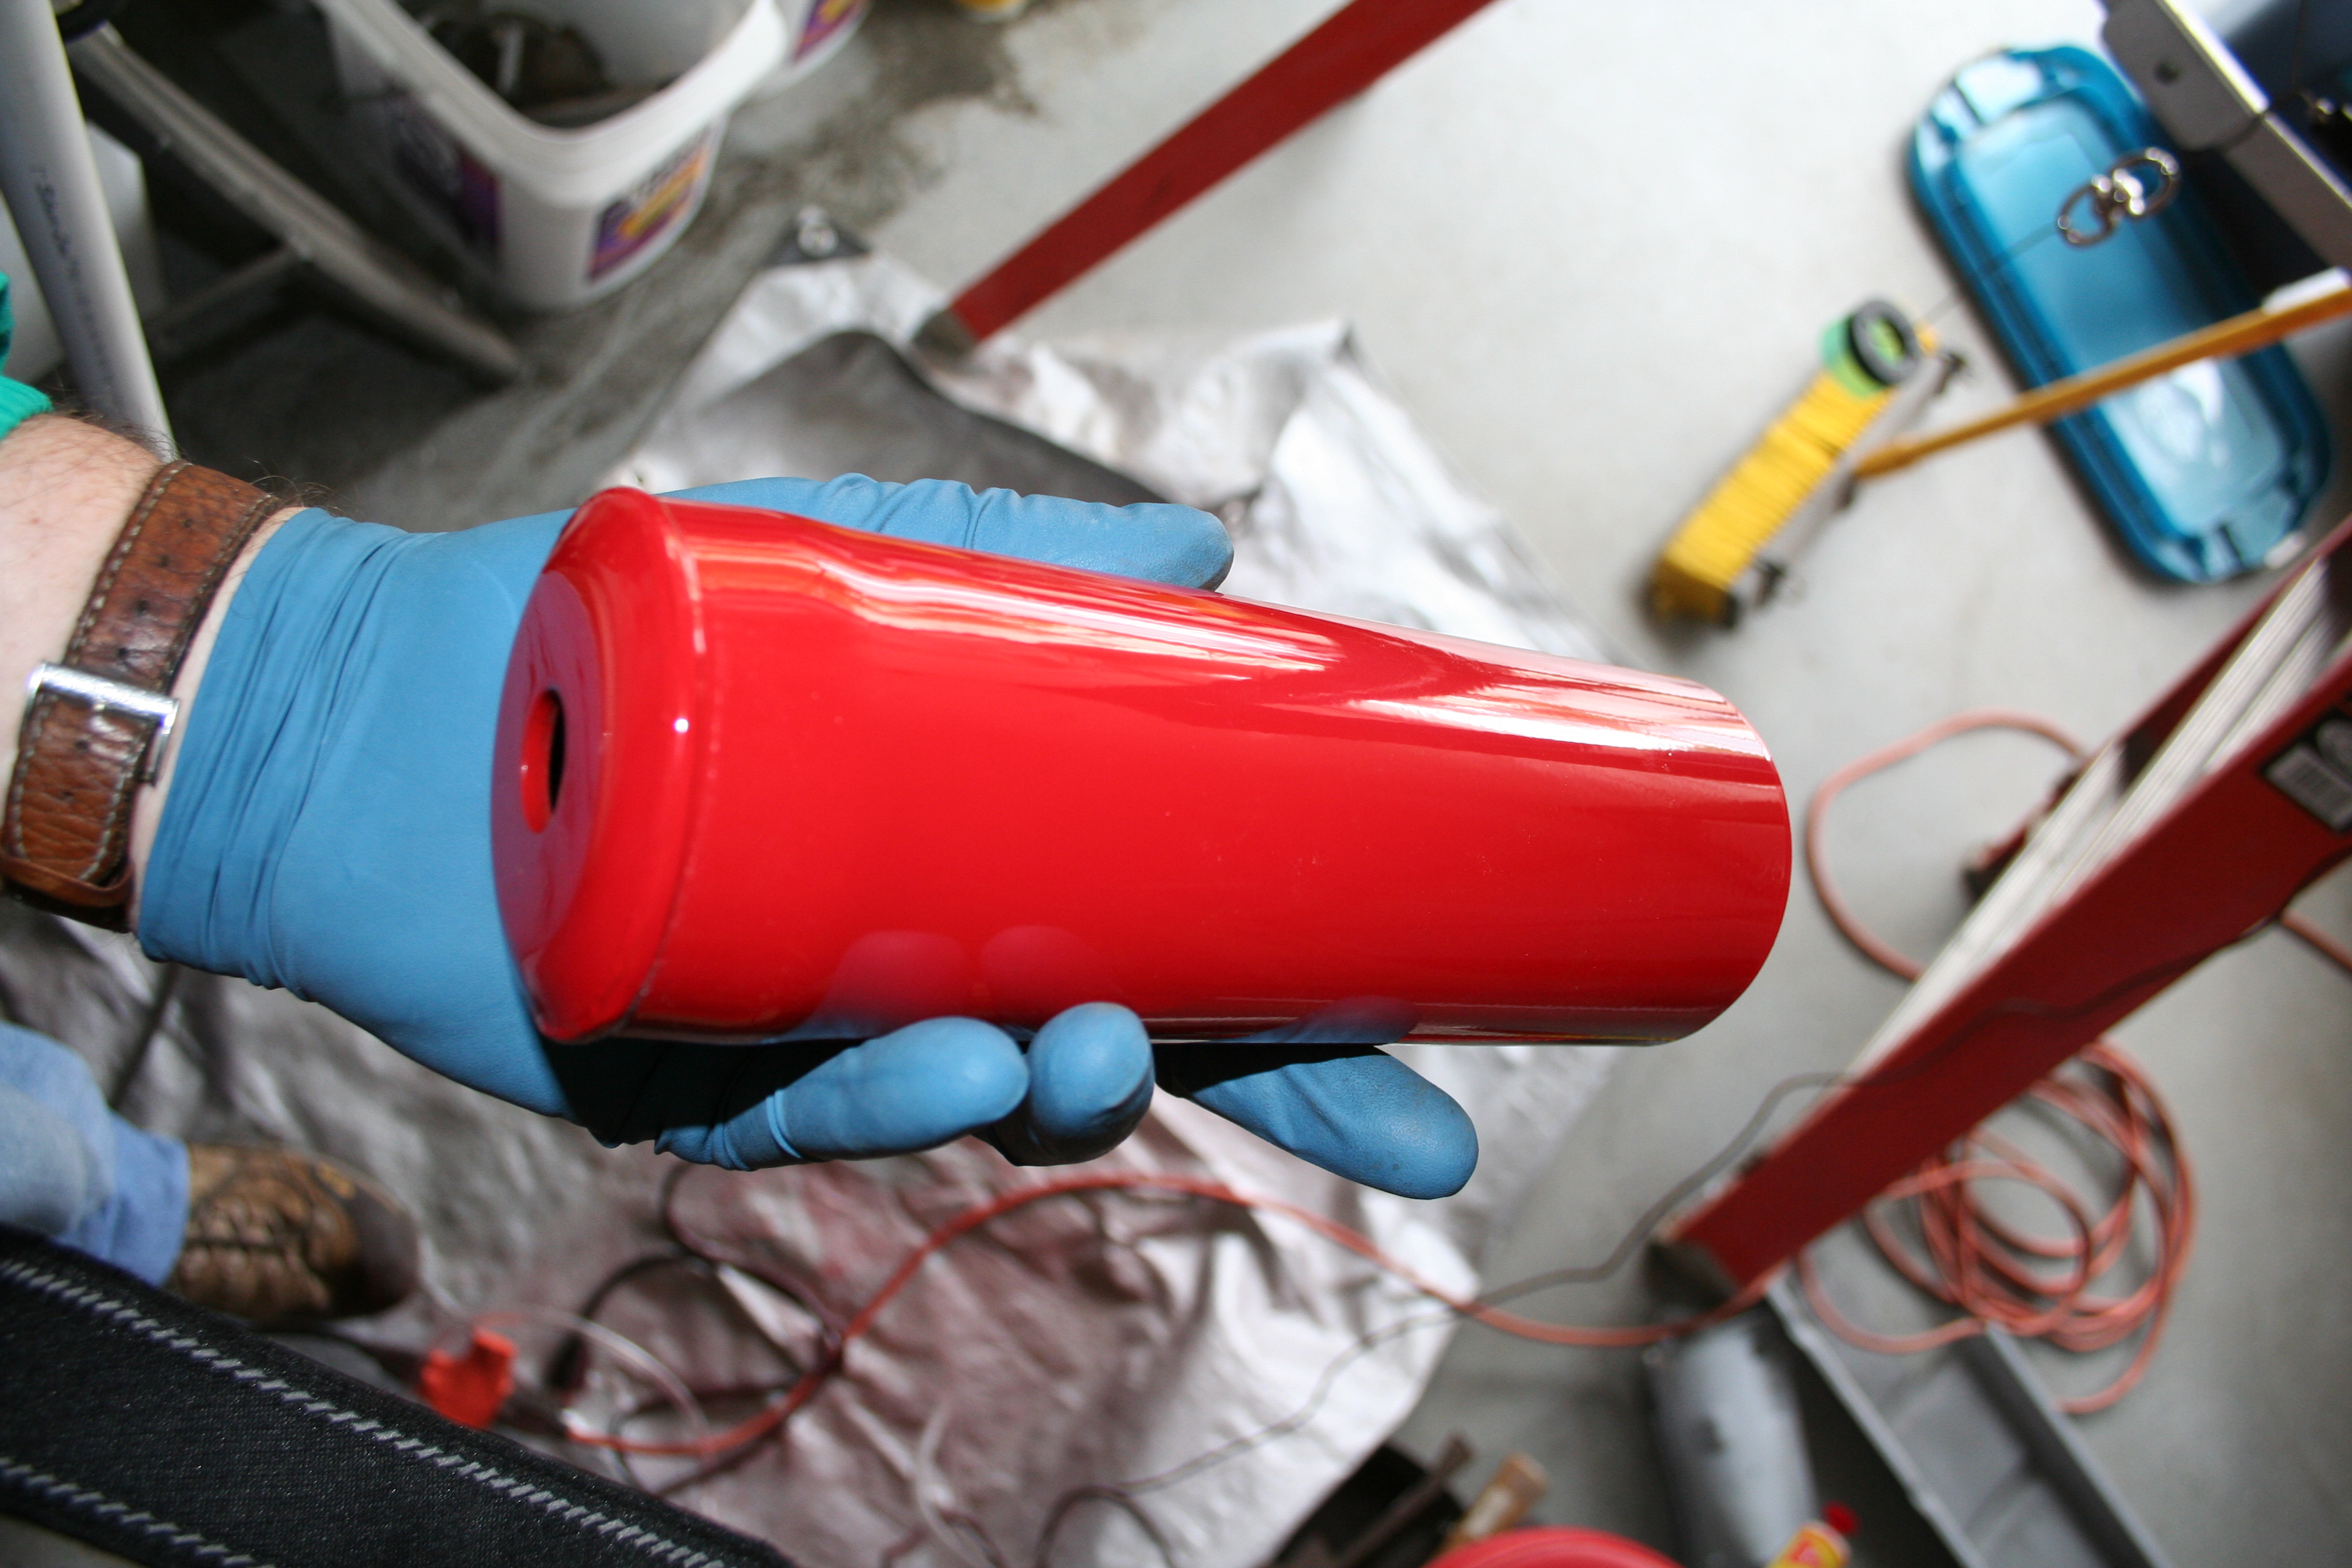
Here is part all cooled down and out of oven. It looks fabulous. I had maybe one or two small fish eyes (Not sure what the cause is. Probably a contaminant of some sort) and no orange peel.
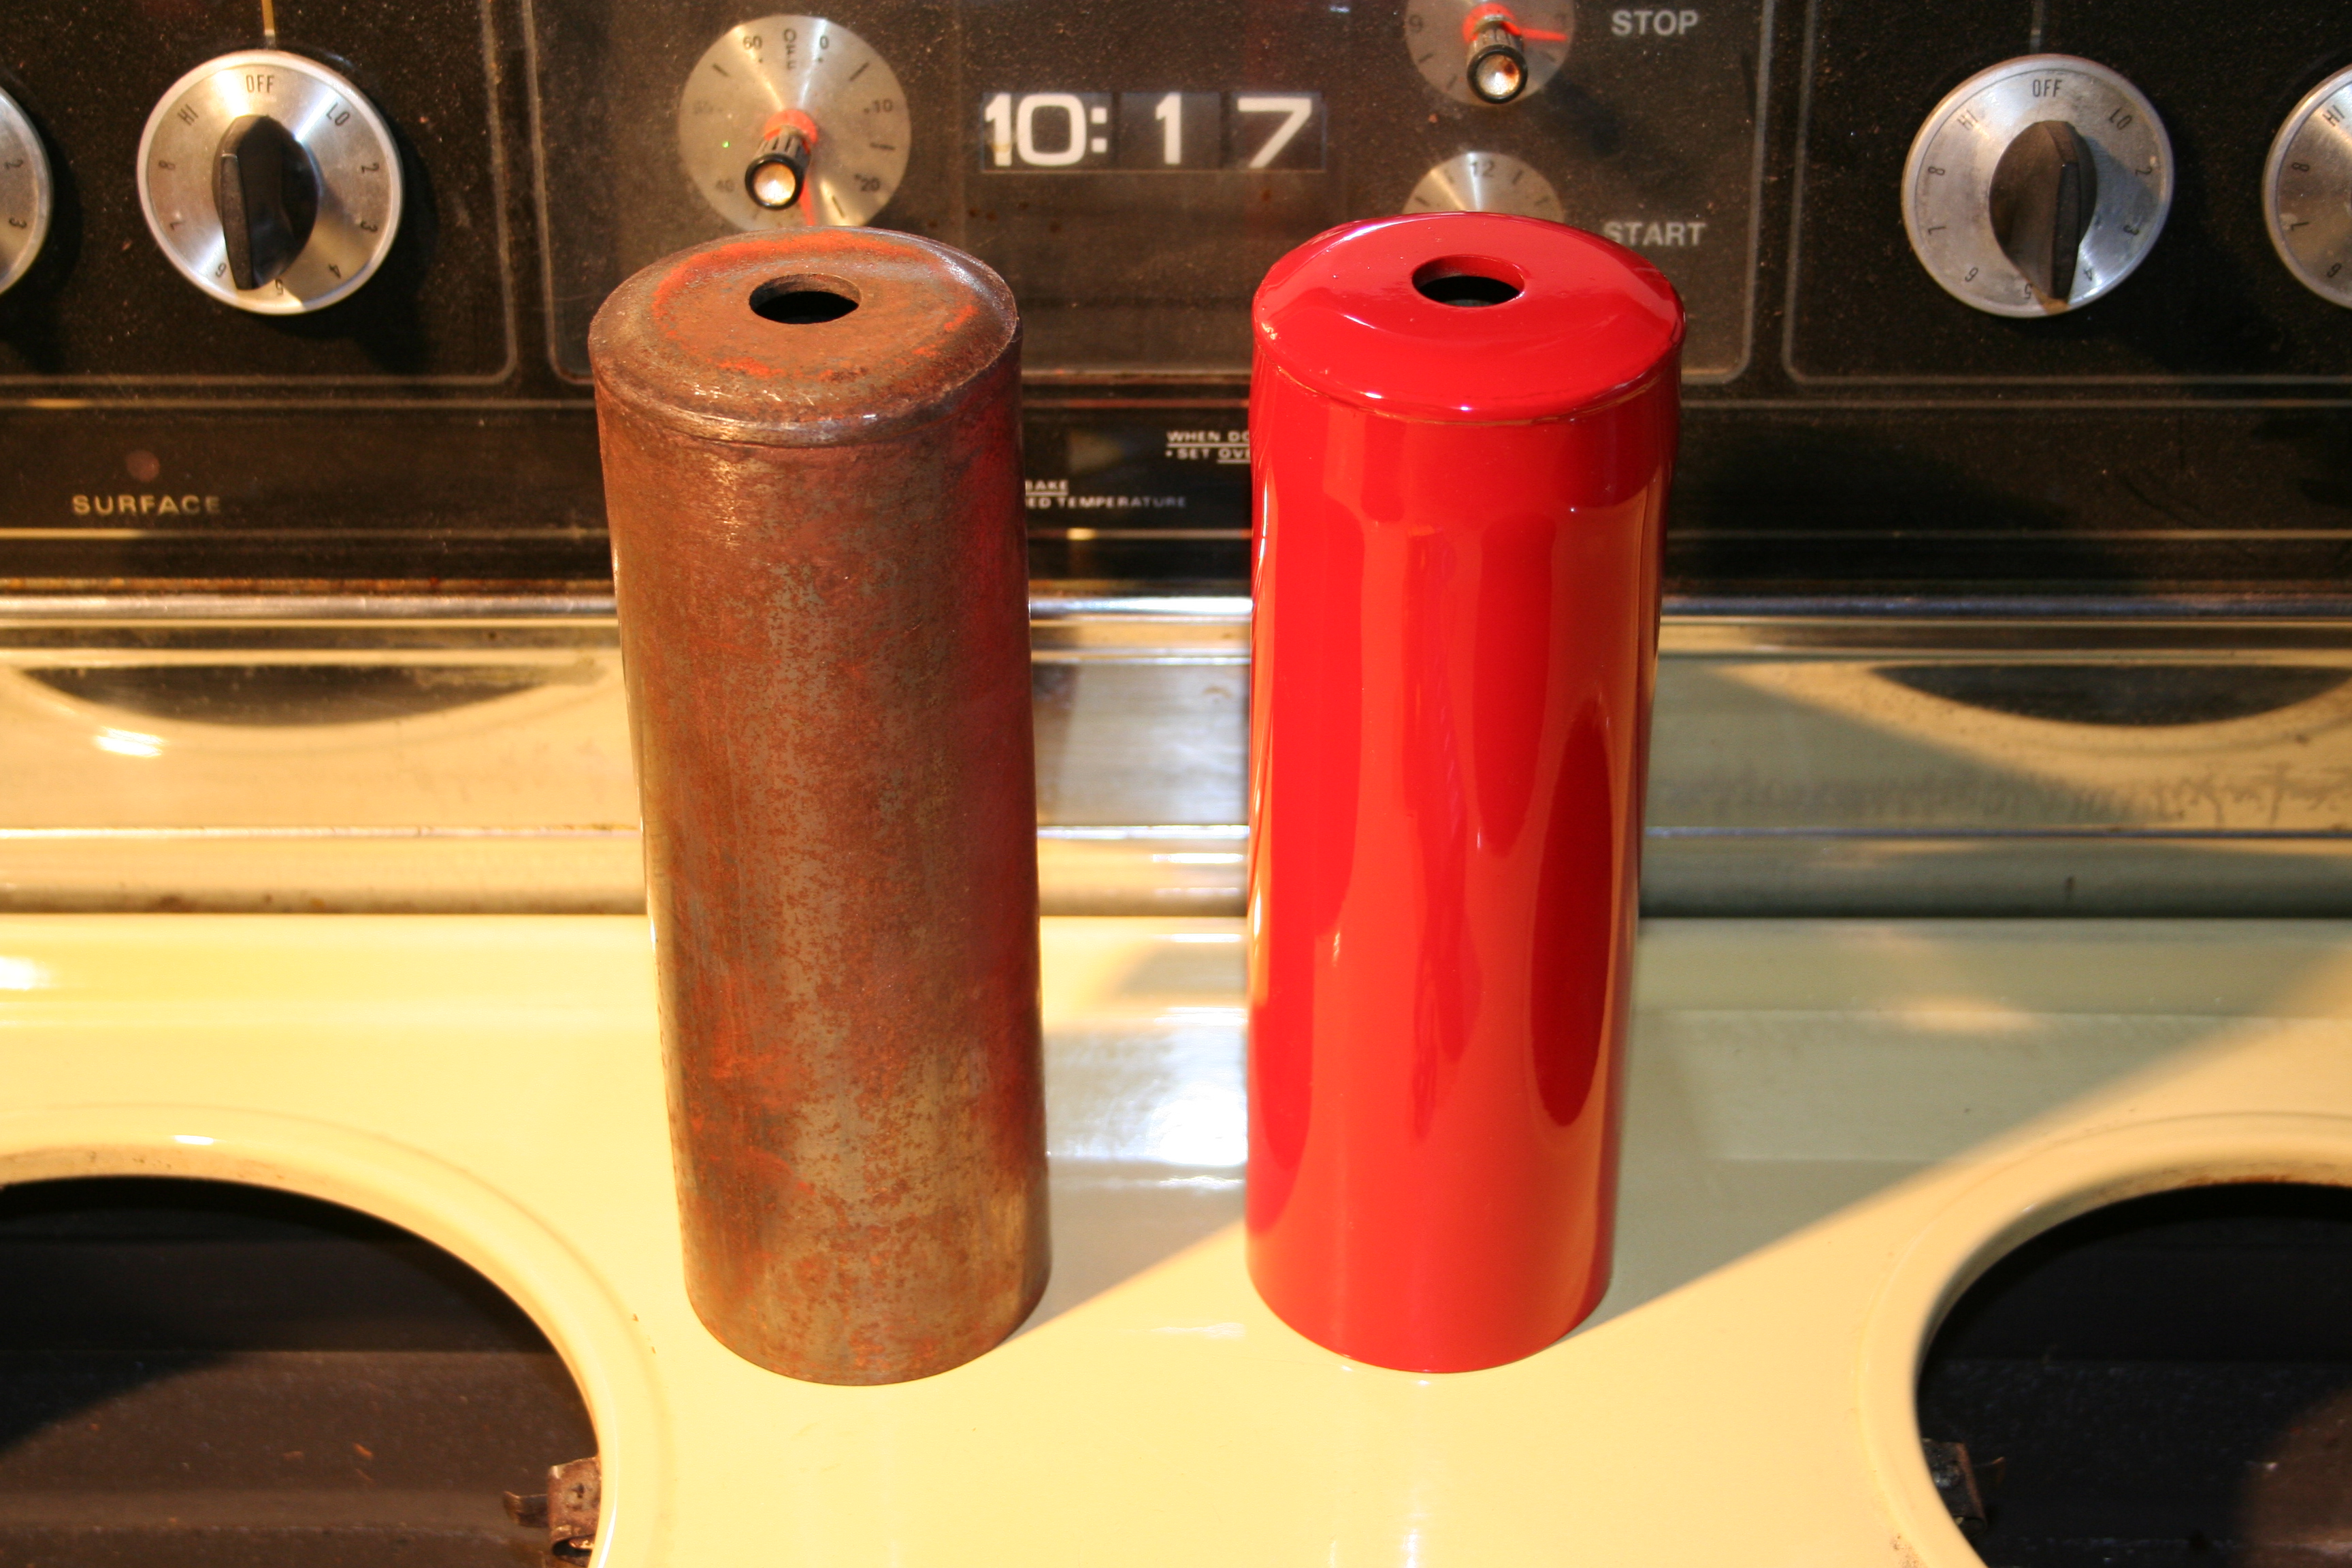
One on left is what it looks like after Jasco paint remover (some slight surface rust). One right is finished product.
I also coated the special Koni gland nuts that are used with the OEM Koni strut and the new sport inserts. I used the green silicon high temp tape to cover the threads. You can see that after removal from the oven that some of the powder on the tape has cured. Tape came right off and threads were unpainted. I hope to get the struts themselves done tomorrow. They will require much more media blasting and tape work. The tape work is for the bearing surfaces, mounting surface for the caliper, various bolt holes and the threaded top where the gland nut screws in. Regarding color match, overall, the paint is not quite as "orange" as the struts were originally. But I think they are close enough. The color matches the Koni red pretty well on my Koni boxes. :)
11/11/2008Ok, powder coating the dust covers was easy. And as it turns out it was probably easy due to a number of factors. The part was pretty easy to coat because...
The problems I ran into with the struts is that it is hard to get powder into interior corners. The powder will tend to collect on surfaces prior to getting into deep recesses. I am also having a hard time judging how much is too much or too little powder. The result is that for the struts, I had a few places in deep recesses or interior corners that didn't get coated thick enough. So I am going to have to do a second coat. Also, the part heats up differently because of the varying thickness of metal. For example the casting part (spindle, brake caliper ears, steering arm) takes a long time to reach cure temp while the thin tube does not. The result is that the thin sections stay at cure temperature much longer than the rest of the part. I don't know if this will cause an issue. So far it looks like it doesn't.
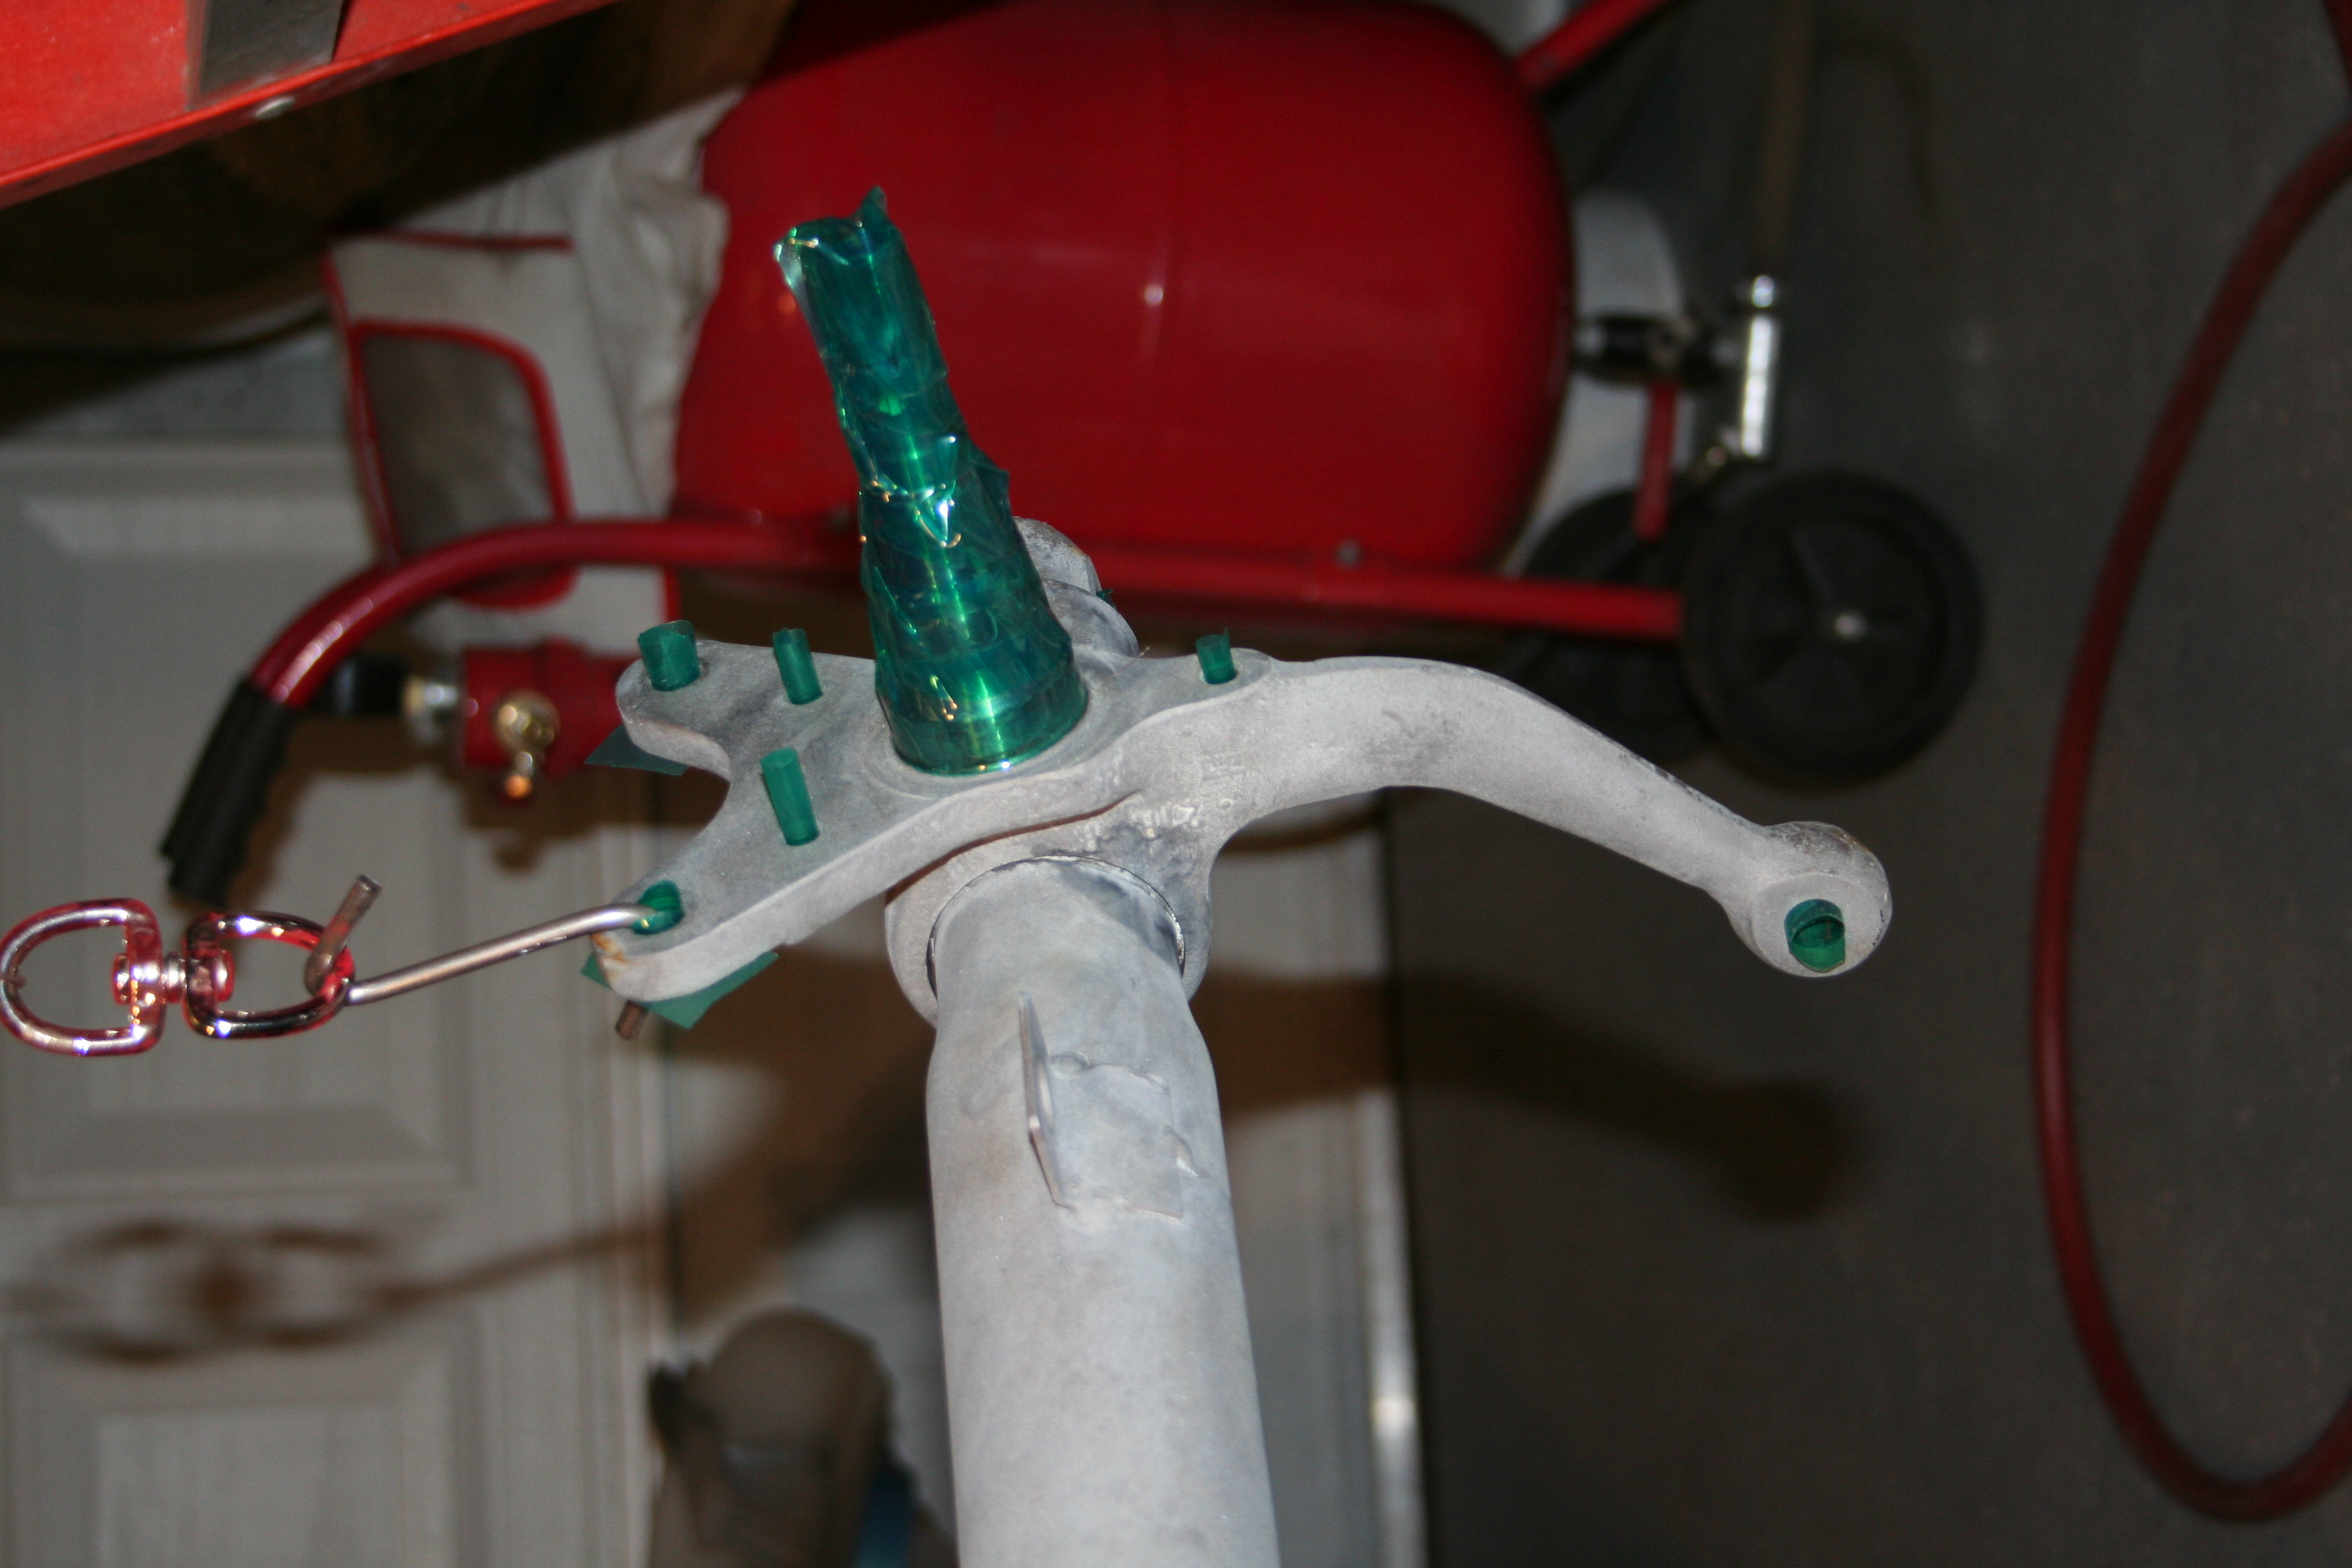
Here it is all taped up and ready to be coated. Whitish looks is Zinc Phosphate coating that is a result of using Metal Ready.
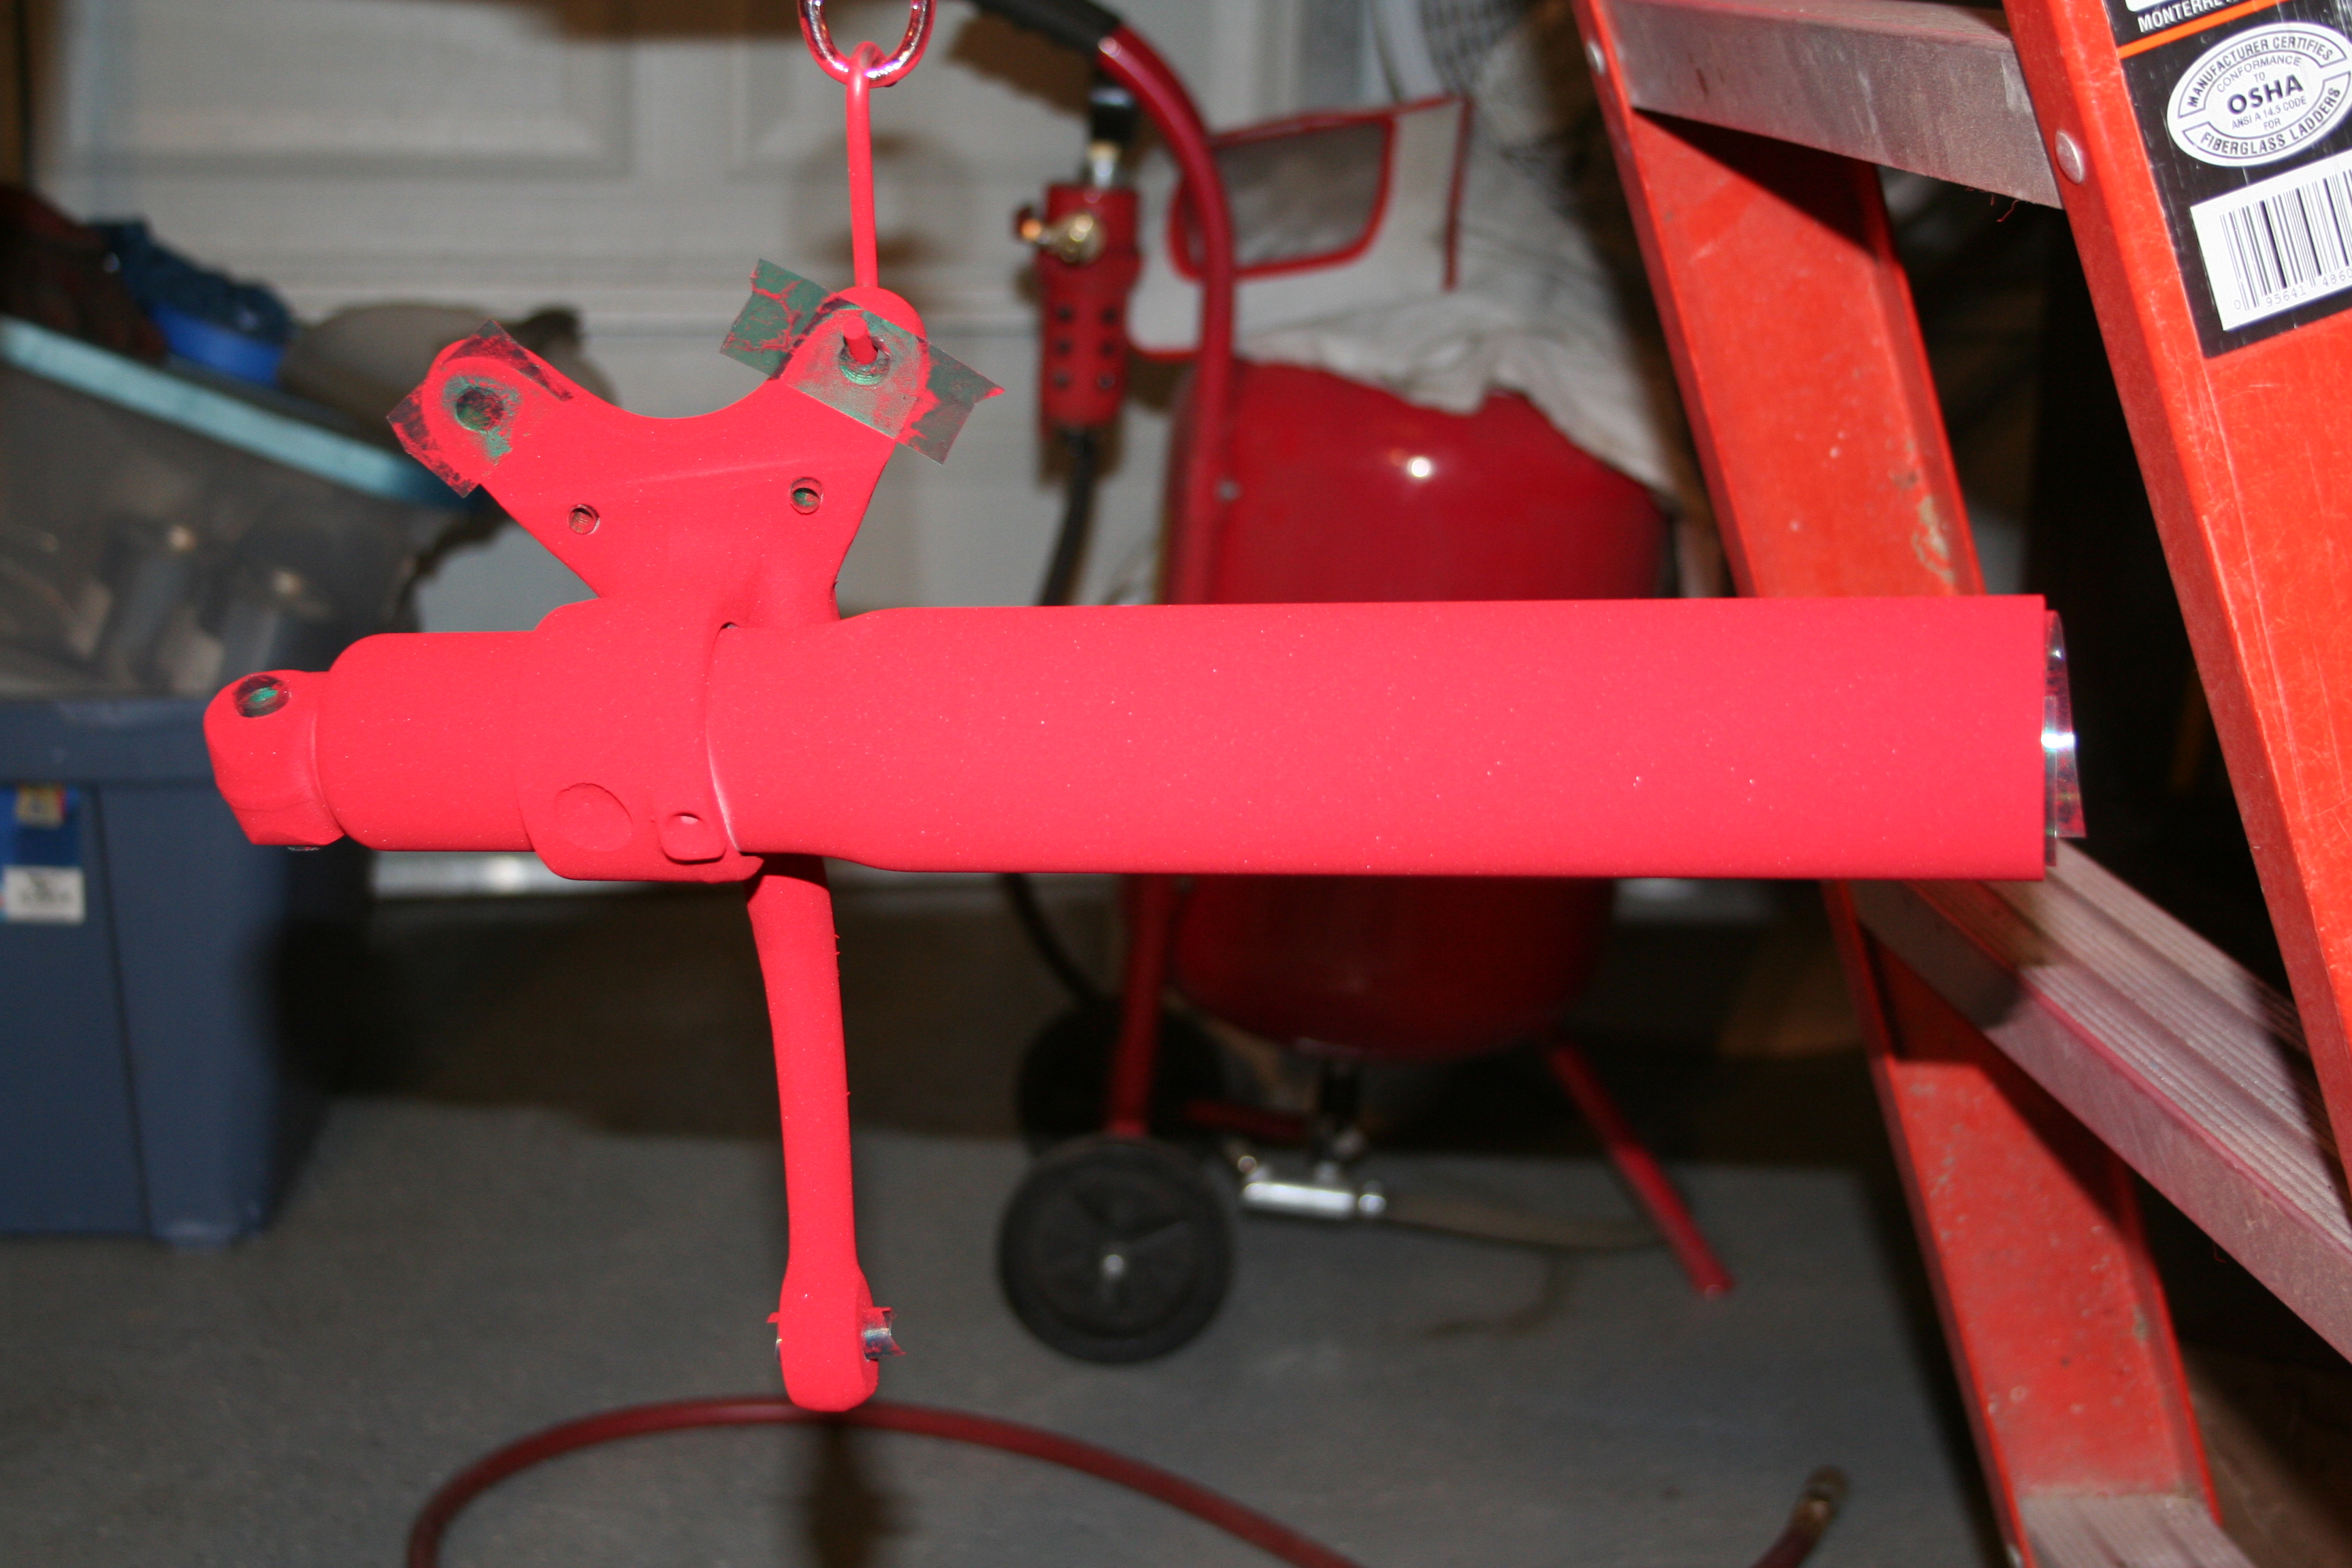
Here you can see it is coated. You can see a thin place in the powder that I missed but showed up via the flash from the camera. It is where the tube meets the cast part. 11/16/2008Ok, after reading a bit about how to deal with the issues I ran into the other day. Apparently it is not uncommon to put multi-coats onto a part. So I am going to put a second coat on the struts. The first coat actually looks pretty good. It's just a bit thin in a few places. Here are the tricks I am going to try to help resolve my problems from the first coat...
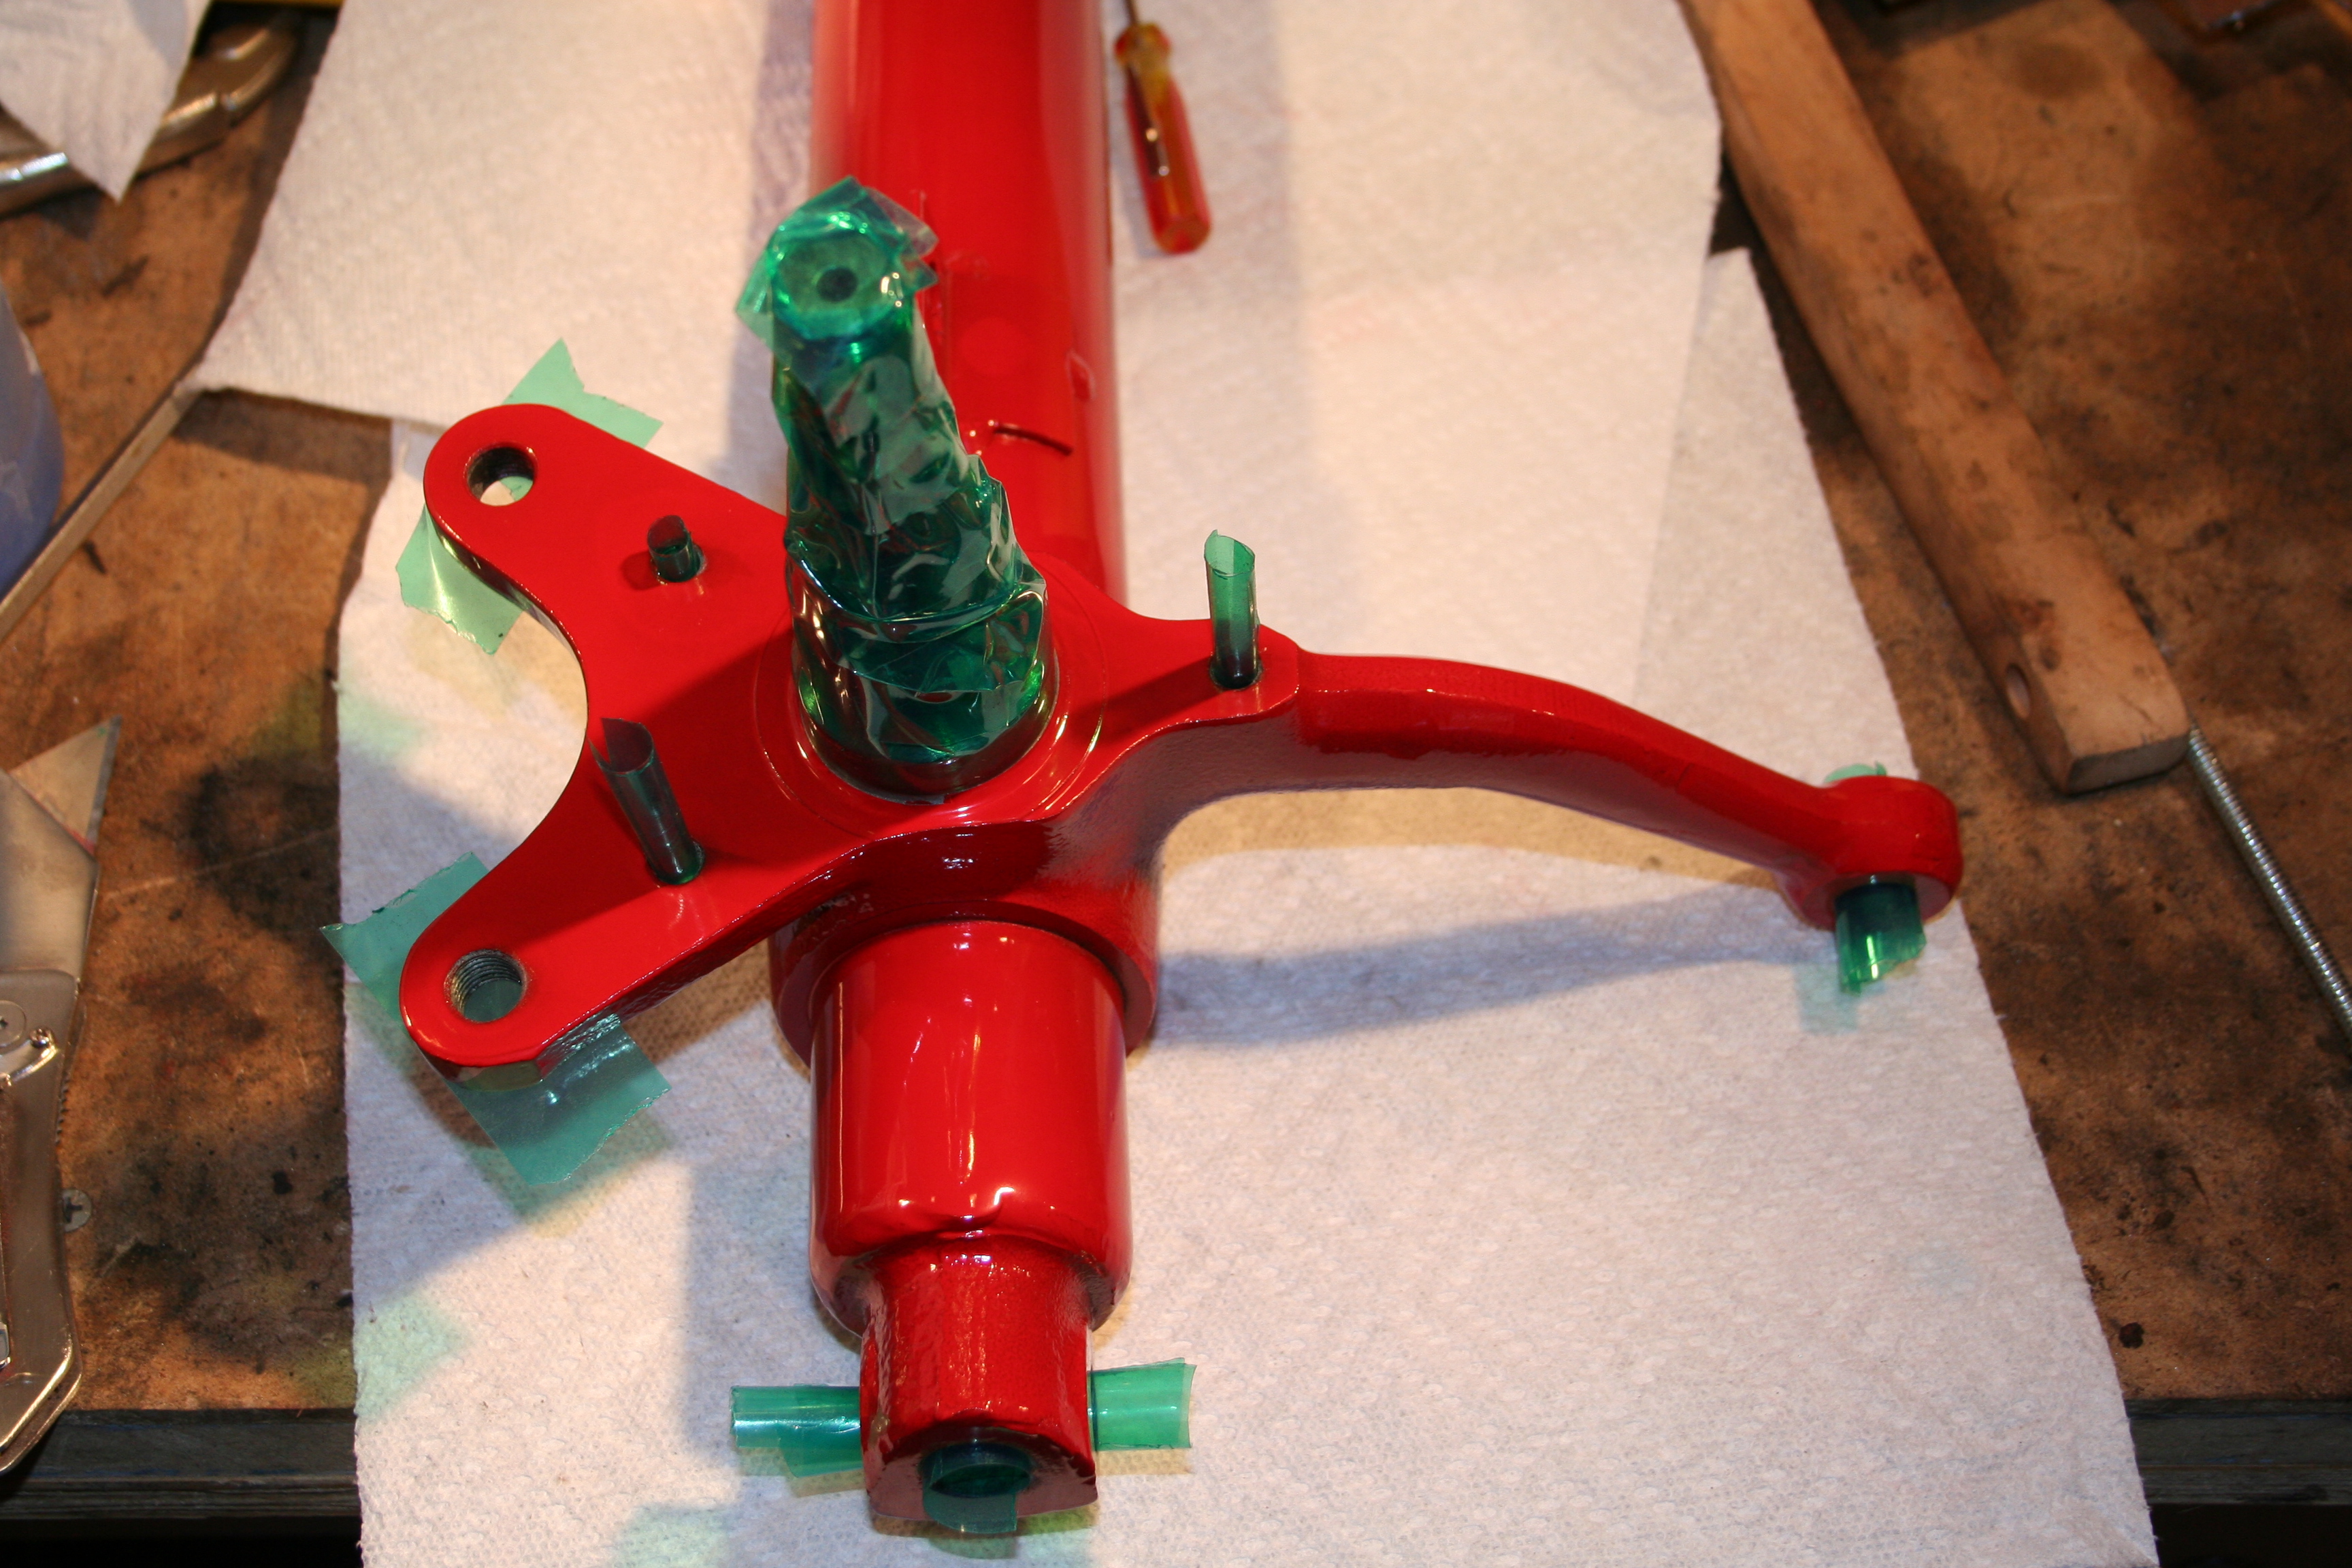
This is the part after the first coat. I removed the old tape and re-taped all the spots I don't want to be coated. I also washed the part to remove any oils from my skin that may have be deposited while handling the part after the first coat.
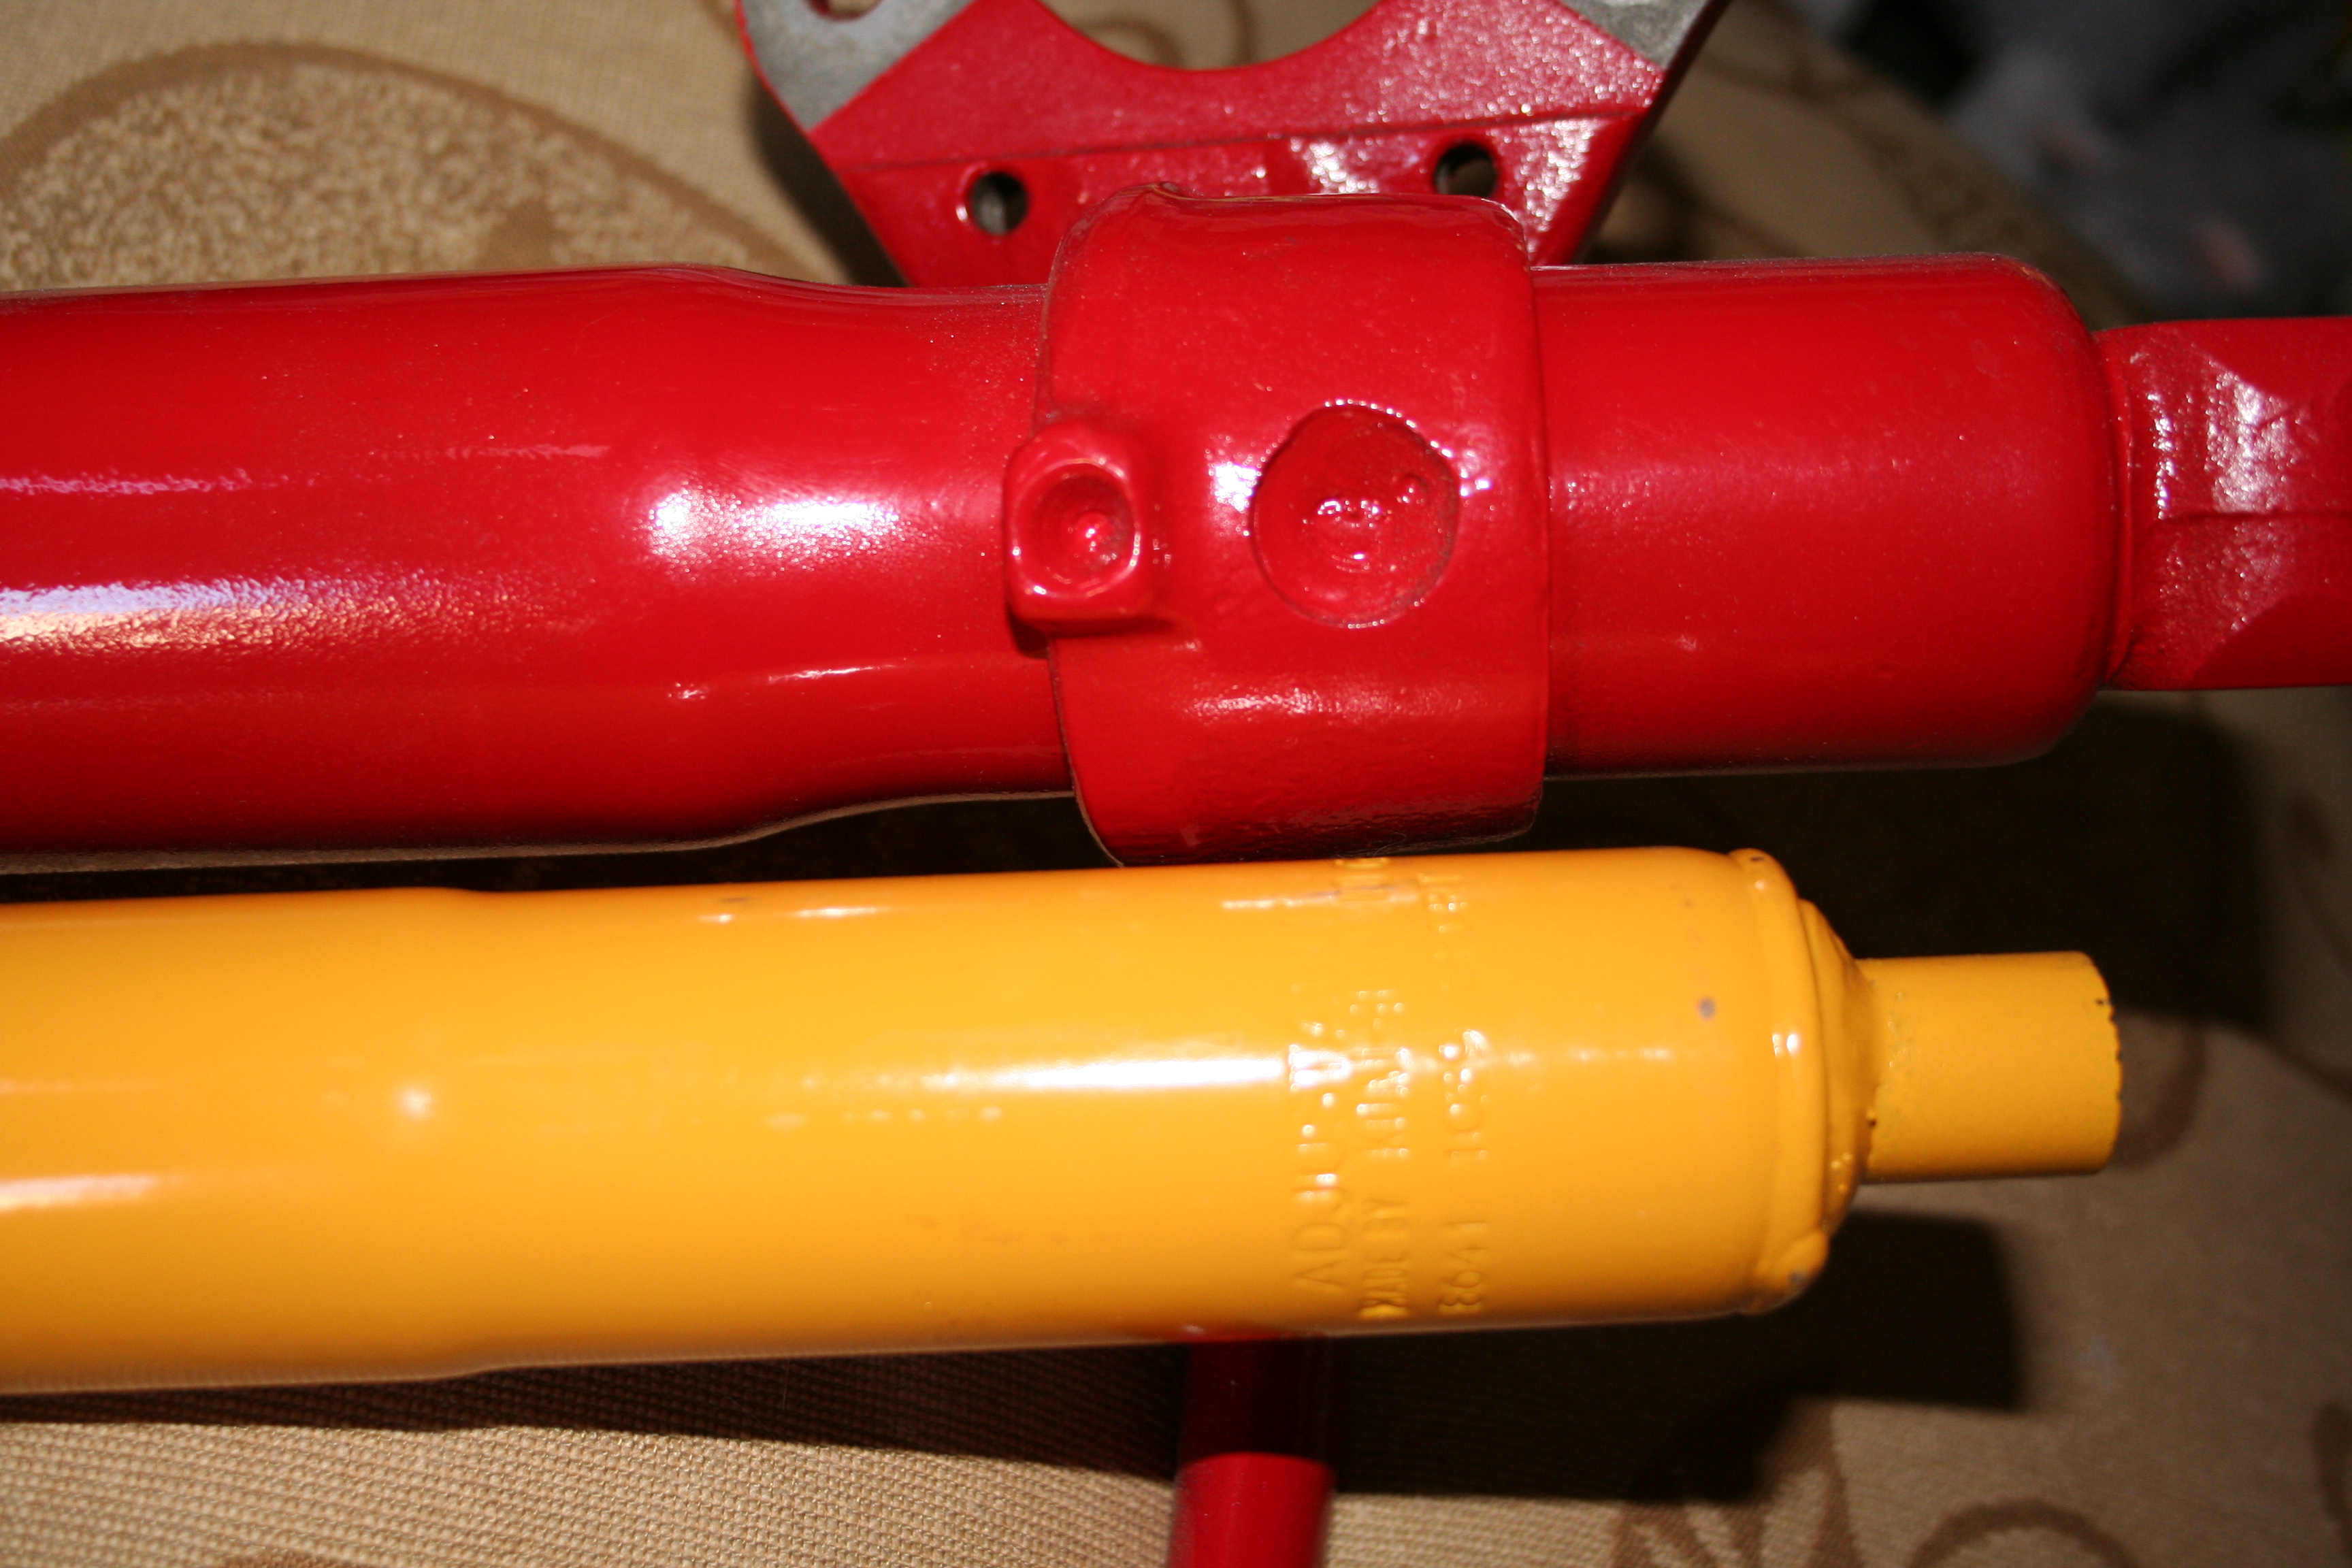
Here is the final product. It is still not perfect, but it is pretty good. I have some sections that have a bit of orange peel awhile others are very glossy. But it's not really noticeable. My wife and kids are also asking if anyone is even going to see this part when its on the car. :D I don't think they understand that I want to do a good job regardless if it is seen or not. I did notice that I think it's much harder to get a good ground on the part for the second coat. The resulted in a problem with powder sticking to the part. For example it was difficult to get powder to stick on the bottom surfaces. This might also have been an issue with the gun. I am not sure at this point. The bottom line is that I spent more time on the second coat and also had more wastage of powder the second time around. 2/9/2009Someone was asking a question on 914world.com about the exact same KONI struts I have and what KONI inserts fit. Basically the question was about using the 914 inserts in the 911 strut. The problem is that (based upon what I have been told by KONI) the 914 insert doesn't "neck down" in the right place and when you insert the insert into the 911 strut, it will not bottom out correctly. It supposedly is very close to almost working, but not a guarantee fit. Apparently the neck on the 911 insert is higher up due to this exact issue.
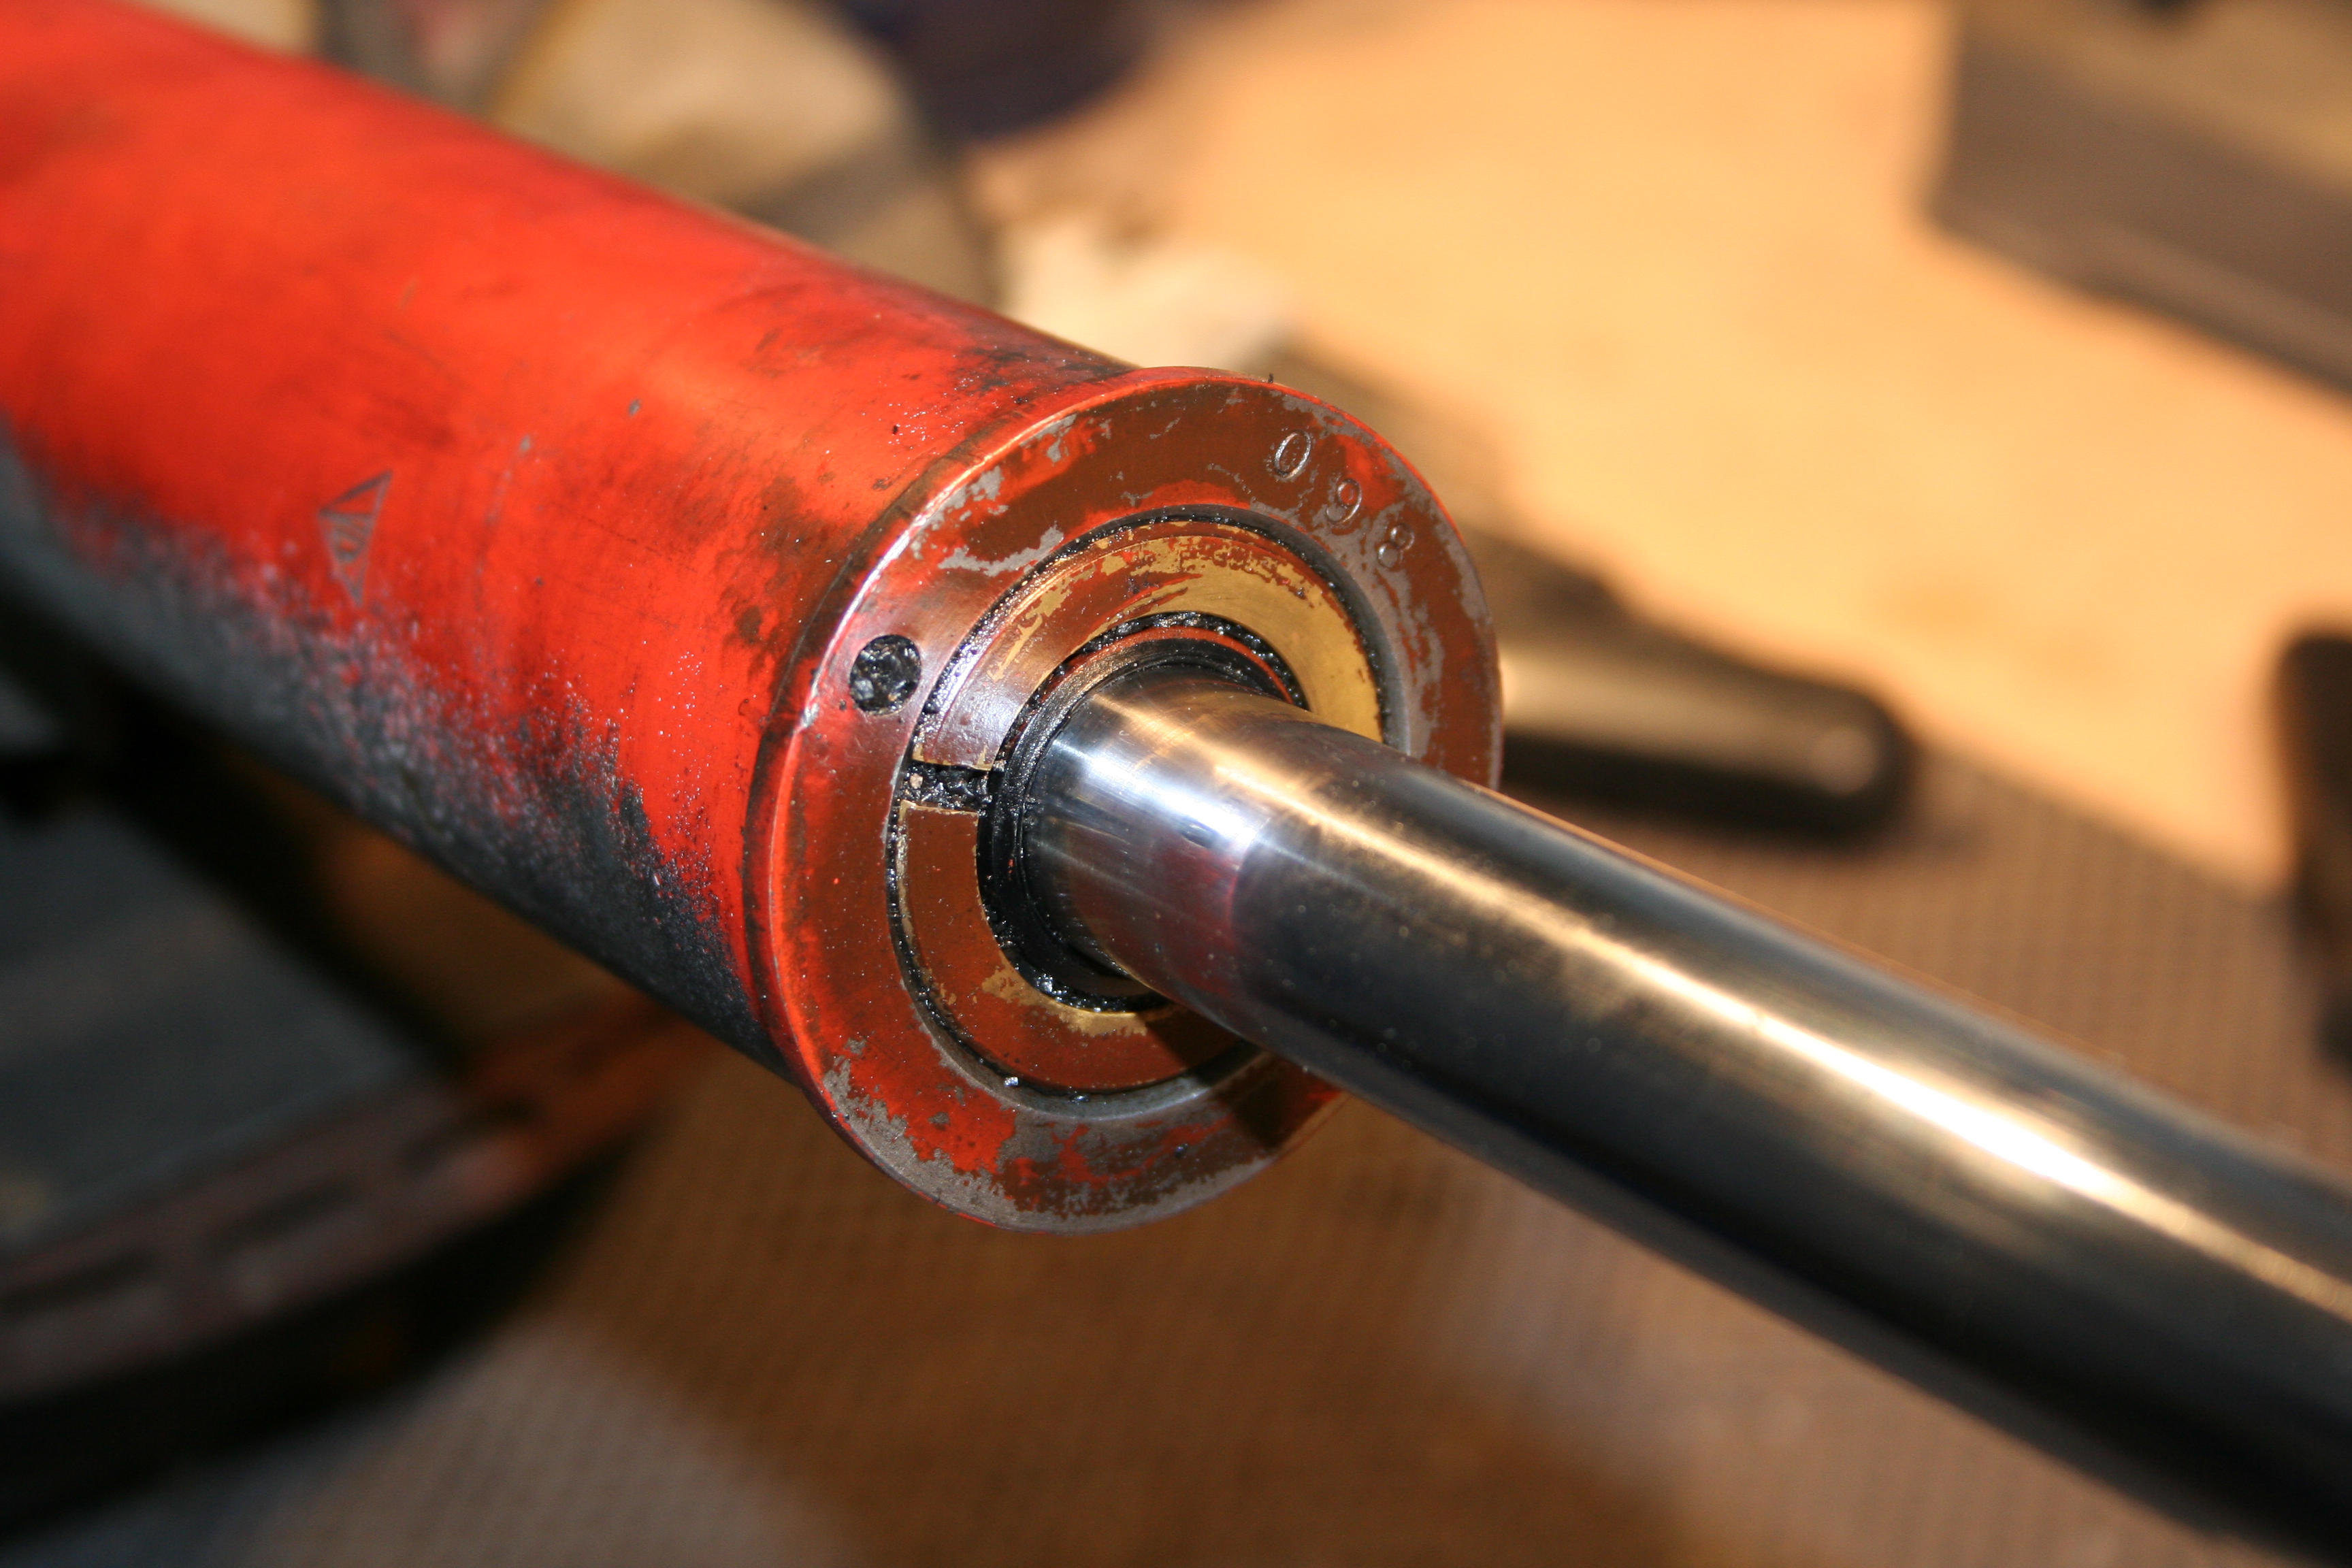
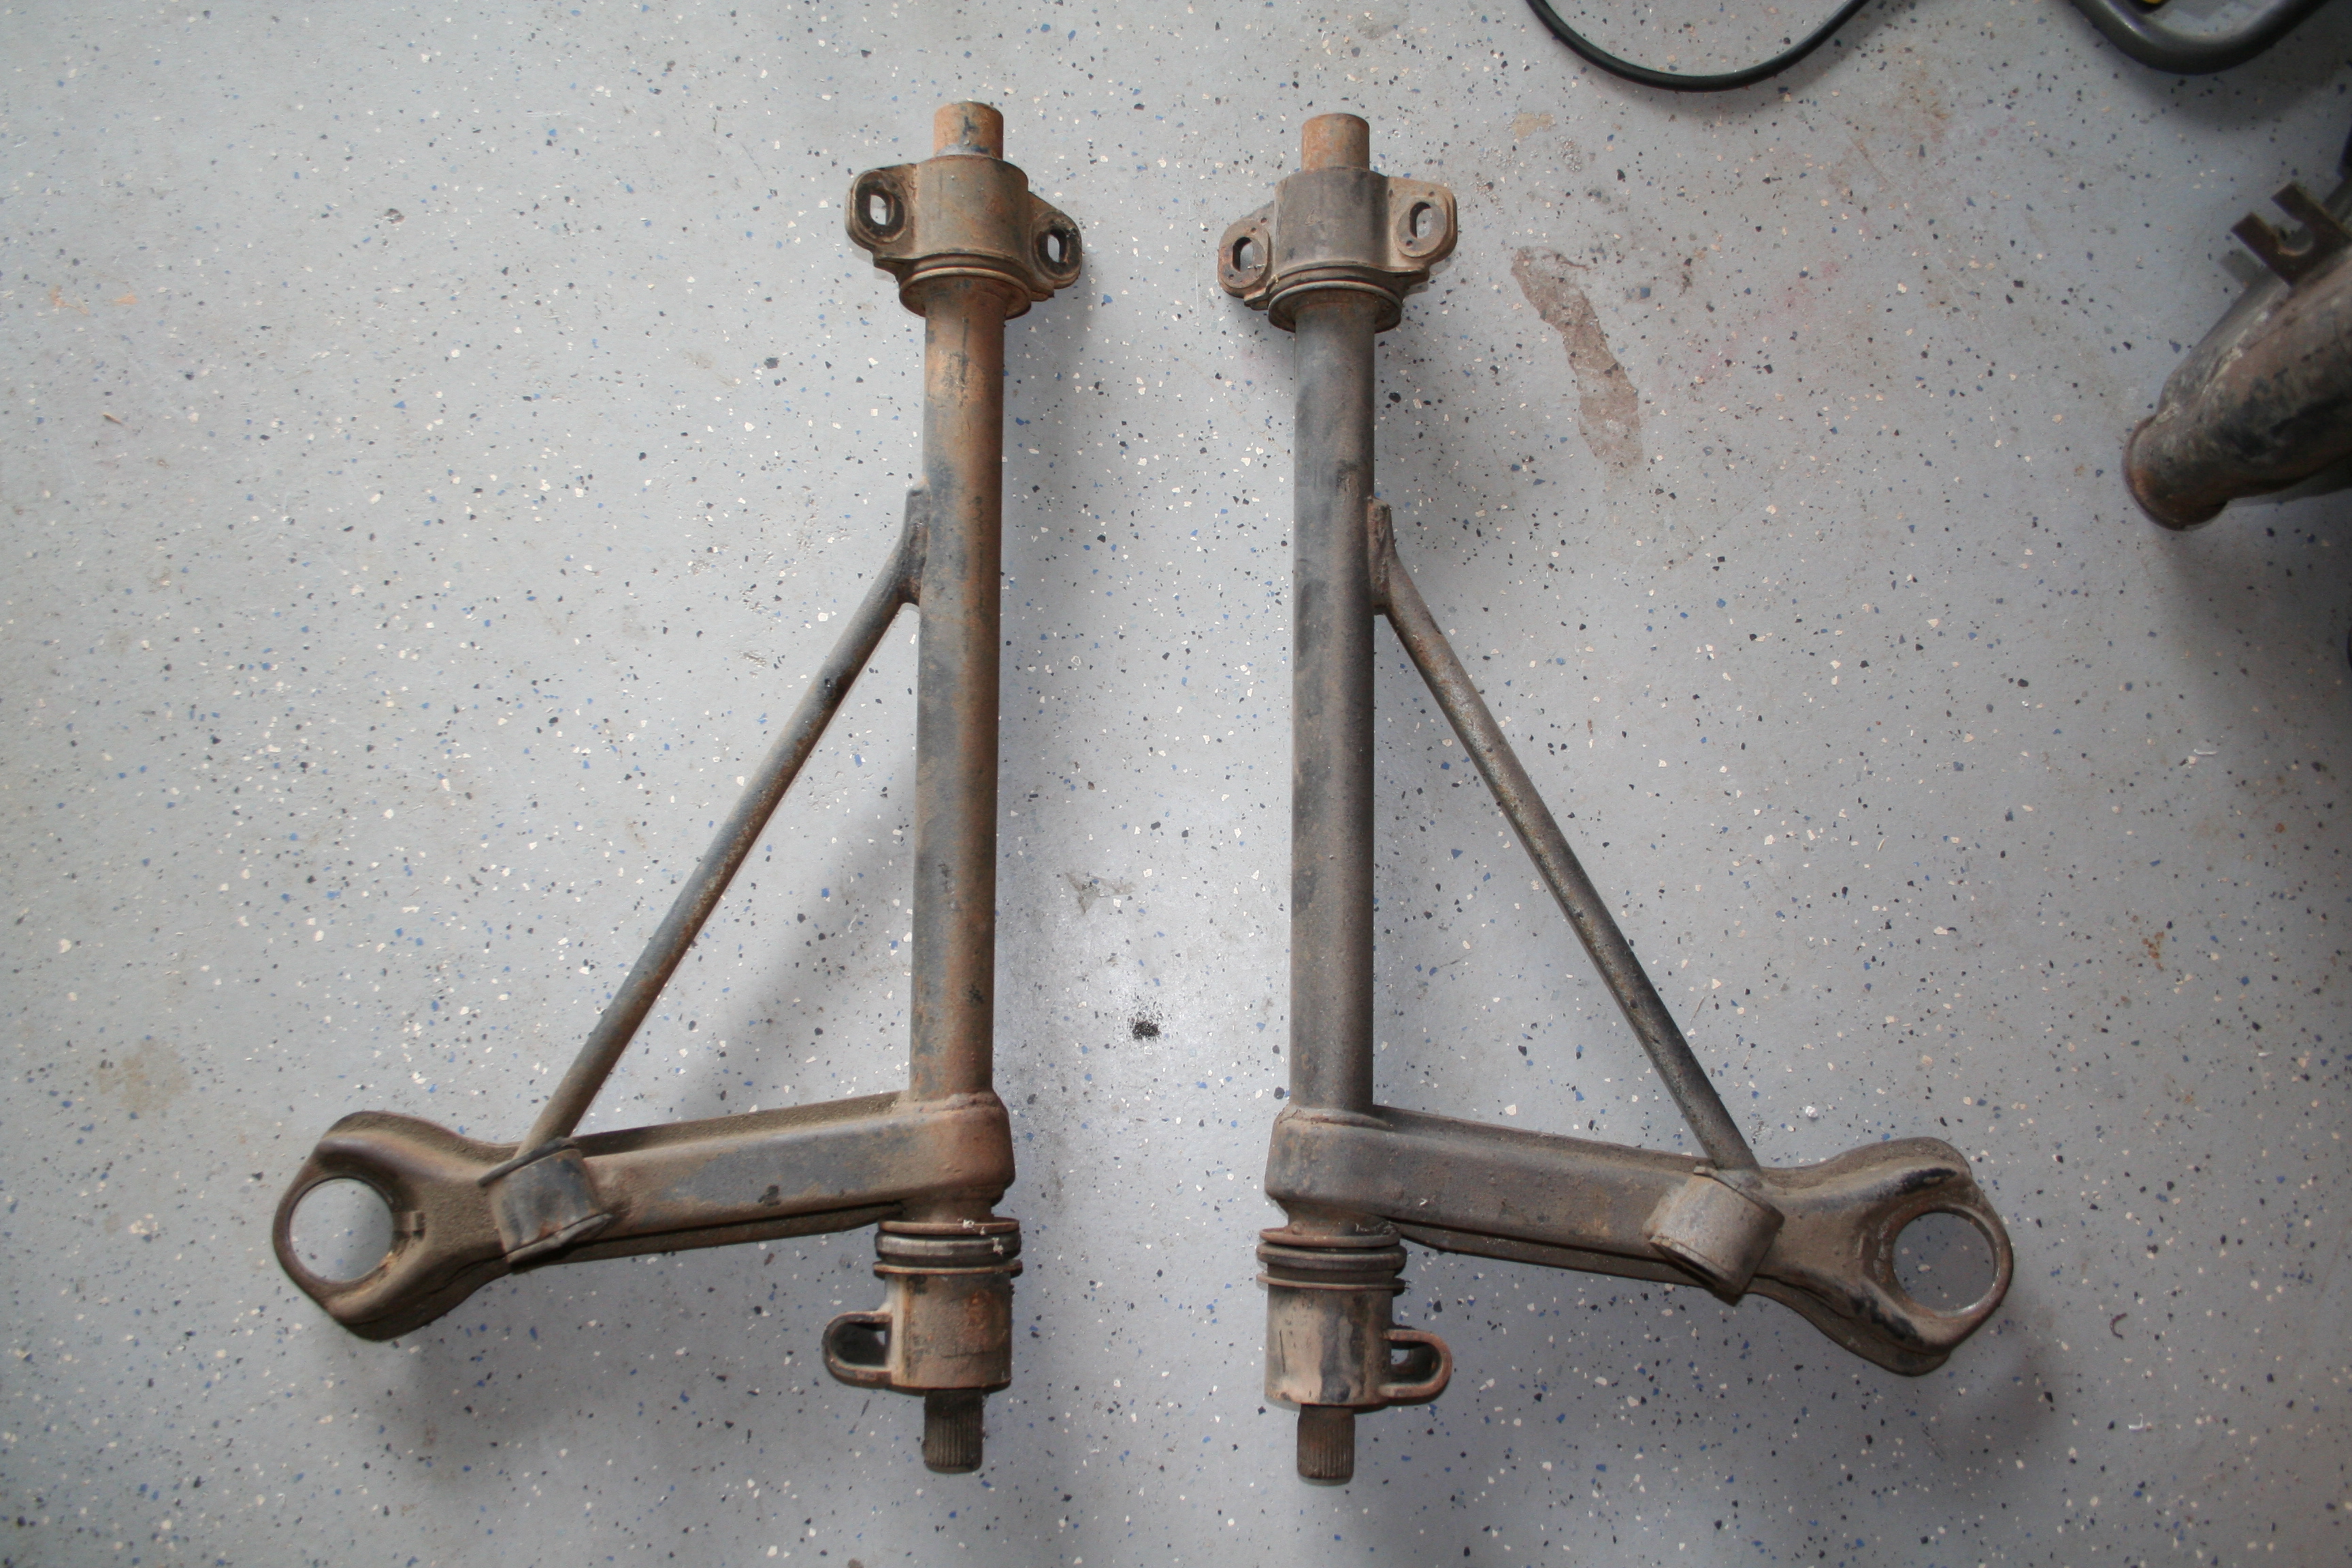
Here you can see the neck down of both the strut and insert. I wish I had a 914 insert so I could see (as well as show) the difference. 5/25/2009As part of my overall suspension work I pulled out the front a-arms so I could document them prior to removing the old bushings, etc. I didn't take photos, but the trick is to use a torch and heat the outside section until you can start to hear the rubber sizzle. At that point you can take a wrench and pull the outer section off and then using a screwdriver or similar and remove the bushings from the ends of the a-arms.
|
|